Hi all,
Just wanted to share progress pics of a build I have underway.
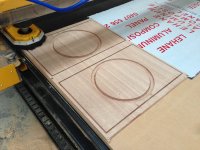
The design is by Paul at Red Spade Audio and construction by myself. I've been meaning to build a pair of subs for ages and I have a CNC router so I though why not push it to its limits.
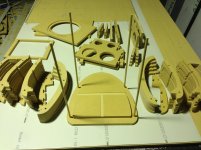
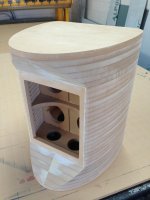
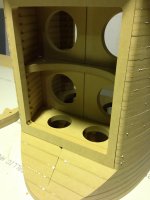
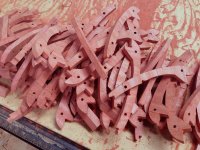
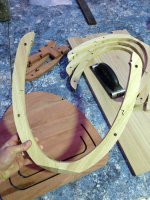
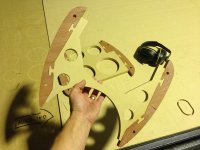
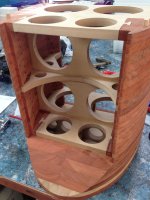
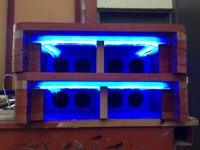
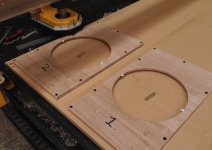
Pauls design is complex in CAD taking many hours to design but the end product will look simple and hopefully elegant. He's extremely thorough and concentrated on creating a very rigid and dead box with plenty of wall thickness and internal bracing as you can see from the pics.
We're making an MDF version to test the theory but the two final products will be made from solid red gum select. I couldnt settle on any paint/laminate finish that would stand the test of time so I just bit the bullet and went for hardwood.
I'll continue to post up more pics as we progress.
Just wanted to share progress pics of a build I have underway.
The design is by Paul at Red Spade Audio and construction by myself. I've been meaning to build a pair of subs for ages and I have a CNC router so I though why not push it to its limits.
Pauls design is complex in CAD taking many hours to design but the end product will look simple and hopefully elegant. He's extremely thorough and concentrated on creating a very rigid and dead box with plenty of wall thickness and internal bracing as you can see from the pics.
We're making an MDF version to test the theory but the two final products will be made from solid red gum select. I couldnt settle on any paint/laminate finish that would stand the test of time so I just bit the bullet and went for hardwood.
I'll continue to post up more pics as we progress.
Attachments
Wow lots of time on your hands huh?
Unfortunately no, very little time. Starting to wish I just build a square box but it's past the point of no return.
As they say no pain no gain!

In this case... lots!
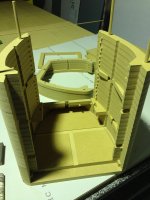
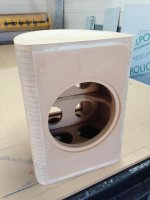
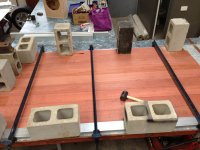
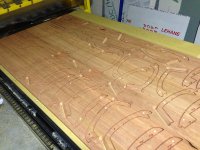
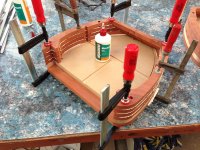
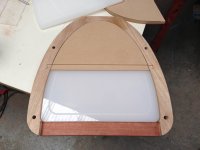
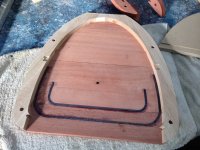
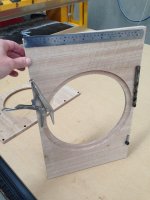
Practice run went together just fine. Bit of PVA and a few bricks on top too easy. The red gum will be a different story, working with real timber is a whole new ball game. Construction of the real ones will need to be a bit more advanced as filler like you see on this just finished proto wont be an option.
Practice run went together just fine. Bit of PVA and a few bricks on top too easy. The red gum will be a different story, working with real timber is a whole new ball game. Construction of the real ones will need to be a bit more advanced as filler like you see on this just finished proto wont be an option.
Attachments
This really begs the question, but what will you do with the MDF test enclosure after all of this effort?!?
Chris
2 options , paint them black and hide them for a multi sub approach or sell them to cover some cost
. Looking good James
can't wait to see the timber units . Cheers
Mal
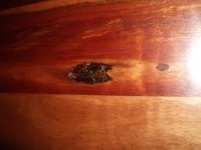
Yea thats the stuff. I considered light hardwoods like tassie oak at half the price but it's hard to beat the colour and weight of red gum. I would have gone for ironbark as its slightly heavier and harder again but it's hard to come by.
With a little luck I should get to cut the red gum this weekend. Goto make progress on this.
With a little luck I should get to cut the red gum this weekend. Goto make progress on this.
So theres been some down time, but we're finally making progress!
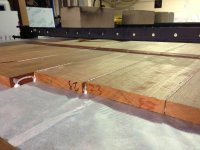
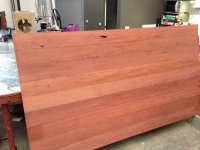
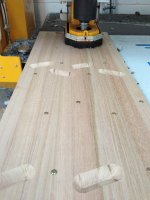
Here we're laminating the Red Gum into a sheet then machining flat both sides to 18mm thickness.
Here we're laminating the Red Gum into a sheet then machining flat both sides to 18mm thickness.
Attachments
Last edited:
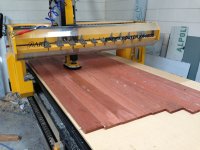
Far out, I cant explain how many hours are going into this. It feels like it will never end. Few more progress pics to bring it up to date. Going hard now because I can finally see the end in sight.
Attachments

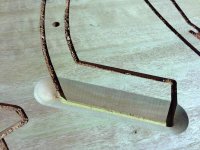
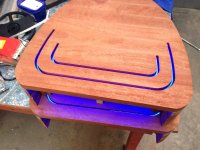
I wanted to carve a logo on top but couldnt come up with anything. In the end I just went with simple illuminated lines. I laminated a layer of opal acrylic in place of the MDF internal layer to spread the light evenly. I'm leaving them open at the moment but when the last clear coat dries I'll pour this stuff in the slots which just leaves a crystal clear glass like bead.
Attachments
Last edited:

- Home
- Loudspeakers
- Subwoofers
- Rythmik curved sub build