I had been thinking of building a small sub for the A/V system in our work out room at home. Space is limited so it had to be a small sub. The sub will be used for 50/50 HT and music, so a ported sub is what I wanted. CSS had just introduced a line of small subs with Passive Radiators, and after looking over the various kits, I choose the QUARTET10 subwoofer kit.
The kit comes with the SDX10 subwoofer, 2 APR 10 Passive Radiators, a 300 watt Bash amp, 4 cabinet spikes, and all mounting hardware. The kit is priced at $379, a quick check shows the individual parts total $475, the kit is definitely an excellent value. I ordered the kit and 4 days later it arrived. The kit arrived in two boxes.
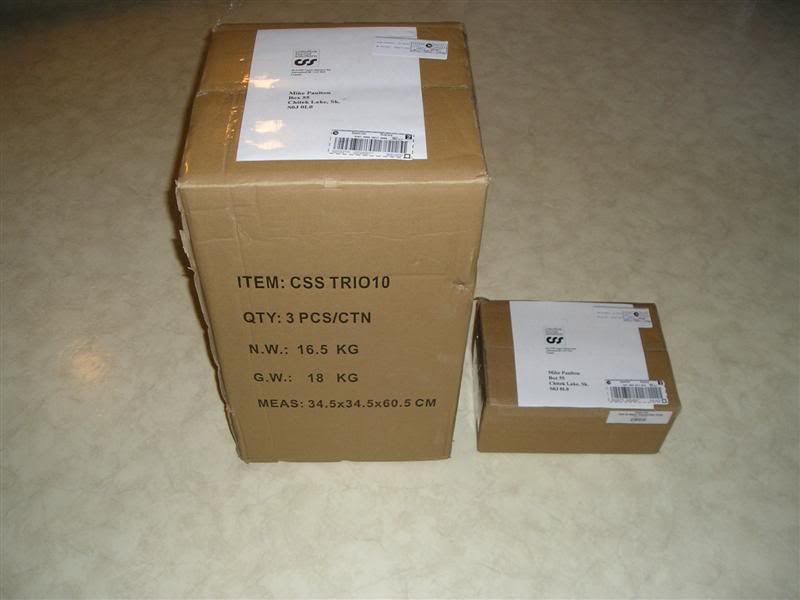
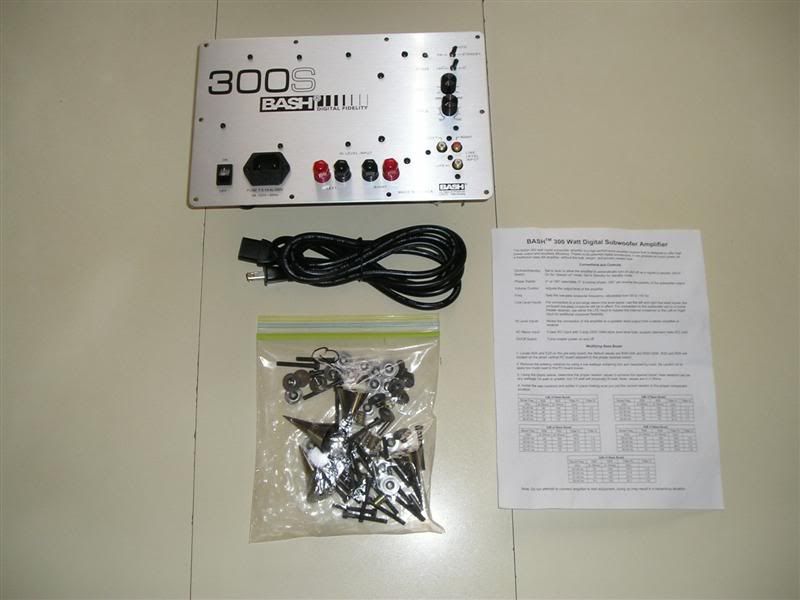
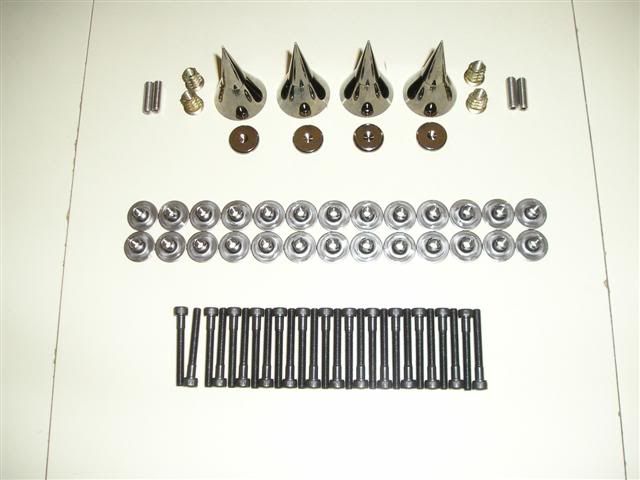
The first box contained the amp, the chart of boost tables for changing the high pass filter, the cabinet spikes and the mounting hardware.
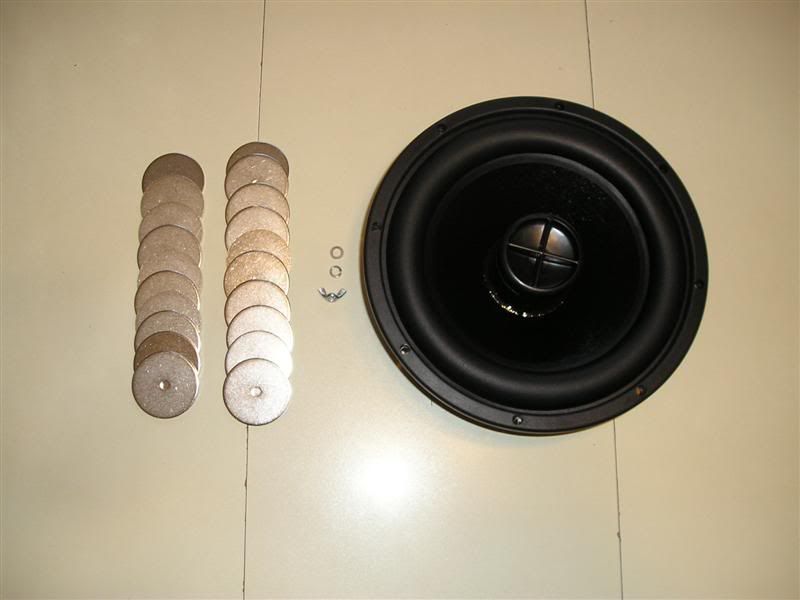
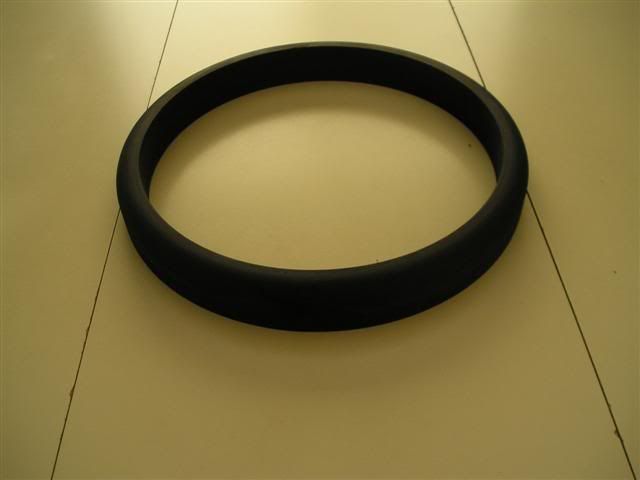
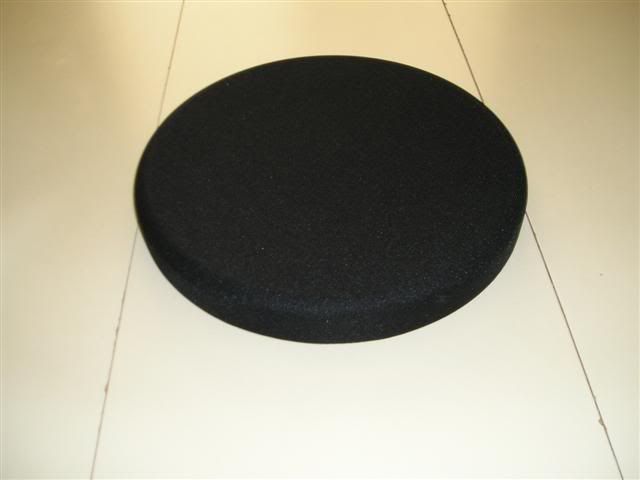
The second box contained the SDX10 subwoofer and the two 10 inch Passive Radiators. Each PR comes with 20 45 gram tuning washers, a lock washer and a wing nut to hold them in place.
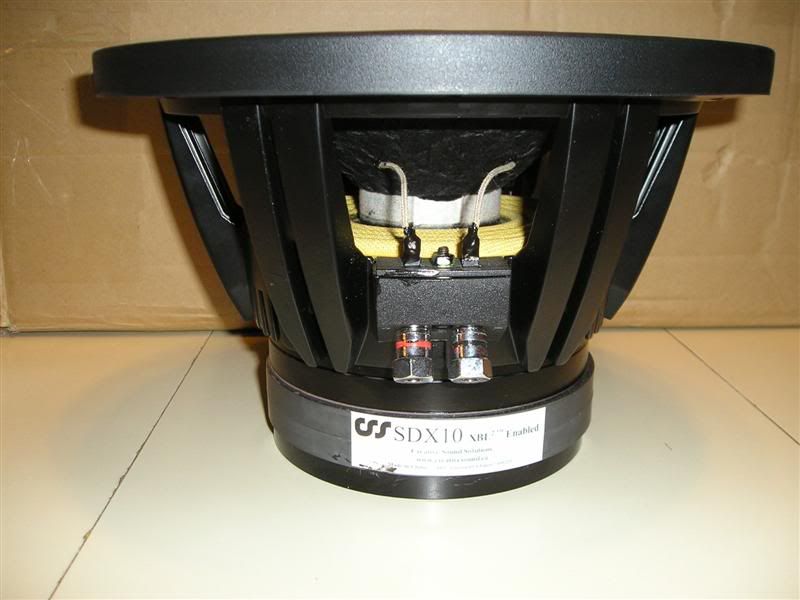
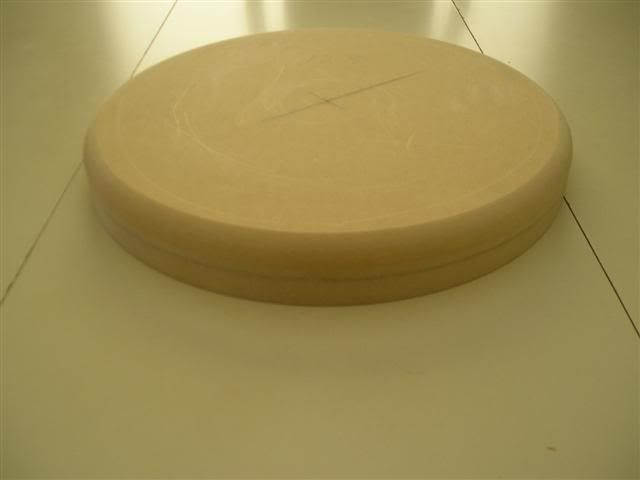
Here's a pic of the sub. It's well built and the quality shows.
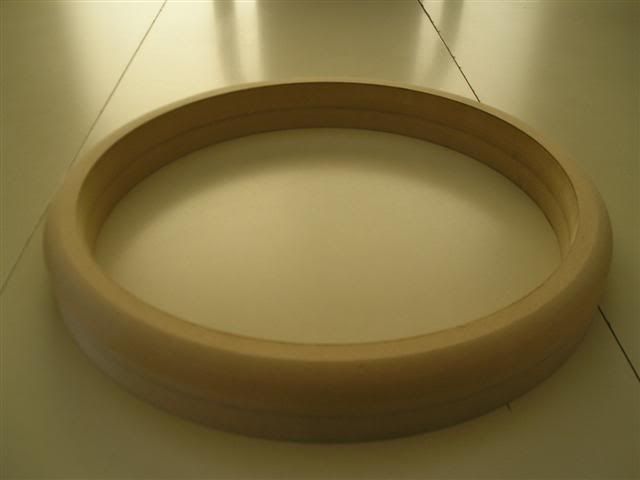
This is everything the kit comes with.
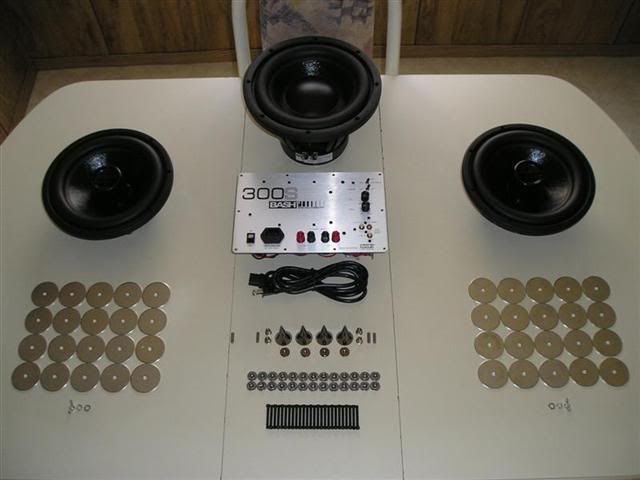
The kit comes with the SDX10 subwoofer, 2 APR 10 Passive Radiators, a 300 watt Bash amp, 4 cabinet spikes, and all mounting hardware. The kit is priced at $379, a quick check shows the individual parts total $475, the kit is definitely an excellent value. I ordered the kit and 4 days later it arrived. The kit arrived in two boxes.
The first box contained the amp, the chart of boost tables for changing the high pass filter, the cabinet spikes and the mounting hardware.
The second box contained the SDX10 subwoofer and the two 10 inch Passive Radiators. Each PR comes with 20 45 gram tuning washers, a lock washer and a wing nut to hold them in place.
Here's a pic of the sub. It's well built and the quality shows.
This is everything the kit comes with.
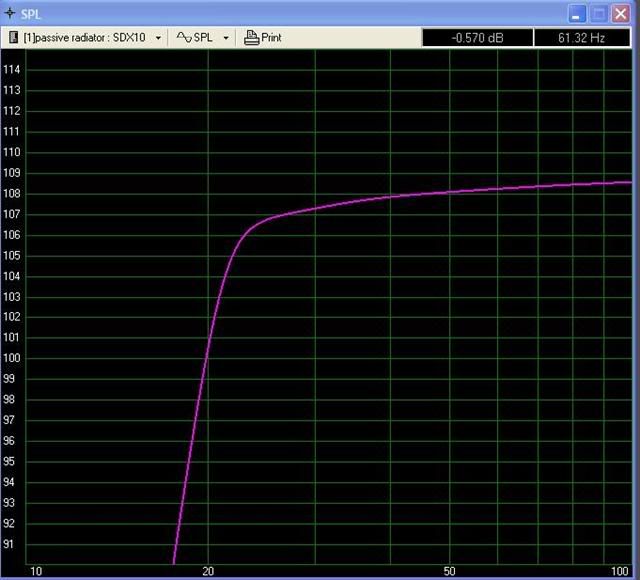
Here is some modeling of the sub. The recommended cabinet size is a cube with an external measurement of 18 inches, so the net volume will be 66 liters or 2.3 cu.ft. Adding 270 grams of mass to each PR will tune the cabinet to 22 hz. The Bash 300 amp comes with a high pass filter at 20.4 hz, and 1 db of boost form 31 to 35 hz.
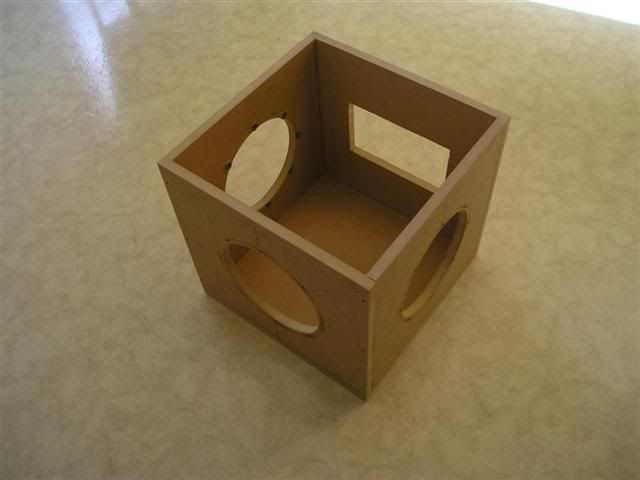
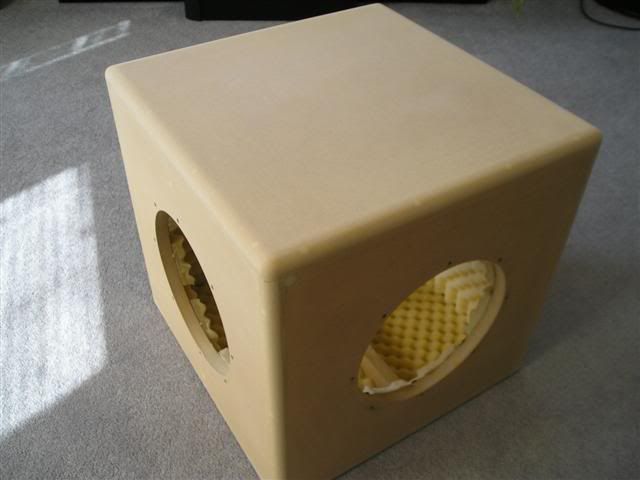
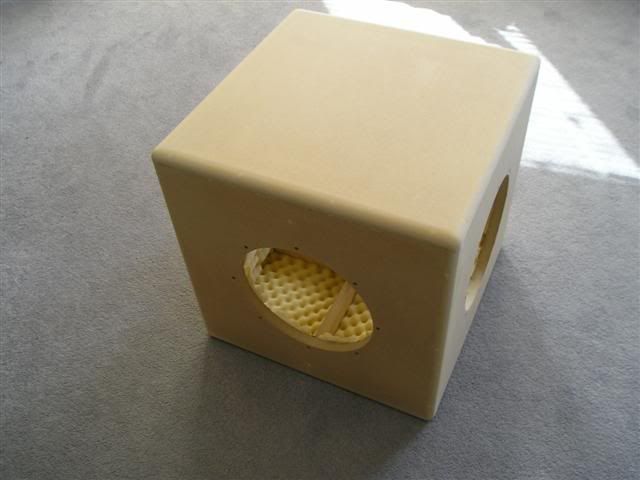
Here's a couple pics of the box. All cut outs done and Hurricane nuts installed.
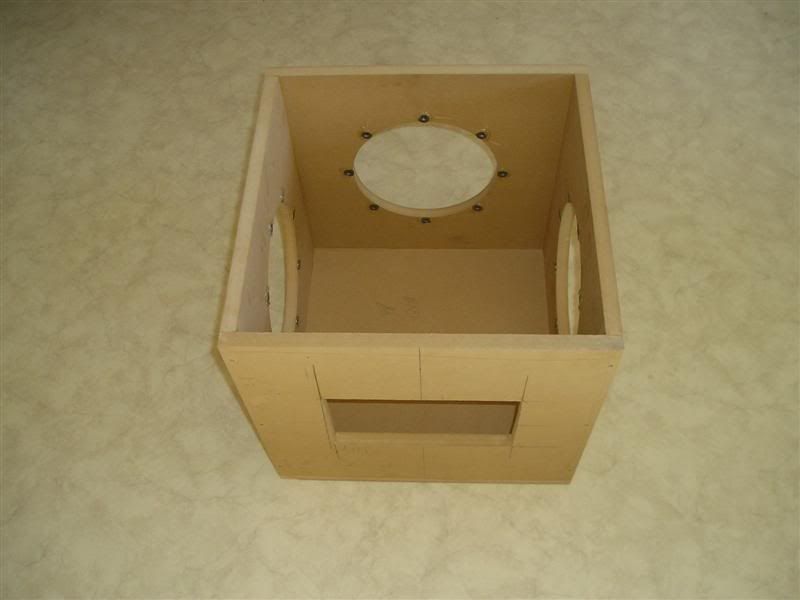
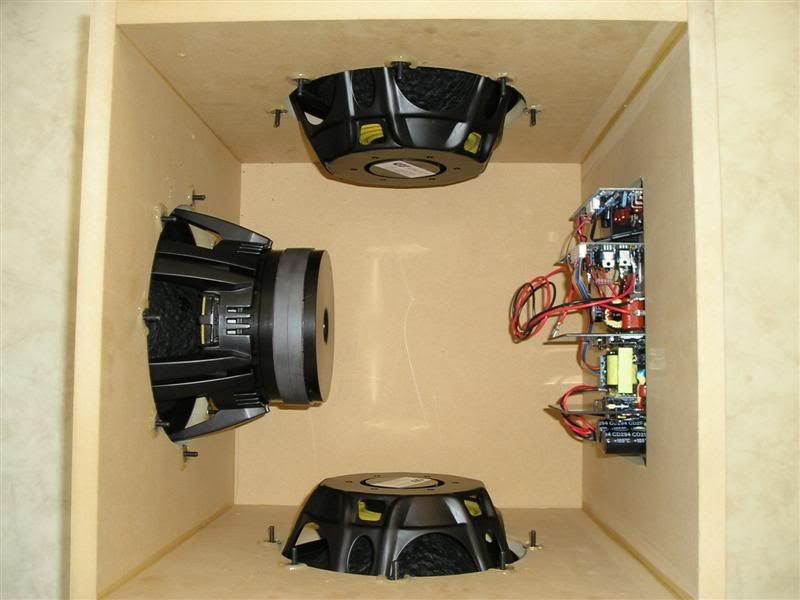
Test fitting the components.
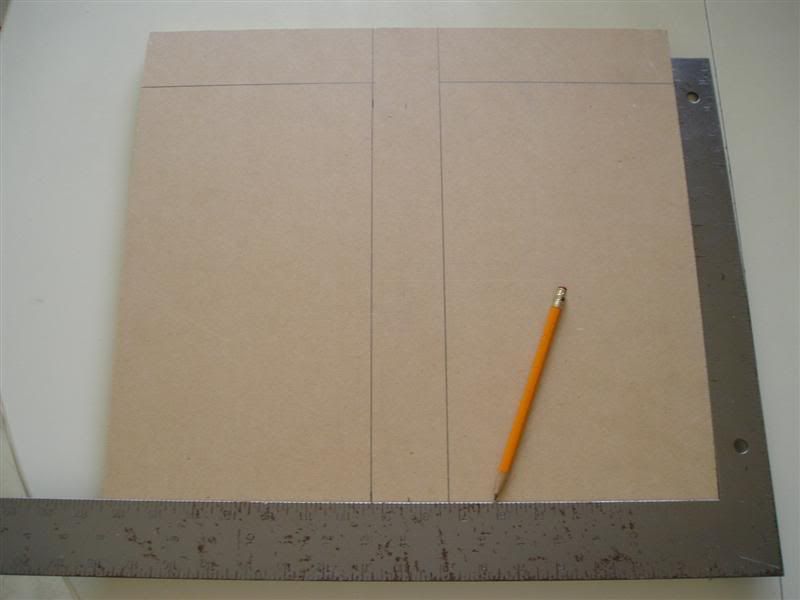
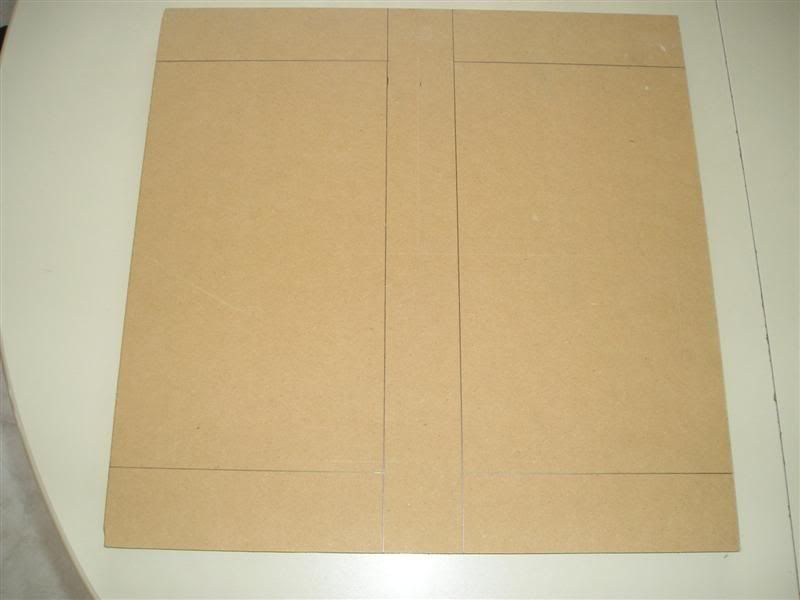
The bracing was easy. Use the width of the wide end of a framing square to draw a "I" on a 16.5" x 16.5" square.
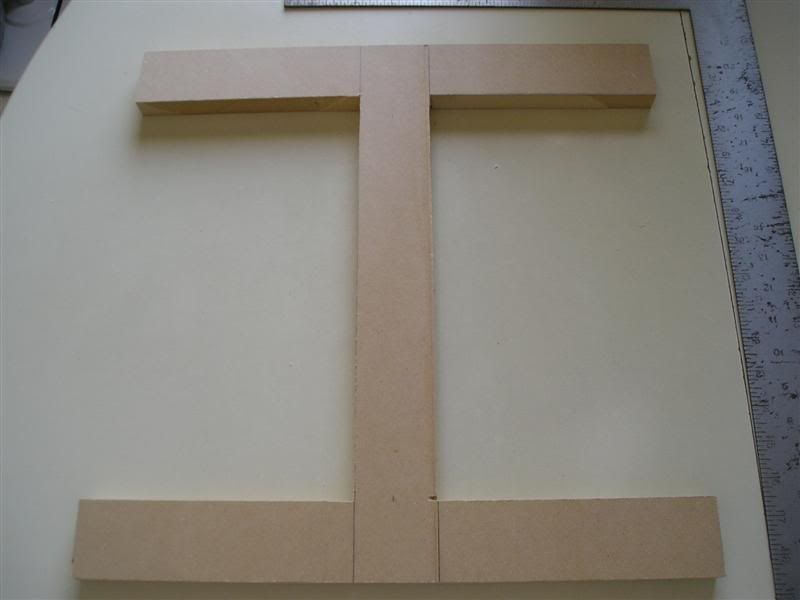
The cut out brace.
The brace installed on the driver and amp side.
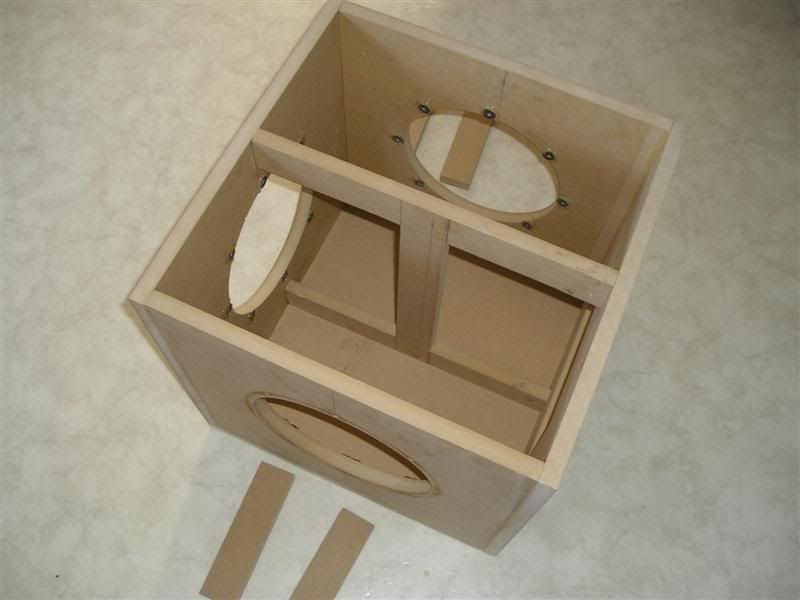
Add 4 pieces from the center of the "I" brace to the top and bottom of both PR sides.
Cabinet lined with egg crate foam. This is my own personal choice, the foam is not included with the kit. The purpose (supposedly) is to damp the back wave of the sub so it doesn't have a "hollow" sound to it. Some people say it has no effect on the sub, some say it does. More testing is needed to verify the benefits or lack of. I have always lined my subs with foam, this one is no exception.
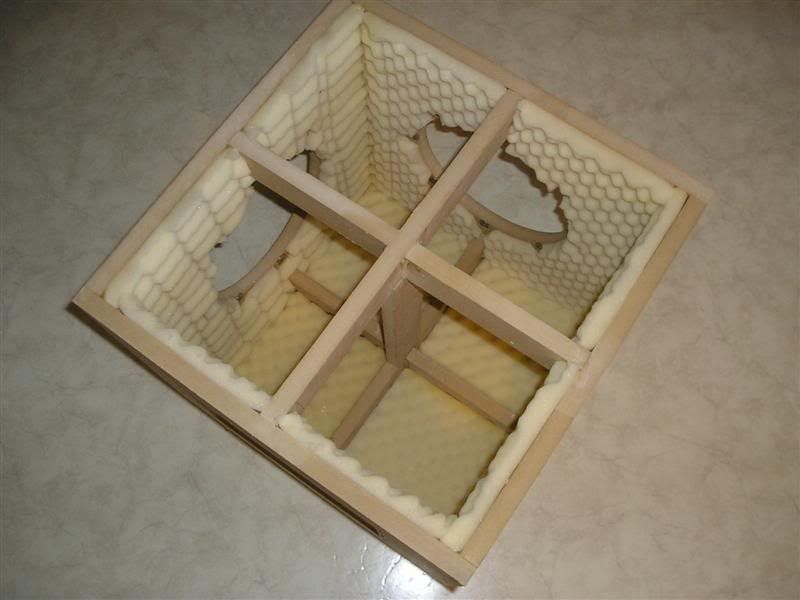
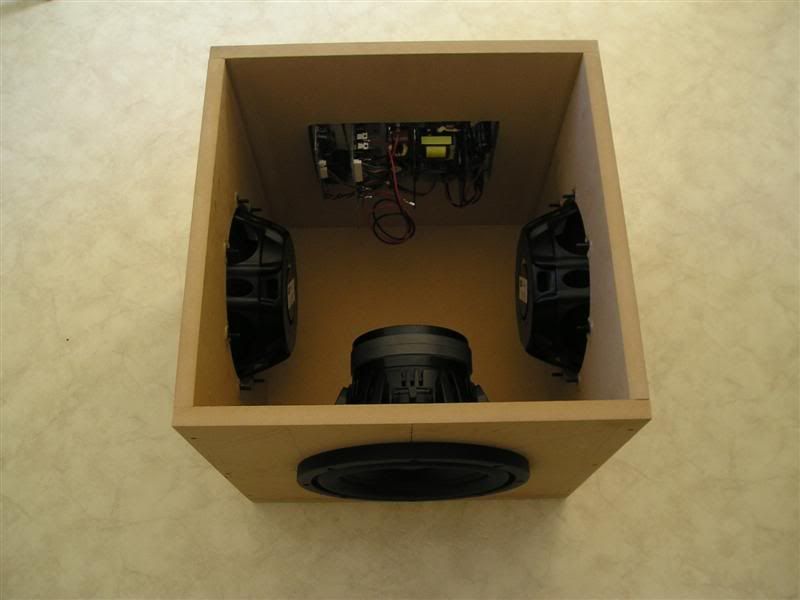
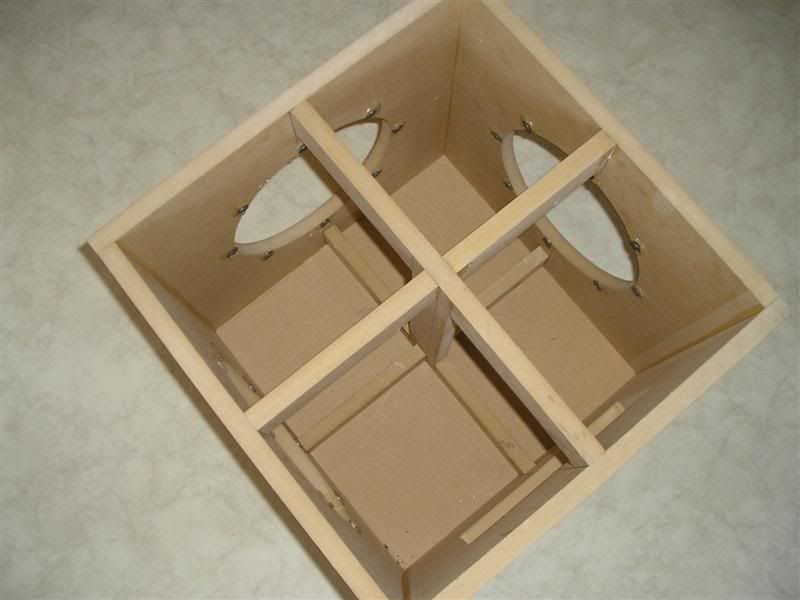
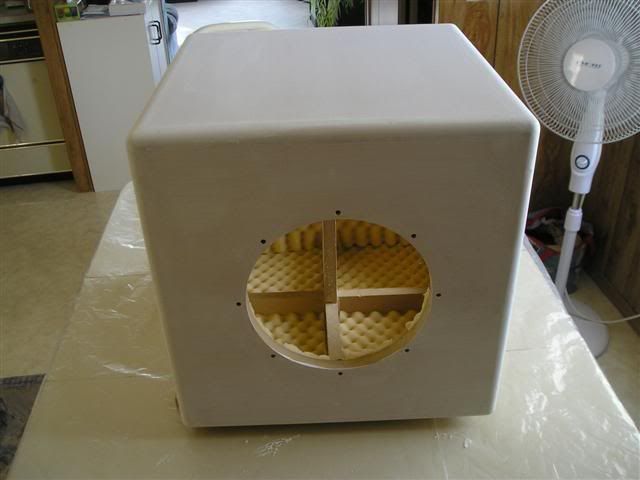
I have the cabinet completed and all components mounted for a test run.
Here's a couple pics of the box. All cut outs done and Hurricane nuts installed.
Test fitting the components.
The bracing was easy. Use the width of the wide end of a framing square to draw a "I" on a 16.5" x 16.5" square.
The cut out brace.
The brace installed on the driver and amp side.
Add 4 pieces from the center of the "I" brace to the top and bottom of both PR sides.
Cabinet lined with egg crate foam. This is my own personal choice, the foam is not included with the kit. The purpose (supposedly) is to damp the back wave of the sub so it doesn't have a "hollow" sound to it. Some people say it has no effect on the sub, some say it does. More testing is needed to verify the benefits or lack of. I have always lined my subs with foam, this one is no exception.
I have the cabinet completed and all components mounted for a test run.
It's time to tune the Passive Radiators. The sub design calls for 270 grams to be added to each PR. The PR's come with twenty 45 gram washers, so 6 washers need to be added to each PR. With the CSS PR's tuning couldn't be simpler. First unscrew the cap on the PR's center tube.
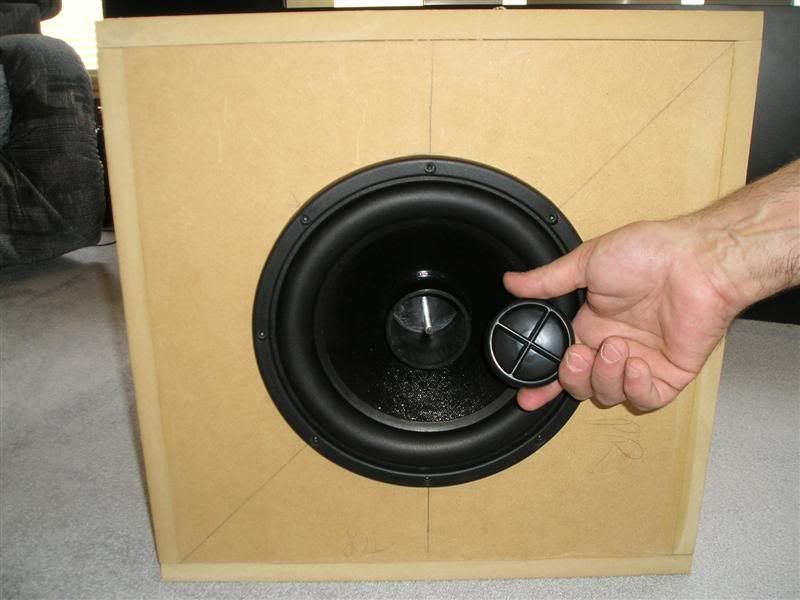
Add the required washers.
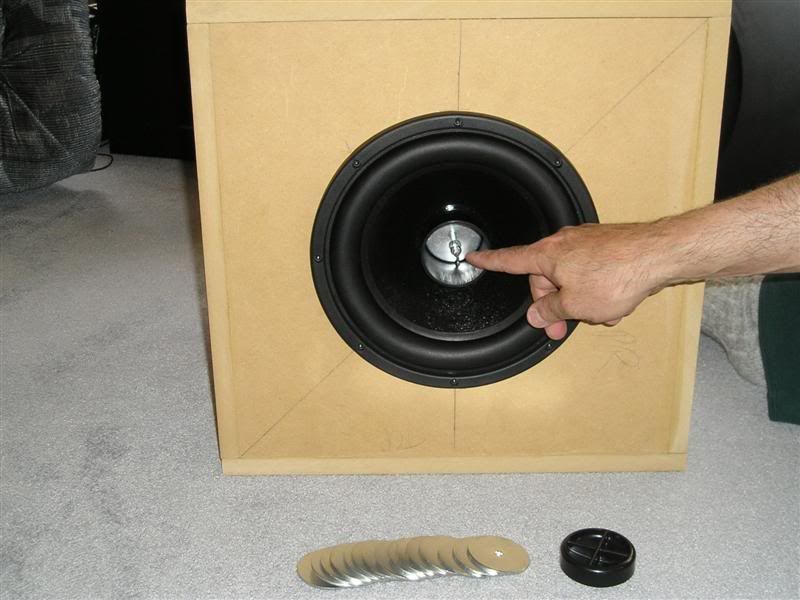
Tighten down the supplied lock washer and wing nut.

Replace the center cap. It's that simple!
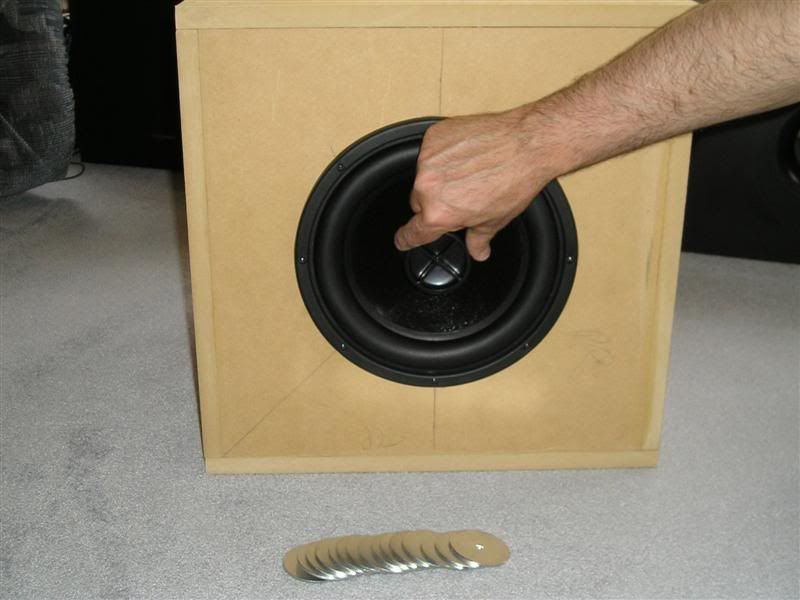
With 270 grams added to each PR the box tuning will be 22 hz. Since changing the weights on the PR's is external, I be experimenting with different tuning just because it'll be so easy! Listening test will be next.
I did some SPL tesing to see what the sub is capable of. The sub was placed in a corner of the room with the SPL meter one meter away on a tripod stand. I used the R.S. 33-2055 Digital Meter and applied the correction file to the readings.
10 hz - 104 db
12 hz - 106 db
16 hz - 101 db
18 hz - 103 db
20 hz - 104 db
22 hz - 100 db
25 hz - 102 db
30 hz - 103 db
35 hz - 108 db
40 hz - 113 db
45 hz - 110 db
50 hz - 103 db
55 hz - 101 db
60 hz - 98 db
65 hz - 96 db
70 hz - 95 db
75 hz - 96 db
80 hz - 95 db
The SPL meter was set to fast response and "C" weighting. The effects of room gain are obvious in the 10 -12 hz range, as well as a room interaction issue in the 35 - 45 hz range. I need to get REW setup on my laptop and post a graph. All in all, I'm impressed with the performance of this 10 inch sub.
Add the required washers.
Tighten down the supplied lock washer and wing nut.
Replace the center cap. It's that simple!
With 270 grams added to each PR the box tuning will be 22 hz. Since changing the weights on the PR's is external, I be experimenting with different tuning just because it'll be so easy! Listening test will be next.
I did some SPL tesing to see what the sub is capable of. The sub was placed in a corner of the room with the SPL meter one meter away on a tripod stand. I used the R.S. 33-2055 Digital Meter and applied the correction file to the readings.
10 hz - 104 db
12 hz - 106 db
16 hz - 101 db
18 hz - 103 db
20 hz - 104 db
22 hz - 100 db
25 hz - 102 db
30 hz - 103 db
35 hz - 108 db
40 hz - 113 db
45 hz - 110 db
50 hz - 103 db
55 hz - 101 db
60 hz - 98 db
65 hz - 96 db
70 hz - 95 db
75 hz - 96 db
80 hz - 95 db
The SPL meter was set to fast response and "C" weighting. The effects of room gain are obvious in the 10 -12 hz range, as well as a room interaction issue in the 35 - 45 hz range. I need to get REW setup on my laptop and post a graph. All in all, I'm impressed with the performance of this 10 inch sub.
Finishing the box. All holes filled and sanded, 3/4 inch round over done to all edges and final sanding done.
First coat of sealer done.
Since the sub and PR's are surface mounted the grills are simple to build using a "friction fit" method. First glue two pieces of MDF together and cut a circle 12 inches in diameter and round over the edge.
Cut out the inside of the grill just a hair smaller then the diameter of the sub and the PR's. A few minutes of hand sanding the inside ensures a perfect fit.
Grill frame sanded and painted black.
Grill cloth attached to frame.
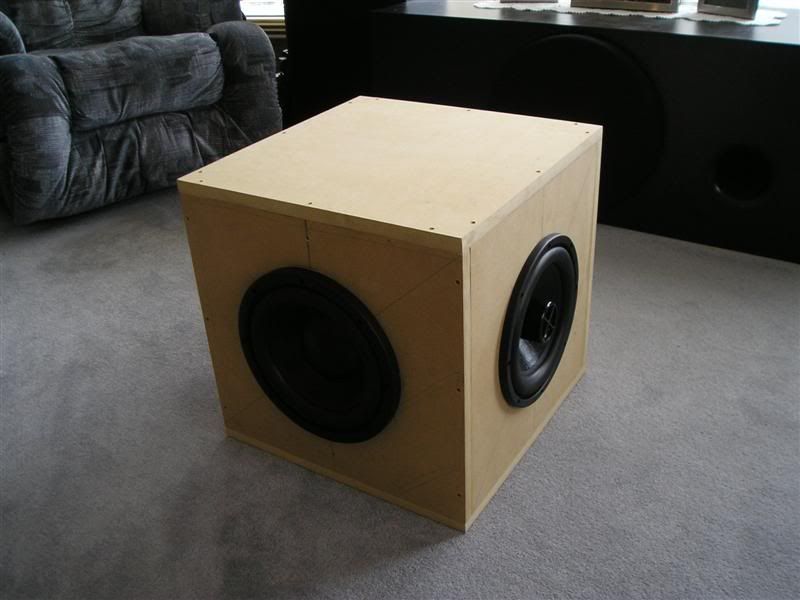
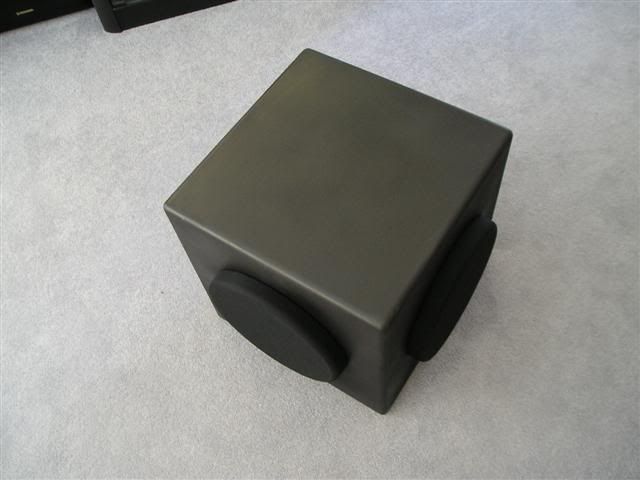
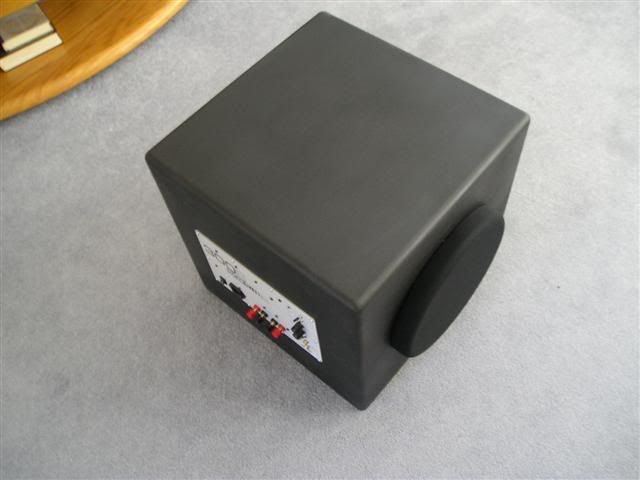
Cabinet painted and components installed.
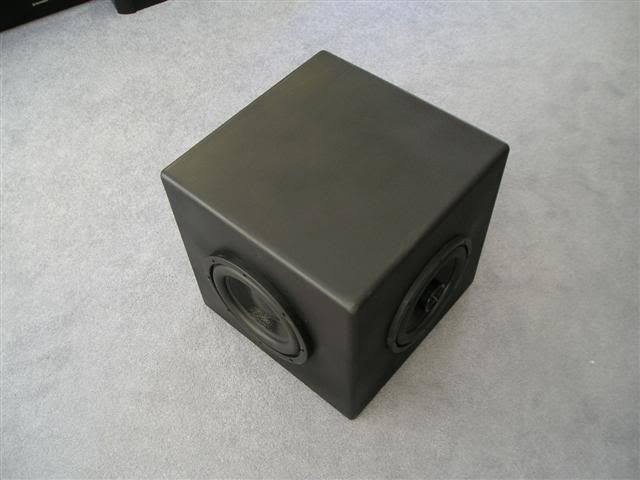
Grills installed.
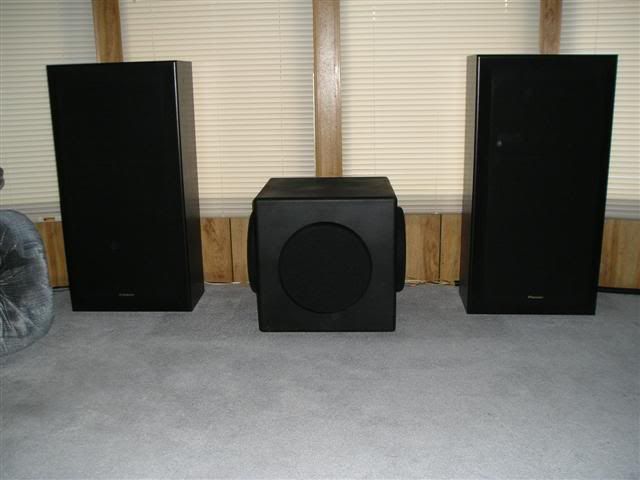
I currently have the sub set up in my living room as shown below. Once the sub is moved into the work out room it's place will be a a corner. The sub will sit 45 degrees to the corner so no PR is firing directly into a wall. I'll post a graph of the in room response when I get REW set up.
First coat of sealer done.
Since the sub and PR's are surface mounted the grills are simple to build using a "friction fit" method. First glue two pieces of MDF together and cut a circle 12 inches in diameter and round over the edge.
Cut out the inside of the grill just a hair smaller then the diameter of the sub and the PR's. A few minutes of hand sanding the inside ensures a perfect fit.
Grill frame sanded and painted black.
Grill cloth attached to frame.
Cabinet painted and components installed.
Grills installed.
I currently have the sub set up in my living room as shown below. Once the sub is moved into the work out room it's place will be a a corner. The sub will sit 45 degrees to the corner so no PR is firing directly into a wall. I'll post a graph of the in room response when I get REW set up.
cube sub
Hi there: Great report, fine job on completed project. Your feelings about the sound reproduction would be appreciated. ....regards Michael
Hi there: Great report, fine job on completed project. Your feelings about the sound reproduction would be appreciated. ....regards Michael
I was impressed by the low end output of this 10 inch sub, considering the room it's in now is 15' x 30'. It would be ideal for HT applications in smaller sized rooms. I'm away at work at the moment, but next week the sub will be moved to a smaller work out room where we have a AV system. I have no doubt it will perform well.
- Status
- Not open for further replies.