Hi reedcat,
Using the schematic in post 1800, your feedback resistors are R5 (820R) and R6 (27K). R5 is very sensitive as far as your circuit gain goes. It wouldn't hurt to use a higher wattage resistor for R6, or two to make up the 27K value. That will reduce temperature change as your output power changes.
-Chris
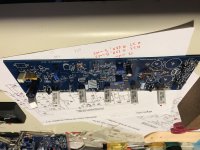
I found the spot where the diode should be on my PCB. It is marked as "D-BC (option)". The spot is empty. I didn't fill it since the build guide doesn't mention it and the BOM doesn't have it.
Is the build guide still not updated!? I "complained" about this a long time ago, but... ouch. Maybe the build guide PDF should be replaced by the Wiki page, which is easier to keep up-to-date.
The anti-sticking diode is across Q7/8.
It has to be rated for full rail to rail voltage. In your case that will be 2*67Vdc +10% for mains voltage variations.
The other sch has changed the transistors from Q7 & 8 to Q9 & 10Just found ostripper's comment on baker clamp diode. It goes between the output side of C8 (where C8 meets R31 and R28) and the Base of Q9 (where C7 meets Q9's base). It is marked D3 on this schematic (attached).
diyAB Amp - The "Honey Badger"
I am not sure if my PCB has it. Does anyone know where I can find the latest schematic for the board on sale? My BOM lists D8/D9 but I don't see them on the schematic listed on the DIY store front or in the schematic included in build guide.
Edit1: I found the latest schematic. It is that little image at the store front. The best way to look at it is right click and save it as an image file. Baker clam is marked at D10. My BOM doesn't have it so I probably don't have it in the PCB which explains the strange shape of the clipped sine wave
Edit2: I found the spot where the diode should be on my PCB. It is marked as "D-BC (option)". The spot is empty. I didn't fill it since the build guide doesn't mention it and the BOM doesn't have it.
Sorry for the wrong data.
Is the build guide still not updated!? I "complained" about this a long time ago, but... ouch. Maybe the build guide PDF should be replaced by the Wiki page, which is easier to keep up-to-date.
I believe it was updated in the 2012 Version of the build guide?
On the 8th page of the build guide (available from the DIYA Store), under the section "Ideas and Alternatives", subsection "Cascode/ Current Mirror".
I believe this is the "Baker Clamp" modification if I understand it correctly. It is presented as one of three different methods of cascode reference.
Cheers,
Tim
Last edited:
I believe it was updated in the 2012 Version of the build guide?
On the 8th page of the build guide (available from the DIYA Store), under the section "Ideas and Alternatives", subsection "Cascode/ Current Mirror".
I believe this is the "Baker Clamp" modification if I understand it correctly. It is presented as one of three different methods of cascode reference.
Cheers,
Tim
Sorry, I just compared the boards to the schematic. I guess I was wrong!
a 3pin inline VR can be inserted in either direction.Does the orientation of r17 variable resistor matter. Center leg stays in the center outer legs reversed. Can r23 and r27 be 1/4 watt?
As a variable resistor, it still operates the same. But the direction of rotation of the adjuster will either increase, or decrease the resistance.
You need to decide what effect you want when you turn in one particular direction and insert the VR to achieve that.
My preference is for the effect to increase when I turn in a clockwise direction.
eg. when I want to increase the output bias voltage, I want the resistance to decrease. I look at the PCB traces and find which two leads are shorted and find which orientation gives a decrease in resistance for a clockwise rotation.
That way I get an increase in output bias with clockwise rotation. But, That is a personal preference.
I know from looking at many Member designed layouts that most Members here don't care and some boards even have different rotation on the same PCB !!!
Last edited:
Does the orientation of r17 variable resistor matter. Center leg stays in the center outer legs reversed. Can r23 and r27 be 1/4 watt?
Looking closely at the build guide and the schematic, r23 and r27 seem to carry just under 9mA at their rated resistance. Power is I*I*R so only milliwatts across those resistors. Verified by a search in the build thread where the designer ostripper confirmed it (26 July 2013, post 384))
In fact ostripper's comment at the time was that most resistors can be 0.125W with no issues.
hi I'm fine !! as soon as the pcb will be available in the store, then the store ... and I'll take both the transformers .. I'm completing the big Ekta and 4ohm speakers ... that require many W .. thanksFrom 2 x 37 VAC you'll get about 2 x 55 VDC, which is suitable for the HoneyBadger. Install one of your transformers if you're usin 8 ohm speakers, or both for 4 ohm loads.
Best regards!
")
HoneyBadger and Ekta, yummy!hi I'm fine !! as soon as the pcb will be available in the store, then the store ... and I'll take both the transformers .. I'm completing the big Ekta and 4ohm speakers ... that require many W .. thanks
excellent .. buy !! thanks now I have 2 questions on the PSU; I'm going to use my 2 toroidal transformers from 600w 2x37 and do a dual mono, a friend had passed me a x psu dual mono x f5 turbo v2 that uses a transformer from only 2x24, I can use this psu (mur3020w, cap from 15000uf 63v, ..) , x dual mono I have to use houses from 5u x 400 ?? or x dissipate the heat can be enough 5u x 300 ???? thank you
Last edited:
I advise to build a few amps before this reason is your questions, this is not choose build guide and solder plug&play.excellent .. buy !! thanks now I have 2 questions on the PSU; I'm going to use my 2 toroidal transformers from 600w 2x37 and do a dual mono, a friend had passed me a x psu dual mono x f5 turbo v2 that uses a transformer from only 2x24, I can use this psu (mur3020w, cap from 15000uf 63v, ..) , x dual mono I have to use houses from 5u x 400 ?? or x dissipate the heat can be enough 5u x 300 ???? thank you
Even the designer said that his ef3 is more stable than this ef2.
You need knowledge, like do it yourself amp.
You need knowledge, like do it yourself amp.
Or ask questions, get answers.
As mentioned before, the DC voltage will end up at about 55 V with your transformers (or maybe a bit lower). The 63 V rating should do it, although some may say that more margin would be better. But with this PSU already available I would just give it a try.
- Home
- Amplifiers
- Solid State
- diyAB Amp - The "Honey Badger"