Hi highviewvideo,
")
-Chris
Don't feel bad. I've done similar things.I guess it was on another site I use that the question was asked and I've posted a reply on the wrong one
-Chris
Open the case. Looking down from the top with the front panel away from you the power supply board is in the centre towards the back of the unit. It measures 150x100mm (approx)
On this board are many capacitors but pay attention to two 100mF caps (63V) which may have discoloured. easy to test if you have an ESR meter. Also check for high restsance (dry ) joints.
Again looking down at the unit the input sockets are on a board at the near right. You have to remove this board from the unit to gain access to and replace the small drive belt on the input selector and encoder board.
I hope this helps.
Problem at Power-Up
Hi,
We have a 911 Amp that doesn't complete the power-up cycle. Maybe a protection circuit is cutting-in.
Basically when we press the main AC power button on the front the RED LED just keeps flashing and doesn't go to it's normal steady-state..
Has anyone seen this problem with the Sansui AU-x911DG Amp?
the selector gears contacts get off
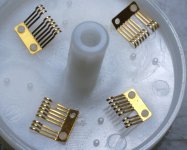
teflon break you can swap position, i loose one contact, it fall on the floor and i c'ant find, i will trow this nonsense amplifier in the dust bin:
teflon break you can swap position, i loose one contact, it fall on the floor and i c'ant find, i will trow this nonsense amplifier in the dust bin:
Attachments
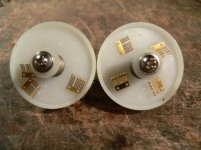
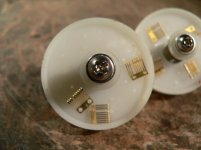
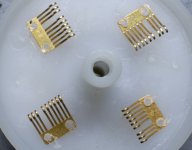
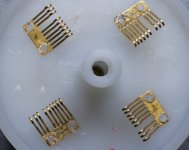
What a waste... I have the same issue with these fingers. In my case someone had a go at them and glued them to the plastic. But if you look carefully you see unused posts that can be used to re-attach the fingers to the wheel. I will attempt this and report back here.i will trow this nonsense amplifier in the dust bin:
Attachments
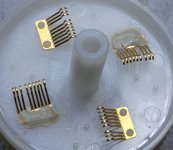
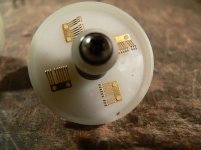
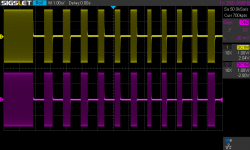
The glue in the left pic above had gone brittle and the fingers were all bent. I tried hot melt glue but the vanes also fell off. So I decided to use the spare posts. With my soldering iron at 180°C I carefully melted the post to fix the vanes. This resulted in a complete fix. The contacts were cleaned and not greased in any way. The gold flash will wear faster but the sound will not be affected. The scope shows subsequent input switching.
Still, what a horrible engineering...
Still, what a horrible engineering...
Attachments
- Home
- Amplifiers
- Solid State
- Sansui AUX911DG repair tips