I know alot around here do believe in paying a site for instructions, but LL is really worth it. I dont post here, but I have done some reading here.
I have an older 2MP digi-cam, so the quality is better in person, even though you can clearly see that I got good results. The corners sometimes appear dark but they really arent. I completly alligned the fresnels to the exact MM.
The cost to me .....
Samsung 512N $200
LL kit bought used $60
m59 ballast new but bought from individual seller $50
Eye Bulb $40 from UL
The artic fan, I nabbed off of Ebay for $15
Norpro $13 .....
Miscellaneous stuff from Home Depot $25
for a grand total of $402 bucks ....
here are my results
An externally hosted image should be here but it was not working when we last tested it.
An externally hosted image should be here but it was not working when we last tested it.
An externally hosted image should be here but it was not working when we last tested it.
An externally hosted image should be here but it was not working when we last tested it.
An externally hosted image should be here but it was not working when we last tested it.
An externally hosted image should be here but it was not working when we last tested it.
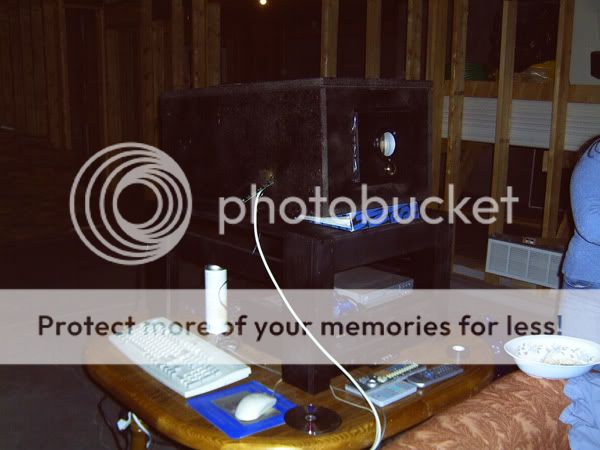
here is the screen .... I made this myself .... I got the screen material and made a frame out of 1/2 MDF ..... I mounted that, and then stabled the screen material to it ..... I then layed the outer frame painted black and composed of 1/8'" playwood on top
An externally hosted image should be here but it was not working when we last tested it.
An externally hosted image should be here but it was not working when we last tested it.
An externally hosted image should be here but it was not working when we last tested it.
An externally hosted image should be here but it was not working when we last tested it.
and now my newer results ... ive made some changes .... mainly the lighting rig ... and now I got a much brighter image .... I also got ahold of a slightly better camera ... even though this camera isnt the best either ..... Also ..... the image is even lit on the sides ... something with the optics of camera make the center look brighter
An externally hosted image should be here but it was not working when we last tested it.
An externally hosted image should be here but it was not working when we last tested it.
An externally hosted image should be here but it was not working when we last tested it.
An externally hosted image should be here but it was not working when we last tested it.
An externally hosted image should be here but it was not working when we last tested it.
An externally hosted image should be here but it was not working when we last tested it.
An externally hosted image should be here but it was not working when we last tested it.
An externally hosted image should be here but it was not working when we last tested it.
An externally hosted image should be here but it was not working when we last tested it.
An externally hosted image should be here but it was not working when we last tested it.
An externally hosted image should be here but it was not working when we last tested it.
An externally hosted image should be here but it was not working when we last tested it.
An externally hosted image should be here but it was not working when we last tested it.
An externally hosted image should be here but it was not working when we last tested it.
An externally hosted image should be here but it was not working when we last tested it.
An externally hosted image should be here but it was not working when we last tested it.
An externally hosted image should be here but it was not working when we last tested it.
An externally hosted image should be here but it was not working when we last tested it.
An externally hosted image should be here but it was not working when we last tested it.
An externally hosted image should be here but it was not working when we last tested it.
And lastly ..... a shot of the screen with some lights on .... to try to portray the brightness this thing puts out ....
An externally hosted image should be here but it was not working when we last tested it.
there is some mean looking shots in that collection m8 i only hope that when i have completed my little pj my shots will look a little like yours
That one of picking up the dust in the gladiator looks awsome
That one of picking up the dust in the gladiator looks awsome
Great job, those are awesome results! Almost done building mine which is pretty much the same except vertical. Hopefully it will turn out as well.
A few questions if you don't mind.
Your screen size is 138". How far away is the front of the projector from the screen. What angle is the projector at (relative to the floor)? How high from the floor is the projector? Is there keystoning? Do you have keystone correction? How effective is it?
Thanks in advance. I'm very close to building my pj, and I I'm decerning the last few details.
yes ... right now the projector is on top a stand that has it sitting at about 5 feet off the ground, and is about 12 feet back from the screen.
I do have keystone correction, the front collecting fresnel has two very small holes drilled into the corner (then masked), and I strung a small peice of Cat5 wire conductor through the hole, and snuggly tied it to a dowell rod that runs from each side of the projector.
What this does, is that when you tilt the projector up (or down), gravity will let that fresnel lense swing, thus you have auto keystone, no need for adjustment.
i havnt tested its tolerance, but it works fine at the angle I have it at now ....
you can see how it works better with this pic here .....
An externally hosted image should be here but it was not working when we last tested it.
That is very smooth (keystone correction), I was wondering how I a going to deal with it as I am planning on making a similar design and my wife dosn't want too large and image (so closer to the wall it is with a bit of a tilt 🙁 Sure seems better than what I was think of trying to glue dowl to it and drill holes in the side of the case for a knob etc etc etc.
Great shots too btw. Just wondering, I didn't see a condensor in your shots, is taht a future upgrade you plan on, or did you try one and not find an appreciable difference? I am just wondering where I am going to get one if I plan on using one.
Great shots too btw. Just wondering, I didn't see a condensor in your shots, is taht a future upgrade you plan on, or did you try one and not find an appreciable difference? I am just wondering where I am going to get one if I plan on using one.
Thanks for the quick reply.
I'm planning on a 120" screen, ceiling mount projector. So, my angle of keystoning will be more acute than yours.
Before I make the final enclosure, I will be playing around with keystone correction and see how much I can do and still maintain a decent image. I've also been working on lens shift. BTW, tilting the fresnel is part of a lens shift design. Making it work properly in the DIY world is a bit of work.
I notice on your design (as well as most others) pivot the collector fresnel at the top (or bottom depending on projector location). Would it not be better to have the fresnel pivot at the center to allow for less movement of the fresnel to provide the same correction? This MAY allow for a sharper final image.
Yeah ... some pivot in the center ..... but, I ended up with focus where I m at ..... if It hadnt I would have done a center pivot as well.....
bigunn ... No I have a split fresnel setup .... in which that there is a fresnel behind and in front of the screen ... If you look at a closeup of the keystone image I posted you will see that there is a lens on both sides of the LCD
bigunn ... No I have a split fresnel setup .... in which that there is a fresnel behind and in front of the screen ... If you look at a closeup of the keystone image I posted you will see that there is a lens on both sides of the LCD
I get the split fesnel idea, I was really interested in knowing if you were using a condesor for the light source, pre fresnel #1 to help intenify your light on the rear fresnel.
Bigg'un said:I get the split fesnel idea, I was really interested in knowing if you were using a condesor for the light source, pre fresnel #1 to help intenify your light on the rear fresnel.
No , Maybe I dont know the entire 4-11 on those condensors ..... I havent really researched the design of the DIYprojectorComp or anything .... So my intial and only though to this point was that those little lenses spread the point source out wide (for use when NOT using a split fresnel setup) Something you dont want in a split fresnel setup because it wants a focused point source to collimate its light from
I take it that I must be wrong in what one of those little condensors do ..... Does it make the arc envelope of the bulb more of a point source (opposite of what I was thinking)?? If So, I will tinker with implementing one
They look like half a magnifying glass, whatever that would do, I don't know, I don't have anything like that to fool around with 🙂
I did some research on them ...... very very very little ....
but from what I read, they have the same function as the "rear fresnel" in a split setup .....
it seems that it will take the almost point source of light, and span it out so it hits the LCD evenly, then the collector "front fresnel" collects this light and sends in through the projection lens.
It also seems that the owner of DIYPC isnt selling them anymore, or he quite stocking them ..... according to a thread I read in their forum, he responded telling people that he quit stocking them, but could order more if someone requested .....
Using one of these with a split fresnel would probably be a really bad idea ....
You will have to determine which system your are going to use .....
From the little bit of reading I did ... it appears that using a split fresnel design can result in a brighter more evenly lit picture, but can be hard as hell to tune properly ... where as the condenser method works well the first time you fire it up .... I cant say with any degree of experience, as I dived right into the split fresnel design ... but you should probably do some research between the two ....
Good Luck ....
I think I will go with the split fresnel design and if that dosn't work out too well, I will join the fresnels together and try it that way.
I've also been working on lens shift. BTW, tilting the fresnel is part of a lens shift design. Making it work properly in the DIY world is a bit of work.
Heya buddy, lens shift is totally different then what you are thinking, a frensel has nothing to do with it and it cant be acheived with frensels. Lens shift can only be acheived by using 2 offset wedge prisims at the back of the projection lens. Lens shift is offsetting the optical axis.
Trev 🙂
Tilting the fresnel is still an optical keystone correction method. But, I guess a 'true' lens shift is beyond what I can expect in DIY. However, if I tilt the fresnel, I am moving the optical center of axis from the the objective lens. To compensate, shoudln't I need to move the objective lens to properly align it again? I know doing so is not common in current designs, but this is the type of thing that I want to test first before I build my unit
Tilting the fresnel is still an optical keystone correction method
Thats correct, but lens shift has nothing to do with keystoning. Lens shift alows you to have the projector flush with a table or roof and have the image coming out at the apropiate angle from the projection lens to the screen.
With a frensel the image only comes out strait, keystoned or not, with lens shift you can keep the projector where it is and move the image up, down, or side to side without having to ajust any keystone or moving the actual projector. Infact those projectors with lens shift dont have keystone as they dont need it. What they do need though is a wide angle projection lens.
However, if I tilt the fresnel, I am moving the optical center of axis from the the objective lens.
No it dont move the axis at all, its just changing the focus of the top and bottom of the cone of light going into the back of the projection lens, its not moving the actual optical center axis like what lens shift does.
Lens shift is easy enough to do, its very diyable, all you need is 2 wedge prisims................. that arent so cheap.
Trev🙂
Attachments

- Status
- Not open for further replies.
- Home
- General Interest
- Everything Else
- The Moving Image
- DIY Projectors
- Scuba's Lumen lab results