Sorry if this is a redundant thread. But I've had to figure this one out over a few projects and now I'll share the fruits.
Single Ply (Raw) Veneer:
It will give you splinters, plain and simple. The best defense against this is to just steel yourself against it. Because I've found gloves don't work
It will split. So don't get mad when it does.
It has two sides. Make a note before you cut it up! One side of the veneer will look much different to the other once applied and glued. The easy way to keep track is to always apply it curl-down. The curl never changes.
It's absorbent. It'll soak up glue, oil, stain and paint. This is both a strength and a weakness.
Application:
Step One:
Make sure you have some good wood glue. Gorrilla glue, despite being highly recommended by the mustachioed gentleman at home depot, will not work. It increases in volume, not good for veneering. I like titebond red myself.
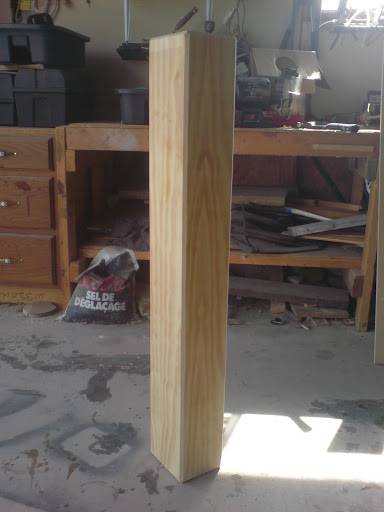
Make sure your surface is as flat as possible. Then wash it down with a mildly damp rag.
SOAK THE VENEER. You need to submerge it in water, I doubt temperature makes a difference but for the sake of disclosure I use cool water. Make sure not to go nuts and leave it in overnight or something, ten to fifteen minutes is what I do. This pre-soak makes the next step much easier because it renders the veneer flexible, keeping it from splitting and snapping apart in your hands.
Oh and make double-sure you have enough veneer, I've had to run back to the store more than once for more.
Step Two
Extract your veneer from the water. Give it like a minute or two to get a little less-wet (trust me). Then place a brick or otherwise heavy thing on one end, allowing you to unroll it, place another block on the other end. This stuff hates not being rolled.
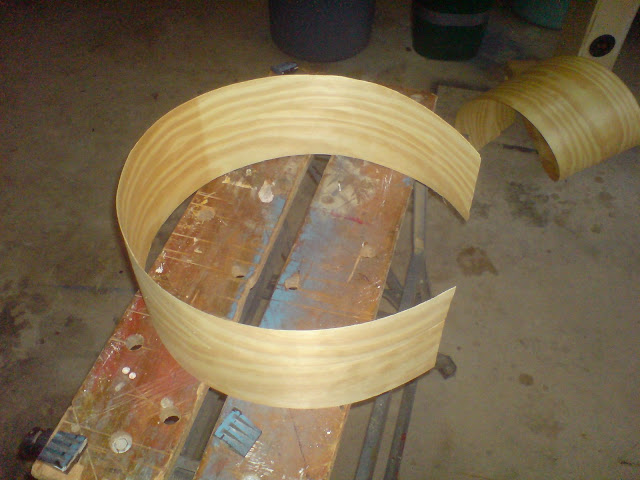
Now you need to mark out the shapes you need to cut. You can measure them out but I find placing the article to be veneered directly on the veneer to be a much safer bet. Use chalk or a soft pencil to mark your cuts.
Cut it using scissors. Resist the urge to use snips or a knife. Kitchen, Scissors, Only.
Wow now you've cut it all! Let it dry out so it'll stick to glue. (Usually an hour)
Step Three
Glue. This is the part that's hard to get right. Too much glue and no matter what you'll get waves and bumps. Too little and it won't stick/will have air blisters. I can't help you much because it depends heavily on how flat your surface is, what type of wood your veneer is, what shape/size you're doing. Just eyeball it.
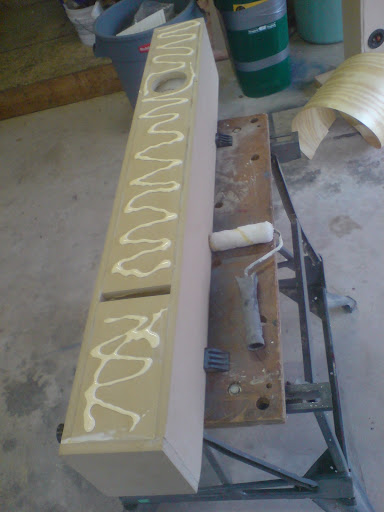
Another useful trick is to use a little paint roller to even out the glue. You must even the glue out or you will get seriously bad results.
Once your glue is applied you need to put the veneer on. Fighting the curl can be tough, put it down flat with your hands and then massage it into the glue until it more or less stays put, all the while making sure not to split or snap it. Then you need to put a very flat unwarped board over the veneer.
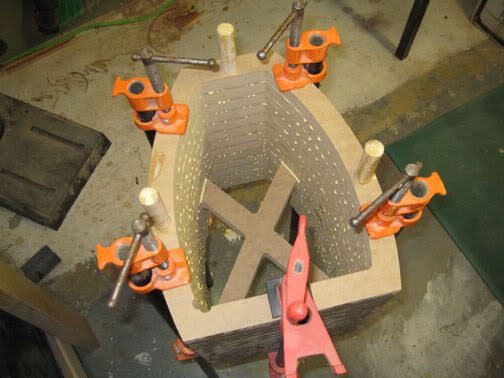
Secure with many clamps and heavy stuff.
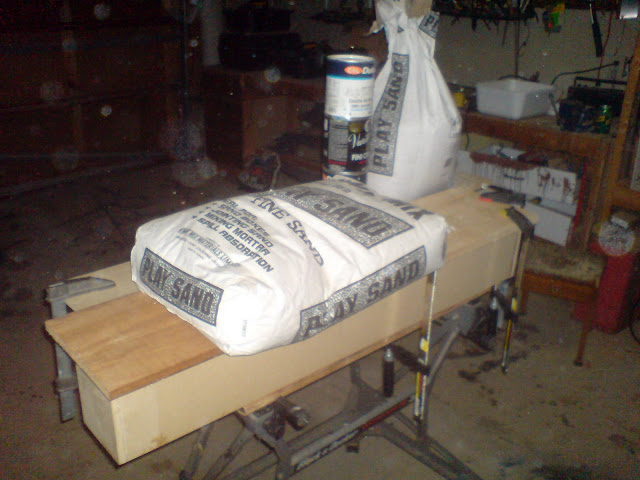
Leave this to sit for approximately one third of your wood glue's recommended curing time. Have a sandwich, I sometimes watch a movie piecemeal during the little hiatuses.
Step Four
Repeat step three until you can veneer on all the desired surfaces. Trip excess where absolutely necessary using those kitchen scissors we discussed earlier.

Step Five
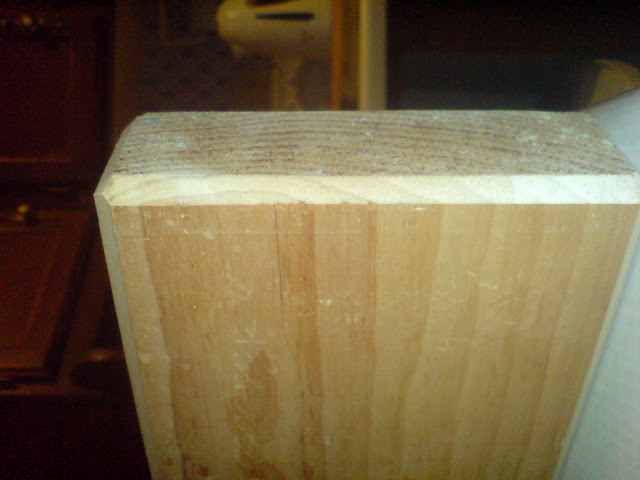
Sand the sucker to taste.
Okay now some fun.
Bust out your speaker-builder's excalibur, AKA your router an attach your round-over/chamfer/trim bit. I strongly suggest one of the former. A trim-bit (square) finish is kind of a pain in the bum. The process is the same, it's just more delicate and critical that one not screw-up.
Set the depth for your router, USE TEST PIECES. Remember this is going to trim your excess veneer and make pretty corners on your box in one fell swoop.
If you feel i necessary apply painter's tape along all the edges that won't be disintegrated by the router in order to protect the finish from the bit-bearing and the router base.
Personally I feel the painter's tape a bit unnecessary, any scuffs can be addressed with sandpaper later. Remember this veneer is thick and can be sanded all over town.
Step Six
Done routing?
Did it go okay?
You're basically done!
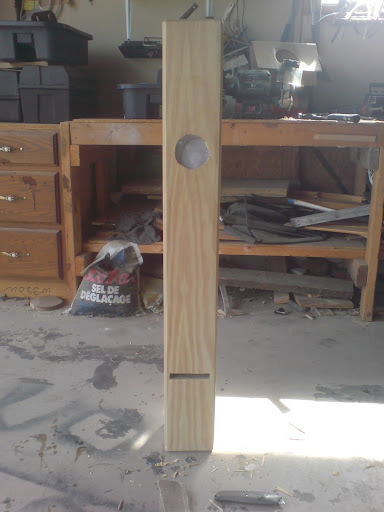
One last thing. If you already cut your driver holes et al you'll need to punch them through.
Here's how:
Take your utility knife and tap the veneer with it's butt until you're sure you've found the centre of desired orifice.
Now brain it with your knife's butt. Just smack on through it's okay trust me. Once through gently but forcibly expand the hole you pushed through still using the butt of the utility blade. Eventually you'll have folded all of the veneer down into the hole. Now slide out the sharp bit of your knife and carefully shave off the pushed-through veneer until you've got a nice clean hole. Then sand to be double sure.
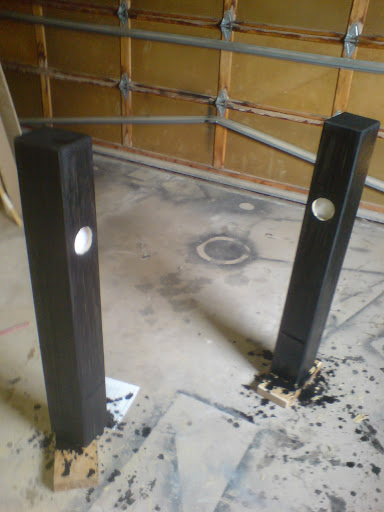
Now you're really done! All that's left is oil, stain, varnish, paint, lacquer or whatever you plan on doing next.
Anyway that's how I do it.
Single Ply (Raw) Veneer:
It will give you splinters, plain and simple. The best defense against this is to just steel yourself against it. Because I've found gloves don't work
It will split. So don't get mad when it does.
It has two sides. Make a note before you cut it up! One side of the veneer will look much different to the other once applied and glued. The easy way to keep track is to always apply it curl-down. The curl never changes.
It's absorbent. It'll soak up glue, oil, stain and paint. This is both a strength and a weakness.
Application:
Step One:
Make sure you have some good wood glue. Gorrilla glue, despite being highly recommended by the mustachioed gentleman at home depot, will not work. It increases in volume, not good for veneering. I like titebond red myself.
Make sure your surface is as flat as possible. Then wash it down with a mildly damp rag.
SOAK THE VENEER. You need to submerge it in water, I doubt temperature makes a difference but for the sake of disclosure I use cool water. Make sure not to go nuts and leave it in overnight or something, ten to fifteen minutes is what I do. This pre-soak makes the next step much easier because it renders the veneer flexible, keeping it from splitting and snapping apart in your hands.
Oh and make double-sure you have enough veneer, I've had to run back to the store more than once for more.
Step Two
Extract your veneer from the water. Give it like a minute or two to get a little less-wet (trust me). Then place a brick or otherwise heavy thing on one end, allowing you to unroll it, place another block on the other end. This stuff hates not being rolled.
Now you need to mark out the shapes you need to cut. You can measure them out but I find placing the article to be veneered directly on the veneer to be a much safer bet. Use chalk or a soft pencil to mark your cuts.
Cut it using scissors. Resist the urge to use snips or a knife. Kitchen, Scissors, Only.
Wow now you've cut it all! Let it dry out so it'll stick to glue. (Usually an hour)
Step Three
Glue. This is the part that's hard to get right. Too much glue and no matter what you'll get waves and bumps. Too little and it won't stick/will have air blisters. I can't help you much because it depends heavily on how flat your surface is, what type of wood your veneer is, what shape/size you're doing. Just eyeball it.
Another useful trick is to use a little paint roller to even out the glue. You must even the glue out or you will get seriously bad results.
Once your glue is applied you need to put the veneer on. Fighting the curl can be tough, put it down flat with your hands and then massage it into the glue until it more or less stays put, all the while making sure not to split or snap it. Then you need to put a very flat unwarped board over the veneer.
Secure with many clamps and heavy stuff.
Leave this to sit for approximately one third of your wood glue's recommended curing time. Have a sandwich, I sometimes watch a movie piecemeal during the little hiatuses.
Step Four
Repeat step three until you can veneer on all the desired surfaces. Trip excess where absolutely necessary using those kitchen scissors we discussed earlier.
Step Five
Sand the sucker to taste.
Okay now some fun.
Bust out your speaker-builder's excalibur, AKA your router an attach your round-over/chamfer/trim bit. I strongly suggest one of the former. A trim-bit (square) finish is kind of a pain in the bum. The process is the same, it's just more delicate and critical that one not screw-up.
Set the depth for your router, USE TEST PIECES. Remember this is going to trim your excess veneer and make pretty corners on your box in one fell swoop.
If you feel i necessary apply painter's tape along all the edges that won't be disintegrated by the router in order to protect the finish from the bit-bearing and the router base.
Personally I feel the painter's tape a bit unnecessary, any scuffs can be addressed with sandpaper later. Remember this veneer is thick and can be sanded all over town.
Step Six
Done routing?
Did it go okay?
You're basically done!
One last thing. If you already cut your driver holes et al you'll need to punch them through.
Here's how:
Take your utility knife and tap the veneer with it's butt until you're sure you've found the centre of desired orifice.
Now brain it with your knife's butt. Just smack on through it's okay trust me. Once through gently but forcibly expand the hole you pushed through still using the butt of the utility blade. Eventually you'll have folded all of the veneer down into the hole. Now slide out the sharp bit of your knife and carefully shave off the pushed-through veneer until you've got a nice clean hole. Then sand to be double sure.
Now you're really done! All that's left is oil, stain, varnish, paint, lacquer or whatever you plan on doing next.
Anyway that's how I do it.
Interesting thread. Thanks for sharing. You do things differently than me. Which is cool. I use a vacuum bag. I decided a while back that if I was going to save the money using raw veneer, I ought to make it painless for myself.
FWIW, I would never soak veneer in water like that. But, hey if it works for you..
I'm with you on the titebond. Gorilla glue is not for veneer, ever. I use a 3" roller to even out the glue. It also helps to dictate the amount of glue that gets put on. I always leave routing the driver recesses till after the entire cabinet is veneered. I just like the way the edges come out, and it is less work in the end.
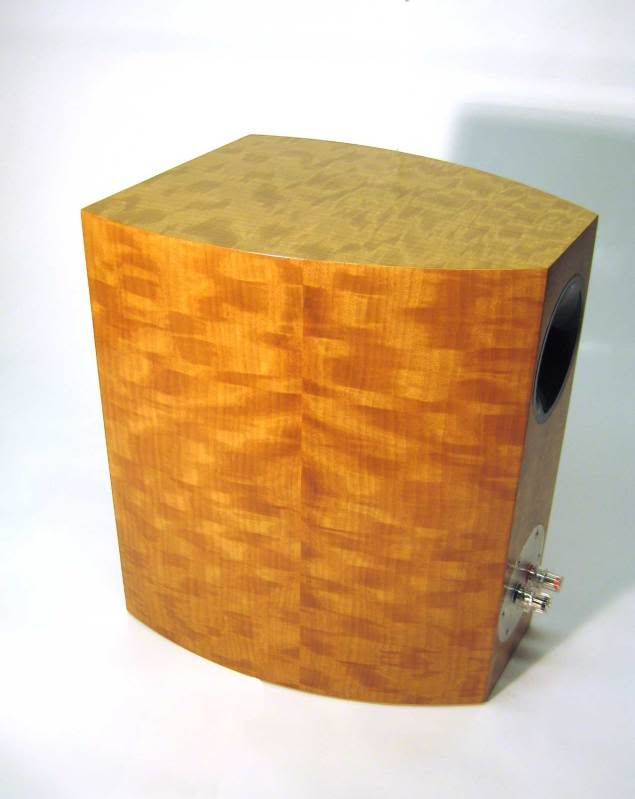
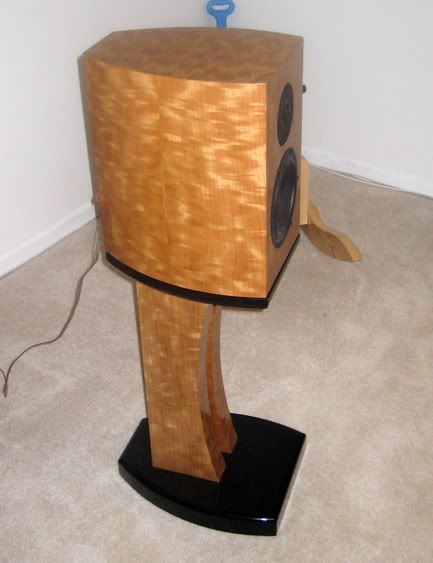
One thing is for sure, there is no edge detail like that acheived with raw veneer..
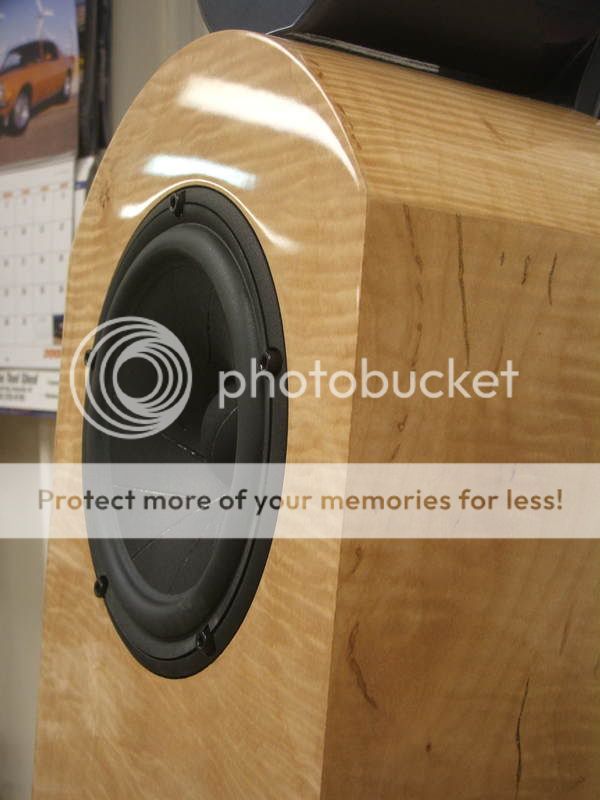
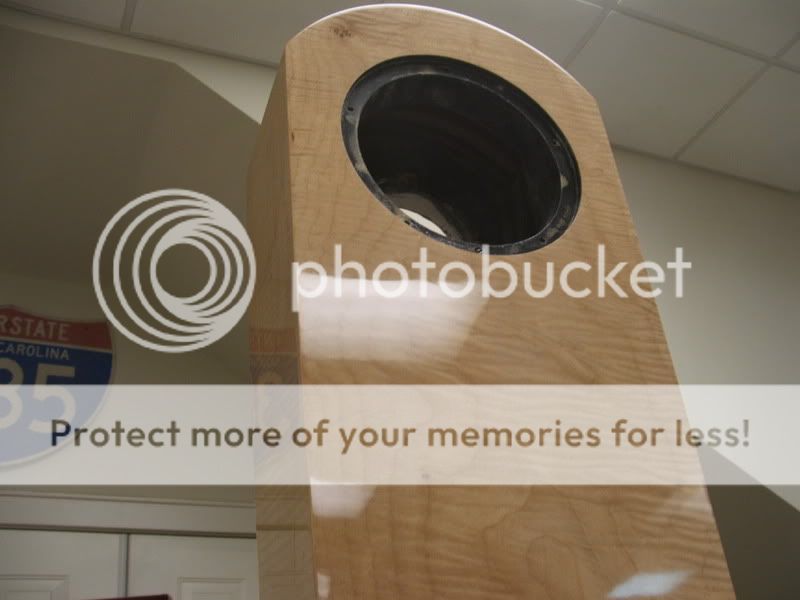
The vacuum bag allows me to seam veneer as well. The second photo shows book matching.

FWIW, I would never soak veneer in water like that. But, hey if it works for you..
I'm with you on the titebond. Gorilla glue is not for veneer, ever. I use a 3" roller to even out the glue. It also helps to dictate the amount of glue that gets put on. I always leave routing the driver recesses till after the entire cabinet is veneered. I just like the way the edges come out, and it is less work in the end.
One thing is for sure, there is no edge detail like that acheived with raw veneer..
The vacuum bag allows me to seam veneer as well. The second photo shows book matching.

i have yet to try the vacuum bag.. that is on my list..
I do yellow wood glue.. apply to both cabinet and veneer.. let dry.. then with at a old t shirt on hot iron.. work from the center out.. the heat along with pressue will flash the glue making a rock hard ultra flat bond...

I do yellow wood glue.. apply to both cabinet and veneer.. let dry.. then with at a old t shirt on hot iron.. work from the center out.. the heat along with pressue will flash the glue making a rock hard ultra flat bond...
Trusound. What method do you use for that lacquer finish?
BTW I would probably wine and dine those speakers they're so good looking.
BTW I would probably wine and dine those speakers they're so good looking.

I would caution using the iron on method with raw veneer. I know from experience. I thought I had mastered it. It fails every single time.
The heat extracts so much moisture cracks develop. Big long serious cracks. Maybe not at first. Some times they do develop right away. other times, I had speakers completely finished (airlees applied lacquer on top of vinyl sanding sealer) that were crack free. Then, four months down the road, cracks. Big ones. Vacuum bag or caul system veneering I have done has never failed yet. (it's been over two years)
Every one has their own opinion, but mine is to never, never iron on raw veneer. That's what forced me into a vacuum bag system.
these have been finished for over a year.. I doubt if they will crack if they haven't already.. thanks for the heads up though..
how long did it take you to master the vacuum bag? and what is a good site to read on thechniques etc?
how long did it take you to master the vacuum bag? and what is a good site to read on thechniques etc?
s7horton said:I would caution using the iron on method with raw veneer. I know from experience. I thought I had mastered it. It fails every single time.
The heat extracts so much moisture cracks develop. Big long serious cracks. Maybe not at first. Some times they do develop right away. other times, I had speakers completely finished (airlees applied lacquer on top of vinyl sanding sealer) that were crack free. Then, four months down the road, cracks. Big ones. Vacuum bag or caul system veneering I have done has never failed yet. (it's been over two years)
Every one has their own opinion, but mine is to never, never iron on raw veneer. That's what forced me into a vacuum bag system.
I too would think they would be okay if they have been complete for a year. Just wanted to make sure that people less experienced were aware that your project was not necessarily the norm. And, I still recommend not going the iron on route with raw veneer.
joewoodworker.com is a good source for info on vacuum bag veneering. Also try the forum at vac-u-press. They some nice and expensive presses for all applications.
joewoodworker.com is a good source for info on vacuum bag veneering. Also try the forum at vac-u-press. They some nice and expensive presses for all applications.
I've had alot of success with a 22.2mill bubble free veneer from a place called http://www.oakwoodveneer.com/products.html It seems to be less work to use then when I used raw or paperbacked. I always worried about it releasing from my work when I stained it. The 22.2 mil stuff does not have that problem.
re: Cracks
Hi S7Horton:
I'm working with veneering (just getting started here), and was planning to do iron-on for my beveled edges.
I was able to get good adhesion with iron-on on a beveled edge by using veneer softener, letting dry a little bit, and ironing through a wet t-shirt. Were you ironing on the wood directly? Any moisture added?
I'm really hoping I can get the iron-on to take well on those edges, because they'd be difficult to apply with cauls. I'm working with raw veneer.
Do you have any tricks for edging? I have the bevels and the driver cutout to deal with. My plan was to rough cut the driver cutout with scissors after using softener, and, once the veneer is attached to the face, cut it as close as I can and finish with a flush trim bit. For the bevels, I was going to veneer the adjoining faces, then iron-on (or cauls, if I have to) pieces for the bevels, trimmed slightly oversize, and finish with a flush-trim bit, riding the bearing on blue tape to avoid the lines in the work.
This discussion couldn't have come at a better time 🙂
s7horton-very beautiful work. I have been using vacuum bag veneering for several years now but have only done flat panels. It looks to me like you applied the veneer after you had completed the enclosures. If so, was there any issue of the box being crushed by the vacuum? I have read that you need to support curved panels. Did you need to support the interior of the enclosure.
Terry
Terry
Badman, with raw veneer, I wouldn't recommend iron on. Even with those beveled edges. I would try a caul approach before anything. Actually, I would try a vacuum bag first, but that may not be an option for you. I have a standard order I follow when I veneer. Bottom, back, sides, front, top. I would follow the same order in your situation. Which means I would do the bottom, back, sides, bevels, front, then top. That way, when looking at the front of the speaker, you won't see the edge line (not that there is much from the raw veneer anyway)...sorry I wasn't much help. I would really need to see a picture of the bevel before I could make much of a recommendation with a caul system.
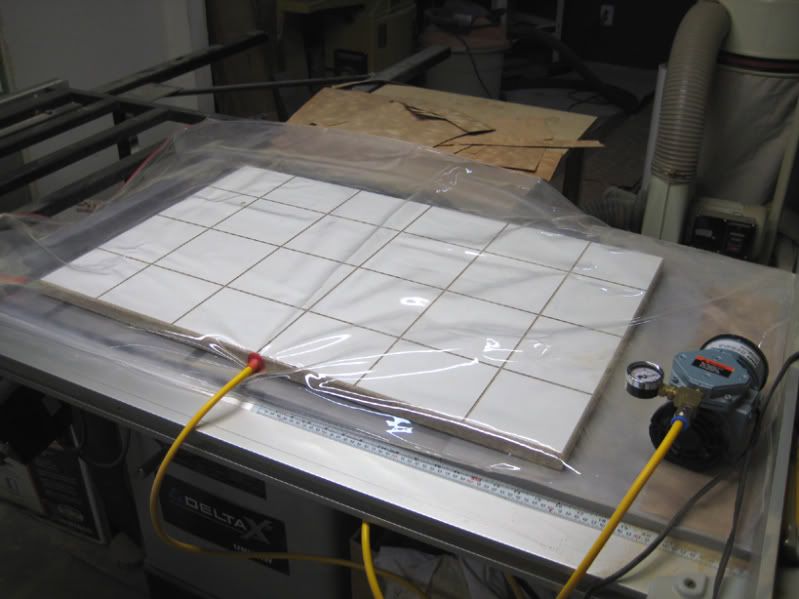
ilardi, I have not ever supported the inside of my cabinets. However, I also don't use an ultra-powerful vacuum pump. As you probably saw in the picture I posted above, the pump is quite small. I'm nowhere near the 29" of Hg like some bigger pumps can be from vac-u-press. I am getting somewhere near 25-26" of Hg. In addition, the photos above are 1 1/8" walls with solid internal bracing.
I may put more thought into internal support if I had a longer cabinet with less bracing and thinner walls.
s7horton,
Thanks. I really need to try this. I have been thinking about curved cabinets for awhile now. If I may be allowed one more question: How did you make the curves? Did you use some sort of lamination or bendable ply or mdf or...?
Thanks.
Terry
Thanks. I really need to try this. I have been thinking about curved cabinets for awhile now. If I may be allowed one more question: How did you make the curves? Did you use some sort of lamination or bendable ply or mdf or...?
Thanks.
Terry
s7horton said:
, I have not ever supported the inside of my cabinets. However, I also don't use an ultra-powerful vacuum pump. As you probably saw in the picture I posted above, the pump is quite small. I'm nowhere near the 29" of Hg like some bigger pumps can be from vac-u-press. I am getting somewhere near 25-26" of Hg. In addition, the photos above are 1 1/8" walls with solid internal bracing.
I may put more thought into internal support if I had a longer cabinet with less bracing and thinner walls.
I think we have the same vac bag setup though I have a 4x8' bag. So you veneered the entire curved cab in the bag? I have always laminated the curved panels in the bag including the veneer, then built the rest of the cabinet around them and veneered the rest with clamps and cauls.
For veneering the top and bottom, do you just stand the cabinet up in the bag?
thanks and regards,
Dennis
I'm not sure the pump I have could drive a 4'x8' bag. I mean, it probably could, but it would take forever for the air to get completely extracted.
This project was done with stacked lamination. I have yet to build a curved cabinet using a different method. I had the parts locally CNC'd. I work with a shop that does it, so they cut me a deal. What a time saver!
Dennis, for veneering the tops and bottoms, I do just stand the speaker straight up. Or, I use a caul system. I have an extra wing off my table saw (replaced by a sliding table). I have used that numerous times as part of my caul system. It works like a charm with these smaller stand mount speakers.
hmmm... gonna have to give the vacuum bag method a go. my first time and i made a few mistakes. but only really noticible up close. the joins were a pain. but i think it came up alright. what makes it hard for me is the humidity, which has made the edges curl, which is a royal PITA to get flat again.
Attachments


- Status
- Not open for further replies.
- Home
- Loudspeakers
- Multi-Way
- Single-Ply (Raw) Veneer. How-To.