p { margin-bottom: 0.08in; } I'd like to share my experience (what little I have) regarding two aspects of Acoustat electrostatic speaker panels. The first aspect is how to clean the panels properly and the second is my opinion on the three 5/16” thick felt diaphragm dampers centrally affixed to the rear stator. The panels mentioned here are 9” wide panels from a 2+2 speaker.
I read a fair amount on this forum and other forums regarding how to properly clean Acoustat panels beyond the safe 1st stage of vacuuming them. My panels were quite dirty and had faint brown stains in large areas of the plastic cube louver stators. I strongly suspect that this was due to the high voltage bias supply attracting cigarette smoke over a long period of time, however it could have been due to any other smoke source including a fireplace.
I removed the felt dampers from the rear stators and then proceeded to vacuum the panels thoroughly with a brush vacuum attachment incorporating 1/2” long bristles resembling a horse hair paint brush. This resulted in a noticeably cleaner looking panel, but I still wanted those awful looking brown stains gone. At this point I knew I wanted to progress to stage two. I understood that stage two cleaning was going to entail significantly more risk to the panel, but I accepted the risk anyway. I then proceeded to check the resistance between the diaphragm and each stator with both a 275 volt output 200megaohm ohm meter and a DMM on its maximum 2000megaohm scale. The resistance from diaphragm to each stator was high enough to be unmeasurable on all eight panels after only a thorough vacuuming.
Now that I knew the basic electrical condition of all eight panels, I felt I could move on to stage two cleaning and measure the panels again after they were washed. I then proceeded to round up all the detergents around the house that I felt could possibly work well based upon what I had read up till then. It basically came down to only two product candidates I felt comfortable with; “Spot Shot” carpet stain remover and “Cascade” automatic dish washing detergent. I selected both of these for testing because I felt they would be fairly safe and would be fairly easy to rinse thoroughly so no (or very little) electrically conductive residue would remain.
First I tested the conductivity of these products by simply inserting the DMM's probes into a small amount of each cleaner while in a small plastic container top. In its liquid state, both measured about the same around 600kohms (not great so far). I then decided to quickly (not thoroughly) rinse each container top out with water so as to simulate the condition of the panel after soaping and rinsing. I then let the container tops dry out and repeated the test with the DMM on the same 2000megaohm scale. No conductivity in either container top. Great! I then wanted to get a subjective idea of the quantity of residual detergent remaining after rinsing, so I took one product in one hand and the other product in the other hand. I then rinsed both hands with water (not thoroughly). The Spot Shot had far less residual, so I was more biased towards that product.
I then decided to test the cleaning effectiveness and the chemical compatibility of the Spot Shot product on both the plastic louver structure as well as the diaphragm coating. The effectiveness of the Spot Shot at removing the the ugly brown stains from the louver structure was fine as well as the compatibility. Then with Q-Tip in hand, I proceeded to test the chemical compatibility of Spot Shot on an extreme peripheral area (the only safe area you should EVER test) of the diaphragm, well away from the bias supply lead-in point of the diaphragm coating. NO GO! Boy, was I surprised at how delicate the diaphragm coating was! I have never had a problem with Spot Shot discoloring or harming a carpet and was surprised at this.
At this point I was beginning to feel that no detergent was going to be safe enough for me to feel totally comfortable with, so I decided to stop any further chemical compatibility testing on the periphery of the diaphragm's coating.
I realized the only sensible thing I could do to safely implement stage two cleaning was a simple rinse with water. I took a panel outside, and carefully without applying too much pressure or concentrating for too long in any one spot, proceeded to wash the panel front and rear with a garden hose nozzle. I then gently shook out the remaining water being careful to grasp the panel at two points quarter of the way in. I then blew out the panel gently with compressed air and set it out to dry in the sun.
I blew it out a few more times, made sure it was dry, and proceeded to ohm test it the same way I done before. SUCESS! OK, now for the second panel. I sprayed the second panel with the water nozzle, but this time I got brave. I thought to myself, self, this is a tough and thick Acoustat Mylar diaphragm, and also when it's displaced by water pressure the stator wires will support it. Yeah!. WRONG......
It turns out that there is reason to believe that Acoustat did not adequately (or at all) roughen the Mylar before application of the coating. The result being the unpleasant experience I had with the second panel's diaphragm coating coming off in a few (admittedly only a few) places. The next hurtle now is to determine if the flakes of conductive coating (bad to have roaming around) can be removed from the panel and if the areas that flaked off are important areas or not.
So the lesson of this is to make sure you do not use excessive water pressure to clean your panels. The other lesson is that (in my opinion) you cannot rid your panels completely of ugly brown stains and still maintain a respectable margin of safety. SO DON'T SMOKE AROUND YOUR ACOUSTATS! And don't put them anywhere near a fireplace either.
OK, on to the felt diaphragm dampers...
After cleaning the panels you will be faced with reattaching the felt dampers. After looking at the dampers it was clear that Acoustat had liberally applied contact adhesive to the WHOLE surface of the damper where it attaches to the rear stator louver.
Here is what I see as being wrong with this. This changes the felt damper properties from being a good absorber of acoustic energy to one that reflects more than it should. This will return upper mid and high frequency acoustic energy to the diaphragm resulting in near-field reflective energy problems. With the result being less than ideal transparent high frequency reproduction. In my opinion the liabilities associated with the presence of the felt dampers outweigh the benefits of controlled and damped diaphragm behavior near its low frequency resonance.
As for me, I am not completed convinced that these felt dampers do a whole lot to damp the diaphragm in this frequency region anyway especially when they are as loosely attached as they were. They practically fell off on all eight panels!
Thanks, Professor Bizzt
Wow you did a lot of good work there and you must be a very patient man. The felt pads do have to be securely mounted to work properly. The speakers do sound better without but then just play some high level ,ow bass content music and yo will see what the pads do for you. Synthetic felt is nowhere nears as good an absorber as quality 100% wool felt. Also a recently re tensioned diaphragms works better in terms of stability than does a somewhat loose diaphragm but they don't stay tight forever. If you build your own panels you can loose the pads by making a clamp up the centre of the diaphragm or using more tension or clamping dots or whatever you like best to stabilize the diaphragm.
Don't blame the pads for not working when the 25 year old adhesive has floated off of the styrene grid work which is full of plasticizer. Whey you glue the pads back down use an adhesive which is tolerant to plasticizer which sweats out of the bade plastic grid constantly over time. Hope this helps. Best regards Moray James.
Don't blame the pads for not working when the 25 year old adhesive has floated off of the styrene grid work which is full of plasticizer. Whey you glue the pads back down use an adhesive which is tolerant to plasticizer which sweats out of the bade plastic grid constantly over time. Hope this helps. Best regards Moray James.
Hi Moray,
Thank you for the compliment!
The point I was trying to make in my ridiculously long opening post was to be very careful cleaning these panels and to be aware of what the felt diaphragm damping pads are doing to the sound, not only at lower frequencies, but also at the top end of the frequency range.
Again, I want to stress that the Acoustat factory applied (at least in the pair I have) contact adhesive to the WHOLE inside surface of the felt pads. This will completely change the frequency selective absorption characteristics of the pads.
A much better assembly technique would have been to:
Tape off the area where the three felt pads are to be placed.
Position the panel flat level so that the rear stator faces down, insuring that gravity keeps the contact adhesive from dripping inward towards the diaphragm.
Apply a liberal amount of contact adhesive via a soft rubber roller to the plastic louver structure within the taped off section.
Apply the felt pads within the taped off section.
Quickly move the panel to a bench so as to allow the weight of the panel to hold the felt damper pads securely while the contact adhesive dries.
This technique would preserve the absorptive properties of the felt to the extent the particular felt formulation was capable of (synthetic or wool). Of course this would do nothing to address the issue of the louver's plasticizer interfering with a high quality bond. That is an issue for those familiar with adhesive selection and techniques.
The issue of low frequency diaphragm control via felt damping pads does not really concern me to any great extent as I don't like to run my Acoustats (or any other electrostatic) at low frequencies anyway. Call me a nonconformist (or worse), but I don't even like to run ESLs (especially early Acoustats, don't know about the Spectras) at high frequencies. I view them as terrific midrange transducers in a high quality, equalized, 3-way active system. Therefore I will probably pass on the re-installation of the felt damping pads.
On behalf of many an audiophile... Thanks for the help all these years Moray.
Best wishes......
Thanks for the post on the panel washing...
Moray
As you no the pads are out of my Acoustats panels, an just Duck tape is far better for me....As i Dont think that Acoustat panels have any High fr to lose....one of the best mods was to pull the pads off...better sound ...more open an better top end...an Dont forget the bias mod....A must for all Acoustats..
Hope your well ....an all the babys are ok.....thanks for just being there..
Happy hoho..
Professor Bizzt:
A very thorough examination of the washing of Acoustat panels! Nice work. It is true that Acoustat never roughened the Mylar surface. However, the custom-made conductive 'paint' did contain a solvent that was designed to allow a very firm 'molecular' bonding to the Mylar (Dupont HS-65). In all my years of talking to Acoustat owners, I have never heard of any of the coating flaking off on its own. Of course, any sort of force applied via a water spray may dislodge some of it, as you unfortunately found out. I wouldn't worry too much about the missing areas, unless they are large. Just make sure to remove any of the loose flakes.
There has been much debate on the felt blocks, which are actually a composite of wool and rabbit hair. When I was an employee at Acoustat, I would have told you not to remove them, but my tolerance of 'alternate' ideas has mellowed over the years, and now my advice would be to try it if you want to. Since they are probably falling off any way, it can't hurt to try it before re-attaching them. The original contact adhesive does not last forever. I've had good luck using 3M 'Spray 77' adhesive, spraying it on the felt, waiting a few minutes, and then pressing it onto the panel.
In any case, any postive contribution of the felt blocks is at low frequencies, so if you are not using the panels full range, leaving them off will probably have no negative effect.
It is SO thrilling for me to see Acoustat speakers just keep going and going. Who would have thought nearly 20 years after Acoustat's demise, I (and others, thanks to the DIY Audio forum) would still be advising owners on the care and feeding of speakers that are as old as 35 years? That's one damn fine product, I say, and it's really gratifying that I feel the same pride in having worked for Acoustat after all these years! It was indeed the 'dream job'.
Professor Bizzt: I have seen the felt pads with adhesive all over the inside surface and also where the adhesive was only applied to the louvre, The adhesive is not the problem the problem was and is the plasticizer in the louvre material, it sweats out of the material over time and the adhesive bond simply floats up on the film of plasticizer. Cleaning the grid and giving it a light scuff with a 3M scrubbie pad will give you more surface area when you re glue the pads back in place (or not). I used a nitryl based synthetic based adhesive cement and applied it to the grid with a small roller. Don't forget to vac the panels after you scuff the surface to get any dust and bits.
Allen: that's interesting as I used duct tape to play with the area of the pad(s) and with various patterns. Latter I got more serious and installed cubes of dense open cell foam which I cut up on the band saw to fit the louvre so I could really play with the shape of the damping. That worked well but was a fuss as you can imagine.
A.A.M.: I have to agree with you 100% and give you and all the Acoustat team a tremendous hi five. Over all these years I have given much though and time attempting to come up with better versions of the Acoustat whic is possible but I find that to this day I don't think I would have done much different. Just about any better versions I have come up with all cost more in time and materials. I doubt any would have been acceptable to Jim as I know the company was spending more than they wanted too. You are right in that the Acoustat is to me the best commercial stat panel ever brought to market. It works extremely well and it lasts and it sounds very good to this day. I can only say thank you for the hard work and the integrity you all put into your work and into the product. Extra big thank you to Jim. Very best regards to all and a very happy Christmas Moray James.
I would also like to go on record applauding the work of the Acoustat team. I have a friend that has a large and powerful tri-amplified system utilizing Acoustats from 100Hz to 8000Hz, and he is more than happy with the results after trying many other systems before. It is almost a certainty that this will be his final system and I agree with his decision.
I would like to say a little more about what I put the second panel through regarding its "bath". The garden hose water pressure was at most about 45PSI (we have a well system with a pressure gauge). The nozzle was a generic squeeze trigger gun type without a nozzle spray pattern adjuster at the output. The spray distance to the panel was never less than 12".
Despite my exuberance washing the second panel, I still felt I was not abusing it. I never did adjust the spray pattern into a beam. The pattern was cone shaped, but a stronger cone than I used on the first panel. I really don't feel the conductive coating should have washed off as easily as it did in select areas.
The conductive coating flakes that did come off were very tenacious in that it was very difficult to blow them off the louvers when they deposited themselves there. For this reason (and despite the fact that the panel ohm tested fine after) I am not holding out a lot of hope for the proper operation of this particular panel as it is almost a certainty that there are conductive flakes hiding in areas that will cause long-term problems. They may burn away never to be an issue again, they may not.
Personally (and I am certainly no authority in this area) I feel that Sy over at this thread http://www.diyaudio.com/forums/planars-exotics/109789-esl-diaphragm-coating.html is making some very good points regarding Mylar surface preperation and is trying to make sure everyone understands how important that is. I agree with him that this is of critical importance.
Happy holidays everyone....
I too would like to go on record for Applauding the Acoustat team for there design.
I don't have a set of them but I always wanted a pair.
I wished I had taken up the chance to take a tour of the Acoustat headquarters back in the early 80's When I lived in Naples Fla.
Had they been more available then for display, I am sure I would have gotten a set, over the Infinity SM150's that I had got back then instead, Although they were very nice speakers for their day as well.
I was going to get a set, But I wanted to see and hear them first hand before I bought anything.
They are the very inspiration of my own design with a twist of improvements and I will probably never veer away from it.
A may someday try the other methods of construction just to see if they measure up.
But why spend more than what is necessary to get such an incredible sound in the first place that I get with this method of construction and cost of materials.
Thank you, Professor Bizzt, for a wonderful report and taking the risk of your panels to demonstrate the cleaning process of these panels.
As it is very good for the record to show what the physical limits of the coating is.
When I first started my research on possible construction methods I found many pictures and reports on the internet of the Diagphram coating becoming cracked and detachted,I don't know the exact reasoning as to why, as there are several reasons for this to happen.
What I can say though is if it ever happens to anyone else, there are several products out there that can be used to repair the spot should a very large chunk or area become missing without having to tear them apart and risk ruining the original Diagphram.
Should be an easy repair as a little less mass hanging on the diagphram can be a good thing as well.
Thanks Again,Cheers and Happy Holidays to all !!!
jer")
I don't have a set of them but I always wanted a pair.
I wished I had taken up the chance to take a tour of the Acoustat headquarters back in the early 80's When I lived in Naples Fla.
Had they been more available then for display, I am sure I would have gotten a set, over the Infinity SM150's that I had got back then instead, Although they were very nice speakers for their day as well.
I was going to get a set, But I wanted to see and hear them first hand before I bought anything.
They are the very inspiration of my own design with a twist of improvements and I will probably never veer away from it.
A may someday try the other methods of construction just to see if they measure up.
But why spend more than what is necessary to get such an incredible sound in the first place that I get with this method of construction and cost of materials.
Thank you, Professor Bizzt, for a wonderful report and taking the risk of your panels to demonstrate the cleaning process of these panels.
As it is very good for the record to show what the physical limits of the coating is.
When I first started my research on possible construction methods I found many pictures and reports on the internet of the Diagphram coating becoming cracked and detachted,I don't know the exact reasoning as to why, as there are several reasons for this to happen.
What I can say though is if it ever happens to anyone else, there are several products out there that can be used to repair the spot should a very large chunk or area become missing without having to tear them apart and risk ruining the original Diagphram.
Should be an easy repair as a little less mass hanging on the diagphram can be a good thing as well.
Thanks Again,Cheers and Happy Holidays to all !!!
jer
Last edited:
Latest update
Hello everyone,
I know this post is a bit late, but I just completed this pair (the ones mentioned in the opening post) of 2+2s today.
The coating that came off in places on some of the panels did not detrimentally impact performance on those panels. Despite the loss of some of the conductive coating at the critical entry point of the diaphragm (near the diaphragm high voltage supply wire area), there was no loss in output of those panels compared with the others. So a happy ending there.
The rear stator felt dampers were left off in this project to determine the performance of the speakers without them. Yes, there were pronounced and problematical resonances at 51Hz and 84Hz without the dampers (AcoustatAnswerMan, your warnings were well taken into account, thank you), but I felt these were adequately tamed to my satisfaction with the bandpass EQ function of my Behringer DCX2496. Personally, I have seen time and again how this reasonably priced loudspeaker management device has been indispensable in getting 2+2s and other speakers under control.
Leaving the felt dampers off also allow one to listen to these speakers from the rear. Doing so results in far less high frequency dispersion of course, but it also results in a worthwhile increase in clarity and vividness due to being on axis to both panels at the focal point of about 4'. Understandably too close for most people, but at least you have that option if you want to exercise it.
The high frequencies in my finished project are better than any other 2+2 I have yet experienced. I suspect removal of the felt dampers have at least something to do with that.
Best wishes....
p { margin-bottom: 0.08in; } I'd like to share my experience (what little I have) regarding two aspects of Acoustat electrostatic speaker panels. The first aspect is how to clean the panels properly and the second is my opinion on the three 5/16” thick felt diaphragm dampers centrally affixed to the rear stator. The panels mentioned here are 9” wide panels from a 2+2 speaker.
I read a fair amount on this forum and other forums regarding how to properly clean Acoustat panels beyond the safe 1st stage of vacuuming them. My panels were quite dirty and had faint brown stains in large areas of the plastic cube louver stators. I strongly suspect that this was due to the high voltage bias supply attracting cigarette smoke over a long period of time, however it could have been due to any other smoke source including a fireplace.
I removed the felt dampers from the rear stators and then proceeded to vacuum the panels thoroughly with a brush vacuum attachment incorporating 1/2” long bristles resembling a horse hair paint brush. This resulted in a noticeably cleaner looking panel, but I still wanted those awful looking brown stains gone. At this point I knew I wanted to progress to stage two. I understood that stage two cleaning was going to entail significantly more risk to the panel, but I accepted the risk anyway. I then proceeded to check the resistance between the diaphragm and each stator with both a 275 volt output 200megaohm ohm meter and a DMM on its maximum 2000megaohm scale. The resistance from diaphragm to each stator was high enough to be unmeasurable on all eight panels after only a thorough vacuuming.
Now that I knew the basic electrical condition of all eight panels, I felt I could move on to stage two cleaning and measure the panels again after they were washed. I then proceeded to round up all the detergents around the house that I felt could possibly work well based upon what I had read up till then. It basically came down to only two product candidates I felt comfortable with; “Spot Shot” carpet stain remover and “Cascade” automatic dish washing detergent. I selected both of these for testing because I felt they would be fairly safe and would be fairly easy to rinse thoroughly so no (or very little) electrically conductive residue would remain.
First I tested the conductivity of these products by simply inserting the DMM's probes into a small amount of each cleaner while in a small plastic container top. In its liquid state, both measured about the same around 600kohms (not great so far). I then decided to quickly (not thoroughly) rinse each container top out with water so as to simulate the condition of the panel after soaping and rinsing. I then let the container tops dry out and repeated the test with the DMM on the same 2000megaohm scale. No conductivity in either container top. Great! I then wanted to get a subjective idea of the quantity of residual detergent remaining after rinsing, so I took one product in one hand and the other product in the other hand. I then rinsed both hands with water (not thoroughly). The Spot Shot had far less residual, so I was more biased towards that product.
I then decided to test the cleaning effectiveness and the chemical compatibility of the Spot Shot product on both the plastic louver structure as well as the diaphragm coating. The effectiveness of the Spot Shot at removing the the ugly brown stains from the louver structure was fine as well as the compatibility. Then with Q-Tip in hand, I proceeded to test the chemical compatibility of Spot Shot on an extreme peripheral area (the only safe area you should EVER test) of the diaphragm, well away from the bias supply lead-in point of the diaphragm coating. NO GO! Boy, was I surprised at how delicate the diaphragm coating was! I have never had a problem with Spot Shot discoloring or harming a carpet and was surprised at this.
At this point I was beginning to feel that no detergent was going to be safe enough for me to feel totally comfortable with, so I decided to stop any further chemical compatibility testing on the periphery of the diaphragm's coating.
I realized the only sensible thing I could do to safely implement stage two cleaning was a simple rinse with water. I took a panel outside, and carefully without applying too much pressure or concentrating for too long in any one spot, proceeded to wash the panel front and rear with a garden hose nozzle. I then gently shook out the remaining water being careful to grasp the panel at two points quarter of the way in. I then blew out the panel gently with compressed air and set it out to dry in the sun.
I blew it out a few more times, made sure it was dry, and proceeded to ohm test it the same way I done before. SUCESS! OK, now for the second panel. I sprayed the second panel with the water nozzle, but this time I got brave. I thought to myself, self, this is a tough and thick Acoustat Mylar diaphragm, and also when it's displaced by water pressure the stator wires will support it. Yeah!. WRONG......
It turns out that there is reason to believe that Acoustat did not adequately (or at all) roughen the Mylar before application of the coating. The result being the unpleasant experience I had with the second panel's diaphragm coating coming off in a few (admittedly only a few) places. The next hurtle now is to determine if the flakes of conductive coating (bad to have roaming around) can be removed from the panel and if the areas that flaked off are important areas or not.
So the lesson of this is to make sure you do not use excessive water pressure to clean your panels. The other lesson is that (in my opinion) you cannot rid your panels completely of ugly brown stains and still maintain a respectable margin of safety. SO DON'T SMOKE AROUND YOUR ACOUSTATS! And don't put them anywhere near a fireplace either.
OK, on to the felt diaphragm dampers...
After cleaning the panels you will be faced with reattaching the felt dampers. After looking at the dampers it was clear that Acoustat had liberally applied contact adhesive to the WHOLE surface of the damper where it attaches to the rear stator louver.
Here is what I see as being wrong with this. This changes the felt damper properties from being a good absorber of acoustic energy to one that reflects more than it should. This will return upper mid and high frequency acoustic energy to the diaphragm resulting in near-field reflective energy problems. With the result being less than ideal transparent high frequency reproduction. In my opinion the liabilities associated with the presence of the felt dampers outweigh the benefits of controlled and damped diaphragm behavior near its low frequency resonance.
As for me, I am not completed convinced that these felt dampers do a whole lot to damp the diaphragm in this frequency region anyway especially when they are as loosely attached as they were. They practically fell off on all eight panels!
Thanks, Professor Bizzt
Acoustat panels soaking in luke warm water and very very mild liquid detergent like ( Dawn ) then very important - rinse - rinse - rinse - and rinse again.
Attachments
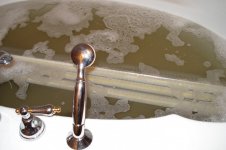
Quote:Acoustat panels soaking in luke warm water and very very mild liquid detergent like ( Dawn ) then very important - rinse - rinse - rinse - and rinse again.
This is not good advice. Detergent is a conductor at the voltages used in these speakers. Fact is that detergent has been used as a diaphragm treatment to make it conductive. Do not use detergent on your panels. Best regards Moray James.
This is not good advice. Detergent is a conductor at the voltages used in these speakers. Fact is that detergent has been used as a diaphragm treatment to make it conductive. Do not use detergent on your panels. Best regards Moray James.
Quote:Acoustat panels soaking in luke warm water and very very mild liquid detergent like ( Dawn ) then very important - rinse - rinse - rinse - and rinse again.
This is not good advice. Detergent is a conductor at the voltages used in these speakers. Fact is that detergent has been used as a diaphragm treatment to make it conductive. Do not use detergent on your panels. Best regards Moray James.
Thank's for the warning moray the reason i gave this advice is that this was the way more than a hundred panels where cleaned without any problems tests where done before with different solutions before using diswashing liquid soap.
I hear what you are saying the problem is that you are using a product name which can change from region to region and not be available in others. Detergents contain surfactants and while the product you used did rinse off other may not and not all folks will take the time to rinse enough times. I would say better not to take the chance if you do not intend to test fully. Here again most folks tend to be very lazy and will opt for the least they think they can get away with. So that is my recommendation and folks can do what they like with it. If you have tested and confirmed that you can safely use a detergent (can you measure surface resistance?) then great but if you cannot they I would not recommend the risk. Best regards Moray James.
https://en.wikipedia.org/wiki/Surfactant
https://en.wikipedia.org/wiki/Surfactant
I again guys not being a DIY myself i gave my friend Jocelyn a call yesterday if it as to do with Acoustat in Canada he's the man the ADVICE was to use mild liquid detergent and very very important rinse - rinse - rinse - and rinse again if you follow that advice there is no problem my friend as been doing Acoustat mods for a very long time and as done this procedure hundreds of time BUT you must treat your Acoustat panels with care and you will be well rewarded my present pair of 1+1s are my sixt pair of Acoustats and the only pair that the panels where washed and modified here are some of the mods that i know of soldering of top and bottom heads - doubling of the contact points on all panels - fastening to a 2x3 steel frame resting on felt covered with russian wood if you wish you can see 25 photos of the making of my speakers in the diyAudio photo section Enjoy.
MrAcoustat Gallery - My Photo Gallery
MrAcoustat Gallery - My Photo Gallery
After I removed the felt strips I used LesToil degreaser/cleaner in warm water and let them soak . Amazing how dirty the water became.Then emptied the tub refilled with fresh water soaked for a couple of hours, repeated twice, then let them dry for a week. Working OK for the past 8 months.
Andy
Andy
After I removed the felt strips I used LesToil degreaser/cleaner in warm water and let them soak . Amazing how dirty the water became.Then emptied the tub refilled with fresh water soaked for a couple of hours, repeated twice, then let them dry for a week. Working OK for the past 8 months.
Andy
All i can say Atom666, is that you did it the RIGHT way and one more thing the ORIGINAL felt strips had to much glue on them when putting them back just put a little contact glue it will do the job.
- Status
- This old topic is closed. If you want to reopen this topic, contact a moderator using the "Report Post" button.
- Home
- Loudspeakers
- Planars & Exotics
- Acoustat panel cleaning & the effectiveness of the felt dampers