When building my DIY planar magnetic drivers (see this thread) I bumped into the issue of how to make electrical connections to the 10 micron thick aluminum traces that are bonded to the 13 micron thick kapton film diaphragm. Soldering heavy speaker wire directly to thin aluminum foil would be asking for trouble. The cable stiffness would apply too much mechanical stress to the foil which would either tear or peel away from the kapton. Instead, I elected to use copper tape with adhesive backing (left over from an ESL project) between the cable and the aluminum traces. It’s easy to solder copper tape to copper speaker wire, as long as both surfaces are clean. The trick is soldering copper tape to very thin aluminum foil bonded to a plastic diaphragm.
Why is soldering to aluminum a problem? Sorry for the brief interjection of chemistry but that’s my home field. Aluminum exposed to air very quickly forms a so-called native oxide coating. That aluminum oxide layer interferes with the soldering process and with the joint’s conductivity. To solder metal-to-metal, in this case copper to aluminum, without a non-conductive oxide layer that interferes with the conductivity, a bit more chemistry can help.
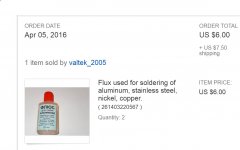
Seeking a broadly available technique, I bought on Ebay a surprisingly cheap elixir that really helped (see the attached photo). Unfortunately, early successes were deceptive. I was able to make connections of a sort but over time I’ve found some of them not to be reliable. It’s taken awhile to refine my soldering process and create stable connections. Temperature control and attention to preparing the surfaces have proven to be crucial. I thought I'd write up my experience in case it saves someone else some hassles, or perhaps someone can point out an even better approach.
The kapton tape I used is remarkably tolerant of high temperatures (the beauty of kapton) but it’s still not hard to overdo it. Part of the trick is getting the copper and aluminum hot enough for the solder to flow properly between them without damaging the underlying kapton.
The other hiccup I encountered is that the adhesive on the copper tape I used was handy in some parts of the application (like sticking the tape to the speaker frame) but it definitely interfered with soldering (no surprise) and also interfered with thermal conductivity. You can’t apply a soldering iron to an adhesive-covered copper tape surface and expect good thermal contact.
So here’s what’s worked for me:
If this attempt to describe the process is unclear I can try to add some "visuals" but I thought I'd try the less labor intensive posting approach first.
Few
Why is soldering to aluminum a problem? Sorry for the brief interjection of chemistry but that’s my home field. Aluminum exposed to air very quickly forms a so-called native oxide coating. That aluminum oxide layer interferes with the soldering process and with the joint’s conductivity. To solder metal-to-metal, in this case copper to aluminum, without a non-conductive oxide layer that interferes with the conductivity, a bit more chemistry can help.
Seeking a broadly available technique, I bought on Ebay a surprisingly cheap elixir that really helped (see the attached photo). Unfortunately, early successes were deceptive. I was able to make connections of a sort but over time I’ve found some of them not to be reliable. It’s taken awhile to refine my soldering process and create stable connections. Temperature control and attention to preparing the surfaces have proven to be crucial. I thought I'd write up my experience in case it saves someone else some hassles, or perhaps someone can point out an even better approach.
The kapton tape I used is remarkably tolerant of high temperatures (the beauty of kapton) but it’s still not hard to overdo it. Part of the trick is getting the copper and aluminum hot enough for the solder to flow properly between them without damaging the underlying kapton.
The other hiccup I encountered is that the adhesive on the copper tape I used was handy in some parts of the application (like sticking the tape to the speaker frame) but it definitely interfered with soldering (no surprise) and also interfered with thermal conductivity. You can’t apply a soldering iron to an adhesive-covered copper tape surface and expect good thermal contact.
So here’s what’s worked for me:
- If the copper tape has adhesive on it you can try to dissolve the adhesive with acetone, hexanes, ethyl acetate, or some other organic solvent, but I found it quicker and easier to remove it mechanically. I used coarse sandpaper to abrade away the adhesive. The copper looks very bright when it has a clean and fresh surface so it’s easy to tell when you’ve sanded enough. You only need to remove adhesive from the part of the tape that will be soldered to the aluminum so there’s little point in wasting time sanding more of the tape than necessary.
- Once the copper tape has been sanded to brightness, either of its surfaces can be used for soldering.
- I found it advantageous to tin (coat with solder) both surfaces of the copper tape in the small region that will form the joint. The side facing the aluminum will provide all the solder for the joint. Tinning the back side helps because it can be tricky to get good thermal contact with the copper tape while holding it with tweezers. The solder bridges the gap between the soldering iron and the copper during the next step.
- I used a cotton-tipped swab soaked in the “elixir” described previously to wet the surface of the aluminum. I first tried using a syringe to form a droplet on the aluminum but that approach was problematic. The aluminum under the droplet would sometimes dissolve away during the soldering process, and when it didn’t, it seemed to result in joints that failed days or weeks later. It’s better just to dampen the surface of the aluminum but not leave a droplet.
- In general, the trick to soldering is to make the surfaces to be joined hot enough, and clean enough, to encourage molten solder to flow between them. In this case, the aluminum is so thin that it takes very little to heat it up. The thicker and wider copper has much more thermal mass and conductivity so it takes more heat to warm it up. With that difference in mind, I held the copper tape with tweezers and touched its tinned end with the soldering iron until the solder melted before bringing the copper into contact with the aluminum. I relied on the hot copper and solder to transfer heat to the aluminum foil. If I wasn’t confident the joint was hot enough to ensure good wetting by the solder, I added a very brief and gentle touch of the soldering iron tip to the back of the copper tape while its front touched the aluminum. Don’t get carried away with the extra heat and only do this while the copper is still hot from the pre-heating! Too much heat is worse than too little---you’ll irreversibly damage the aluminum or kapton. When everything goes smoothly, when the hot copper touches the aluminum you’ll hear a hiss from the boiling elixir, the solder will flow to the aluminum, and the joint will quickly cool and form a good connection.
If this attempt to describe the process is unclear I can try to add some "visuals" but I thought I'd try the less labor intensive posting approach first.
Few
Attachments
I've not tried silver paint for this application because of my experiences using it for some non-audio purposes. It provides extremely little mechanical strength so I would have no confidence that the copper tape would remain joined to a constantly vibrating diaphragm. Perhaps someone else has tried it and can report on their experience.
Few
Few
Hello to all
I used the silver paint at first to repair the Alu strip of an AMT membrane, but the electrical resistance was too high, probably because of the aluminum oxide, and the adhesion was not satisfactory and so I went to soldering. Basically I do as described by FEW, but of course the components are of other brand. I would like to add that I found quite a laborious and unrepeatable the job of welding on aluminum strips, from 8 up to 80 μm thick, until I found the right tin alloy. The best and easiest results I achieved with a so-called "low temperature" (179 ° C) Sn68Pb36Ag2 alloy, that I modified as follows: I cast enough wire to have a drop of 1 cm in diameter, then, keeping the ball fused with the soldering iron at 320 ° C, I plunged a silver wire and held it in for about 1 minute. Silver at that temperature does not melt, but one part goes into solution in the tin alloy enriching it in silver, and when it is removed it is visibly thinner. Of course, if they exaggerate with silver, the melting temperature of the alloy rises, but not much. I used this alloy to coat with tin the thinner Alu stripes, with excellent and consistent results. It's very sliding. For a little thicker strips I added, with the same procedure, a bit of zinc, which still raises the melting temperature, but makes the coating easier with very little flux, perhaps because zinc removes oxygen from superficial oxide. With the first alloy I use the soldering iron at 280 ° C, while with the second alloy I use 320 ° C.
Important notice: Never mix the flux contained in the tin alloy wires with the flux for aluminum. They are enemies. If you used the welder to melt a tin wire wait 1 minute with the soldering iron at 330 ° C and clean the tip before welding the aluminum. After welding the aluminum clean the iron's tip well with water, otherwise it is covered with a black crust that prevents you from making other welds and can only be removed mechanically.
lupi
Thanks very much for the additional information on this topic. Very helpful! In my application, with the aluminum glued to kapton, I worried about using a technique that required even higher temperatures than those that were already making me nervous. On the other hand, Dupont specifies most of kapton's properties up to 200 C but does mention use up to 400 C so perhaps I've just been too cautious.
Few
Few
electrical connections to aluminum
it's pretty simple to electroplate copper onto aluminum (@ room temps no less!), and then solder to the copper (gold, silver, etc.,) layer that is metallurgically bonded.
But hi-fiers seem to revel at making life difficult
John L.
auplater
it's pretty simple to electroplate copper onto aluminum (@ room temps no less!), and then solder to the copper (gold, silver, etc.,) layer that is metallurgically bonded.
But hi-fiers seem to revel at making life difficult
John L.
auplater
it's pretty simple to electroplate copper onto aluminum (@ room temps no less!), and then solder to the copper (gold, silver, etc.,) layer that is metallurgically bonded.
I have tried with the electroplating, Ag, Cu and Zn, but I encountered several problems: The first is that for an "in situ" electrodeposition it is difficult to use the liquids needed to clean the Al well without spoiling anything around. The second is that you can not dip the part in a becker, so you can use only brush electroplating or chemical deposition, which is not very adherent. The third is that if you deposit a thin layer, even a couple of um, the flux that is used to weld will corrodes it immediately. If you know a proven method for these particular situations, would you like to share it?
Brush plating on aluminum can work... just have to use the right sequence, i.e. zincate by immersion / wiping, then brush plate with cyanide copper (or pyrophosphate if you're afraid of cyanide) then brush plate with acid copper, cyanide silver, gold whatever.
or you can plan ahead and leave a "tonque" of metallized kapton beyond the end of the traces that can be immersed in the correct processing solutions to build up a thicker layer of copper to solder to.
or you can plan ahead and leave a "tonque" of metallized kapton beyond the end of the traces that can be immersed in the correct processing solutions to build up a thicker layer of copper to solder to.
Thank you for sharing. I will try again as you have described as soon as I have the opportunity. The phase I found most critical is just the first, since I've never got quite uniform zincature. However, for repairs I find welding faster, since once you've learned, all the job takes a few dozen secondsBrush plating on aluminum can work... just have to use the right sequence, i.e. zincate by immersion / wiping, then brush plate with cyanide copper (or pyrophosphate if you're afraid of cyanide) then brush plate with acid copper, cyanide silver, gold whatever.
or you can plan ahead and leave a "tonque" of metallized kapton beyond the end of the traces that can be immersed in the correct processing solutions to build up a thicker layer of copper to solder to.
lupi
… I used a cotton-tipped swab soaked in the “elixir” described previously to wet the surface of the aluminum. I first tried using a syringe to form a droplet on the aluminum but that approach was problematic. The aluminum under the droplet would sometimes dissolve away during the soldering process, and when it didn’t, it seemed to result in joints that failed days or weeks later. It’s better just to dampen the surface of the aluminum but not leave a droplet…
Thanks for sharing your Aluminum soldering method. I haven’t experimented much with soldering to thin ribbons or tapes, deciding just to use mechanical clamp type contacts. However I did build a few ESLs using perforated aluminum sheets. The technique I wound up having consistently good luck with was the mechanical scraping under solder blob described in another thread here: Soldering Aluminium
Obviously NOT something easily adaptable for connections to thin aluminum tape on mylar/kapton.
Your mention of the “elixir” dissolving the aluminum has me wondering if there will be corrosion or failure over time.
Do you clean the joint after soldering to remove all remnants of flux or “elixir”?
it's pretty simple to electroplate copper onto aluminum (@ room temps no less!), and then solder to the copper (gold, silver, etc.,) layer that is metallurgically bonded.
But hi-fiers seem to revel at making life difficult
I certainly don’t like to make things difficult or any more complicated than necessary. However I was never able to produce strong joints, or joints that lasted for that matter, using electroplating on perforated aluminum. Note that I am not saying it can’t be done, only that I was unable to do it with my limited experience and knowledge of the process. As with many things, I’m sure it’s as much an art as a science. So, once you have it figured out and can produce consistently good results, you can’t understand why anybody would use any other method.
Based on your experience, would you mind sharing more details on the exact chemicals(brands and sources would be great) and steps you would use for the brush plating technique you mentioned?
Are the kits and chemicals sold here a good way to start out?
Plug N' Plate(R) Acid Copper Kit - Caswell Inc
Zincate - 8 fl oz - Caswell Inc
If not, can you suggest alternative sources?
Thanks in advance…
- Status
- This old topic is closed. If you want to reopen this topic, contact a moderator using the "Report Post" button.
- Home
- Loudspeakers
- Planars & Exotics
- soldering to aluminum traces on a planar magnetic speaker