A BIG thanks. To Nelson Pass for being so generous in an age obsessed with knowledge hoarding. To Peter Daniel for being to chassis, what NP is to the circuit - a Class A amp, especially, is nothing without a proper chassis. To everyone else on this forum for helping me out (either directly or indirectly): I really consider this as an achievement for this forum that even I could attempt and successfully complete this (this is my first ever DIY).
Attachments
") Very nice indeed.
Very nice indeed.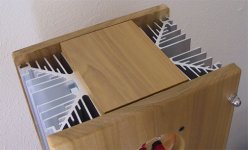
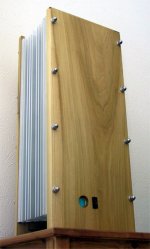
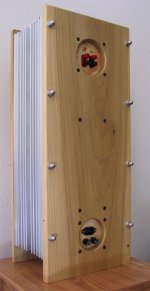
Well, that is it. I think that I have done enough construction for a while, and am now going back to the original hobby (that got me into this in first place) - listening to music - for the rest of the year, atleast. Ah, music - very smooth and relaxed, although the bass does not seem as tight as the Adcom (first impressions, got a lot more listening to do). And the reason for great sound: the magic dust (manufactured at passlabs, and who knows what else: Nelson himself mentioned something about Astro-Lube once) sprinkled on PCBs and Q-pack. The power is more than enough for music, but seems a bit anemic for movies (DVDs). The sinks are running pretty hot (uncomfortable to touch), though not so hot that you cannot touch them. In order to increase bias, I will have to take one of the MOSFETS out of the PCB and farther from the others (to better spread heat on the sink - the bottom is a lot cooler than the top). Better option will be to do an active crossover and a subwoofer... Those will be the next projects then, hopefully the active crossover will be available early next year (please Nelson, oh please!).
Attachments
Thank you all, for kind words. It does look a lot better in real life - a 100K jpeg cannot do justice to richness and depth of a better quality wood grain.
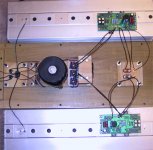
Heatsinks are MECI surplus. PCBs and original Q-pack are from passdiy. Transformers are Plitron. Other electrical components as well as replacement Q-pack (for the one that blew up) are from digikey. Hardware from local HD.
Dennis Hui said:Are those the heatshinks available on Meci?
Heatsinks are MECI surplus. PCBs and original Q-pack are from passdiy. Transformers are Plitron. Other electrical components as well as replacement Q-pack (for the one that blew up) are from digikey. Hardware from local HD.


Banned
Joined 2002

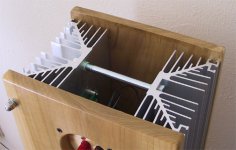
Magnetmaz said:can you post a closeup of the power supply, please? There's a piece of wood that obscures how you have the caps set up. I just want to see how you have everything laid out.
-Maz
Pl refer to this thread for closeup shots (I would hate to take up redundant space by posting duplicate pictures).
MikeW said:I'm glad you you got it up and running. I hope it sounds as good as it looks, nice work. What did you have to do to fix it?
I replaced Q1, Q2, Q5, R0 & R1. R0 was blown, and looks like all the Qs were blown. Why? I do not know, probably one of them was bad initially - but now the evidence has been destroyed.

- Status
- This old topic is closed. If you want to reopen this topic, contact a moderator using the "Report Post" button.
- Home
- Amplifiers
- Pass Labs
- Yet another Zen4 completed