Thanks Zen Mod, means a lot coming from you!damn admirable process , from very start
No one was working at the cabinet shop today, I had unfettered access to everything.
The pics tell most of the story, but next up is to veneer the edges, install the hardware on the doors and the turntable lid. And then stain/finish of course.
You can see now how the thick structural floor is now buried, pockets for the amps, and space for cord management on the back.
Now that the speaker “boxes” are installed you can see the cabinet walls are all over 1 1/2” thick. The finish front baffle is 1” Baltic Birch.
Going to be a nice home for the new and improved Pass amps.
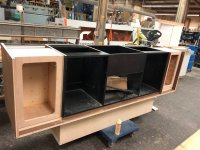
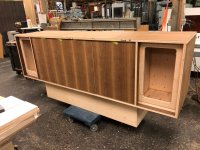
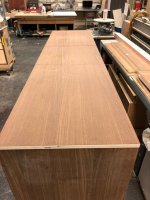
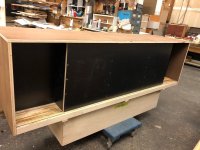
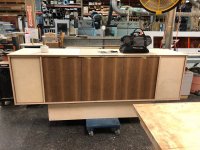


Busy work week so minimal time on my projects. But was able to spend all day today on the console portion. Installed all the edge banding, final sized the top and the 3 doors, and installed the soft close hinges on the doors. Next up on that will be the open/slide hardware on the turntable lid.
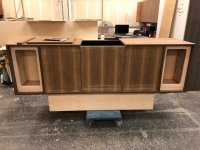
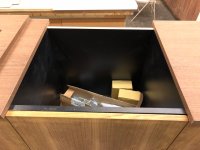
The wire came in for the amps, but still waiting for some new parts. So worked on upgrading my DAC and adding a tube based active output to it.
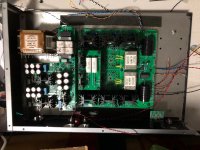


The wire came in for the amps, but still waiting for some new parts. So worked on upgrading my DAC and adding a tube based active output to it.

The wire came in, made some progress on the power supply. I’m using 14 gauge, silver coated Teflon covered wire from IEC through the DIY Audio power supply boards. Using Cardas Audio Quad Eutectic solder. P channel side done on first amp.
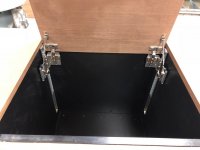
I found this trick hardware for the turntable lid. Besides just opening it also allows the lid to slide down behind the turntable. Now no worries it will hit me on the back of the head when I down changing albums! Modified the hardware some by swapping out to soft close hinges from what was sent.
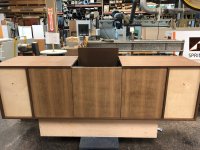
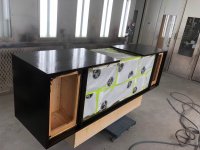
Carpentry portion of the console is done. Sanded everything down to 220 grit, mixed up some custom stain, 90% coffee and 10% black dye, then shot 2 coats of sanding sealer.
As you can see in the light, the Wenge has really deep grain. I want to still see some after finish, so will probably sand and the spray 2 coats of satin clear, instead of filling up the grain completely.

I found this trick hardware for the turntable lid. Besides just opening it also allows the lid to slide down behind the turntable. Now no worries it will hit me on the back of the head when I down changing albums! Modified the hardware some by swapping out to soft close hinges from what was sent.


Carpentry portion of the console is done. Sanded everything down to 220 grit, mixed up some custom stain, 90% coffee and 10% black dye, then shot 2 coats of sanding sealer.
As you can see in the light, the Wenge has really deep grain. I want to still see some after finish, so will probably sand and the spray 2 coats of satin clear, instead of filling up the grain completely.

What a beauty!
Thanks! Still more to go.
My wife is in retail, so she was busy all weekend. Left me to my own endeavors!
Saturday I sanded everything down with 400 and shot 2 coats of satin clear. Sounds easy, but 7 hours of works.
Today I ran over with my son and picked it up. With it in the sun room, and my gear close by, I could figure out where best to cut for access and cable routing.
That done, and then all the openings painted black, along with all exposed wood, I broke down my old rack and gear and moved the new console into place.
Still need to final adjust everything and install the shelves and gear.
As soon as I finish the amps and final install, I’ll take some more pics of the back, but I’m really excited so far. Everything fitting like I planned so far.
The speaker baffles are 1” Baltic Birch that I just used the same stain on. Looks good enough since it will be covered with an off white cloth grill.
The Teak doors are finished with wipe on/wipe off Teak oil.
I guess my amp build should really be classified as duo mono? 😎
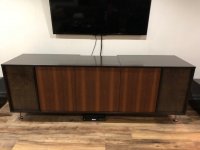


Mosetly finished the console portion today and have all the equipment in place, except the amps.
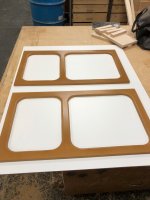
This weekend was focused on the speaker cabinet section and grills. I made the grills out of 3/8” MDF, rounded over the cuts with a 1/4” router bit, shot 2 coats of sanding sealer and covered in Advent looking speaker cloth off eBay.
I’m using everything I’ve learned from my other speaker builds to give these JBL LE8T’s every opportunity to shine. I mentioned before they have been completely rebuilt including cones, surrounds and the magnets recharged.
The interior cabinet volumn is 1.79 cu ft and the 3” port tube is 7 1/2” long. Cabinets are lined with 1/8” bitumen pads and 2” Denim Insulation with the bottom half of the cabinet filled with layers of the Denim Insulation.
The front baffle is 1” Baltic Birch attached to the cabinet with 20 screws from the inside so I can easily swap out driver/combinations or other improvements.
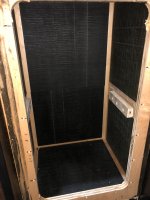
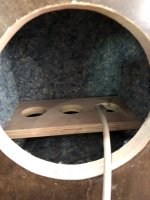
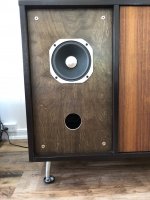
The speaker grills are held in place with magnets.
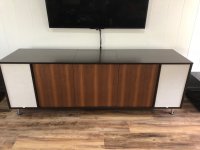
Everything but the amps running. I made a quick video on YouTube here;
YouTube
Standing in for the amps under construction is a NAD 2200.
This weekend was focused on the speaker cabinet section and grills. I made the grills out of 3/8” MDF, rounded over the cuts with a 1/4” router bit, shot 2 coats of sanding sealer and covered in Advent looking speaker cloth off eBay.

I’m using everything I’ve learned from my other speaker builds to give these JBL LE8T’s every opportunity to shine. I mentioned before they have been completely rebuilt including cones, surrounds and the magnets recharged.
The interior cabinet volumn is 1.79 cu ft and the 3” port tube is 7 1/2” long. Cabinets are lined with 1/8” bitumen pads and 2” Denim Insulation with the bottom half of the cabinet filled with layers of the Denim Insulation.
The front baffle is 1” Baltic Birch attached to the cabinet with 20 screws from the inside so I can easily swap out driver/combinations or other improvements.


The speaker grills are held in place with magnets.

Everything but the amps running. I made a quick video on YouTube here;
YouTube
Standing in for the amps under construction is a NAD 2200.
Thanks for the compliment!Looks awesome!
Only thing missing is hidingthose wires going to the tv inside the wall!!
Yea, about those wires. We live in a typical Hawaiian house constructed in 1952. In my home state of Tennessee you would tear down and rebuild, here it’s $1.5M. Construction is is called “single wall”. Literally every wall is 1” x 6” redwood tongue and groove, together edge to edge.
So no hiding in the wall, the wires are thicker than the wall! The TV is through bolted! Don’t know how the houses stand up.
Looking at some sort of “sock” to at least make it better.
This week I have enjoyed listening to the new console. Played a few albums and so far I can’t detect any input from the console. I takes a decent whack on the side of the cabinet to hear it. More testing to come after the amps are installed. Weighed them today, each one weighs 96 lbs., that much added mass should have an effect also.
So far I’m impressed with the full range driver. I experimented with one channel by bridging the NAD amp, major improvement to the dynamics. Obviously looking for continued improvement when the new amps are installed.
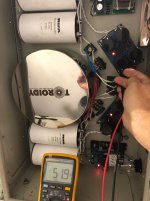
So this weekend it’s back to amp building. Today I finished the power supply on the first one. The power supply is unchanged from the original build. Powered it up, 51 volts and change on both sides.
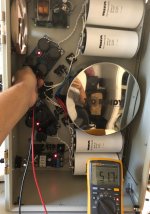

The twin power supply is finished and powered up without issue.
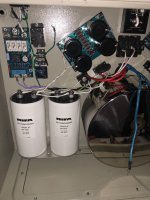
FYI, Power supply consists of 1500VA, 38v transformer, 4ea 82,000uF large Rifa caps, 8ea 15,000uF Mundorf M-Lytic AG caps, for a total of 448,000uF per monoblock.
Next up completing the remote on/off switching and fan circuit. The McIntosh preamp has an tigger to start other equipment so I’m using that as the input to my circuit.

For a change of the audio experience I decided to try out the Babelfish J.
Took a bit to get the boards to Hawaii from the other side of the planet.
But I received them this week and got to work. A few more hours drilling and tapping the holes for the boards and mosfets.
Have another round of parts ordered and en route, but making progress.
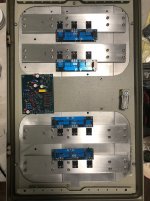
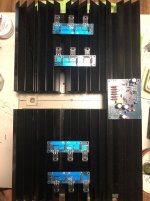
Here is a pic to get scale of the boards vs the heatsinks.
Took a bit to get the boards to Hawaii from the other side of the planet.
But I received them this week and got to work. A few more hours drilling and tapping the holes for the boards and mosfets.
Have another round of parts ordered and en route, but making progress.

Here is a pic to get scale of the boards vs the heatsinks.

I’ve been living with my console for almost a year. Mostly pleased with its looks, functionality, and performance. So I thought I would post a review.
Been making some notes on how to better adjust the shelves and locate the equipment. Ventilation needs to be improved for the RAKK dac and the McIntosh pre. But the major downside was the built in speakers.
I tried a couple different drivers, and researched changing it to a 3-way design. But reality is volume, I would never get enough performance from space allowed for the speaker. I guess I was kidding myself that the simplicity would trump performance.
Every time I brought out my Ekta Grandes to compare a change, it would take longer and longer for me to take them away. So decided they would stay, with some upgrades theirselves.
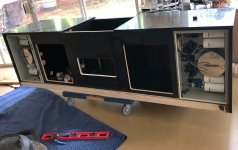
So brought out the surgical equipment and removed 15” off of each end. Of course this also took away the space for the amps.
Since I think the Babelfish amps are the best ones I’ve built to date, and rival most of the commercial amps I heard, they will get new cases to be displayed properly.
So here is what the console looks like now.
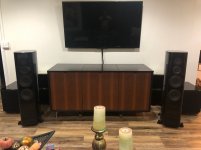
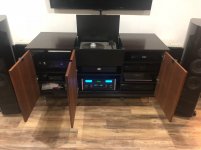
Still sitting on a moving dolly as I’m still tweeking.
Been making some notes on how to better adjust the shelves and locate the equipment. Ventilation needs to be improved for the RAKK dac and the McIntosh pre. But the major downside was the built in speakers.
I tried a couple different drivers, and researched changing it to a 3-way design. But reality is volume, I would never get enough performance from space allowed for the speaker. I guess I was kidding myself that the simplicity would trump performance.
Every time I brought out my Ekta Grandes to compare a change, it would take longer and longer for me to take them away. So decided they would stay, with some upgrades theirselves.
So brought out the surgical equipment and removed 15” off of each end. Of course this also took away the space for the amps.
Since I think the Babelfish amps are the best ones I’ve built to date, and rival most of the commercial amps I heard, they will get new cases to be displayed properly.
So here is what the console looks like now.


Still sitting on a moving dolly as I’m still tweeking.
- Status
- This old topic is closed. If you want to reopen this topic, contact a moderator using the "Report Post" button.
- Home
- Amplifiers
- Pass Labs
- Aloha F5 v3 part 2, console build