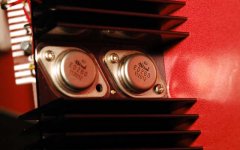
This is how you usually see them:
The top is free from cables, and insulated with the mica.
The screws are not insulated from the case.
Underneath, the screws are insulated from the heatsink with a plastic washer, quite the same as those used on TO-220 packages.
One of the screws has a "tabbed-washer" (don't know the name of those things...) to which you can solder the wire, and then a spring-washer to ensure tension, then the nut.
_
Attachments
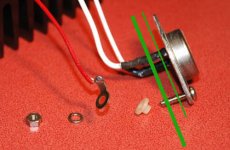
...Sorry if the pictures are a "quick and dirty" job, I couldn't find a neat "exploded view" anywhere quick.
Anyway the thick green line represents the heatsink, the thin green line represents the mica; hardware is mounted in the shown sequence.
Edit: You can buy the entire kit (mica + all washers) for 25 cents.
Cheers,
pilli
_
Anyway the thick green line represents the heatsink, the thin green line represents the mica; hardware is mounted in the shown sequence.
Edit: You can buy the entire kit (mica + all washers) for 25 cents.
Cheers,
pilli
_
Attachments
...a neat exploded view can be found on this site (towards the end of the page).
I am not sure I am allowed to paste here the copied picture, so just the link. And it is in French.
(The part labelled "canon" is a "nylon bush", all the rest is metal.)
http://pagesperso-orange.fr/mgiaco/electron/radiateur/radiateur.htm#Assemblage
(For those who understand French, that page also has an extensive analysis of heatsinking.)
_
- Status
- This old topic is closed. If you want to reopen this topic, contact a moderator using the "Report Post" button.