I'll be interested in what you do. I've never gotten poplar to stain well at all, and that's some very pretty poplar you have there. I've tried a lot of different things, using a pre-stain treatment did help, but was never great.
In my opinion, skip stain, seal with clear lacquer and tint lacquers from there on. There are stains that functions on poplar that contains vinyl binders and bentone paste for example, but tinting lacquer is quick and simple solution.
However, there are several ways to skin a ca..eh, pretty popular poplar

It will be interesting to see what comes up here....
Peter
Ok so I pulled the first top/bottom CLD glue up out of the clamps, and I glued up the second enclosure.
BTW this is what a loaded up bar clamp is supposed to look like =)

This is what I started with after the glue dried. Notice the masking tape over the kerfs, since it’s common for the flush cut bit to skim the surface, this helps protect the relatively thin top layer of the kerf

Spiral cut up cut bit by CMT, really nice cuts like a dream

And after the flush cut


Tape off


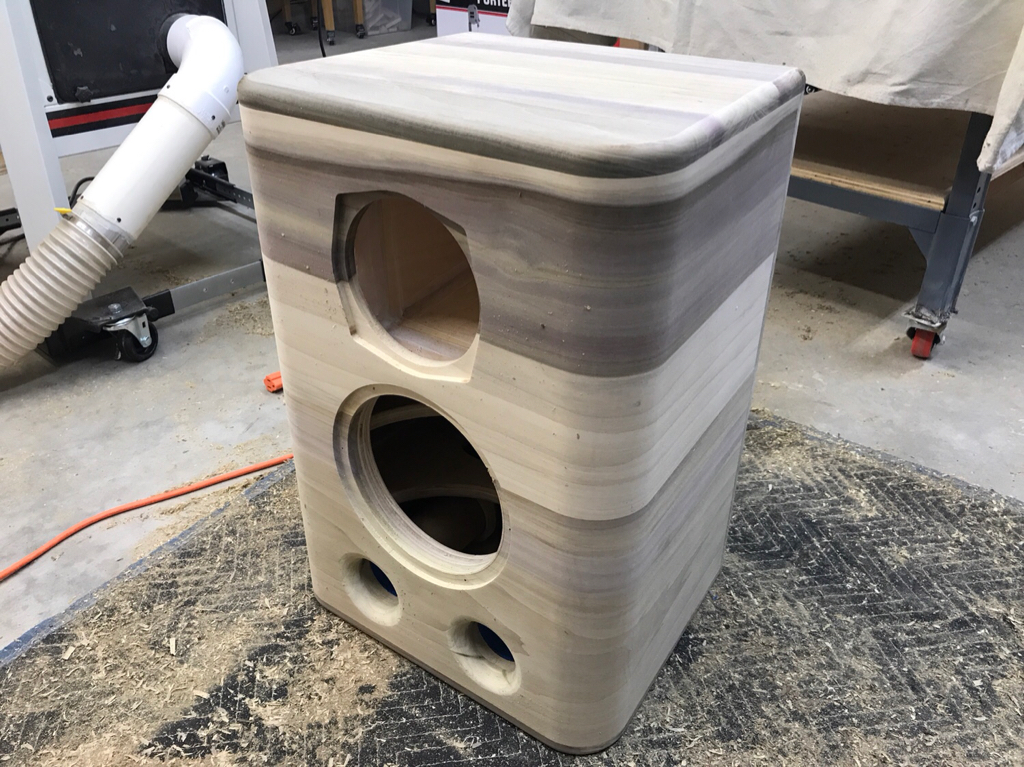
I did some quick initial sanding with 80 grit, I’ll be sanding the kerfs by hand as to not sand too deep, finally starting to look like a speaker!


BTW this is what a loaded up bar clamp is supposed to look like =)
This is what I started with after the glue dried. Notice the masking tape over the kerfs, since it’s common for the flush cut bit to skim the surface, this helps protect the relatively thin top layer of the kerf
Spiral cut up cut bit by CMT, really nice cuts like a dream
And after the flush cut
Tape off
I did some quick initial sanding with 80 grit, I’ll be sanding the kerfs by hand as to not sand too deep, finally starting to look like a speaker!
Little more done tonight, I started by sanding the kerfed areas, this was a little nerve racking as I didn’t want to sand through, after using this technique below by hand I finally built up some confidence and carefully sanded it with 150 grit in my RO sander, that went well. I was able to almost completely sand out the kerfs but I’m not sure I want to go all the way, see images below

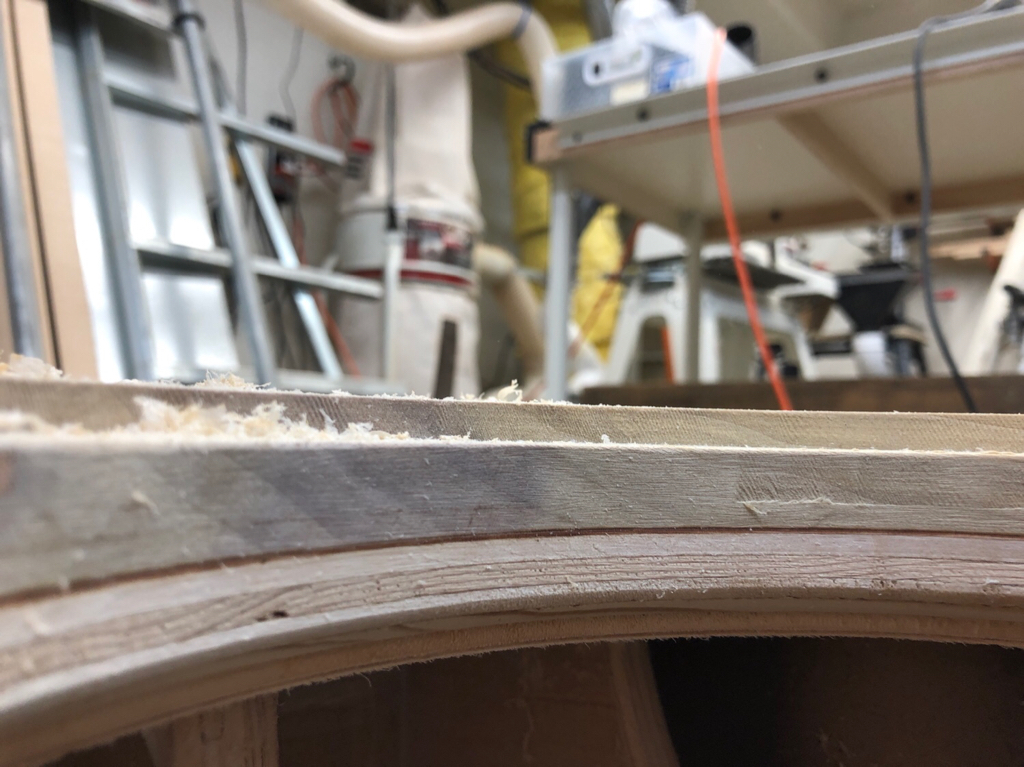
After finish sanding the whole enclosure with 220, I applied a 1/2” roundover to all top, back and bottom edges

Trick with a 1/4” shank bit, bury it in the collet to prevent any flex of the shaft for a smoother cut.

Barely any burning or marks, full speed and full pass, ready for a quick sand with 220


Left edge after sanding, right before


All sanded and ready for the next step!


Thanks!
Javad
After finish sanding the whole enclosure with 220, I applied a 1/2” roundover to all top, back and bottom edges
Trick with a 1/4” shank bit, bury it in the collet to prevent any flex of the shaft for a smoother cut.
Barely any burning or marks, full speed and full pass, ready for a quick sand with 220
Left edge after sanding, right before
All sanded and ready for the next step!
Thanks!
Javad

I have already learned so many thing about the woodworking from the pictures. Thank you for posting those.
Great to hear that! Means there is a great reason to do this documentation, thank you =)
drewan said:Hi, Thankyou thankyou thankyou on how to make a jig for awkward shapes. I'm 30 yrs a carpenter and didn't know how to do that. Any good ideas about a jig for the FE4?.
Hah my pleasure!
Ok coming along, wrapping up the saw dust phase of the project!
Time for some binding posts, I’m putting in binding posts for each driver as in the future I may consider going fully active on this.
I’ll be doing a recessed bowl cut for the binding posts, the recessed circular binding post provision has sort of become a little design detail on every build I do, and I’m taking it to the next level by doing a curved bowl cut. The binding posts are located between the two lower braces in the enclosure


The ID of the template is 4”, which is held securely with double sided tape


And the bowl cut

As you can see the bottom cut of the bit doesn’t leave the smoothest surface

Template removed

Surface irregularities are easily removed with a 2 inch sanding disc

After sanding with up to a 250 grit finish

And with binding posts temporarily put in place

Since the baffle for the woofer flange was so thick I wanted to put a relief cut to make sure the woofer can breathe easily, I’m not bothering doing anything with the mid as the baffle flange is only about 1/2 inch thick there, and there’s plenty of breathing room. The challenge with the kerf baffle like this is that I really didn’t want to cut driver holes before bending the kerfs as I didn’t want to weaken or put any extra flex in the baffle assembly, so this meant I wasn’t able to put any relief cuts from the outside so I’m doing it from the inside with this under round over bit for Magnate.


Woofer flange thickness

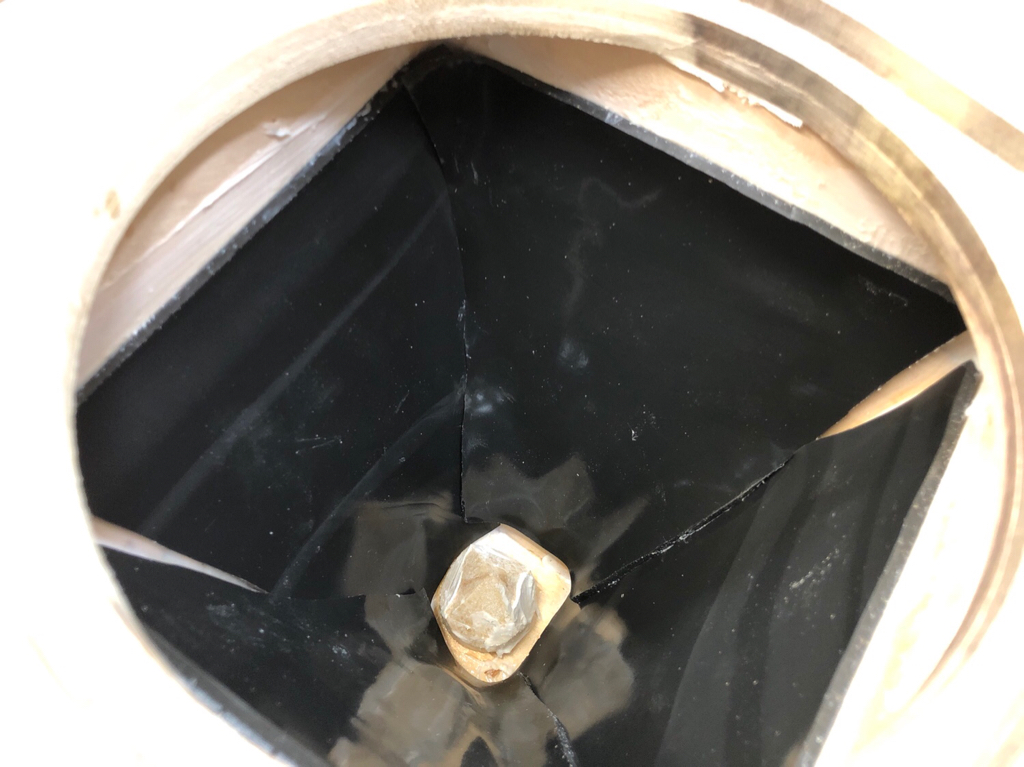
I lined the midrange enclosures with sorbothane, then lined that with 3/4” wool, then stuffed with poly fill

And ready for some crossover tuning

Thanks!
Javad
Time for some binding posts, I’m putting in binding posts for each driver as in the future I may consider going fully active on this.
An externally hosted image should be here but it was not working when we last tested it.
I’ll be doing a recessed bowl cut for the binding posts, the recessed circular binding post provision has sort of become a little design detail on every build I do, and I’m taking it to the next level by doing a curved bowl cut. The binding posts are located between the two lower braces in the enclosure
The ID of the template is 4”, which is held securely with double sided tape
And the bowl cut
As you can see the bottom cut of the bit doesn’t leave the smoothest surface
Template removed
Surface irregularities are easily removed with a 2 inch sanding disc
After sanding with up to a 250 grit finish
And with binding posts temporarily put in place
Since the baffle for the woofer flange was so thick I wanted to put a relief cut to make sure the woofer can breathe easily, I’m not bothering doing anything with the mid as the baffle flange is only about 1/2 inch thick there, and there’s plenty of breathing room. The challenge with the kerf baffle like this is that I really didn’t want to cut driver holes before bending the kerfs as I didn’t want to weaken or put any extra flex in the baffle assembly, so this meant I wasn’t able to put any relief cuts from the outside so I’m doing it from the inside with this under round over bit for Magnate.
Woofer flange thickness
I lined the midrange enclosures with sorbothane, then lined that with 3/4” wool, then stuffed with poly fill
And ready for some crossover tuning
Thanks!
Javad
Tuning for the Pretty Persuasions is coming along well, I have initial modeling done in Xsim and I’m waiting on some crossover parts which will be here Tuesday.
In the meantime I did a quick DSP tune using a MiniDSP 4x8 Sharc, really cool unit as it runs a digital coax input which I run directly out of my laptop for a fully digital signal path into the DSP. I’m running an Adcom GFA-2535 50watt x 4 to the mids and tweeters, and an Adcom GFA-545 to the 8” woofers giving them about 100 Watts each. Crossover points are approx 1000hz at 48db and 200hz at 24db, the amount of PEQ was minimal, I used about 10 filters total to create a response w/in a dB or two full spectrum, and it could be even flatter.
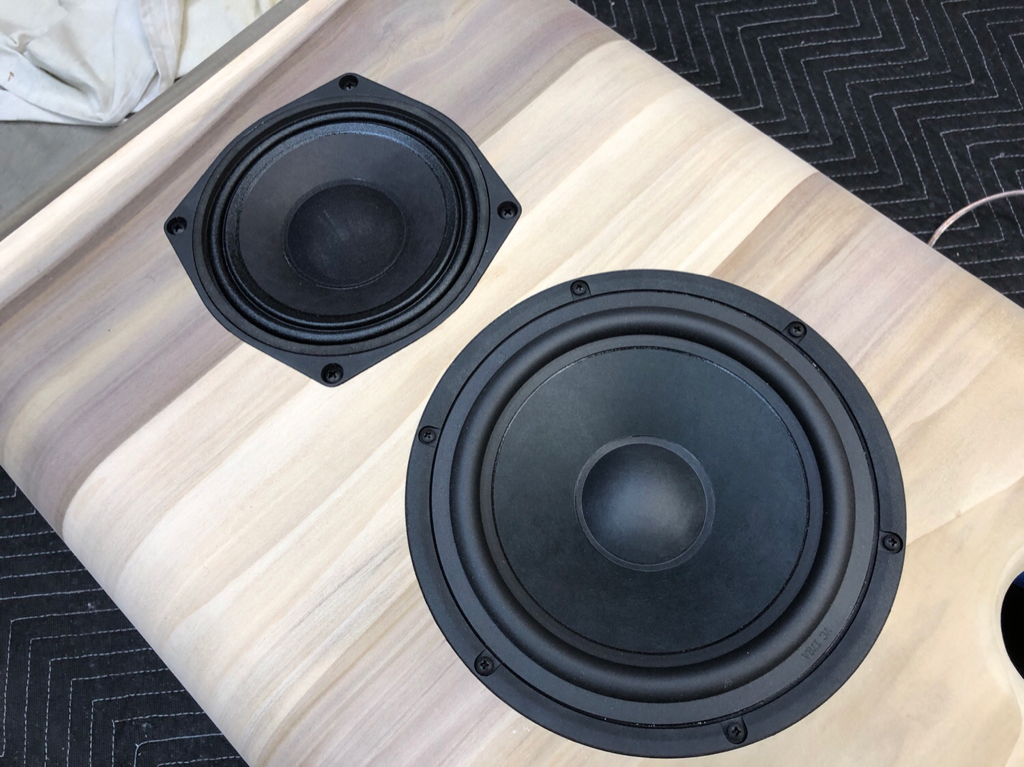
Bass response is flat to about 35hz, my initial impression with this woofer and enclosure are excellent, bass is tight and fast with a warm ported sound and no bloat or sloppiness. My only concern with this woofer (I need to test the other), is that at close to xmax it does make a small sound I can hear if I’m close to it, almost sounds like tinsel slap, I need to investigate further, worst case there are several other more high end woofers with 220mm frames I can use if I need to (I just need to mind a tight budget for the InDIYana event).
See attached for response charts, active makes it so easy to hit whatever response you desire, my passive crossover won’t be nearly this smooth. I also took a few videos, these won’t be winning any Golden Globe awards but they show the speakers, give you an idea that they don’t sound terrible, check them out.
Overall I’m thrilled with how this one speaker sounds in mono, if I have time tomorrow I’m going to assemble the second speaker and listen in stereo, that should be a treat. This is definitely a point source speaker and it sounds like it, I’ll write more about the sound as I spend more time with these guys. Thanks!

Response on axis no smoothing and 1/6, this is with the mic 20” from the tweeter

With individual driver responses

On axis, 22d and 45d

Video of one speaker playing in mono, also showing some of the DSP setup
In the meantime I did a quick DSP tune using a MiniDSP 4x8 Sharc, really cool unit as it runs a digital coax input which I run directly out of my laptop for a fully digital signal path into the DSP. I’m running an Adcom GFA-2535 50watt x 4 to the mids and tweeters, and an Adcom GFA-545 to the 8” woofers giving them about 100 Watts each. Crossover points are approx 1000hz at 48db and 200hz at 24db, the amount of PEQ was minimal, I used about 10 filters total to create a response w/in a dB or two full spectrum, and it could be even flatter.
Bass response is flat to about 35hz, my initial impression with this woofer and enclosure are excellent, bass is tight and fast with a warm ported sound and no bloat or sloppiness. My only concern with this woofer (I need to test the other), is that at close to xmax it does make a small sound I can hear if I’m close to it, almost sounds like tinsel slap, I need to investigate further, worst case there are several other more high end woofers with 220mm frames I can use if I need to (I just need to mind a tight budget for the InDIYana event).
See attached for response charts, active makes it so easy to hit whatever response you desire, my passive crossover won’t be nearly this smooth. I also took a few videos, these won’t be winning any Golden Globe awards but they show the speakers, give you an idea that they don’t sound terrible, check them out.
Overall I’m thrilled with how this one speaker sounds in mono, if I have time tomorrow I’m going to assemble the second speaker and listen in stereo, that should be a treat. This is definitely a point source speaker and it sounds like it, I’ll write more about the sound as I spend more time with these guys. Thanks!
Response on axis no smoothing and 1/6, this is with the mic 20” from the tweeter
With individual driver responses
On axis, 22d and 45d
Video of one speaker playing in mono, also showing some of the DSP setup
Ok coming along, wrapping up the saw dust phase of the project!
Time for some binding posts, I’m putting in binding posts for each driver as in the future I may consider going fully active on this.
Why mar an interesting speaker design with primitive kludge connectors when the Speakon exists? In 4- and 8- pole variants?
Pallas said:Why mar an interesting speaker design with primitive kludge connectors when the Speakon exists? In 4- and 8- pole variants?
I guess I prefer “kludge” connectors like most speaker builders, they allow flexible connections for just about any speaker wire option. After everything I’ve posted this is the one comment you have though? *rolls eyes*
Thanks,
Javad
- Home
- Loudspeakers
- Multi-Way
- Coaxial Speaker Build Thread with FaitalPro 6HX150