Thanks, before I had one 1" tweeter and since changing to two tweeters, the 7" hartley and jbl 2405 the imaging and sound stage have gotten better. Last weekend got my 75tl amps and it is wonderful now. I'll post new pics when I get them. The crossovers were built with help from the place where I got the drivers and there are L pads to control both tweeters and the mid. The veneer is bookmatched bubinga on the sides and bloodwood on the tops and fronts, substrate is 1" mdf.
The veneer is from B&B Rare Woods here in Denver, he has a great web site with lots of scans of available veneer, but it is sure nice to be able to go and see them in person. This project grew and so I didn't have enough bubinga to do all of it.
The veneer is from B&B Rare Woods here in Denver, he has a great web site with lots of scans of available veneer, but it is sure nice to be able to go and see them in person. This project grew and so I didn't have enough bubinga to do all of it.
Re: My audio system
Wow!!!
Here's mine:

dddman said:Hi, this is my sound system. The center channel is homemade.
Wow!!!
Here's mine:
Electrostatic hybrid
I designed and built a center channel capable of keeping up with the huge MartinLogan Monoliths I have:
:
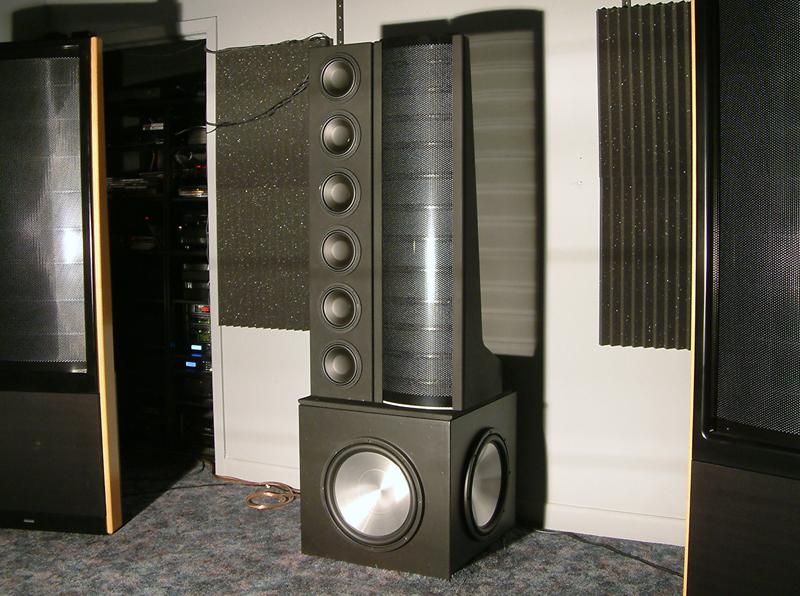
The full design and build was carefully documented in thread over at the MartinLogan Owners Forum.
The Monoliths are also Modded, and the entire rig is biamped with 15 channels of Sunfire amps and DBX DriverRack speaker processors (4800 + 260).
Oh, and there's a rather capable Infinite Baffle Sub as well")
Placed in the custom designed and acoustically treated room, it's the best system I've ever heard, at any price.
I designed and built a center channel capable of keeping up with the huge MartinLogan Monoliths I have:
:
The full design and build was carefully documented in thread over at the MartinLogan Owners Forum.
The Monoliths are also Modded, and the entire rig is biamped with 15 channels of Sunfire amps and DBX DriverRack speaker processors (4800 + 260).
Oh, and there's a rather capable Infinite Baffle Sub as well
Placed in the custom designed and acoustically treated room, it's the best system I've ever heard, at any price.
My new mains project completed.
I had to wait 2 months 3 weeks for these cabinets to get done. Did some work yesterday and was going to take my time with it. Got into a rhythm and went on to complete it.
Before:
After:
I had to wait 2 months 3 weeks for these cabinets to get done. Did some work yesterday and was going to take my time with it. Got into a rhythm and went on to complete it.
Before:
An externally hosted image should be here but it was not working when we last tested it.
After:
An externally hosted image should be here but it was not working when we last tested it.
Re: Electrostatic hybrid
Sweet!
JonFo said:I designed and built a center channel capable of keeping up with the huge MartinLogan Monoliths I have:
Sweet!
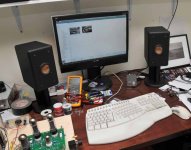
HiVi B3S Computer Speakers
Here are some computer speakers I built using the HiVi B3S using the design from Zaph|Audio. I used some leftover paint from another project so they are fairly plain. They are a big upgrade from my previous speakers and did not cost very much.
Here are some computer speakers I built using the HiVi B3S using the design from Zaph|Audio. I used some leftover paint from another project so they are fairly plain. They are a big upgrade from my previous speakers and did not cost very much.
Attachments
An externally hosted image should be here but it was not working when we last tested it.
An externally hosted image should be here but it was not working when we last tested it.
An externally hosted image should be here but it was not working when we last tested it.
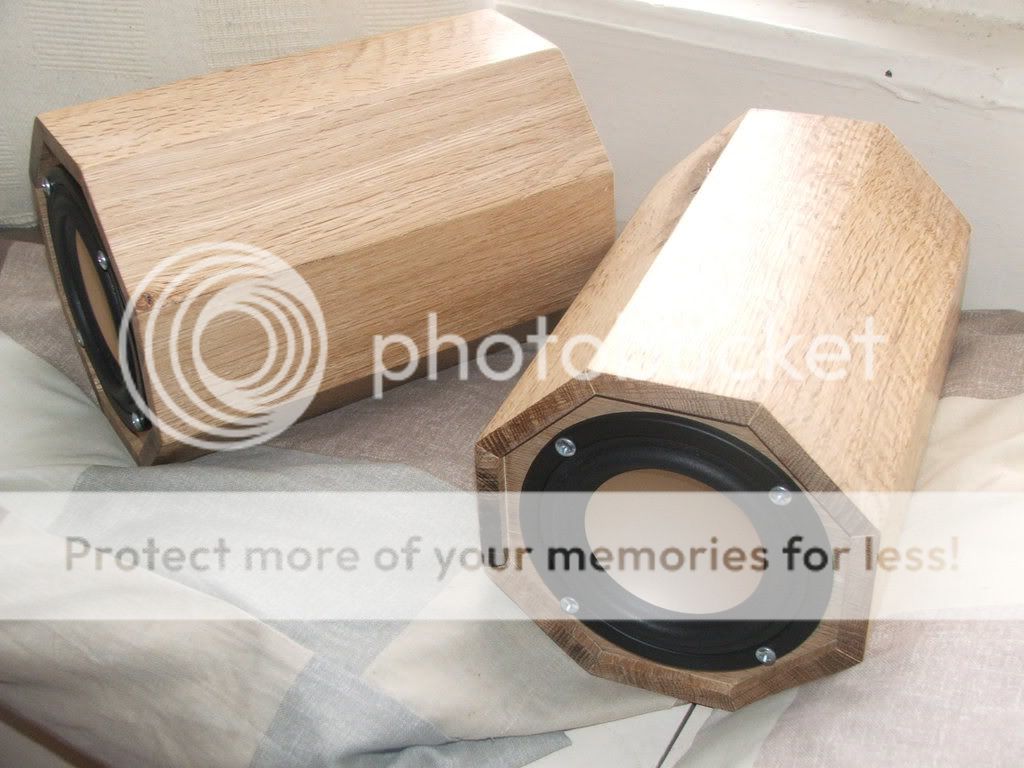
The first speakers I ever built myself. I am sad to say they were built before I really took enough interest in diy audio to know what I was doing... they are solid white oak, have a lip on the edge of the very small baffle, have no acoustic stuffing, no filter components, the driver is too big/enclosure too small (in a moment of incredible stupidity I used the t/s parameters for the 3" HiVi driver but ordered the 4" one....)
They are not isolated in any real way from the surface they rest on.
In fact, technically I think they are the worst designed speakers on here...
BUT the craftsmanship is excellent (if I do say myself) getting an exact 22.5 degree angle on the edge of each of the 16 slats (32 edges) not to mention devising a way to hold the whole bloody thing together while it was glued up was quite challenging.
However I plan to test these as they are... then... rebuild them with the 3" hivi drivers, a smoothed and rounded over baffle, stuffing and the filter which zaph used with these drivers (the enclosure is roughly the same size) and see how big a difference it makes.
hmmmmm
doogyscoot said:Goodness me... sorry I forgot to resize them, if the mods can do anything about that retrospectively I would really appreciate it, that is if they are to big...
The size is good!
And wow, what a dazzling shape, very impressive work!

Simon
cabinets look great.
Here's an idea.
Buy the 3 inchers and make an MDF baffle to go over your 4 inch hole. You can chamfer the edges and paint it black (sort of like the mid enclosure of the B&W 801 matrix). The chamfer would also help with baffle step diffraction. No point letting your hard work go to waste.
Then you could build a proper enclosure for the 4 inchers.
Just an idea.
Roger, that's basically just what I'm going to do. I'll use a a flush trim bit to remove the lip round the edge giving me a flat surface. I'll then take a piece of MDF approximately the same shape as the baffle, put holes on it which match the current driver mount holes. I'll then mount the new baffle to the face and use a flush trim bit again to trim the edges of the new baffle to fit perfectly. Finally I will use a round over bit on the new baffle edges and scallop the rear of the hole allowing the driver more breathing space as per Zaph's guidance. The filter will just have to sit inside somewhere.
The 4" drivers will be used for my next project.... whatever that may be??
Might try Ply for the new baffle though... aesthetically it would be more enjoyable, and that's what these speakers are mainly about.
Any thoughts whether I should just stuff them or line the internal walls with some thing as well?
doogyscoot said:Any thoughts whether I should just stuff them or line the internal walls with some thing as well?
If they sound thin and shouty then put some lamb's wool or something inside.
Simon
My own made outdoor speakers, i used it as a temporary sound source.
http://nagi.ee/photos/ResR/6391373/
http://nagi.ee/photos/ResR/6391371/
These are four old 3gdþ-1 "full-range" speakers used in a four separate colour TV-s. Treble and high are very loud, but poor bass due to small paper cones and no box. I put it on a balcony on third floor and it was heared to 300 meters away with amplified only by 22W stereo chip amplifier. Soon i take them down from there and build a proper box.
And my indoor sound system. (Ps. those lamps are still there)
http://nagi.ee/photos/ResR/4919201/
hey nelona, nope and i don´t touch it anyway, basically i know what electricity is wait, look this (kinda offtopic):
http://nagi.ee/photos/ResR/6405839/
http://nagi.ee/photos/ResR/6405973/
extension cord is not a very big problem . I gonna change almost all wires on the thing from first picture i use as a ownmade historical switching gear to my soldering iron next month, it´s a first large scale project i made when i was 15.
wait, look this (kinda offtopic):http://nagi.ee/photos/ResR/6405839/
http://nagi.ee/photos/ResR/6405973/
extension cord is not a very big problem
. I gonna change almost all wires on the thing from first picture i use as a ownmade historical switching gear to my soldering iron next month, it´s a first large scale project i made when i was 15.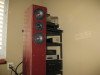
- Home
- Loudspeakers
- Multi-Way
- System Pictures & Description