Bigfishe, thanks for taking time to comment.Being a body shop owner let me warn you!
Seal the wood with wood rot epoxy sealer then use nason
Ful-pox primer! Careful not to run the primer it's very thin!
This should be a five day process
I'm not familiar with "wood rot epoxy sealer" who makes this product?
Funny you mention sealer. I've build/restored 4 cars/jeeps so far and I've always used sealer just before the basecoat. I asked the counter guy at the supply house about sealer and he said with the primer I'm using and since I was going to have a couple coats of primer on the entire exterior area of the cabinet that sealer wouldn't be necessary.
I'm using all Chroma line products, which as you know, is a rep above the Nason line, make any difference?
BTW, I'm from the Nashville area, what body shop do you own? Lived there since 1972.
JonasKarud, I appreciate the vote of confidence!Nice work!
Looking forward to see the end result!
When I decided to build these speakers last month I went online and ordered the drivers and tried ordering the crossover parts. But being over the holidays and the person that deals with individual sales at Jantzen being on holiday it took a little time to complete the order. Then delivery took over another 3 weeks. I have read posts from other speaker builders, some Ekta Grande builders in fact, that have spent months and/or years building a set. Taking over a month to get parts wouldn't be an issue.
They did arrive yesterday, I'll post some pics of the crossover when I get them put together. I didn't realize how big these components would be! I've got to revise my original plan for the speaker base to stuff these. But I didn't want to wait for the parts to arrive before starting. Luckily I still have options.
Painting cars are one thing! Painting wood totally a pain in the ***!
But if you follow me I'll set you up for a paint job Wilson audio would be proud of!!!! Wood rot sealer is sold online, it's a two part one to one mix that will seal the wood from swelling and shrinking!!coat the box inside and out three or four times! Then you will want to use the ful-pox primer
Tell you what PM me and I'll give you the info it's a bit much type
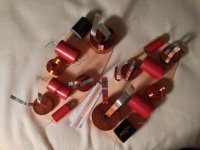
Crossover coils and caps
Well the crossover parts from Jenzen finally arrived yesterday. Didn't have much time this afternoon to work on the project. But I did take a few mins to run over to the shop, make a template of the speaker base area I set aside for the crossover, then transfer and cut out some maple ply to heat glue the parts onto.
These coils and caps are a lot larger than I had expected. I included a 6" measure in the pic. The board is 14 1/2" long and roughly 6 1/2" wide (tapers from middle to both front and back). I used the entire space available to keep the coils as far apart as possible. The larger caps and coils are almost 2 1/4" tall.
I've set up the bottom of the cabinet to hold this board with a removable panel for access. No need to ever have to remove any drivers to make changes or experiment.
Any experienced builders have any comments? I set up the crossover with the tweeter in the rear, mid in the middle and the bass in the front. There is abut 3 1/2" space between coils.

Crossover
Picowallspeaker thanks for commenting.
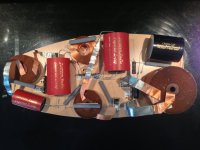
I figured since I'm a beginner I'll probably make a mistake here and there. I want to limit having to pull drivers in and out to troubleshoot/adjust the crossover. Here is a pic of one complete ready to install and connect. Since it might be a couple weeks before I'm ready to put it in I went ahead and labeled the connection points.
I couldn't quickly find an approved method of terminating/connecting the wax coils, so I wrapped the entire width around a lead and soldered, any comments?
It's good to leave out of the cabinet the crossover
No matter of the size of the components.
After all it's....Diy
Picowallspeaker thanks for commenting.
I figured since I'm a beginner I'll probably make a mistake here and there. I want to limit having to pull drivers in and out to troubleshoot/adjust the crossover. Here is a pic of one complete ready to install and connect. Since it might be a couple weeks before I'm ready to put it in I went ahead and labeled the connection points.
I couldn't quickly find an approved method of terminating/connecting the wax coils, so I wrapped the entire width around a lead and soldered, any comments?

Sound dampening
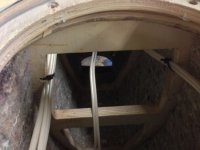
Here is a pic of the 1/2" felt sound dampening installed. The entire interior surface area of the cabinets are covered. The felt is attached by commercial grade contact cement applied to both sides. It took me about 10 hours total to install the 3M padding and the 1/2" felt padding. More time than I would have thought, FYI.
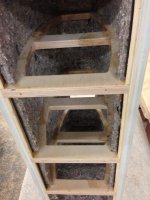
Here is a pic of the 1/2" felt sound dampening installed. The entire interior surface area of the cabinets are covered. The felt is attached by commercial grade contact cement applied to both sides. It took me about 10 hours total to install the 3M padding and the 1/2" felt padding. More time than I would have thought, FYI.

Crossover fitted into base
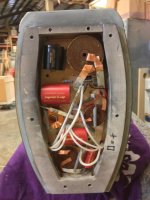
The crossover components are 2" think, I've made a pocket in the bottom of the cabinet. Part of the space is in a recess into the bass section, a 3/4" "toe-kick" gives the balance of space. The toe-kick will be wrapped with stainless steel for a little extra accent. Here is a pic, this crossover is huge, takes every bit of space.
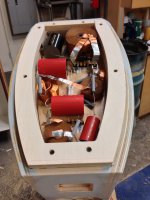
The crossover components are 2" think, I've made a pocket in the bottom of the cabinet. Part of the space is in a recess into the bass section, a 3/4" "toe-kick" gives the balance of space. The toe-kick will be wrapped with stainless steel for a little extra accent. Here is a pic, this crossover is huge, takes every bit of space.

Excellent!
For even better sonic results, try to mount the coils so that their
induction axes point in different directions.
JonasKarud, thanks for commenting. It was all I could do to get these in the way I did, due to space. I only had about 2 1/2" depth to work with and some of the coils are larger than that on their side. I was able to organize them, as in the pic, with 3 1/2" between them. Before I fixed them to the board I sent a pic to Troels and he said he thought the layout looked fine. I know it would have been a safer bet to organize in different directions as you said.
We will see soon, put the first 2 coats of primer on today;
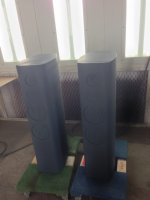
Let the sanding begin!
Almost ready for color
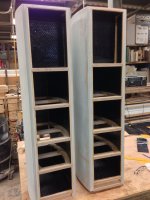
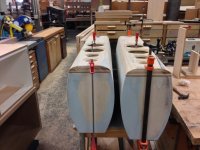
Nice to have a 3 day weekend. I was able to spray the last 2 coats of primer Saturday. Monday morning spent sanding it all over again and filling the small imperfections with some spot putty.
After lunch I wiped them down with a damp cloth and rolled them into the booth. I sprayed them first with a medium wet coat of DTM epoxy primer/sealer, then two medium wet coats of black base coat, then two medium wet coats of Chroma Clear.
Here is a pic of one final sanded and one with the spot putty.
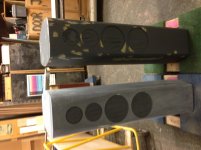

Color on
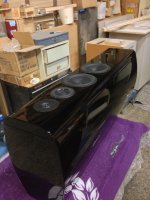
I pulled them out of the booth this afternoon and started the first round of color sanding. Sanding as little as possible with 1200 grit and pad to make the "orange peel" disappear. I was pretty proud of them at this point. With as much sanding and buffing ahead of me I almost talked myself into taking them home, they looked that good. But, sticking to plan, finish the color sanding, then 2 more coats of clear, then another round of color sanding, then the polishing.
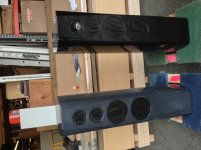
Here is the first one almost complete with color sanding and the one on the right is right out of the booth;

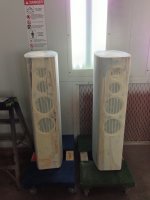
Trying them out at the shop before I took them home today
I was so excited!! Powered right up and sounded great, even in the large open shop. I was really shocked at the amount of base and cleaness of the treble in the worst type of environment. Source audio was my iPhone through the PAS 2 (all tubes4hifi upgrades), I still have to place the Acoustilux, install the rest of the screws and re-install my signature/logo on the right speaker
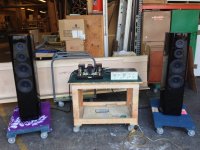
I was so excited!! Powered right up and sounded great, even in the large open shop. I was really shocked at the amount of base and cleaness of the treble in the worst type of environment. Source audio was my iPhone through the PAS 2 (all tubes4hifi upgrades), I still have to place the Acoustilux, install the rest of the screws and re-install my signature/logo on the right speaker

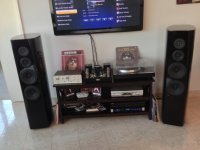
Finally home!
This project started forming in my mind the end of December and now nearly complete and home the first of March. I can't believe how much sanding and polishing these took!
I used a 2 step process, all DuPont Choma products. Each cabinet has 4 coats of clear. Wet sanded with 1200 grit after the first 2, then back in the booth for the next 2. After the second set of 1200 grit wet sanding, then 2000 grit. Then the polishing. I used 3m's Perfect-It 3 step system. Each step uses a different compound with matching buffer wheel. I thought I would never finish!
FYI, each cabinet has about a third of a gallon of clear.

- Status
- This old topic is closed. If you want to reopen this topic, contact a moderator using the "Report Post" button.
- Home
- Loudspeakers
- Multi-Way
- Ekta Grande project/AR-1 variation
