Hello Diy
This is my first speaker project ,I have a habit of biting of more than I can chew when it comes to projects 🙂 .
🙂 .
This project has been going for a number of years now ,life just gets in the way more often than not . I'm also building the electronics from frontend to amps which doesn't help .Plus I have no real electronics knowledge 😱.Plus the room it self needs a bit of acoustic treatment .I was a its all about the front end ,but over the years I feel its more speaker ,xover room interaction .
Any here's a novice approache to speaker design and build 🙂 .
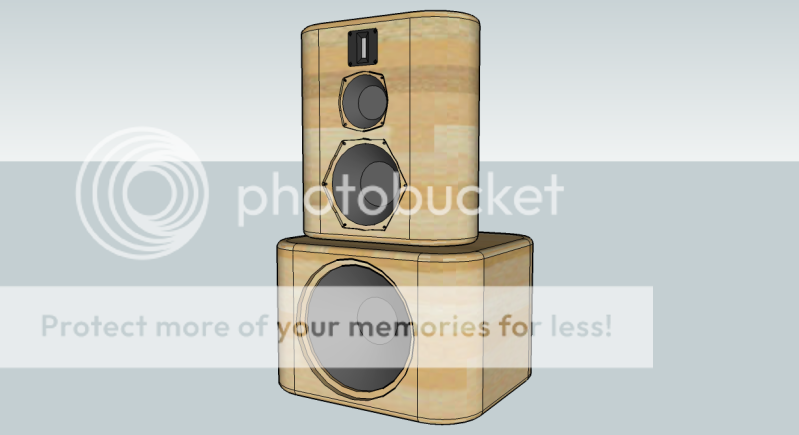
The design ,seperate bass cab's to the mid section so I can move them around and swap out the top section for a Synergy horn ,designed by Paul Spencer ,but thats another project 🙂.
Red Spade Audio: Synergy horn flat pack kit
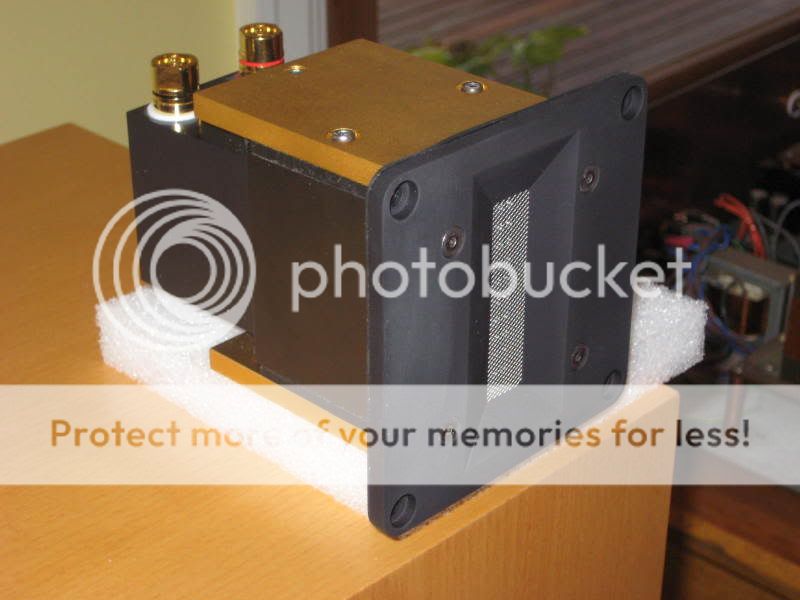
Drivers ,I've heard the Raven tweeters a number of times and I really like how they sound & they sound really nice with PHL's .Bought the drivers from Pat @ War Audio in Perth ,Australia . Pat has been very helpful over the years .
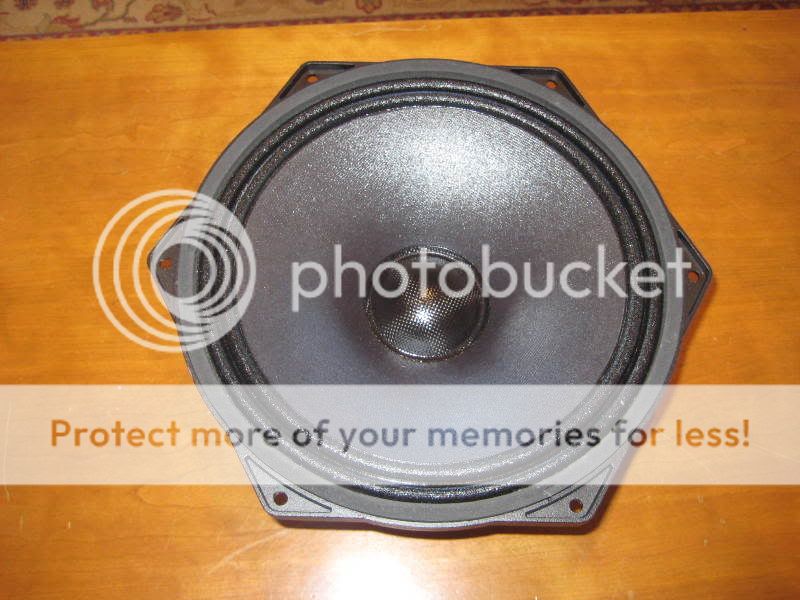
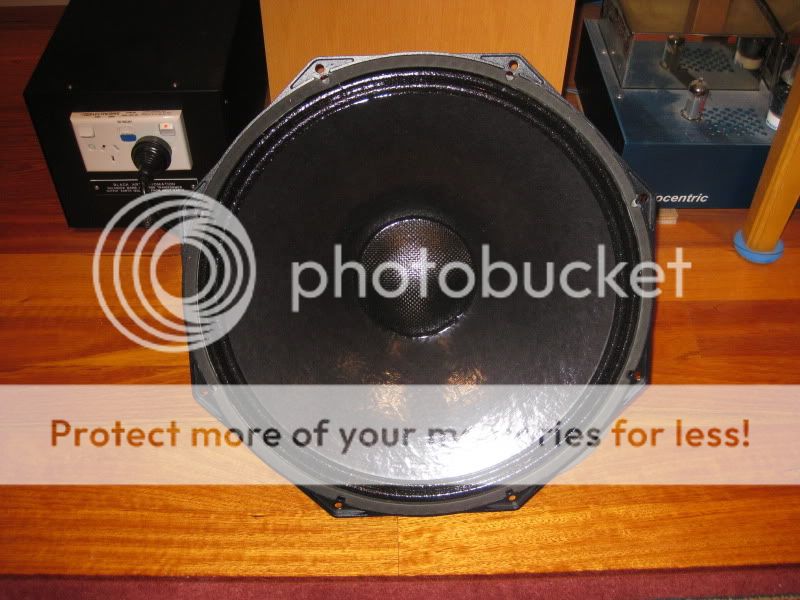
PHL's , 1120 6.5"mid , PHL 3020 10" lower mid , PHL 5021 15" bass driver.

CHeers
This is my first speaker project ,I have a habit of biting of more than I can chew when it comes to projects
🙂 . This project has been going for a number of years now ,life just gets in the way more often than not . I'm also building the electronics from frontend to amps which doesn't help .Plus I have no real electronics knowledge 😱.Plus the room it self needs a bit of acoustic treatment .I was a its all about the front end ,but over the years I feel its more speaker ,xover room interaction .
Any here's a novice approache to speaker design and build 🙂 .
The design ,seperate bass cab's to the mid section so I can move them around and swap out the top section for a Synergy horn ,designed by Paul Spencer ,but thats another project 🙂.
Red Spade Audio: Synergy horn flat pack kit
Drivers ,I've heard the Raven tweeters a number of times and I really like how they sound & they sound really nice with PHL's .Bought the drivers from Pat @ War Audio in Perth ,Australia . Pat has been very helpful over the years .
PHL's , 1120 6.5"mid , PHL 3020 10" lower mid , PHL 5021 15" bass driver.
CHeers
Cab's & Baffles
I wanted large round overs on the corners and a triangle shape cab ,so with toe in the cabs don't look as wide .Also hoping for less defraction on the edge's .
I looked at making a sub frame then wrap it in multiple layers of bendy ply .I found a supplier who would guaranty a 100mm radius with there ply .I was having a chat with a cabinet maker who also built speaker ,Andrew W. from Aslan Acoustic about my project and he offered to CNC the cabs for me .He also machined the front baffles ,which he loved doing 😛 not.I think 12 months latter the swarf was still appearing .
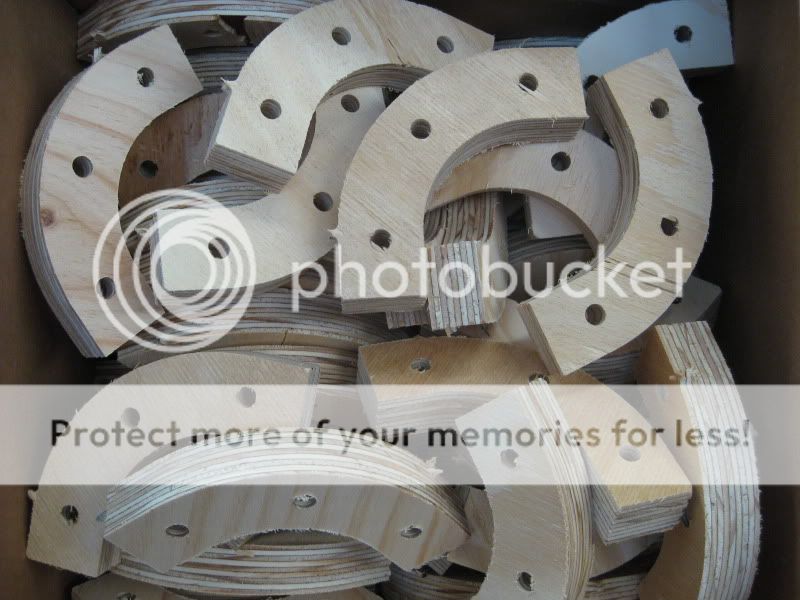
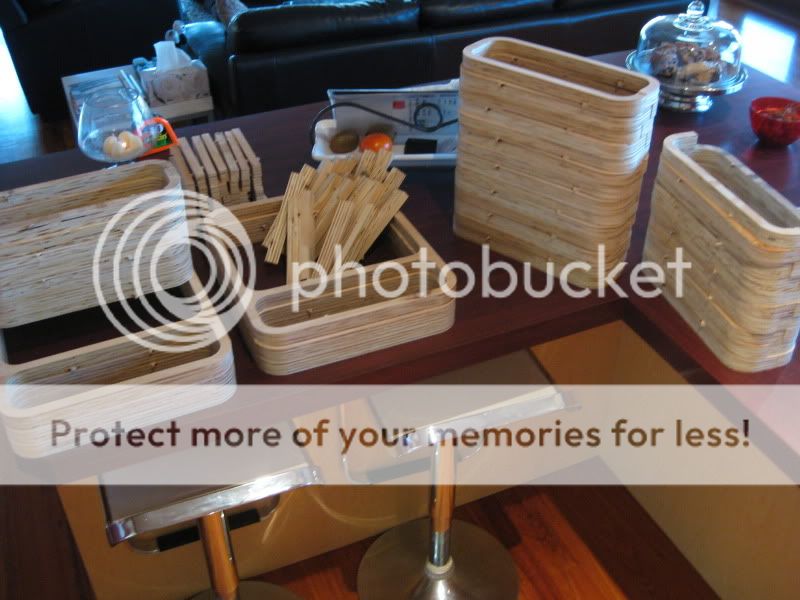
Cabinet piece's the jigsaw begins 🙂.
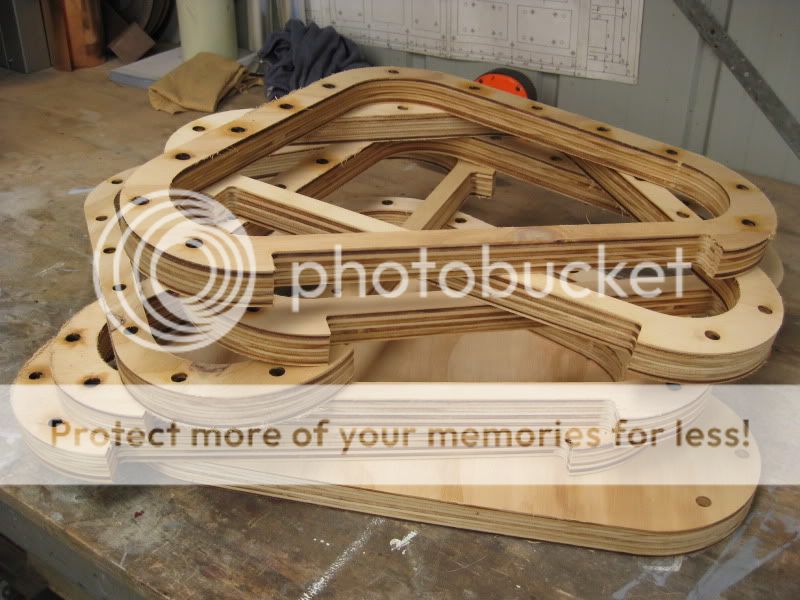

15" bass baffle

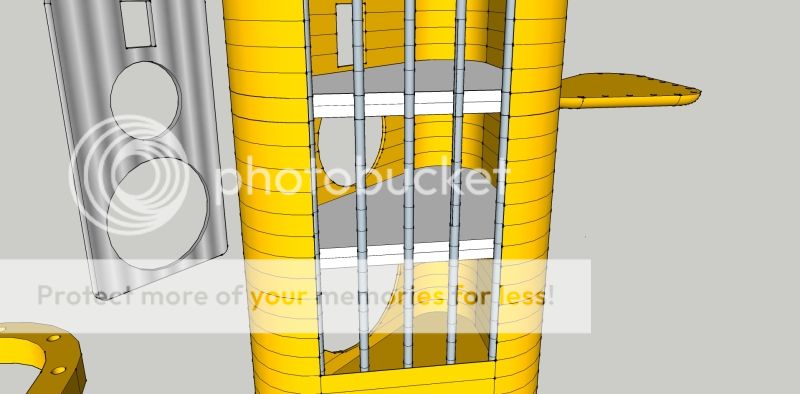
How to build a complicated bass cab out of bits ,for large round overs
Bass cab Wall material ,Finish aircraft grade BB and alloy .

After the cnc'ing a quick stack
CHeers
I wanted large round overs on the corners and a triangle shape cab ,so with toe in the cabs don't look as wide .Also hoping for less defraction on the edge's .
I looked at making a sub frame then wrap it in multiple layers of bendy ply .I found a supplier who would guaranty a 100mm radius with there ply .I was having a chat with a cabinet maker who also built speaker ,Andrew W. from Aslan Acoustic about my project and he offered to CNC the cabs for me .He also machined the front baffles ,which he loved doing 😛 not.I think 12 months latter the swarf was still appearing .
Cabinet piece's the jigsaw begins 🙂.
15" bass baffle
How to build a complicated bass cab out of bits ,for large round overs
Bass cab Wall material ,Finish aircraft grade BB and alloy .
After the cnc'ing a quick stack
CHeers
Last edited:
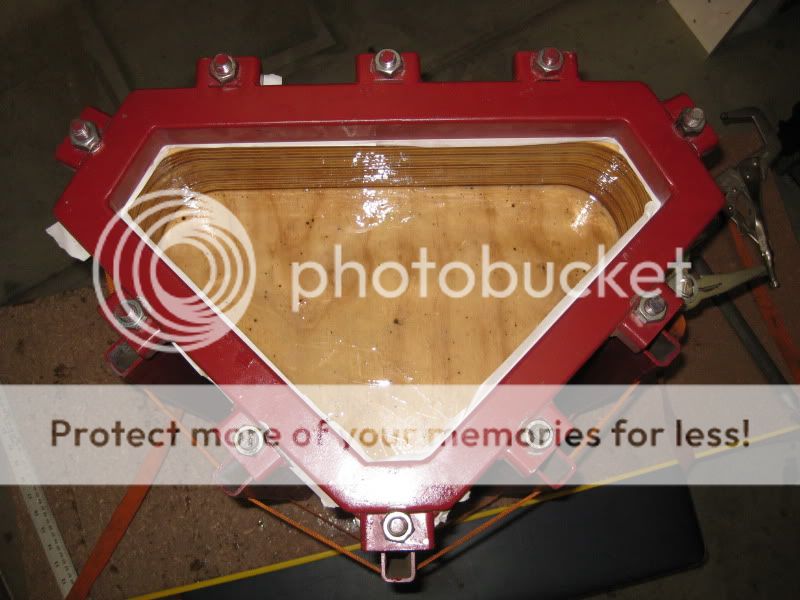
Stacking to Glue
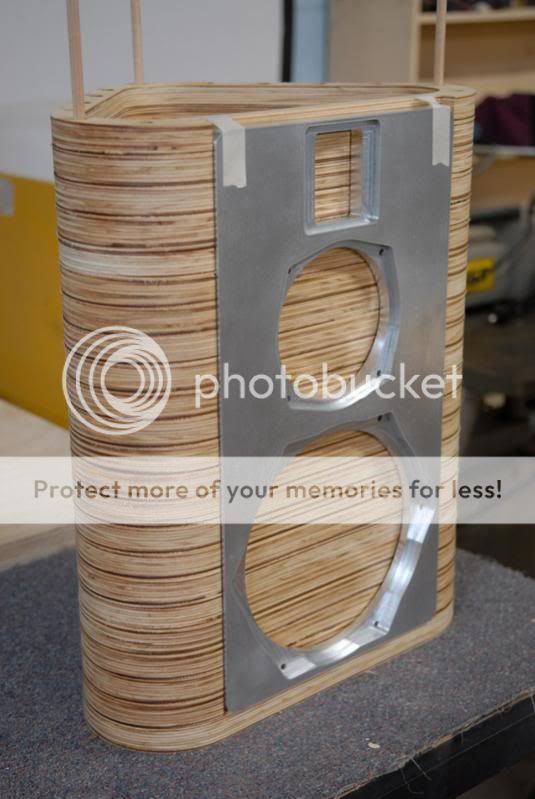
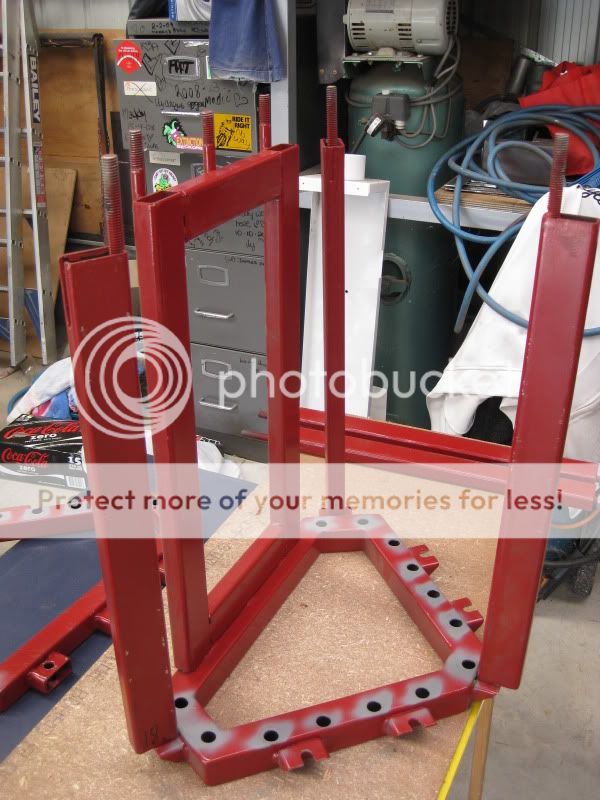
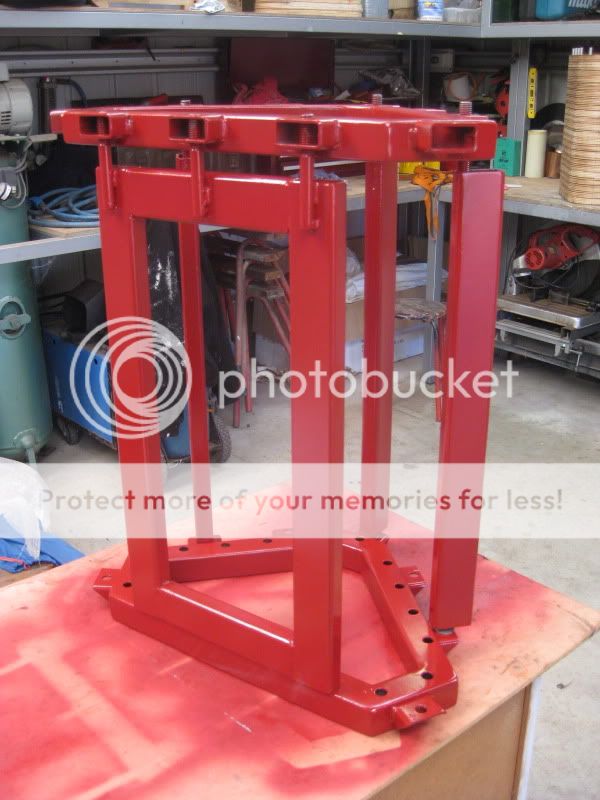
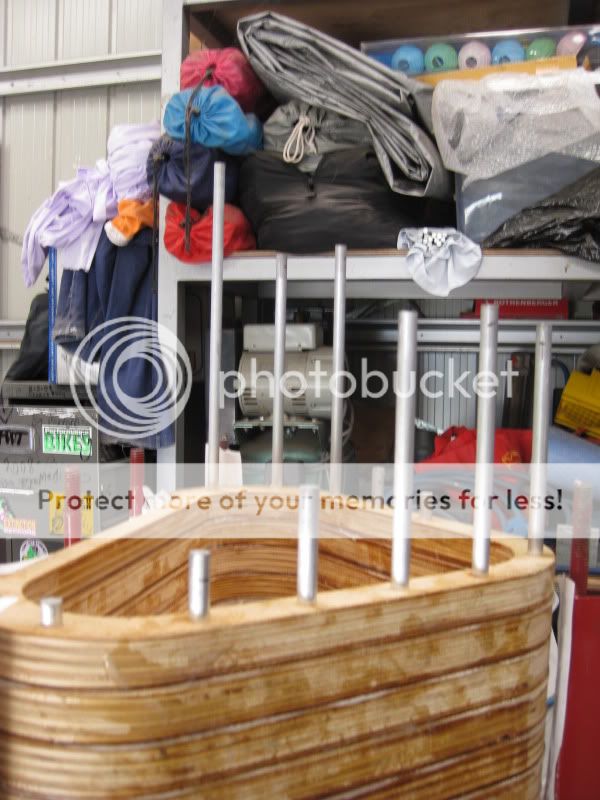
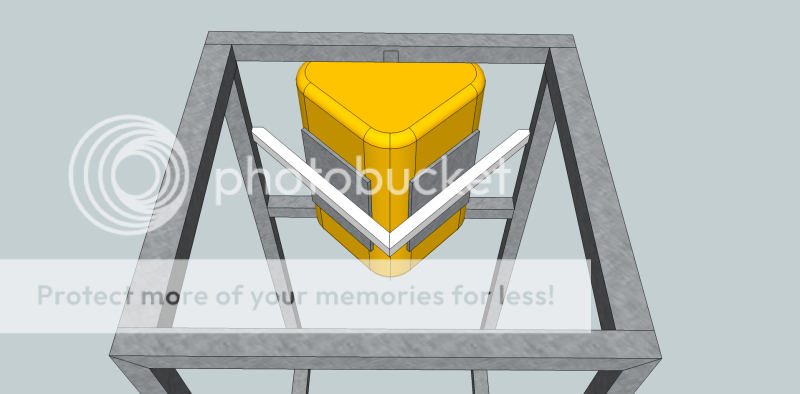
Talking to Andrew about gluing the cab's he told me to watch out for horizontal movement when clamping down to glue . So I made a jig to hold it all in position , if you know me I like making jigs 🙂. To make it more complicated for myself I used ally dowels instead of timber ,15 of them .I hoping the alloy baffles & dowels will add stiffness but not alot of weight .
The jig mock up
The rectangle section is set back and acks as a dummy baffle .
Cheers
Last edited:
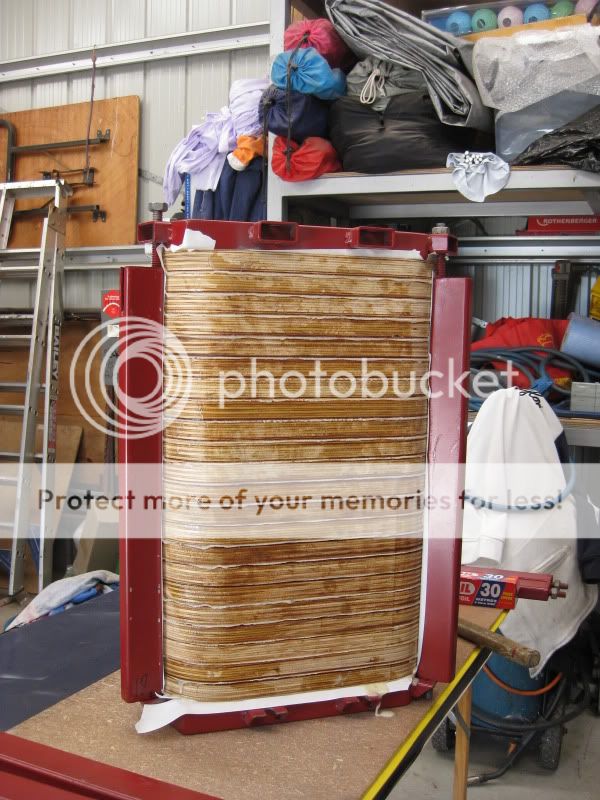
Gluing
Talking with Andrew about gluing he warned me about horizontal movement when gluing and clamping down . So I made a jig ,I like making jigs 🙂 .
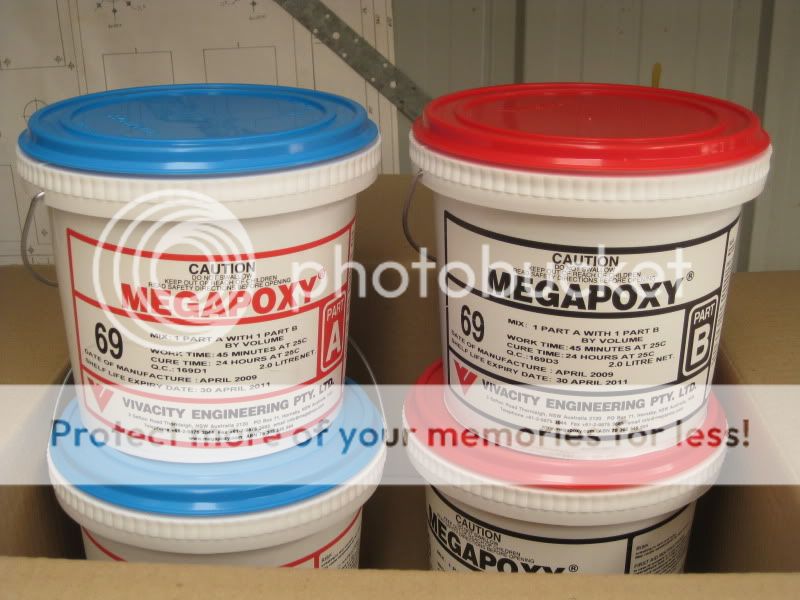
I also done a dry run stacking and clamping to see how much work time I had ,the epoxy glue I used has a 45min work time .The epoxy I used is designed to glue dissimilar materials . The dowels 15 of them are alloy ,I used alloy dowels & baffles ,hoping to improve the stiffness of the cabinets .
Glue
Jig mock up
The rectangle section is set back to ack as a dummy baffle to hold the cab in postion .
Cheers
Talking with Andrew about gluing he warned me about horizontal movement when gluing and clamping down . So I made a jig ,I like making jigs 🙂 .
I also done a dry run stacking and clamping to see how much work time I had ,the epoxy glue I used has a 45min work time .The epoxy I used is designed to glue dissimilar materials . The dowels 15 of them are alloy ,I used alloy dowels & baffles ,hoping to improve the stiffness of the cabinets .
Glue
Jig mock up
The rectangle section is set back to ack as a dummy baffle to hold the cab in postion .
Cheers
Cheers Matei like it
Novice approach my little donkey
Donkey the key word 😀
Cheers
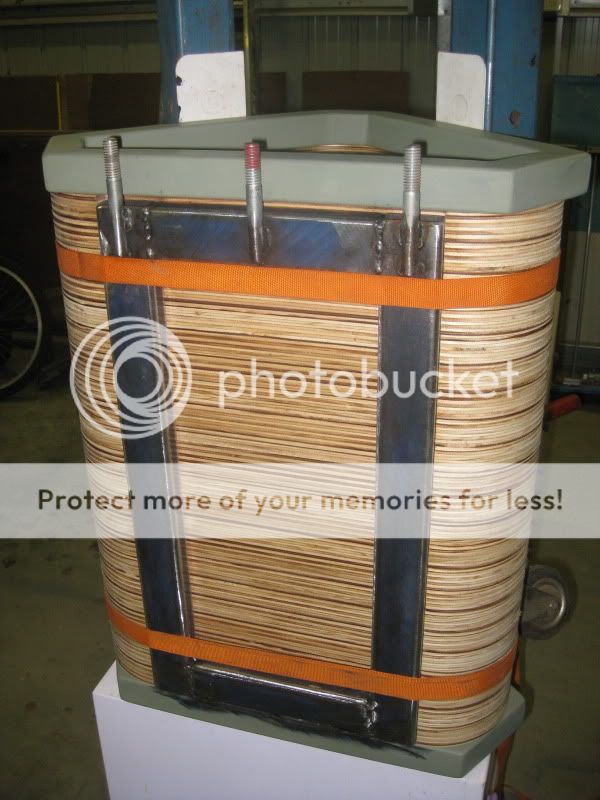
Gluing
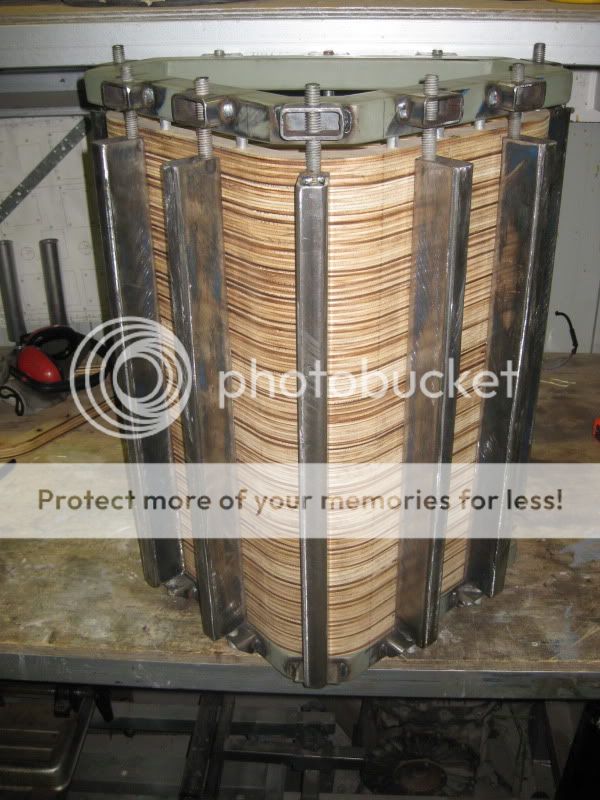
Also a good tip given to me ,run the dowels down once its all stacked .
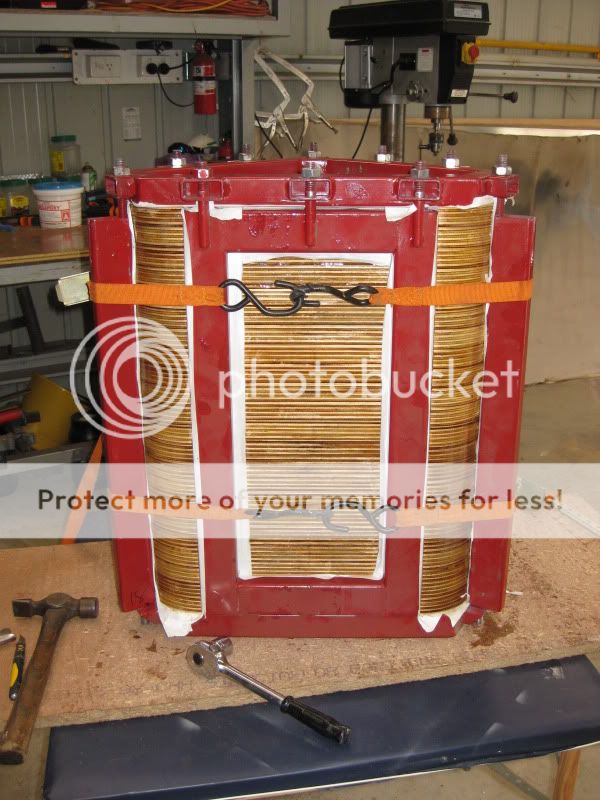
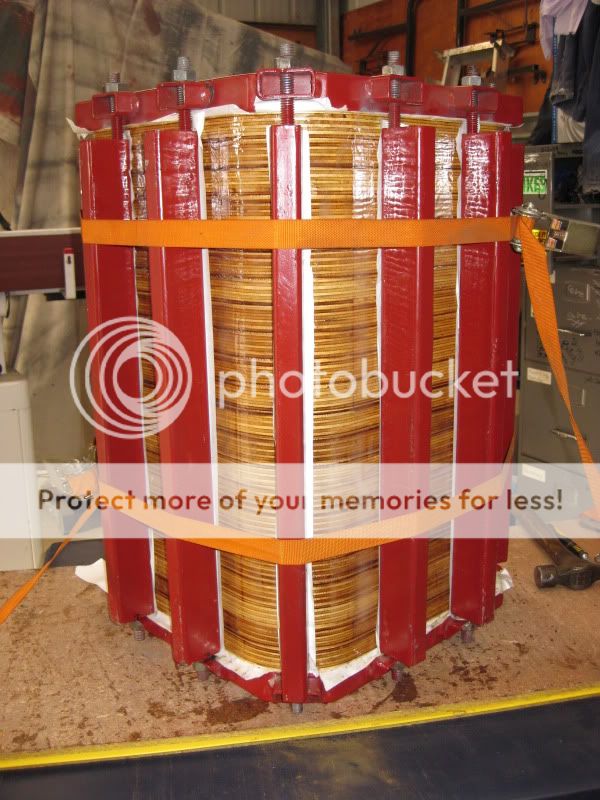
Afetr allowing drying time pulled out
The cabs shiny due to spreading the beads of glue .
Cheers
Also a good tip given to me ,run the dowels down once its all stacked .
Afetr allowing drying time pulled out
The cabs shiny due to spreading the beads of glue .
Cheers
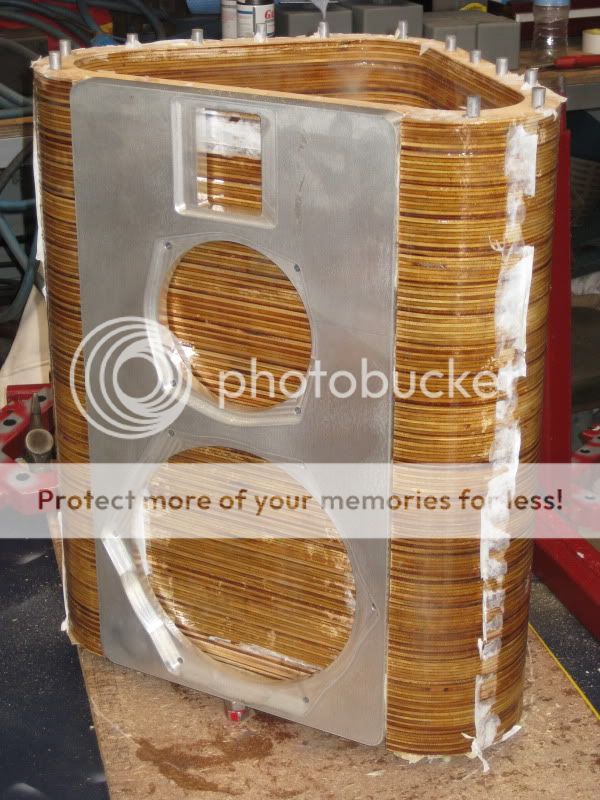
Putting the tops & bottoms on
I left the tops & bottoms last so I could spread out the beads of glue inside .I couldn't get to the 6.5" section .

All glued up Baffles fit like a bum in a bucket 🙂 .
Next step mounting the baffle .
Cheers
I left the tops & bottoms last so I could spread out the beads of glue inside .I couldn't get to the 6.5" section .
All glued up Baffles fit like a bum in a bucket 🙂 .
Next step mounting the baffle .
Cheers
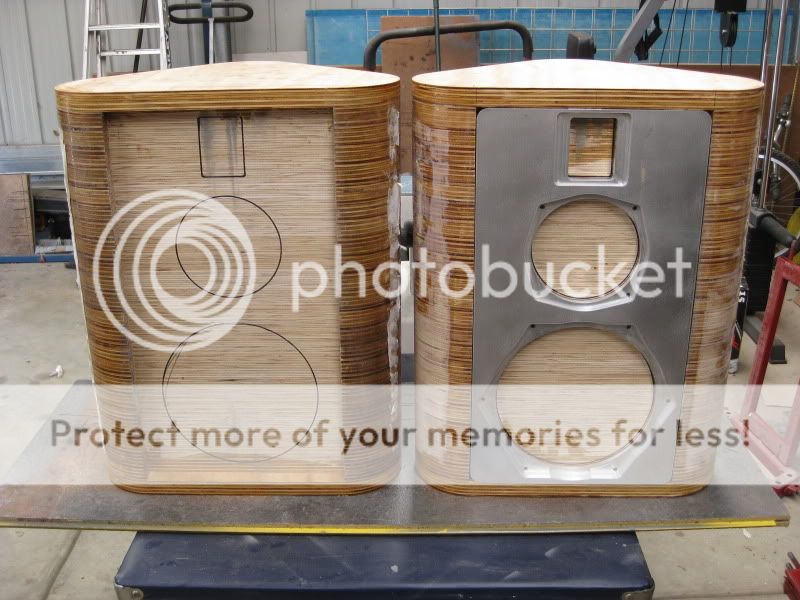
Fixing the baffle
I need to fix the baffle to the cab and I need to route the cab to get a nice flush fit .
ALso should I just bond and screw the baffle inplace or is there any benifit to having the baffle semi decoupled from the cabinet 😕 .
Any ideas guys .
CHeers
I need to fix the baffle to the cab and I need to route the cab to get a nice flush fit .
ALso should I just bond and screw the baffle inplace or is there any benifit to having the baffle semi decoupled from the cabinet 😕 .
Any ideas guys .
CHeers
Another jig
One problem with triangle shaped cabs you just can't lay them on their back and work on the front baffle 🙁 .
So I thought I'll make a jig for the cab to sit in so I could router the area where the baffle fits .Plus I wanted a new portable work bench something I could roll out side and work on .
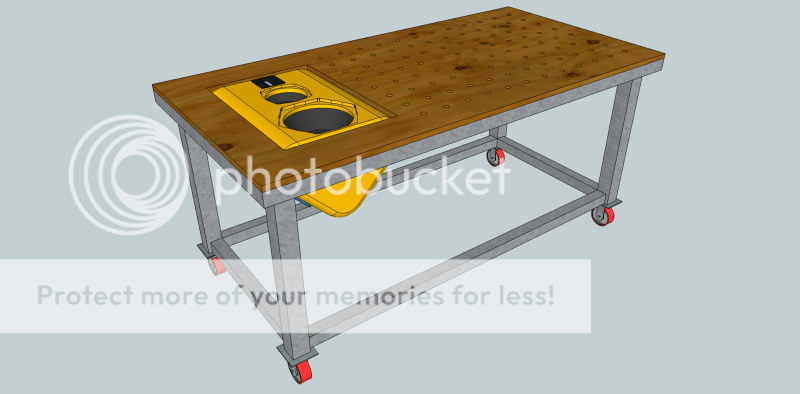
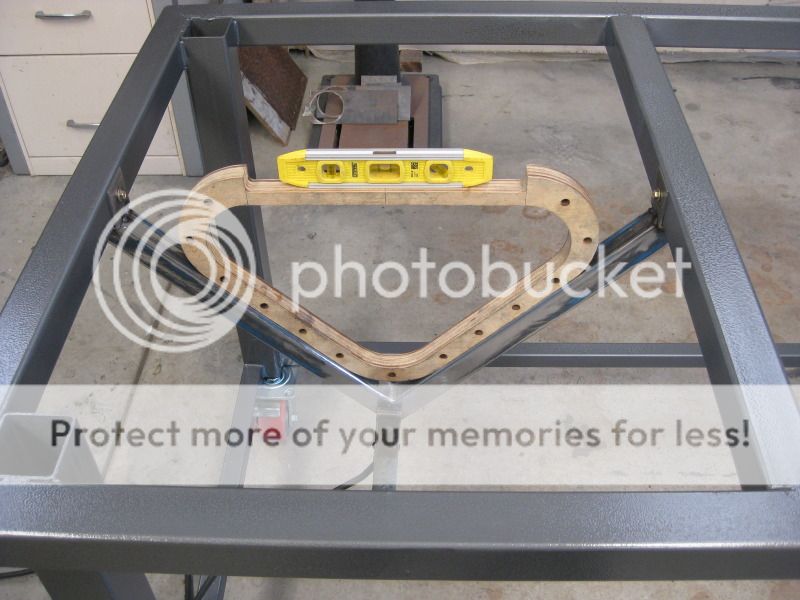
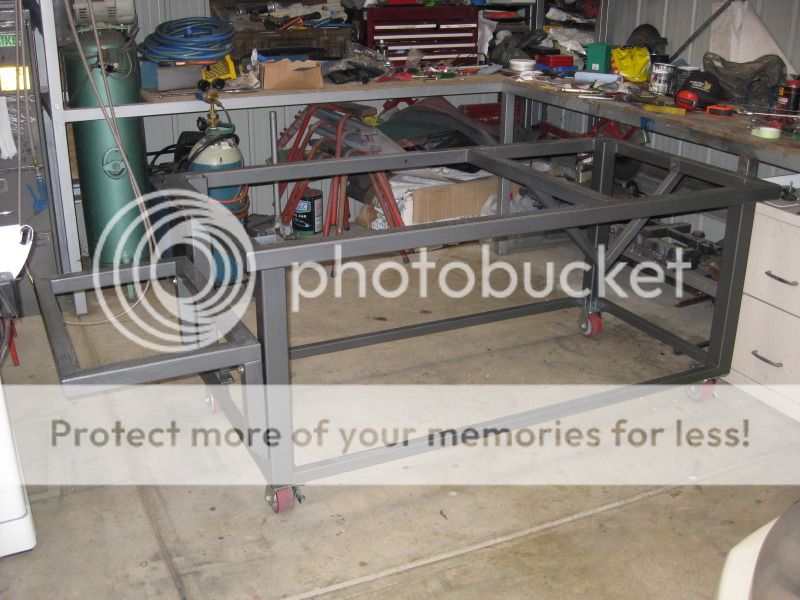
Need to fit the bench tops .
CHeers
One problem with triangle shaped cabs you just can't lay them on their back and work on the front baffle 🙁 .
So I thought I'll make a jig for the cab to sit in so I could router the area where the baffle fits .Plus I wanted a new portable work bench something I could roll out side and work on .
Need to fit the bench tops .
CHeers
The amps I've built for the mid section , they just need a few tweaks and I still haven't fittted 4 chokes to the larger ones .
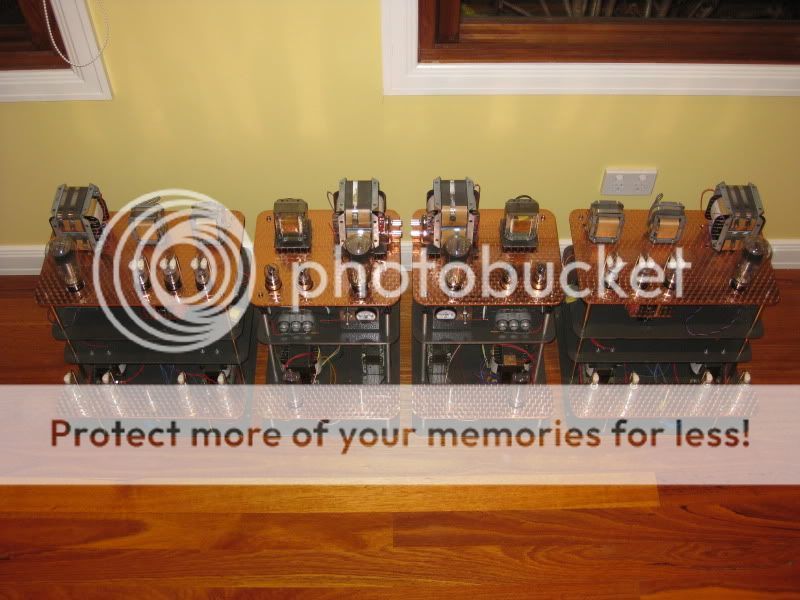
CHeers
CHeers
OK I'm wondering how you separated the 10 from the 6inch mid
Each section divided up ,in white .
CHeers
Oi 56!!
Looking very special there I must say.
Even if your DIY tooling is in itself is a work of art.
Nice work.
I'll be waiting for my invite for a listen and a drink
Looking very special there I must say.
Even if your DIY tooling is in itself is a work of art.
Nice work.
I'll be waiting for my invite for a listen and a drink
Oi 56!!
Looking very special there I must say.
Even if your DIY tooling is in itself is a work of art.
Imagine what he would build if he really got serious😛
looking good 56 - those tafe courses your wife took came in really handy, when do you start taking over and finishing things?


We must be 😀 ,I never did like jigsaw puzzles .Hmmm think we must be shopping for jigsaw puzzle speakers at the same shop...
Great looking project cant wait to see the results
Amp case's each layer is made up of 4 pieces .
An externally hosted image should be here but it was not working when we last tested it.
An externally hosted image should be here but it was not working when we last tested it.
more case's to glue together 🙁
CHeers
- Status
- Not open for further replies.
- Home
- Loudspeakers
- Multi-Way
- 4 way active ,passive or what works best