They sure look nice but for that money id rather buy a big house or an aston martin, anyway thanks for posting that, they are kinda like my design, same theory behind them.
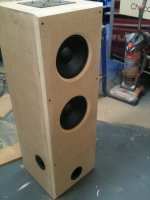
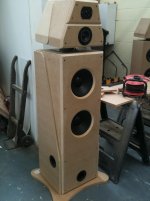
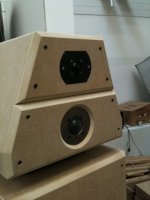
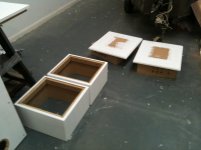
Finaly had time to cut and fit one of the baffles today, looking just as i wanted, finishes them nicely i think.
Finaly had time to cut and fit one of the baffles today, looking just as i wanted, finishes them nicely i think.
Attachments
I figured that may give you a few more ideas, just for reference.
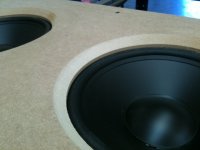
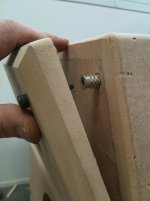
Oh, almost forgot. I don't see any fasteners for the drivers, along the beveled edge. Other than possibly small screws, how did you do that?
The screws that you can see fit the front finishing baffle, the baffle you see is not the main baffle that the speakers are bolted to, each bass unit has 8 m6 bolts screwed into steel T nuts hammered into the rear of the inside baffle, the baffle screws you can see in this photo are actualy m6 hex bolts screwed into worm nuts that are screwed into the rear front baffle, this can be seen in my other photos in earlier posts.
Are you planning to add veneering?
If you look up a couple of paragraphs I mention veneering the side panels, I think it should look pretty cool with the rest in satin black.
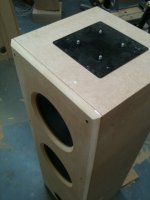
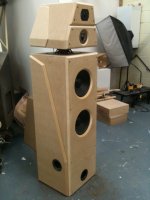
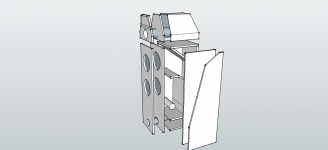
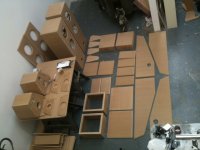
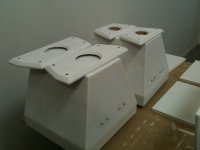
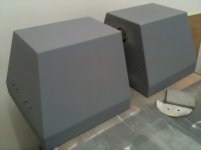
You could possibly name them the Daleks!pretty much finished now just the plinths to get done, you can now see the angled top unit tweeter module is completed.
You could possibly name them the Daleks!pretty much finished now just the plinths to get done, you can now see the angled top unit tweeter module is completed.
You could possibly name them the Daleks!
Nah that prize would probably go to the wilson alexandria speaker lol, only they are over £130,000

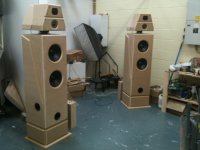
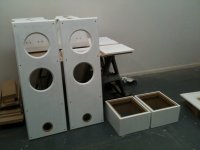
Hi all, finaly had some time to do a bit of work on my speakers, i was not 100% happy with the cone mids so i opted in the end for a 2" dome silk mid driver, this has massively changed the speakers and improved them as far as accuracy, after a few tweeks here and there and crossover adjustment i think im there with the sound i wanted to achieve, these sound awesome indeed.
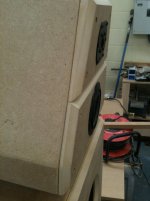
Ive also changed the cabinets side panel design slightly to a more sharper look.
To put it in perspective, ive always had proac speakers, i currently use a mint pair of proac response 3.5 on my system, i love them, they are large too at 52" high 18 x 18" and probably weigh in excess of 75kg each, i think original cost was £5k and worth every penny, indeed they have blown away anything ive ever compared them with, in other words ive never wanted to swap them because ive simply not found a good enough replacement in the last decade, until now, i will have no problem AT ALL, in swapping them for my new home made speakers, believe me this choice is not hard, the clarity and scale of soundstage produced by my home speakers is nothing short of astonishing, i realy mean that, they will stamp and destroy my proacs into tiny matchsticks and spit them out lol, theyre just awesome.
I cant wait to properly record a sound test with proper equipment, im hoping by next week my behringer stereo microphone for my full HD camcorder comes through the post, this microphone is perfect for recording the speakers at high levels and if you listen to my sound test on youtube wearing a good headphone set you should have a good idea how they sound, so keep an eye on my progress.
cheers all.
Attachments
Last edited:
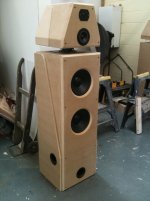
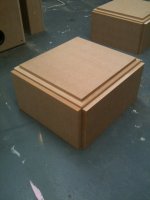
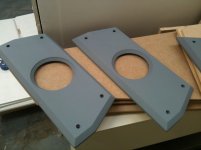
Heres the plinth, i thought it best the plinth complements the speaker cabinets in design features with beveled side panels, these will be black and veneered as well to match, the last photo is of the plinths in place, speakers are pretty much finished now and its just a case of finish now.
Attachments
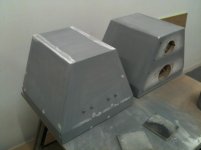
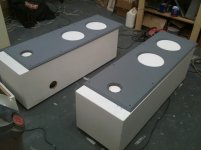
And so after sanding every inch of every piece i started with sealing the MDF with 2 coats of sealer sanding between coats, then 2 coats of primer sanding between coats and 2 coats of undercoat sanding between coats.
Only 1 more coat of dark grey primer, then 2 coats of satin black top coat then 2 coats of laquer polishing between coats.
Only 1 more coat of dark grey primer, then 2 coats of satin black top coat then 2 coats of laquer polishing between coats.
Attachments
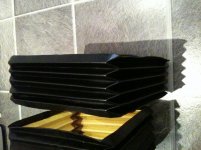
Here are some bellows i made to go under the head to cover the tilting mechanism, they are 12" square and covered in black faux leather.
I really like that. Did you use a template? And do you have pictures showing how you made them?
Some of us would love to know how to do that.
I really like that. Did you use a template? And do you have pictures showing how you made them?
Some of us would love to know how to do that.
I just used 4 sheets of A4 card, did not have any templates, like alot of my work just good old common sense, I don't have any photos of doing it but I guess you could find out on google/utube, I was at one point going to bin them, got a bit frustrated trying to fold them up after gluing the leather on but did it in the end.
I could make a little stills video of the stages if you can't find anything.
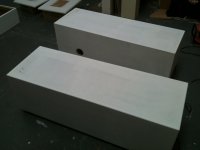
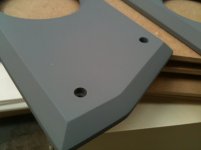
Started the primer coats, this primer reveals any flaws or minor imperfections so i can then spray a 2k filler primer to make all surfaces nice and flat ready for top coat.
Attachments
- Status
- This old topic is closed. If you want to reopen this topic, contact a moderator using the "Report Post" button.
- Home
- Loudspeakers
- Multi-Way
- New UK Member New Speaker Build Project.