What easy options are there for getting a reasonable-looking finish on MDF? I have neither the skill nor the patience for anything that will take many hours to complete, and I don't have a dust-free environment in which to work.
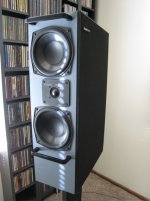
Given these constraints, I realise a showroom finish is unrealistic, but I would like my new speakers to look at least half-decent. The finished speakers will be constructed entirely from MDF, comprising four enclosures, two of 45l and two of about 10l which stack to make a pair of floorstanding speakers.
Given these constraints, I realise a showroom finish is unrealistic, but I would like my new speakers to look at least half-decent. The finished speakers will be constructed entirely from MDF, comprising four enclosures, two of 45l and two of about 10l which stack to make a pair of floorstanding speakers.
Interesting technique. In your case psvavles I would try brushing an enamel type paint on and wet sanding with progressively fine w&d paper, then apply a polish.
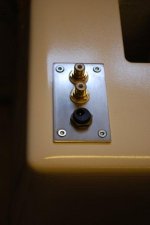
The priming is key, a proper wood primer must be used as automotive primer is too thin and you will go through gallons of it. The edges or any exposed MDF will likely need a rub down and further priming.
The priming is key, a proper wood primer must be used as automotive primer is too thin and you will go through gallons of it. The edges or any exposed MDF will likely need a rub down and further priming.
What easy options are there for getting a reasonable-looking finish on MDF? I have neither the skill nor the patience for anything that will take many hours to complete, and I don't have a dust-free environment in which to work.
Given these constraints, I realise a showroom finish is unrealistic, but I would like my new speakers to look at least half-decent. The finished speakers will be constructed entirely from MDF, comprising four enclosures, two of 45l and two of about 10l which stack to make a pair of floorstanding speakers.
Parts-Express used to carry some vinyl stick on finish that didn't look great, but it was cheap and easy and better than unfinished MDF. They don't seem to carry it anymore, but maybe you could find it somewhere else.
But really, the "easy" approach to half-way decent looking speakers is to use plywood and either edge band veneer or live with the way the plywood edges look. Then you can just rub on an oil finish and have really nice looking speakers with minimal effort.
Last edited:
MDF is never going to look very nice by itself whether treated with varnish or any other clear finish.
Trying to acheive a "Piano gloss" finish will entail a lot of work and even if done well will leave you with a finish that can be ruined quite easily unless you are very careful with the handling and cleaning of your speakers.
One route that woud be clean and involve nothing more than some accurate cutting with a very sharp knife and a steel rule would be to use "iron-on veneers". They are available in different woods and can be very effective if done well. The veneer can be finished by applying a shellac based sanding sealer followed with a good quality wax and polished, or you can leave out the shellac and just use wax; this can be a very satisfying job as the more applications of wax that you use, the greater the lustre you can produce.
The baffle will be the hardest part to do, but this could always be finished in a satin black spray finish. There are some good spray's from a company called "Plastikote" which you will find at B&Q (lots of colours) You could of course use these spray's for finishing your entire speaker!
I think that iron on veneers are available from Wilmslow Audio if not then a Google search will tell you.
A well polished real wood veneer can look exceptional.
Hope this helps
Jerry
You can use gray sandable spray primer available in a spray can at just about any hardware shop. It fills in small imperfections, dries fairly quickly, and can be sanded over and over if needed. It sticks to most anything that isn't greasy. In the attached pic it's adhered to vinyl simulated wood. I actually like the gray color itself and if the can is kept shaken up, the color comes out very even in a nice satin finish.
Attachments
Last edited:
Thanks for all the suggestions. I think I'm going to have a shot at an enamel paint finish. I had a good day yesterday, applying three coats of MDF primer/undercoat and sanding in between. The surface is becoming pretty smooth now and I'm feeling more hopeful.
I'm just working on the two small enclosures at the moment, until I'm happy with the results.
I'm just working on the two small enclosures at the moment, until I'm happy with the results.
Several companies offer spray can paints that can coverup blemishes in the wood and obviate the need for fine painting skills. Rustoleum has their Hammertone series, of which I used their Forest Green Metallic, poor picture:
PlastiKote (sp?) has their Fleck Stone series this in Hunter Green:
Both were pieces of cake to apply and hide a multitude of sins") .
.
Each come in a variety of colors.
Tom.
An externally hosted image should be here but it was not working when we last tested it.
.PlastiKote (sp?) has their Fleck Stone series this in Hunter Green:
An externally hosted image should be here but it was not working when we last tested it.
Both were pieces of cake to apply and hide a multitude of sins
.Each come in a variety of colors.
Tom.
You can use gray sandable spray primer available in a spray can at just about any hardware shop. It fills in small imperfections, dries fairly quickly, and can be sanded over and over if needed. It sticks to most anything that isn't greasy. In the attached pic it's adhered to vinyl simulated wood. I actually like the gray color itself and if the can is kept shaken up, the color comes out very even in a nice satin finish.
I used this method combined with regular white spray paint.
This will not give you a perfect finish but if you're short of time and patience it will do.
Attachments
Beautiful coatings I know and have some samples are NEXTEL Suede Coating and ALEXIT Decorlack 341-85.
www.mankiewicz.de
Mankiewicz Coatings
831 S 21st St
Saint Louis, MO 63103
314-783-2110
www.mankiewicz.de
Mankiewicz Coatings
831 S 21st St
Saint Louis, MO 63103
314-783-2110
The primer/undercoating is going well so far and I'm now on the fourth coat on the small enclosures. One problem: I am getting deep brushstrokes in the finished surface, requiring lots of sanding. I think this is going to be a problem when I come to apply the final paint. Is it my technique that's wrong or what?
Good brushing technique requires alot of practice and experience with many paints so you could try the foam mini roller as suggested or you might try a "paint pad" which are readily available. You are probably applying the paint straight from the tin which might mean it is a little to thick to allow the paint to flow out properly. Check to see what solvent is used for the paint and then use some of this to dilute the paint a little.
If you need to remove brush marks or stipple left from applying your paint then the best way to remove them is by using a cork sanding block with wet'n dry paper wrapped around it. This should only be done when the paint is "hard" dry. Use it wet with a little bit of soap in the water. If you have only a fine texture to remove then "240" grit will be a good starting point and then maybe 360/400 grit. You do not need to go any finer with the grit of paper used as subsequent coats of paint need to "key" into the surface.
Clean the surface occasionally to check your progress and also gently trace your fingertips over the surface when it is wet as this will reveal any texture still to be removed.
"Rub it"
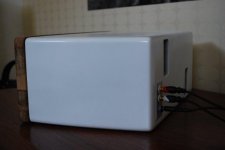
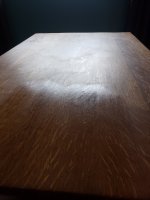
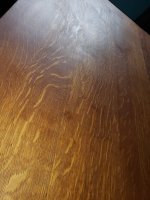
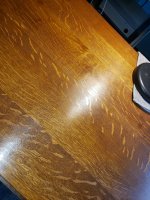
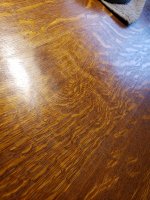
With veneers waxes with carbuba work good. Oak has deep natural grains, its going to take 3 wax applications.
Its starting to look buttery. Pictures dont do it justice, its worth the extra bit of effort. And should last a good while, even on desk surface that sees a lot of traffic.
Its starting to look buttery. Pictures dont do it justice, its worth the extra bit of effort. And should last a good while, even on desk surface that sees a lot of traffic.
Attachments

- Home
- Loudspeakers
- Multi-Way
- Finishing options for MDF