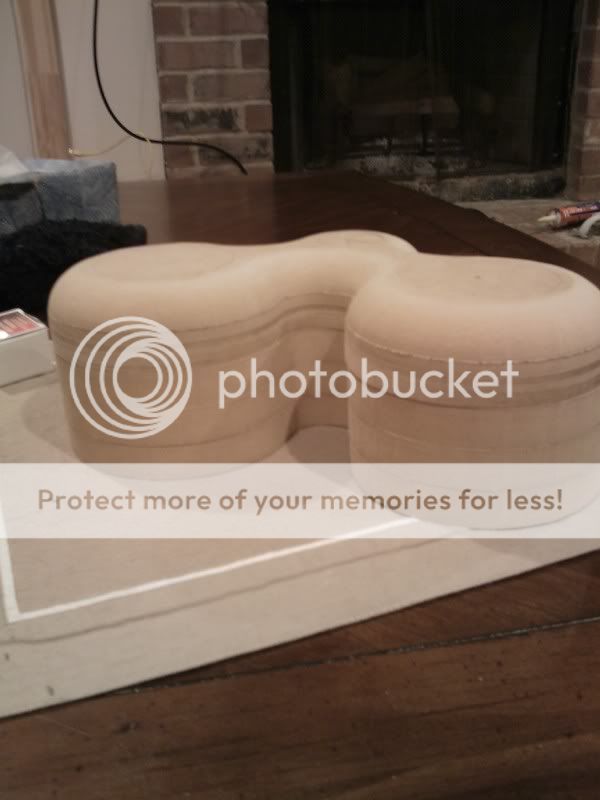
I've had materials for a small sized set of 2-way speakers for my bedroom for a while, and I finally came up with a design I was happy with. Earlier this week while sick and delirious with fever, I became inspired by the Sony Walkman logo.
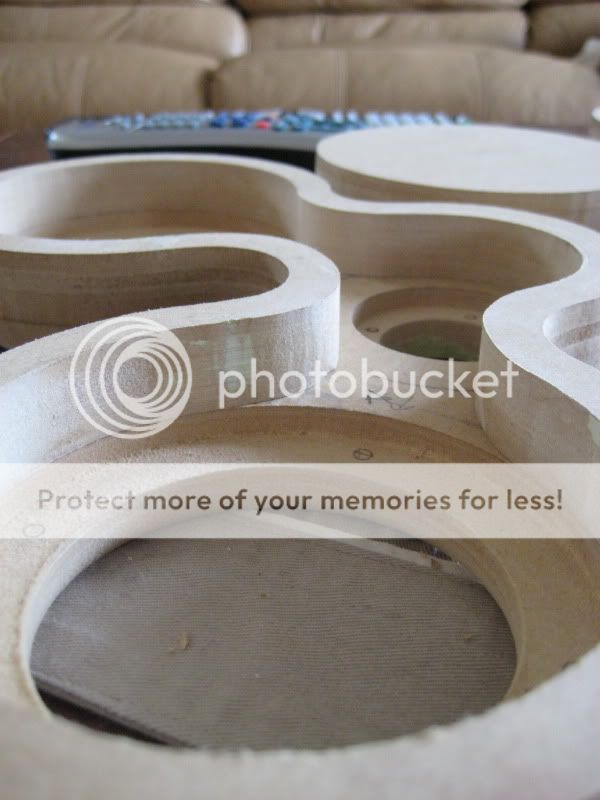
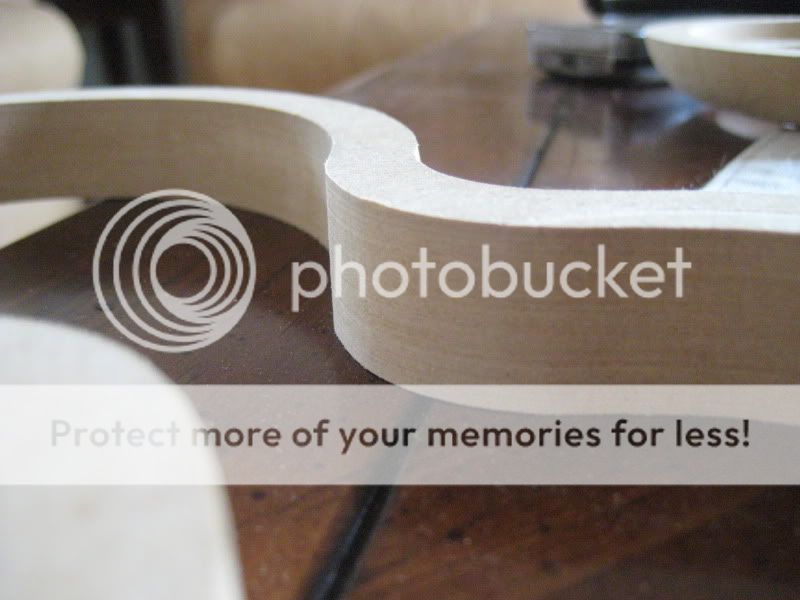
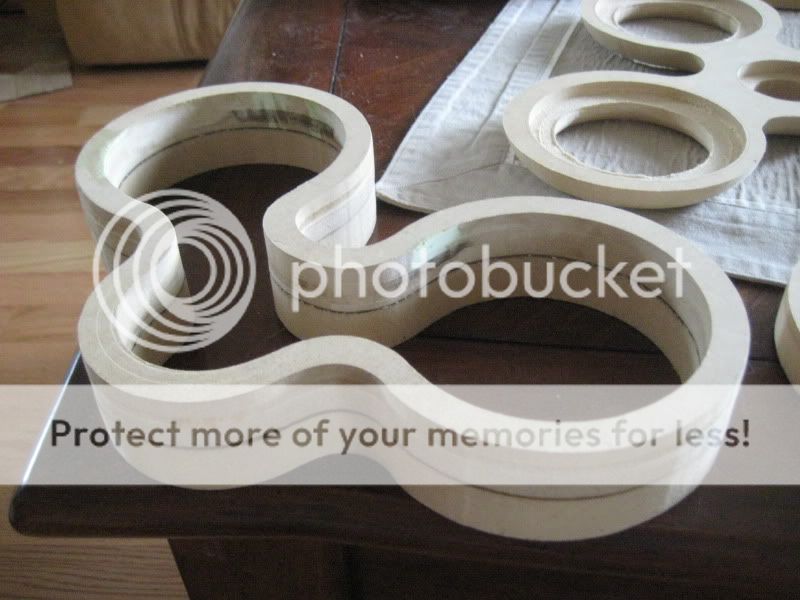
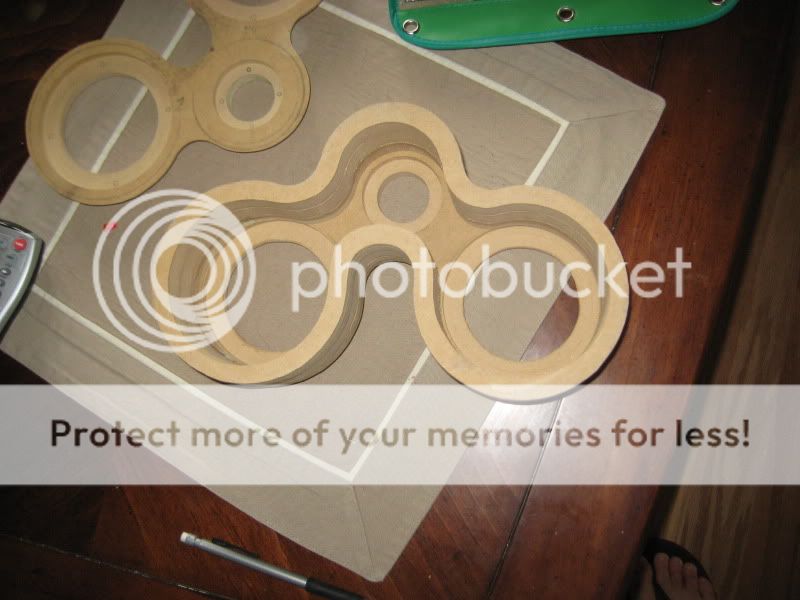
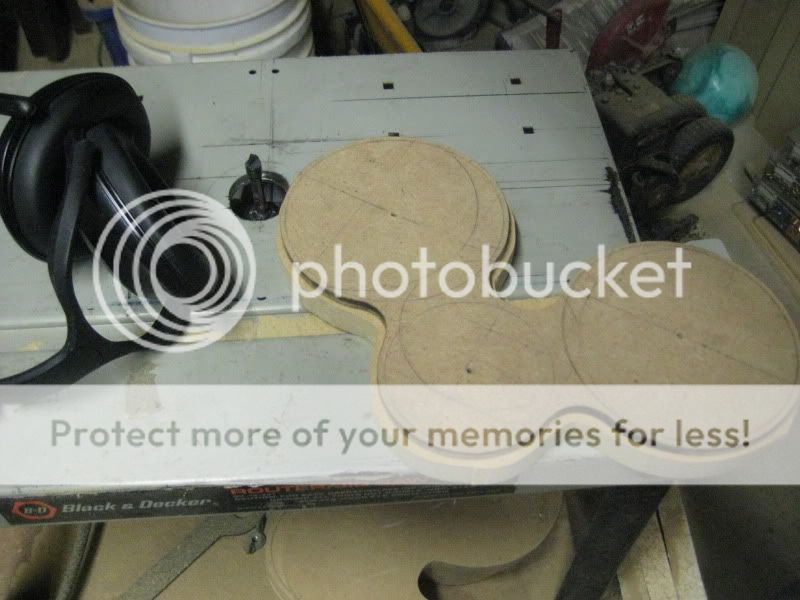
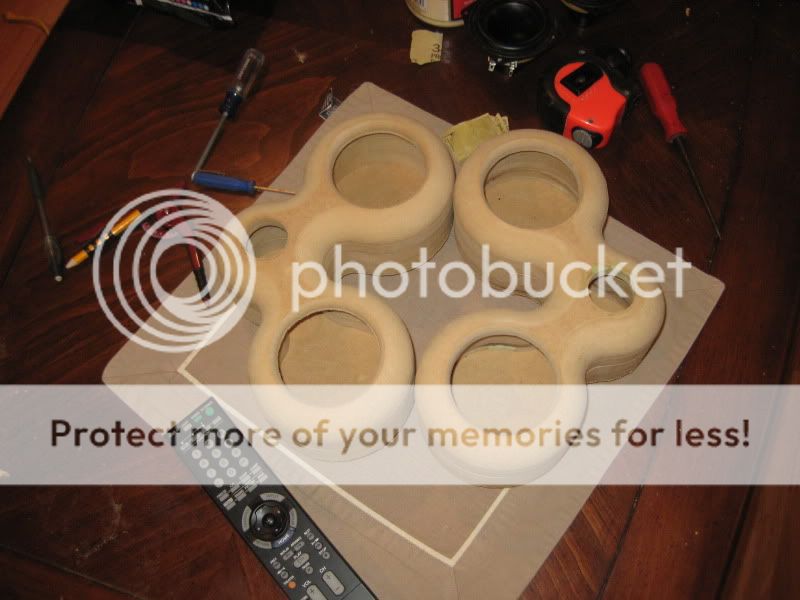
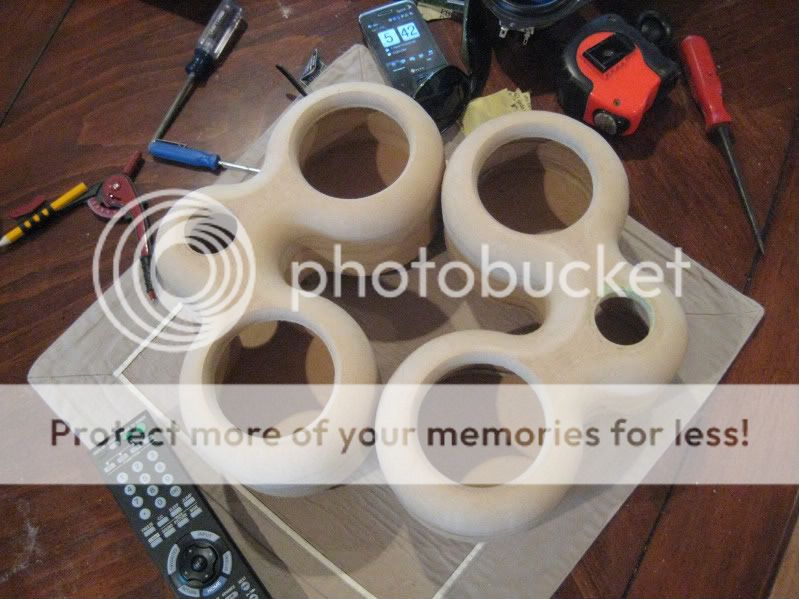
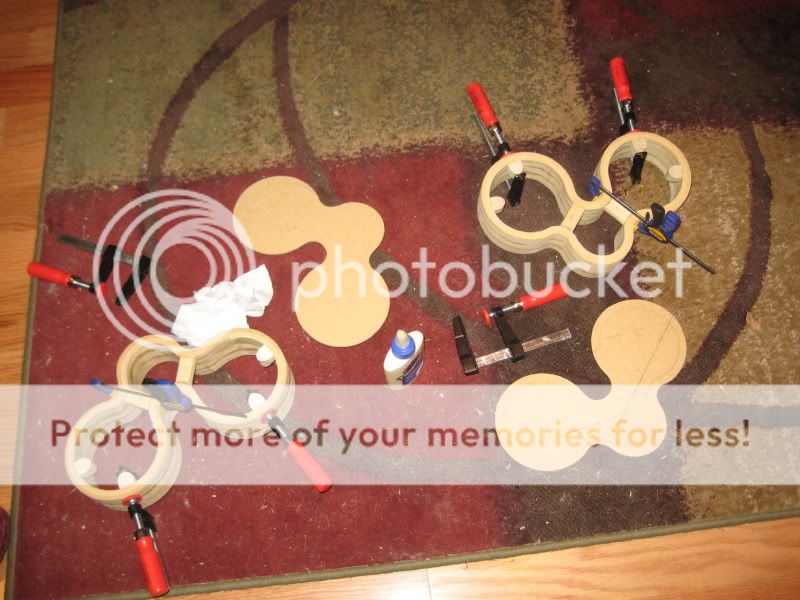
I went ahead and started tracing bowls and cups and such until I had a design I liked. I used my router and circle jig to cut out this 1/4" template. I used this template to cut out five identical pieces to make up each side (I only have one side cut atm) Each egde will be rounded over with a 1" radius.
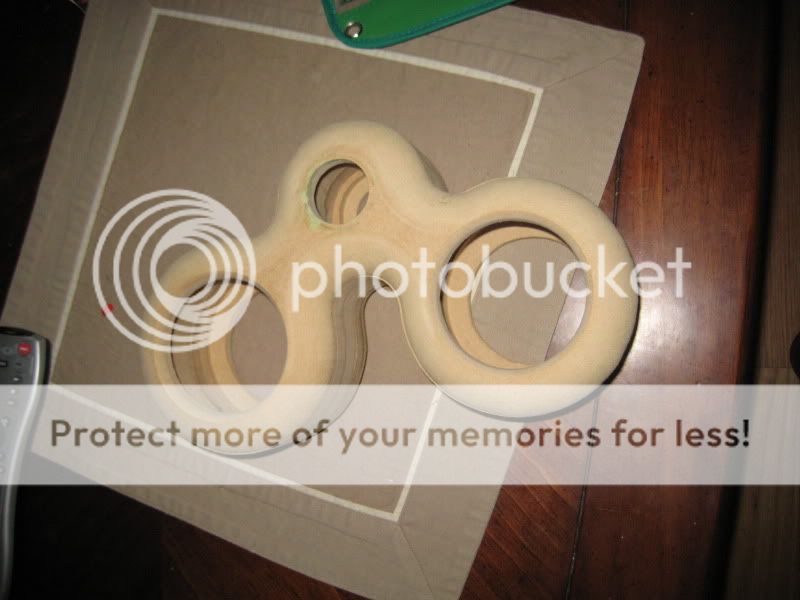
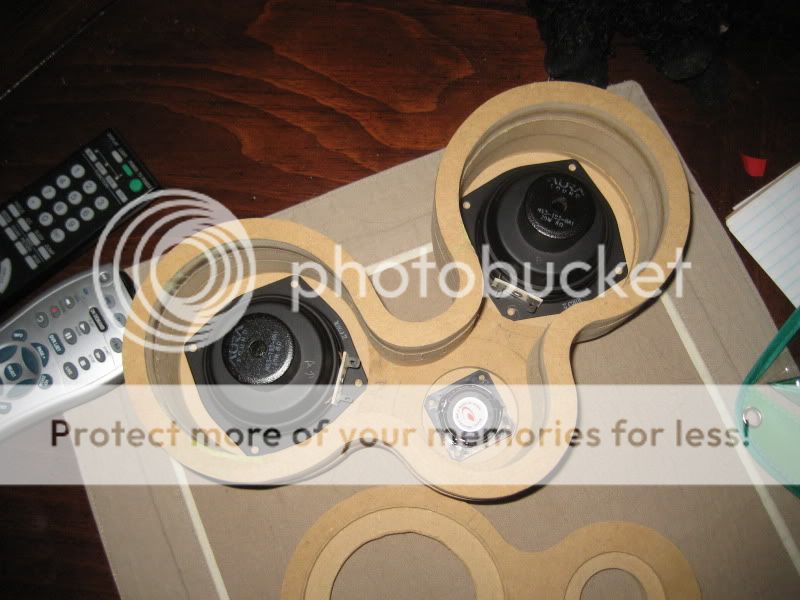
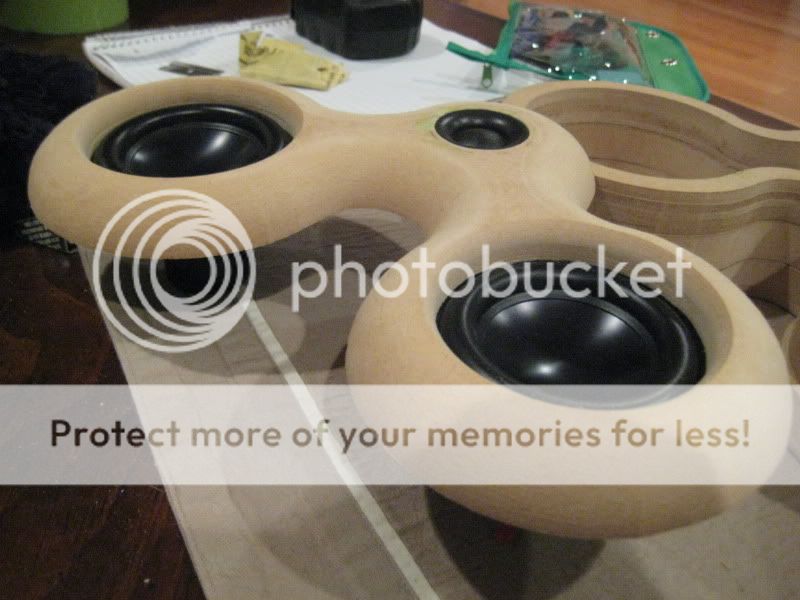
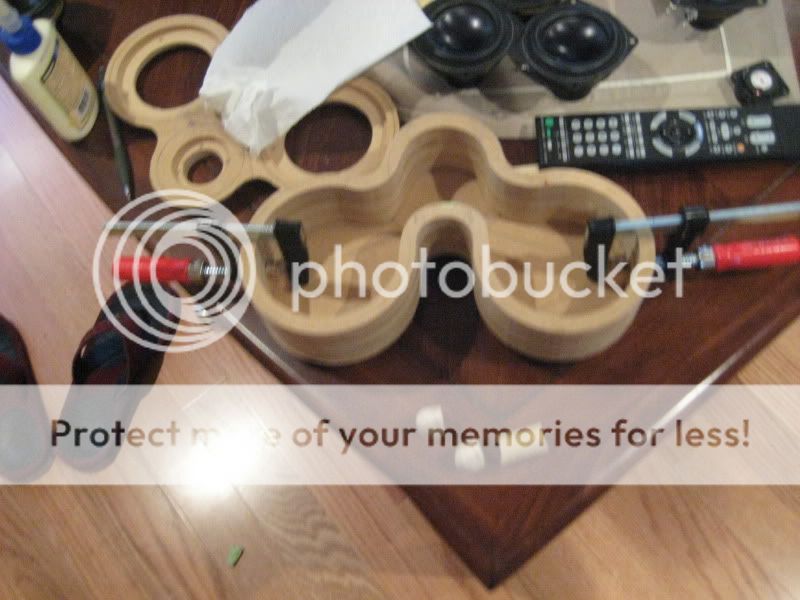
Each speaker will house 2 Aura NS3s, a Daytom rear-mount tweeter, and a premade PartsExpress 2-way crossover (for the time being). I've used this driver combination before, so I'm not too worried about the crossover or the limited space, but ultimately aesthetics were my main focus with this set and sofar they have turned out really nice.


I went ahead and started tracing bowls and cups and such until I had a design I liked. I used my router and circle jig to cut out this 1/4" template. I used this template to cut out five identical pieces to make up each side (I only have one side cut atm) Each egde will be rounded over with a 1" radius.
Each speaker will house 2 Aura NS3s, a Daytom rear-mount tweeter, and a premade PartsExpress 2-way crossover (for the time being). I've used this driver combination before, so I'm not too worried about the crossover or the limited space, but ultimately aesthetics were my main focus with this set and sofar they have turned out really nice.
Pretty funky, nice curves. Any sonic objective to the weird baffle shape?
Not really, I just happen to put a little more emphasis in the look of my speakers than the sound. I've made several small variations of a sealed enclosures for the NS3s and I've liked how all of them have sounded, so I figured I could take some liberties in the design this time around.
Really nice routing and design!
Unfortunately, i've read that round baffles are really bad for edge diffraction, since the distance is identical to the edge all around.
Keep the updates coming!
I think ultimately I just don't have a very audiophilic ear.
")
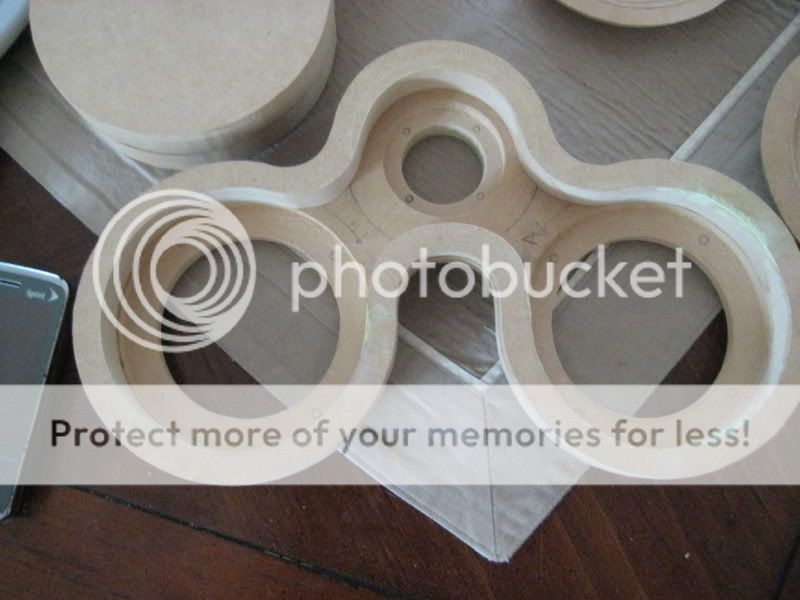
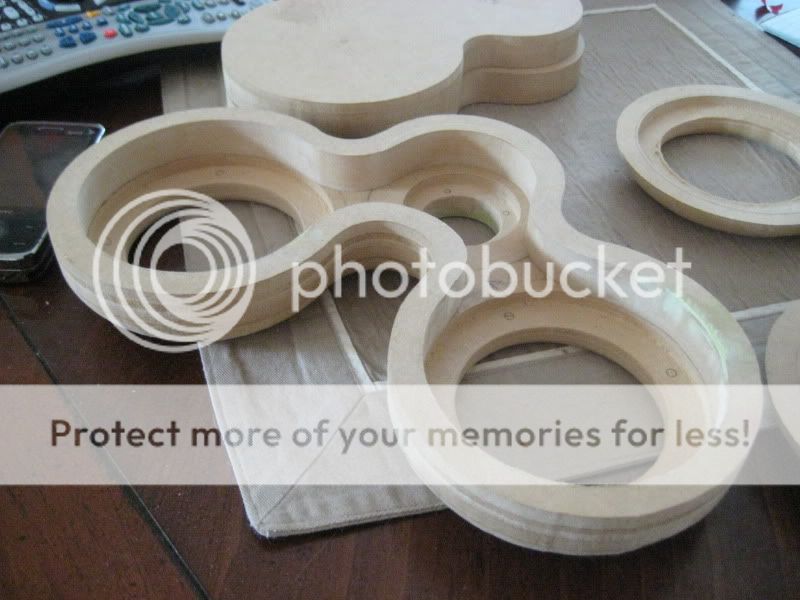
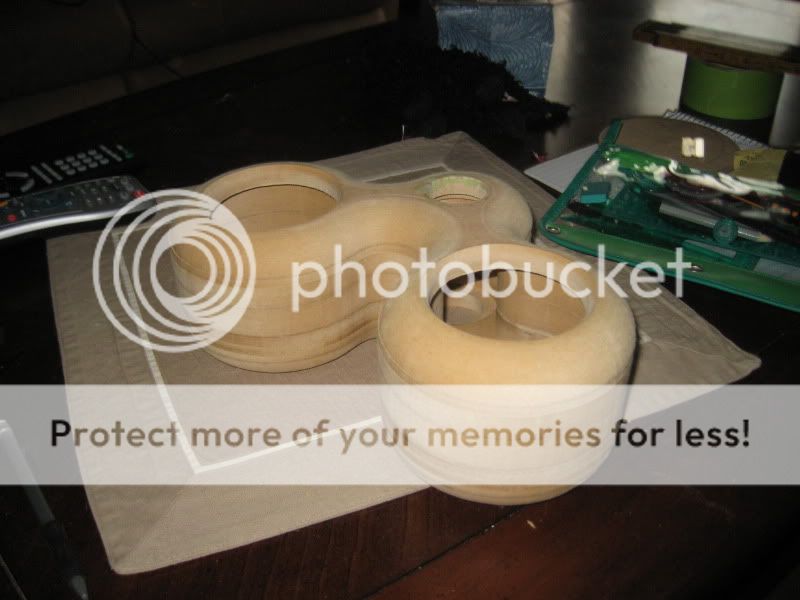
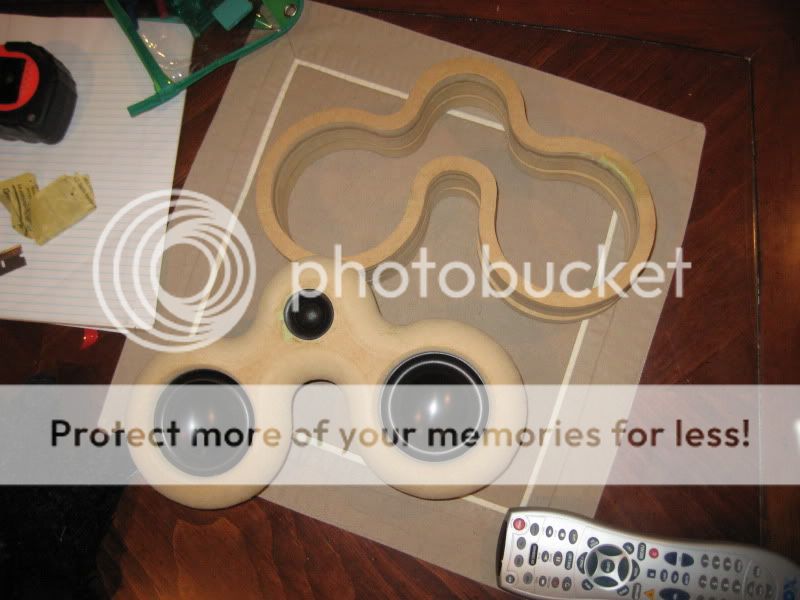
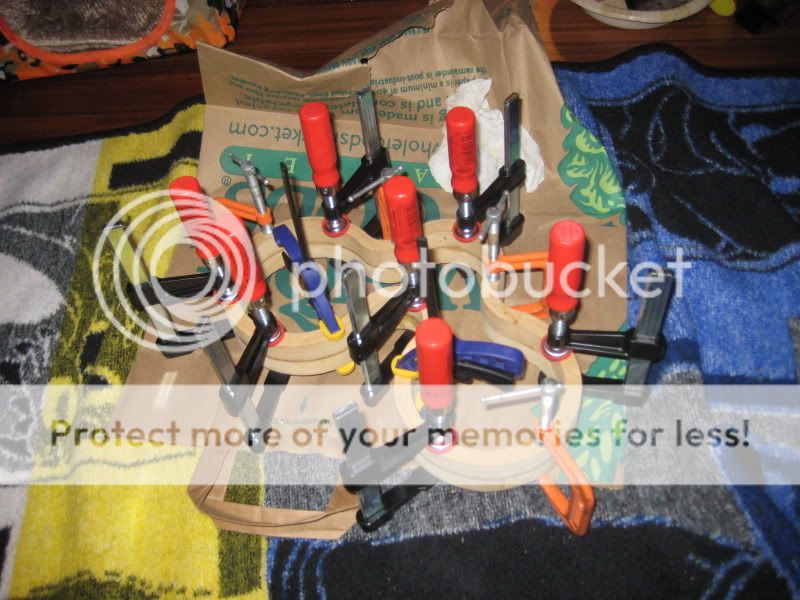
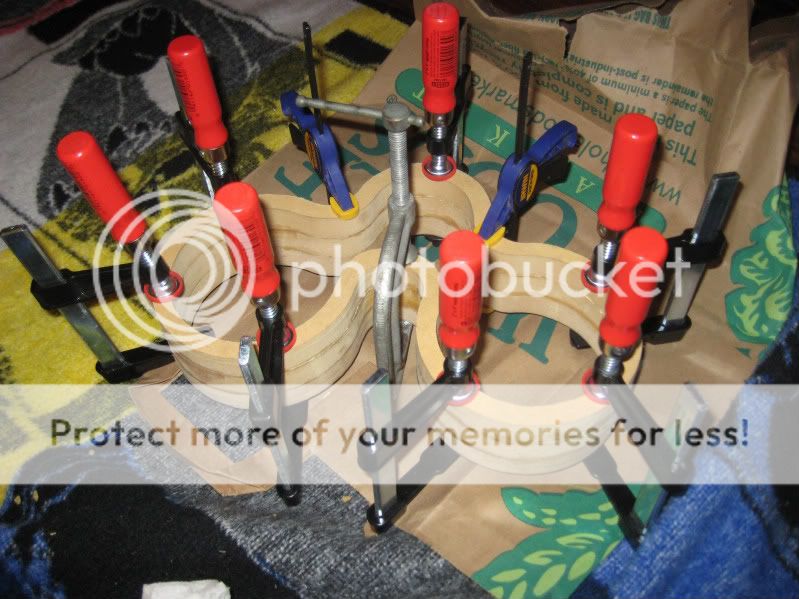
I finished cutting out the template for the inner panels. I used the circle jig and did the rest freehand on the router table. I sanded everything clean using the router and a sanding drum and it looks pretty good imo.


Nice cabinet , spud !
pre-built x-o... glad you said "for the time being.."
I suspect you may have a diffraction dip somewhere that might be able to be treated with a designed and measured x-o.
but....
Nice cabinet.. please make sure you post finished pics..
ps.. you may find the join lines between the mdf layers a bit had to hide without using some sort of textured finish. have fun
pre-built x-o... glad you said "for the time being.."
I suspect you may have a diffraction dip somewhere that might be able to be treated with a designed and measured x-o.
but....
Nice cabinet..
please make sure you post finished pics.. ps.. you may find the join lines between the mdf layers a bit had to hide without using some sort of textured finish. have fun
ps.. you may find the join lines between the mdf layers a bit had to hide without using some sort of textured finish. have fun
I was thinking about skimming the entire surface with a few layers of bondo, or maybe even covering it with some laminate or even some veneer before prepping for paint.
That looks really funky, I like it! Those NS3s are very wideband drivers, mabye the tweeter would work better as a supertweeter (8k or so), but then perhaps you'll be too far off axis for that to work optimally? Try some modelling with Basta! software to get an idea what the baffle will do
this is what I'm talking about!
I love creative stuff like this. Amazing work!
Much thanks.
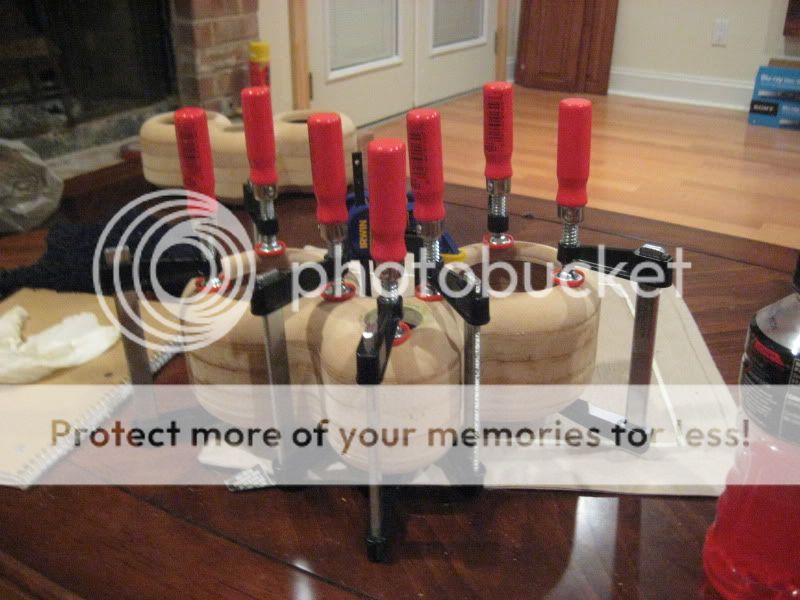
Just finished the second cabinet, and all of my main routing is done. I can finally clean up the 1/2" of dust covering an entire corner of the garage.


Did you work for Walt Disney?
No, but I do admire his work.
The interior edges on the second cabinet didn't line up perfectly when they were iin the right place, so I taped them together and ran the whole thing on the router table one more time, and now they are all nice and flush.
I just couldn't leave it like that considering how good everything else has turned out thus far.
An externally hosted image should be here but it was not working when we last tested it.
Yeah, as someone who is definitely into the science of good sound, but also very much into attractive and interesting design, this is an inspiration. I can't wait to finish the couple projects I'm working on now so I can start getting to more creative works.
I'm going to be getting my hand on a really nice scroll saw soon. I'm excited about that
I'm going to be getting my hand on a really nice scroll saw soon. I'm excited about that
Yeah, as someone who is definitely into the science of good sound, but also very much into attractive and interesting design, this is an inspiration. I can't wait to finish the couple projects I'm working on now so I can start getting to more creative works.
I'm going to be getting my hand on a really nice scroll saw soon. I'm excited about that
I've been told it's really the best way to cut MDF, but I can't seem to trust it enough over my router. Although I did wind up with some unexpectedly nice cuts when cutting the bulk out of some of those panels, I'm still iffy about the blade not staying straight in turns and I just worry about cutting things too much.
I really want to get a band saw eventually, but right now I think I need a drill press instead.
If you're referring to a jig saw, I've always got one of those. What I'm referring to is a proper scroll saw, like one of these dealies:
And yes, nothing beats the router for doing precise circles. I don't have the benefit of a router table, though..
An externally hosted image should be here but it was not working when we last tested it.
And yes, nothing beats the router for doing precise circles. I don't have the benefit of a router table, though..
And yes, nothing beats the router for doing precise circles. I don't have the benefit of a router table, though..
If you have enough scrap wood, you should. You can even build it alongside a table saw to make use of the fence. I'm pretty sure I was a build somewhere on this site: http://woodgears.ca/
I now have all of the internal panels done. I'm working on cutting out some supports from a 3/4" square poplar dowel to screw the back panel into. I was trying to run it on the router to try and match the inside contour, but I think I'm going to have to just run it very precisely on the tablesaw.
I also went and picked up some small 4" Bessey clamps, mainly to try out and return if I didn't like them, but I think I may hold on to them. I was supposed to get 8 but forgt 1 apparently.
I do have a question though... Has anyone ever threaded a hardwood in order to use a machined screw? It seems like if it did fail, you could always replace it with a coarse thread wood screw.
I used a 3/4" square poplar dowel to make blocks for the screws to go in through the back panel. I ran them on the router to match the inside contour.


And cut them into 1" blocks.

The original layout, which would eventually get changed.

I ran the blocks on the router with a sanding drum, just to clean them up a bit.

And clamped them in
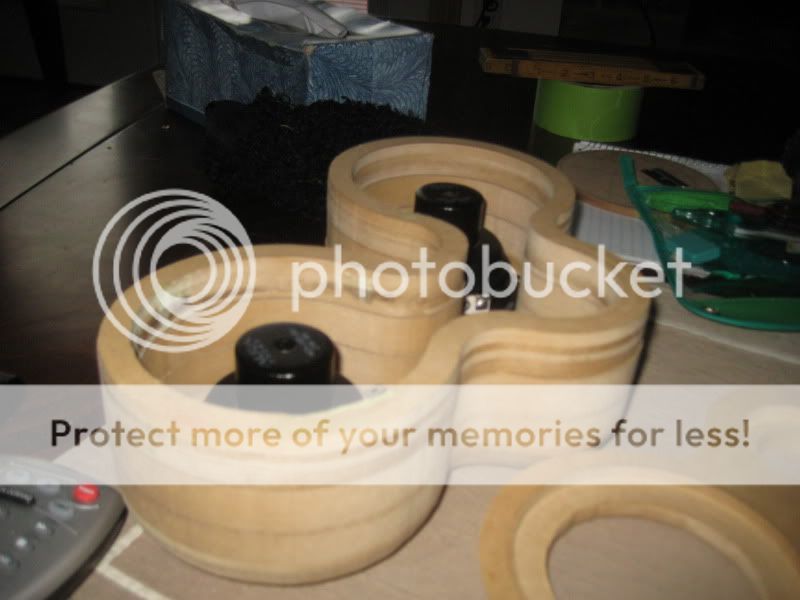
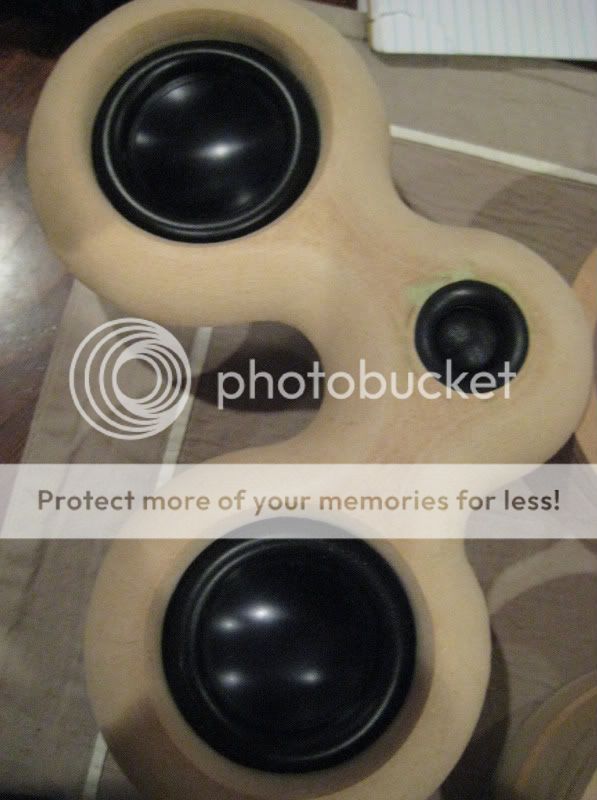
Once I was done with that, I glued the baffles on each speaker. I had to be cautious not to mess up that clean edge around the woofers.

And cut them into 1" blocks.
The original layout, which would eventually get changed.
I ran the blocks on the router with a sanding drum, just to clean them up a bit.
And clamped them in
Once I was done with that, I glued the baffles on each speaker. I had to be cautious not to mess up that clean edge around the woofers.
- Status
- This old topic is closed. If you want to reopen this topic, contact a moderator using the "Report Post" button.
- Home
- Loudspeakers
- Multi-Way
- Funky NS3 MTM Build