Hi everyone,
i suppose there is a formula for making great speaker stands, but i just thought of being more adventurous and experimental.
i thought of using clear acrylic for the speaker base and the stand base, which looks more space-saving, and the middle part will be used for putting cds.
the sides will be MDF, but is there really a need for primer? i had painted MDF before, and it requires a few layers of acrylic paint to look great (3-4 at least). I will be using pale cream colour for the sides.
with regards to the issue of the speaker spikes, i intend to use those clear rubber footers that have the aesthetic look, yet does not destroy the marble floor. is there any comment on this? must i really use spikes, even though my floor is not carpeted?
do you all think it's a feasible idea, as in will it make the speakers sound better than putting the bookshelf speakers on top of a cabinet (which i'm doing right now), and just as good as those commerical stands?
the magico Mini II stand looks awesome, but i think i need quite a number of 1-inch thick MDF to make the body of the stand.
http://www.magico.net/?d=03_Products/02_Mini_II/3.html
http://www.magico.net/?d=03_Products/02_Mini_II/4.html
anodized aluminium! so cool!
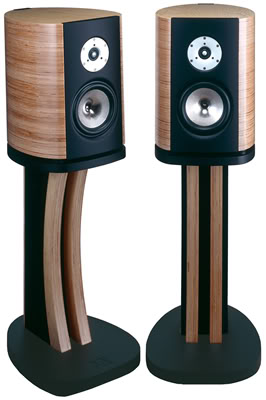
any comments on the difficulty level of making such a pair of stands? (my speakers, unfortunately, are boxy, and not rounded types, and it's possible to get the MDF vendor to cut the curved shape of the body).
Thanks in advance!
i suppose there is a formula for making great speaker stands, but i just thought of being more adventurous and experimental.
An externally hosted image should be here but it was not working when we last tested it.
i thought of using clear acrylic for the speaker base and the stand base, which looks more space-saving, and the middle part will be used for putting cds.
the sides will be MDF, but is there really a need for primer? i had painted MDF before, and it requires a few layers of acrylic paint to look great (3-4 at least). I will be using pale cream colour for the sides.
with regards to the issue of the speaker spikes, i intend to use those clear rubber footers that have the aesthetic look, yet does not destroy the marble floor. is there any comment on this? must i really use spikes, even though my floor is not carpeted?
do you all think it's a feasible idea, as in will it make the speakers sound better than putting the bookshelf speakers on top of a cabinet (which i'm doing right now), and just as good as those commerical stands?
the magico Mini II stand looks awesome, but i think i need quite a number of 1-inch thick MDF to make the body of the stand.
http://www.magico.net/?d=03_Products/02_Mini_II/3.html
http://www.magico.net/?d=03_Products/02_Mini_II/4.html
anodized aluminium! so cool!
any comments on the difficulty level of making such a pair of stands? (my speakers, unfortunately, are boxy, and not rounded types, and it's possible to get the MDF vendor to cut the curved shape of the body).
Thanks in advance!
If you store you CDs there, aren't they going to rattle and buzz when loud music is playing?
I'm not sure 3/4" vertical risers are going to be solid enough, especially with no brace across the back. You might want to double up to 1.5" on each side.
Have you consider or investigated the cost of thick acrylic top and base plates. I'm guessing 3/4" acrylic would be tolerable at best. I would guess 1" would be better.
Do you already have a source for this acrylic material? Just curious what that source is. Always good information to have around.
steve/bluewizard
What kinds of dimensions would you be looking at? The taller it is, the thicker the vertical risers would need to be. I also suggest using some form of bracing. Furthermore, I think I would refrain from putting CDs in the space unless it is going to be a VERY solid stand and having the speaker on felt pads, so the stand would not vibrate a lot. Anyway, thats just my $.02 ")
Dear all,
thank you for the kind advices!
1. ok, firstly, to make the whole process simpler, i'll not be drilling any holes, and hence i will be using industrial strength epoxy glue (which i used it in another non-hifi project before. and it's so much stronger than those translucent epoxy glue).
and hence i will make sure that there's no unfilled cavities, and also to make sure that the MDF after cutting, have no obvious cavities anywhere.
2. haha, i hardly turn up the volume of my amplifiers. i usually turn it up at 7 or maximum 9 o'clock position to avoid disturbing other rooms in the house. and hence i think the cds will not rattle and buzz that much, i suppose so?
3. hmmmm... i never thought of bracing the back, because of aesthetic appeal. if the need arises, i will get a 1 inch MDF board for the vertical riser (i had bought before a piece of around 90cm X 38cm X 2.5cm MDF board in singapore for less than 12 US dollars).
i have a source for acrylic material. recently bought a piece for some other non hifi DIY project, measuring around 21cm X 35cm X 1cm with all four sides beveled 2.5cm, and sets me back at around U$44 in a factory that produces acrylic-only products in singapore.
4. i'm looking at 24" or slightly lesser because i anticipate installing a pair of super tweeters in the near future. (the super tweeters should be at the ear level, or the speaker tweeters?).
if i use those translucent acrylic stops which have a bit of rubbery feel, will the stands still vibrate a lot?
5. the magico mini stands has a 2.7 degree tilt at the top plate... will the speakers slide off the top plate? what can be done to secure them other than blue tack or the ball bearings used in the magico stands? how does the ball bearings prevent the speaker from sliding?
so sorry, i don't understand physics that much. Please enlighten me. Thank you!
dear all, i'm halfway through my project.
tomorrow shall be the full-blown scale, and make-or-break day.
but can anyone please give me advice on this:-
the ball bearings issue. will the speakers slide off from the top plate, esp since it's tilted at an angle?
i don't think so at all, otherwise magico will be in deep trouble.
http://www.magico.net/?d=03_Products/02_Mini_II/3.html
however, how does such mechanism work?
because i intend to get some ball bearings to make it 'beautiful'. haha
Thanks!
The ball bearings work because there are small convex recessions for each ball bearing built into the MINI cabinet. This allows it to stay in place, because it would have to roll "up and off" each of the bearings in order to roll off the stand. If your speakers will have such "divots" in them, then you can use the ball bearings. However, I am not too sure how these work, but I am assuming that they dampen a lot of horizontal vibration, if there actually is such a thing
Best of luck with your stands, let us know how they turn out and of course put up some pics of them if you can.
Best of luck with your stands, let us know how they turn out and of course put up some pics of them if you can.
DONE! my DIY speaker stands!
Thanks, BERENO! and here's the latest update (completion!)
After months of (over)careful planning, working out of budget, sourcing of materials, changing and throwing away ideas time and time again, i finally settled on the easy way out....
(Note: All prices are in SGD, singapore dollars, and all the shop names mentioned are in Singapore as well)
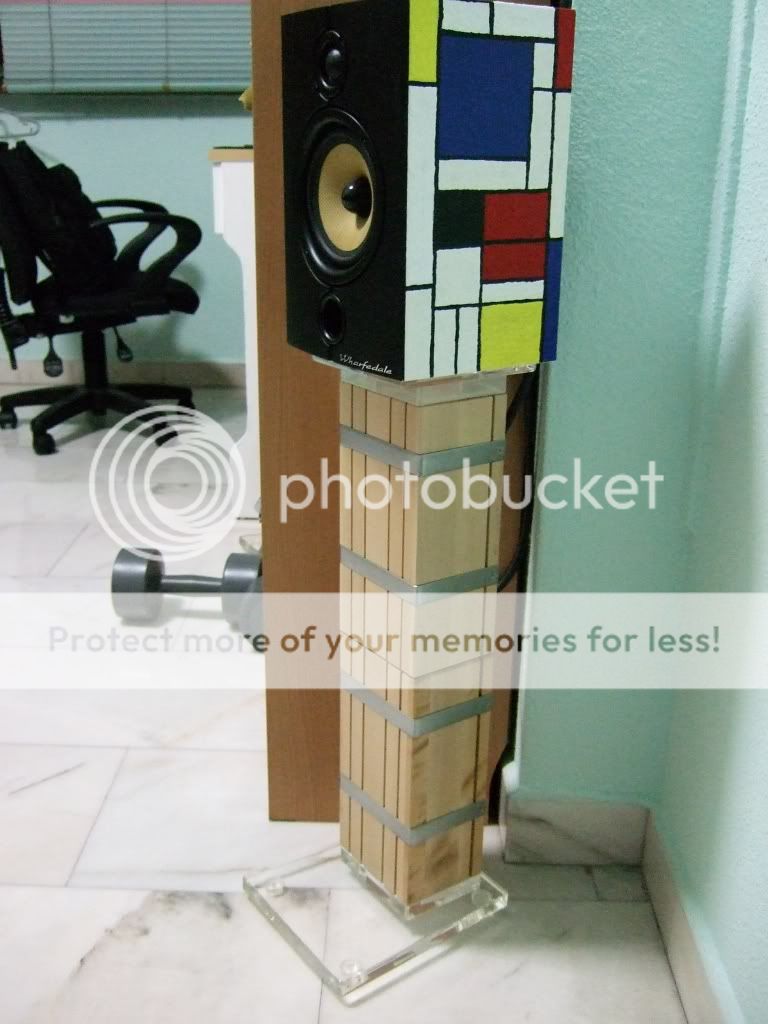
The Piet Mondrian-inspired acrylic paint painting is done on the Wharfedales a few months back. Just trying to have something new other than the normal wood veneers. Same goes for the speaker stand design.
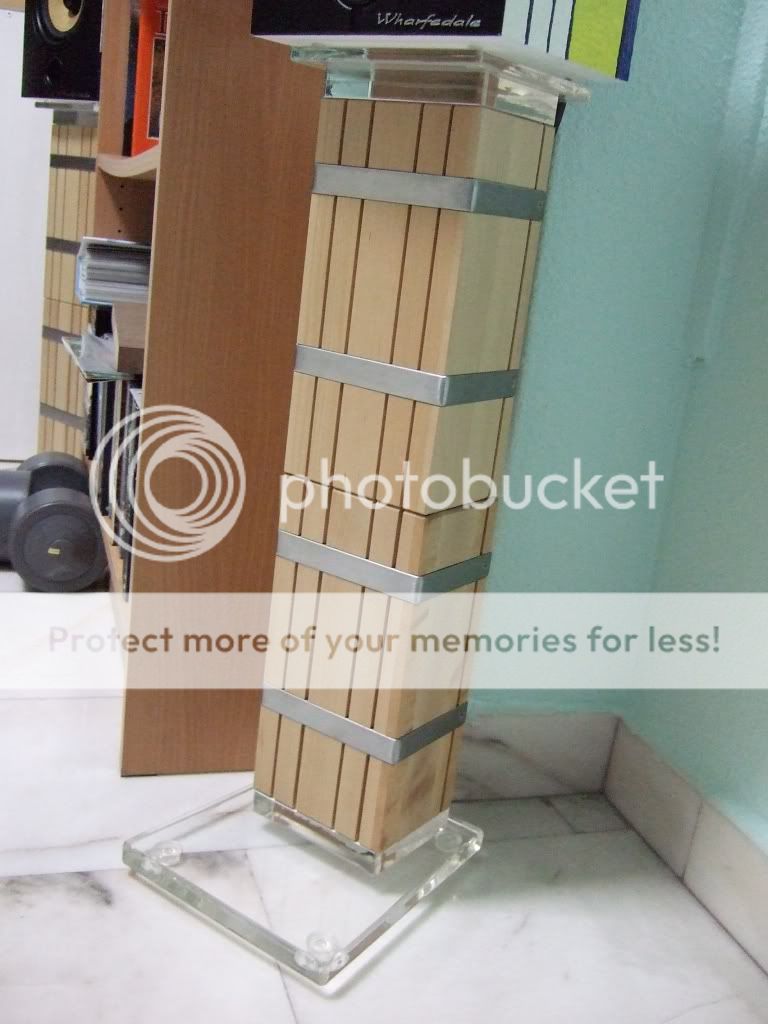
1. Four birch knife block from IKEA, at $15.90 each. it's birch, real tough sia, and heavy (i think i carried more than 20 kg of blocks back home). 'Ready Made' and also somewhat matches my design guideline and my speakers.
http://www.ikea.com.sg/catalog/product_display.asp?art=10066670-503-8-18-549351825-87741594
it's definitely more worth it than getting a carpenter or wood supplier to cut out my desired design (all thrown to the drain). because, i won't be getting my hands dirty, or spend time explaining my ambitious designs, and the carpenters who quoted me are charging exhorbitantly (understandably) in my opinion, and all wood suppliers are only interested in wholesale.
2. Industrial 3 tonne epoxy glue (tougher than the translucent type). mixing the resin and hardener becomes a breeze after the previous DIY earring holder project for my babe.
3. 4 pieces of clear acrylic, with polished and buffed edges and sides, to add up to the total height of 24" (one on top and one at the bottom of the block), and of course, this adds to the total cost unfortunately. 2 clear acrylic for base plate, 2cm thickness X 8 inch X 9 inch (tapered inwards). 2 pieces of clear acrylic for top plate, measuring 6inch X 6inch X 1cm thick.
this design comes in mind that i want my stands to look minimal and as less space-consuming as possible. and hence, the smaller base plate than the ready-mades, and indeed the whole design looks like a disappearing act.
total costs (second time i'm buying from this acrylic manufacturer in Defu Ave 2) is $110. Reasonable, considering the effort needed to buff the sides, and the tapering, and of course, chloroforming the small pieces to the base and top plates.
4. silicon footers for the base, and small little footers for the top plate for the speakers. total cost is less than $10 readily available from DIY shops.
5. White acrylic paint from ArtFriend. used as coating over the 4 pieces of acrylic, before glueing the acrylic to the knife block. this will prevent the ugly appearance of the grey epoxy glue on the clear acrylic.
i understand that this is not an exactly hifi solution, but i like the design to be transparent, and do not want to entertain the thought of spikes hurting the marble floor, and the possibility of being knocked over easily (the auntie from Martin Electronics advised me strongly against spikes).
and being an Arts student, i'm more concerned about the aesthetics rather than the coupling/decoupling issue in which i have no idea at all. and i'm not skilled in drilling holes or whatsoever, so i use the non-hifi solution of glueing everything together using epoxy glue to good effect.
ok, it may not sound that fantastic huh? but it helps to de-elevate the speakers from the top of the cupboard to my listening level, which is the main purpose. and it indeed sounds not bad, with more details!!! i ain't bluffing you, but it's true ok, while listening to Elliott Smith's XO.
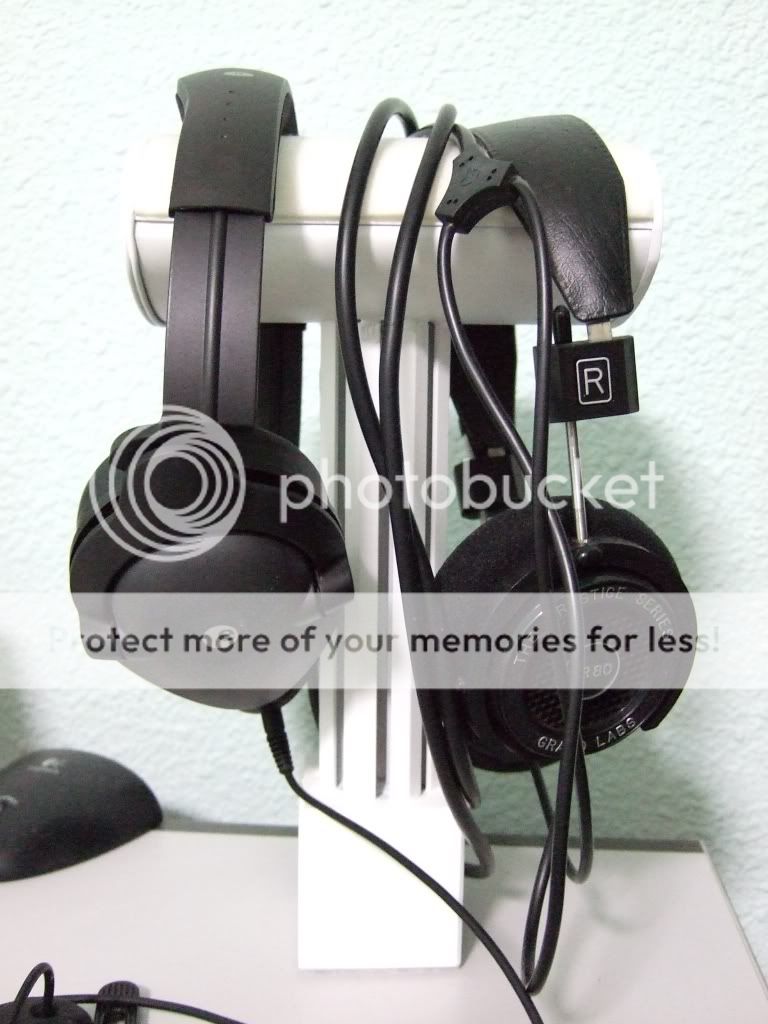
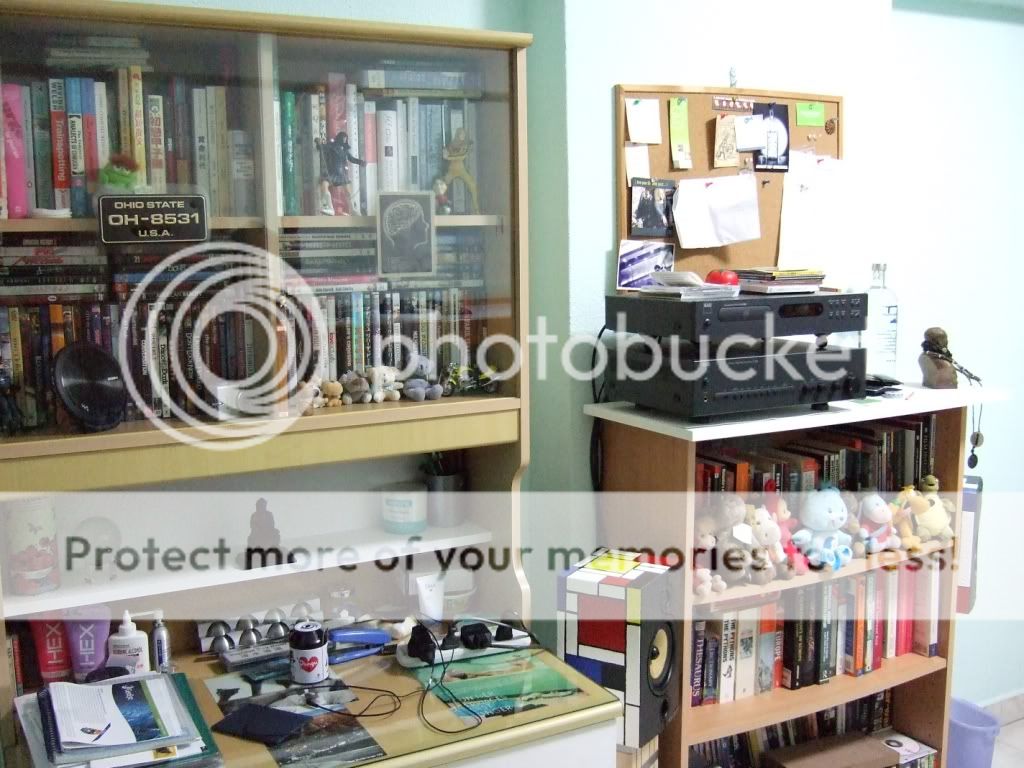
First picture showing the DIY headphone stand that i made a year ago, using a $2 marble slab as a base, from Daiso, and the body (i got it when i helped out at BroadcastAsia 2007) is those aluminium used as the support frame of those exhibits in exhibitions, and the top is a oval-shaped Van Houten chocolate container. was planning for quite some time, but suddenly everything comes together as the materials formed a perfect combo at very little cost.
Glued using normal strength epoxy glue, and it looks like welded parts after the white spray-painting. used felt material bought from ArtFriend for the top and also for the bottom. total cost is less than 15 bucks (inclusive of eating up the chocolates inside the container).
holds 2 pair of headphones perfectly (Sennheiser EH2200 bought many years ago, primarily for movie purposes, Grad SR80 for music)
My DIY Speaker Stands. not far off from my ideal design, and a nice compromise.
Took leave on Thursday to collect the acrylics and finishing everything up. Faxed design over to the acrylic manufacturer a week beforehand.
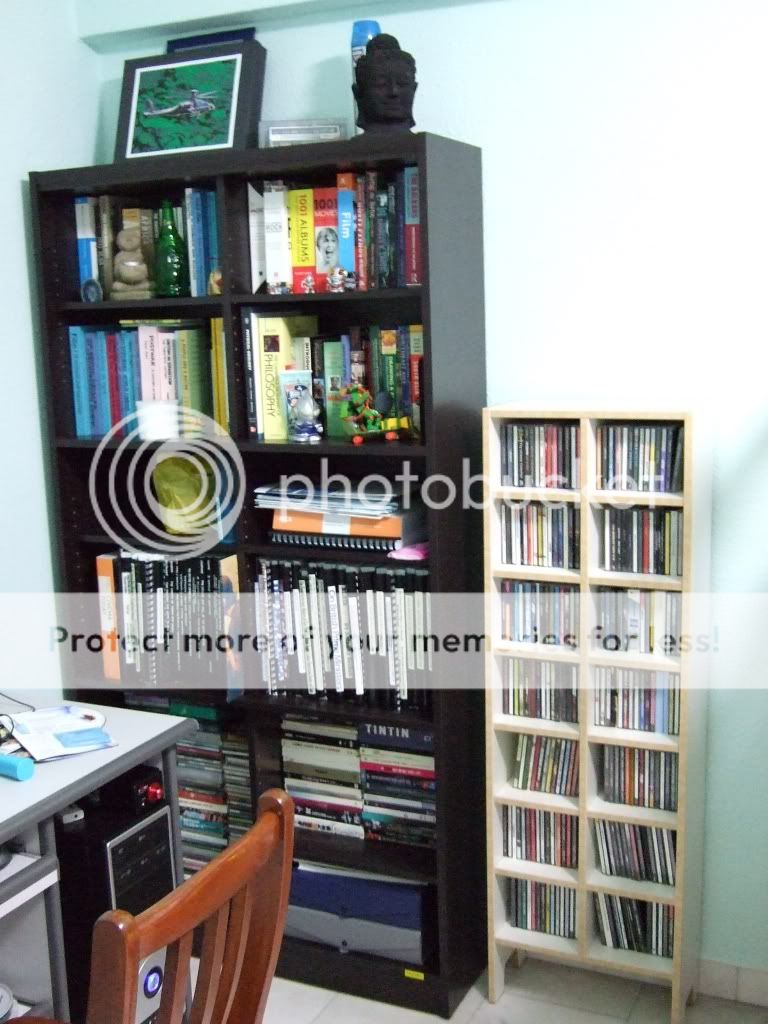
there are a lot of hidden cds (mainly jazz and OSTs) and dvds because the bookcase is deep enough for the width of two dvds/cds. provide great concealing effect away from the prying eyes of my family.
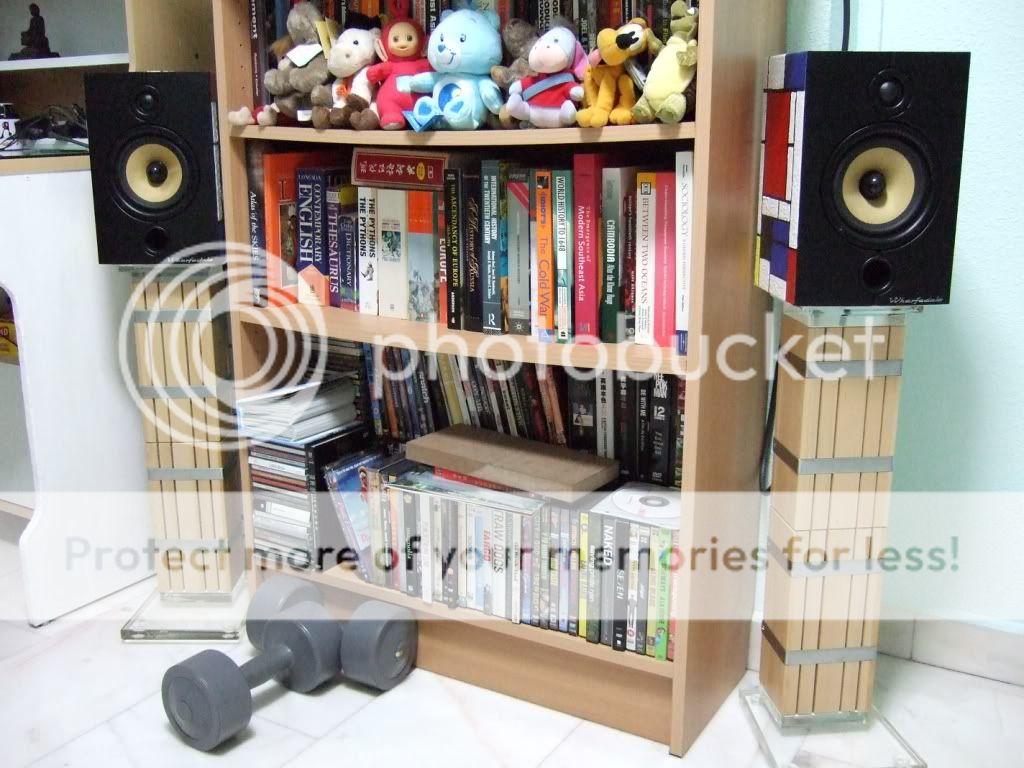
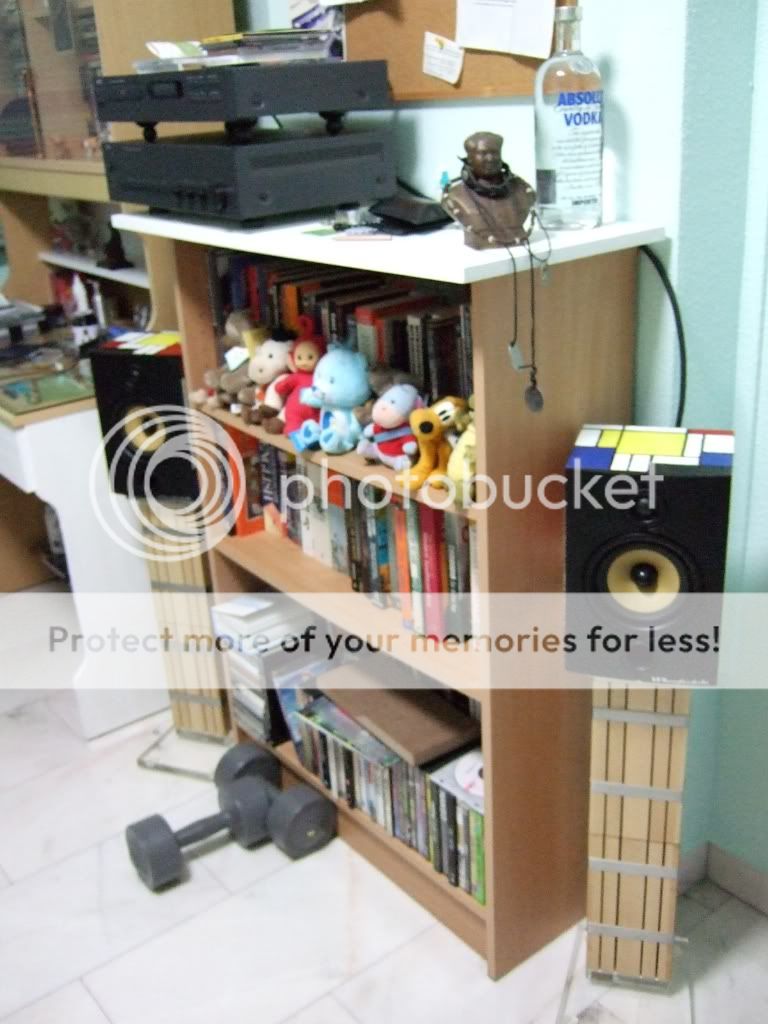
my listening area. often at the computer workstation, and hardly use the cupboard/writing desk. the tapered base is for adjusting the listening position to accomodate to my workstation.
The Travagans Mini (2" speakers) and the Travagans Red amp on my workstation are birthday gifts courtesy from my siblings.

you can't get any more budget than my budget. my trusty second-hand NAD C521BEE and C350 amp. both from different sellers, costing a total of $300 only!!! used wooden balls, painted it graphite, for underneath the cd player, and wooden pieces from Daiso (not evident in the picture) for under the amplifer, also painted graphite.

My cupboard/writing desk (books, and dvds), another cupboard full of books and more cds (not all are seen, mostly chinese cds, and english cds that 'overflowed' from the cd rack), and my IKEA cd rack (for english cds, mostly rock/indie rock). As you can see, there's hardly any books on science nor engineering. A historian, actually.
all comments are welcomed! but too late for any changes, because my design though flawed, is final, and the epoxy glue is final too. haha.
Thanks, BERENO! and here's the latest update (completion!)
After months of (over)careful planning, working out of budget, sourcing of materials, changing and throwing away ideas time and time again, i finally settled on the easy way out....
(Note: All prices are in SGD, singapore dollars, and all the shop names mentioned are in Singapore as well)
The Piet Mondrian-inspired acrylic paint painting is done on the Wharfedales a few months back. Just trying to have something new other than the normal wood veneers. Same goes for the speaker stand design.
1. Four birch knife block from IKEA, at $15.90 each. it's birch, real tough sia, and heavy (i think i carried more than 20 kg of blocks back home). 'Ready Made' and also somewhat matches my design guideline and my speakers.
http://www.ikea.com.sg/catalog/product_display.asp?art=10066670-503-8-18-549351825-87741594
it's definitely more worth it than getting a carpenter or wood supplier to cut out my desired design (all thrown to the drain). because, i won't be getting my hands dirty, or spend time explaining my ambitious designs, and the carpenters who quoted me are charging exhorbitantly (understandably) in my opinion, and all wood suppliers are only interested in wholesale.
2. Industrial 3 tonne epoxy glue (tougher than the translucent type). mixing the resin and hardener becomes a breeze after the previous DIY earring holder project for my babe.
3. 4 pieces of clear acrylic, with polished and buffed edges and sides, to add up to the total height of 24" (one on top and one at the bottom of the block), and of course, this adds to the total cost unfortunately. 2 clear acrylic for base plate, 2cm thickness X 8 inch X 9 inch (tapered inwards). 2 pieces of clear acrylic for top plate, measuring 6inch X 6inch X 1cm thick.
this design comes in mind that i want my stands to look minimal and as less space-consuming as possible. and hence, the smaller base plate than the ready-mades, and indeed the whole design looks like a disappearing act.
total costs (second time i'm buying from this acrylic manufacturer in Defu Ave 2) is $110. Reasonable, considering the effort needed to buff the sides, and the tapering, and of course, chloroforming the small pieces to the base and top plates.
4. silicon footers for the base, and small little footers for the top plate for the speakers. total cost is less than $10 readily available from DIY shops.
5. White acrylic paint from ArtFriend. used as coating over the 4 pieces of acrylic, before glueing the acrylic to the knife block. this will prevent the ugly appearance of the grey epoxy glue on the clear acrylic.
i understand that this is not an exactly hifi solution, but i like the design to be transparent, and do not want to entertain the thought of spikes hurting the marble floor, and the possibility of being knocked over easily (the auntie from Martin Electronics advised me strongly against spikes).
and being an Arts student, i'm more concerned about the aesthetics rather than the coupling/decoupling issue in which i have no idea at all. and i'm not skilled in drilling holes or whatsoever, so i use the non-hifi solution of glueing everything together using epoxy glue to good effect.
ok, it may not sound that fantastic huh? but it helps to de-elevate the speakers from the top of the cupboard to my listening level, which is the main purpose. and it indeed sounds not bad, with more details!!! i ain't bluffing you, but it's true ok, while listening to Elliott Smith's XO.
First picture showing the DIY headphone stand that i made a year ago, using a $2 marble slab as a base, from Daiso, and the body (i got it when i helped out at BroadcastAsia 2007) is those aluminium used as the support frame of those exhibits in exhibitions, and the top is a oval-shaped Van Houten chocolate container. was planning for quite some time, but suddenly everything comes together as the materials formed a perfect combo at very little cost.
Glued using normal strength epoxy glue, and it looks like welded parts after the white spray-painting. used felt material bought from ArtFriend for the top and also for the bottom. total cost is less than 15 bucks (inclusive of eating up the chocolates inside the container).
holds 2 pair of headphones perfectly (Sennheiser EH2200 bought many years ago, primarily for movie purposes, Grad SR80 for music)
My DIY Speaker Stands. not far off from my ideal design, and a nice compromise.
Took leave on Thursday to collect the acrylics and finishing everything up. Faxed design over to the acrylic manufacturer a week beforehand.
there are a lot of hidden cds (mainly jazz and OSTs) and dvds because the bookcase is deep enough for the width of two dvds/cds. provide great concealing effect away from the prying eyes of my family.
my listening area. often at the computer workstation, and hardly use the cupboard/writing desk. the tapered base is for adjusting the listening position to accomodate to my workstation.
The Travagans Mini (2" speakers) and the Travagans Red amp on my workstation are birthday gifts courtesy from my siblings.
you can't get any more budget than my budget. my trusty second-hand NAD C521BEE and C350 amp. both from different sellers, costing a total of $300 only!!! used wooden balls, painted it graphite, for underneath the cd player, and wooden pieces from Daiso (not evident in the picture) for under the amplifer, also painted graphite.
My cupboard/writing desk (books, and dvds), another cupboard full of books and more cds (not all are seen, mostly chinese cds, and english cds that 'overflowed' from the cd rack), and my IKEA cd rack (for english cds, mostly rock/indie rock). As you can see, there's hardly any books on science nor engineering. A historian, actually.
all comments are welcomed! but too late for any changes, because my design though flawed, is final, and the epoxy glue is final too. haha.
haha,
hi sdclc126, i did the 'paint' job myself.
it's based on Piet Mondrian's masterpiece, using those Fabric Acrylic Paint, which has a peniture relief from art and craft shop. They dries up fast, though not easy to squeeze out from the tubes. each tube costs around S$3.
hi sdclc126, i did the 'paint' job myself.
it's based on Piet Mondrian's masterpiece, using those Fabric Acrylic Paint, which has a peniture relief from art and craft shop. They dries up fast, though not easy to squeeze out from the tubes. each tube costs around S$3.
- Status
- This old topic is closed. If you want to reopen this topic, contact a moderator using the "Report Post" button.
- Home
- Loudspeakers
- Multi-Way
- DIY unconventional speaker stands