noah katz said:[B
But you don't have to choose one or the other; as Dr. Geddes said, just fill the entire box w/damping material. [/B]
Just one thing to consider - in a closed box there is no way for heat to get out. Stuffing the box will only make matters worse. Now in a home this "may not" be a problem, but consider this - during a movie the speakers can be going pretty loud for two to three hours without a rest.
I don't stuff my boxes any more than I think necessary for damping. At Ai we used aluminum back panels and they could get hot. We melted a few inductors in tests. If anyone does plan to use these speakers at high outputs for extended periods, I would suggest the alluminum back panel as it is reasonably effective. Most pro speakers are ported for just this reason.

Wow! Thats some serious clamping!
I just tack them together with a pnumatic finish nail gun while the glue sets. The nail heads tend to get ground off when the corners are finished. Thats one of the things I like about the polyurethane glues is the way that they expand to fill the cracks.
I just tack them together with a pnumatic finish nail gun while the glue sets. The nail heads tend to get ground off when the corners are finished. Thats one of the things I like about the polyurethane glues is the way that they expand to fill the cracks.
Re: Summary
Markus
I wanted to thank you for your patience during this trying assembly. Clearly your expectations and mine were not aligned and you are very correct when you say that this kit is not for a novice. Right or wrong, I had never considered your situation. I am the type of person who does anything and everything myself and I guess I just thought that everyone was like that. (A PhD Theoretical Physicist and I do all my own plumbing.) If you don't mind my saying so, you should have bougt them assembled, although you did a great job.
My claim is a superior design, not a superior implimentation. I'd love to have someone else build my deisgns so I could do only that which I excel at. But alas, that is not the reality of the situation. If I want others to share in the quality of the sound that I have developed, then I have to do it all myself, because, if I don't do it, no one else will.
markus76 said:It was fun building the speakers
My expectations were very high because the vendor claimed that the whole concept of the speaker is superior to what is available on the market today. So I was very disappointed that the quality of the wooden parts were not near to that of other kits.
Best, Markus
Markus
I wanted to thank you for your patience during this trying assembly. Clearly your expectations and mine were not aligned and you are very correct when you say that this kit is not for a novice. Right or wrong, I had never considered your situation. I am the type of person who does anything and everything myself and I guess I just thought that everyone was like that. (A PhD Theoretical Physicist and I do all my own plumbing.) If you don't mind my saying so, you should have bougt them assembled, although you did a great job.
My claim is a superior design, not a superior implimentation. I'd love to have someone else build my deisgns so I could do only that which I excel at. But alas, that is not the reality of the situation. If I want others to share in the quality of the sound that I have developed, then I have to do it all myself, because, if I don't do it, no one else will.
Re: Re: Summary
A pleasant bit of contrition goes a long way to smooth the waters. I applaud you for acknowledging your implementation deficiencies. I'll be producing an electroform of a plastic bottle top section or funnel (nearest thing I have to use as a mandrel) as a proof of concept over on the waveguide fab thread. The beauty of EF is it's ability to replicate positive or negative copies of the exact surface in a variety of metals at ambient temperatures=> no thermal distortion (that's why it's used at the Bureau of Engraving, making record stampers, etc.). I can only hope you'll accept that I'm only trying to demonstrate an easier way to make mandrels and/or waveguides to exacting dimensions at relatively low costs and low effort, once 1 master has been produced. If you don't like metal, use it only to replicate the mandrel, or, one could deposit only a few thousandths to establish the surface, back that up with fibreglass spray, plastic, etc., then strip the metal to the finished waveguide. No more messy pours, cures, etc.
Cheers to a financially rewarding product cycle for the Nathans, etc.
John L.
gedlee said:
Markus
I wanted to thank you for your patience during this trying assembly. Clearly your expectations and mine were not aligned and you are very correct when you say that this kit is not for a novice. Right or wrong, I had never considered your situation. I am the type of person who does anything and everything myself and I guess I just thought that everyone was like that. (A PhD Theoretical Physicist and I do all my own plumbing.) If you don't mind my saying so, you should have bougt them assembled, although you did a great job.
My claim is a superior design, not a superior implimentation. I'd love to have someone else build my deisgns so I could do only that which I excel at. But alas, that is not the reality of the situation. If I want others to share in the quality of the sound that I have developed, then I have to do it all myself, because, if I don't do it, no one else will.
A pleasant bit of contrition goes a long way to smooth the waters. I applaud you for acknowledging your implementation deficiencies. I'll be producing an electroform of a plastic bottle top section or funnel (nearest thing I have to use as a mandrel) as a proof of concept over on the waveguide fab thread. The beauty of EF is it's ability to replicate positive or negative copies of the exact surface in a variety of metals at ambient temperatures=> no thermal distortion (that's why it's used at the Bureau of Engraving, making record stampers, etc.). I can only hope you'll accept that I'm only trying to demonstrate an easier way to make mandrels and/or waveguides to exacting dimensions at relatively low costs and low effort, once 1 master has been produced. If you don't like metal, use it only to replicate the mandrel, or, one could deposit only a few thousandths to establish the surface, back that up with fibreglass spray, plastic, etc., then strip the metal to the finished waveguide. No more messy pours, cures, etc.
Cheers to a financially rewarding product cycle for the Nathans, etc.
John L.
gedlee said:Wow! Thats some serious clamping!
I just tack them together with a pnumatic finish nail gun while the glue sets. The nail heads tend to get ground off when the corners are finished. Thats one of the things I like about the polyurethane glues is the way that they expand to fill the cracks.
I tend to overdo things. The entire time I was cursing the fact that I didn't have more clamps. Plus I couldn't find any of the corner protectors for the straps. Serves me right for not being more organized.
I picked up some of the glass bubbles to add to the epoxy. Quite the miracle filler in my humble opinion. I did a test piece and I was pleased with the ease of sanding and the resulting surface.
Yeh, I know. We should be talking about these things over in the building thread...but the train of thought remains here...to wit:
How will polycarbonate perform as a plug upon which to lay-up a fiberglass waveguide?
Is there a minimum time to be allowed for the set so that shrinkage is minimized?
Does the presence of glass beads decrease shrinkage?
How will polycarbonate perform as a plug upon which to lay-up a fiberglass waveguide?
Is there a minimum time to be allowed for the set so that shrinkage is minimized?
Does the presence of glass beads decrease shrinkage?
“Just one thing to consider - in a closed box there is no way for heat to get out. “
Actually I’ve wondered for years why there aren’t more reports of small, sealed, well-insulated boxes powered w/kW bursting into flames.
I suspect the crest factor of program material/low average power is most of it, and/or that the voice coil will fry before the box gets that hot.
Interesting about the Ai aluminum back panels heating up; I guess w/a pro driver that is actually capable of dumping a fair amount of heat continuously it is a real concern and a good reason to go ported.
“A PhD Theoretical Physicist and I do all my own plumbing.”
A small price to pay to become a multifauceted individual.
Ed LaFontaine said:...
How will polycarbonate perform as a plug upon which to lay-up a fiberglass waveguide?
...
I wonder if polycarbonate will withstand the heat of a slightly over catalyzed fiberglass lay up - might be risky.
noah katz said:“A PhD Theoretical Physicist and I do all my own plumbing.”
A small price to pay to become a multifauceted individual.
Brilliant!


amiklos said:I picked up some of the glass bubbles to add to the epoxy. Quite the miracle filler in my humble opinion. I did a test piece and I was pleased with the ease of sanding and the resulting surface.
DANGER!
I discovered this by accident. The glass beads float in the air like dust. There is simply no way to prevent it. There are no long term heath issues, because they are inert, BUT they can cause serious irritation - particularly of the sinuses when breathed. It took me a long time to figure this out. A mask helps, but the beads are actually so small that they appear to go through the mask filters. The irritation of my sinuses was once so great that I could barely get out of bed.
Now I flush my sinuses after each time I come in contact with these beads and I've had no further problems.
Be very careful with them.
Ed LaFontaine said:Is there a minimum time to be allowed for the set so that shrinkage is minimized?
Does the presence of glass beads decrease shrinkage?
The issues with fiberglass shrinkage has to do with pulling the part off of the mold. The longer you wait the harder this is, but the closer the fit will be. With a two part mold and what is called infusion, this problem can be prevented and the parts left until fully cured which results in better precision of the parts. But the infusion process required two molds instead of one and a whole array of extra equipment - i.e. setup costs for infusion are very high compared to hand layup.
One does not put fillers into fiberglass as the matt is actually the filler. Epoxy that is going to be sanded needs fillers because otherwise it will be so hard that it won't sand down nearly as fast as the surface arround it does. The filler should be the same density (or slightly softer) as the material being filled. MDF is pretty soft.
Thanks for the heads up.
Luckily, I, again overdoing it, wear a full face 3M 6000 respirator when dealing with resins, epoxies, paints etc.. I use a half face from the same series when working with MDF (doesn't seal quite as well as the full face).
My neighbors probably think I'm manufacturing chemical weapons in my garage, but I've been gassed enough times in my regular line of work to know how sensitive my respiratory system is so I try to be pretty careful. I'll be surprised if the filler makes it through those cartridges but it never hurts to be aware of a potential hazard.
The mask I use:

with these cartridges:
herel
Luckily, I, again overdoing it, wear a full face 3M 6000 respirator when dealing with resins, epoxies, paints etc.. I use a half face from the same series when working with MDF (doesn't seal quite as well as the full face).
My neighbors probably think I'm manufacturing chemical weapons in my garage, but I've been gassed enough times in my regular line of work to know how sensitive my respiratory system is so I try to be pretty careful. I'll be surprised if the filler makes it through those cartridges but it never hurts to be aware of a potential hazard.
The mask I use:
with these cartridges:
herel
Ed LaFontaine said:
Is there a minimum time to be allowed for the set so that shrinkage is minimized?
One serious problem is that you are laying the glass laminate on the OUTSIDE of the mold as we need a unit with a smooth inner surface
It will be VERY important NOT to have any parallel surface which would make departing very difficult or even impossible
There need to be a "slipp" on every part of the mold, which means that the THROATH is the most critical
Starting with a relatively thin single glass layer and let it harden before the final glass layer may help
A new mold must be water sanded and waxgrinded until shiny and smooth, with absolutely no evident scatchmarks
and finally needs very careful vaxing, at least 10 times before being used, and vaxing in between each time used
Re: Re: Re: Summary
John AKA. auplater,
I have a question for you. Is there a practical limit to the thickness that you can deposit the metal. If you have a small set up at home and a bunch of scrap brass pipe fittings could you get say a 1/4 inch thickness given enough time. That would make a nice horn.
However, I don't think that the vacuum forming method is accurate enough to make a plastic mandrel that would be accurate enough. Does the mandrel have to be coated with a thin layer of metal to work. Any brief information that you can share would be nice. Been too long since I studied electro plating and don't remember much.
auplater said:
A pleasant bit of contrition goes a long way to smooth the waters. I applaud you for acknowledging your implementation deficiencies. I'll be producing an electroform of a plastic bottle top section or funnel (nearest thing I have to use as a mandrel) as a proof of concept over on the waveguide fab thread. The beauty of EF is it's ability to replicate positive or negative copies of the exact surface in a variety of metals at ambient temperatures=> no thermal distortion (that's why it's used at the Bureau of Engraving, making record stampers, etc.). I can only hope you'll accept that I'm only trying to demonstrate an easier way to make mandrels and/or waveguides to exacting dimensions at relatively low costs and low effort, once 1 master has been produced. If you don't like metal, use it only to replicate the mandrel, or, one could deposit only a few thousandths to establish the surface, back that up with fibreglass spray, plastic, etc., then strip the metal to the finished waveguide. No more messy pours, cures, etc.
Cheers to a financially rewarding product cycle for the Nathans, etc.
John L.
John AKA. auplater,
I have a question for you. Is there a practical limit to the thickness that you can deposit the metal. If you have a small set up at home and a bunch of scrap brass pipe fittings could you get say a 1/4 inch thickness given enough time. That would make a nice horn.
However, I don't think that the vacuum forming method is accurate enough to make a plastic mandrel that would be accurate enough. Does the mandrel have to be coated with a thin layer of metal to work. Any brief information that you can share would be nice. Been too long since I studied electro plating and don't remember much.
Re: Re: Re: Re: Summary
I'll be brief,since this is Dr. gedde's thread, and we don't agree on much... see the OS build thread for future ?'s
No practical limit, at least with copper or nickel... I've electroformed regeneratively cooled rocket combustion chambers with internal manifolds to over 1" thick w/copper 1/2" liner for thermal conductivity and 1/2" nickel for strength. .250" would take ~ 4 days in copper with regular setup, much less with nickel-phosphorous @ 20 mil/hr. (with more complex equipment). Remember, with multiple mandrels, you can make more than one piece at a time. It helpsif the mandrel has a conductive layer, be it graphite, silver film, etc.... but it can be microns thick and work (chemically reduced copper films come to mind). It's how ABS auto trim is chrome plated (I helped develop some of that technology 30 yrs. or so ago).
John L.
Hezz said:
John AKA. auplater,
I have a question for you. Is there a practical limit to the thickness that you can deposit the metal. If you have a small set up at home and a bunch of scrap brass pipe fittings could you get say a 1/4 inch thickness given enough time. That would make a nice horn.
However, I don't think that the vacuum forming method is accurate enough to make a plastic mandrel that would be accurate enough. Does the mandrel have to be coated with a thin layer of metal to work. Any brief information that you can share would be nice. Been too long since I studied electro plating and don't remember much.
I'll be brief,since this is Dr. gedde's thread, and we don't agree on much... see the OS build thread for future ?'s
No practical limit, at least with copper or nickel... I've electroformed regeneratively cooled rocket combustion chambers with internal manifolds to over 1" thick w/copper 1/2" liner for thermal conductivity and 1/2" nickel for strength. .250" would take ~ 4 days in copper with regular setup, much less with nickel-phosphorous @ 20 mil/hr. (with more complex equipment). Remember, with multiple mandrels, you can make more than one piece at a time. It helpsif the mandrel has a conductive layer, be it graphite, silver film, etc.... but it can be microns thick and work (chemically reduced copper films come to mind). It's how ABS auto trim is chrome plated (I helped develop some of that technology 30 yrs. or so ago).
John L.
"brass pipe fittings could you get say a 1/4 inch thickness given enough time. That would make a nice horn."
Or a nice bell.
I think it would be better to get just enough metal for structure, then fiberglass it.
If you really want to make sure it's not going to ring, put a coating of Green Glue between layers to get constrained layer damping.
Or a nice bell.
I think it would be better to get just enough metal for structure, then fiberglass it.
If you really want to make sure it's not going to ring, put a coating of Green Glue between layers to get constrained layer damping.
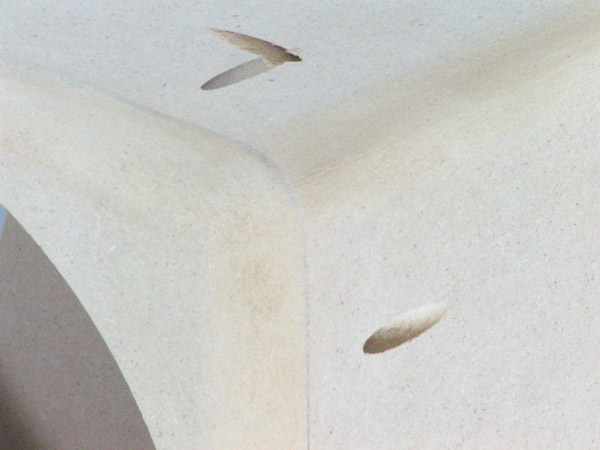
A shipment of cabinet flats will be on their way to Earl tomorrow. These are cut on the CNC, assembled with pocket hole screws, rounded on the router table, sanded, numbered and then disassembled to be packaged. The pocket hole screws really simplify assembly for those who have limited tools available. As all holes are pre-drilled and each cabinet assembled already, they should simply screw back together exactly as they came apart. Seams will be nice and tight. Well, of course I'd suggest using wood glue when you put them together.
Here is a pic of what to expect with 7 pocket holes one each side and 2 on top and bottom. The holes can be easily filled with body filler, wood filler, etc after assembling.

John
Here is a pic of what to expect with 7 pocket holes one each side and 2 on top and bottom. The holes can be easily filled with body filler, wood filler, etc after assembling.
John
- Status
- This old topic is closed. If you want to reopen this topic, contact a moderator using the "Report Post" button.
- Home
- Loudspeakers
- Multi-Way
- Building the Nathan 10