I figure I'd chronicle my first and a half speaker build because a.) I love reading other people's threads and I learn a lot from them and b.) I'll probably learn a thing or two from your comments and unofficially c.) I have nothing to do at the moment. 
I'm an electrical engineer so I know a thing or two about electronics. (Ok maybe I know a lot. But I definitely know more than is healthy) I'm a semi-competent wood worker. I can cut things... yeah. But don't expect me to be cutting fine art out of wood anytime soon.
I say first and a half build because I'm re-using drivers I had in my first build but making new cabinets and crossovers. I'll be making bookshelf sized 2-way with vifa XT25TG30-04 tweeters and P17WJ00-08 woofers. The cabinets will be around 15 liters / .52 ft^3 in volume and will be ported and tuned to 50Hz. The drivers will be crossed over at 2.5kHz LR4 acoustic. Crossovers will be designed and modeled with measurements I'll make of the drivers in the cabinets. I'll be using speaker workshop for modeling.
So here's what I got done over the Memorial Day weekend:
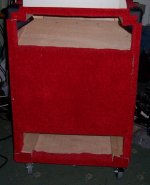
MDF is cut for the cabinets. Even with a budget table saw, MDF cuts like butter.
(a large stock sheet of MDF cut into 1/3's fits nicely into the back of a toyota prius, just FYI.)
Must... have... coffee...
I prefer to cut braces with a router and guide. I think they're neater that way... well at least MDF man approves.
I also prefer not to go bananas with clamps. It's glue and screw all the way for me. Besides, I can get 4 cabinets done an hour this way and you can actually move them after they're done.
The dried glue scrapes off easily with my makeshift scraper tool.
I also use it to remove other imperfections like raised MDF fiber from countersinking.
After that the screw holes are filled in and ready to be sanded (at a later time.)
I chose not to roundover the edges of the cabinet even though I have the bit for aesthetic reasons. The baffle is also non-removable because I plan to...
veneer. (boy am I glad that ping-pong table finally got put to good use.)
This is my first time veneering so I'll be testing things out often.
Here you can see the veneer in comparison with 3/4" MDF.
And...
omg it bends! (not so nicely against the grain though)
And finally (for now) here are samples of the veneer with a few staining options.
On the left is 'golden oak' followed by unstained and 'natural.'
Not sure which one I'll go with though.
I'll be sanding the cabinets next. I'll probably veneer today as well. Any tips on where to place the 'seams' of the veneer on the cabinets wo they look ok?
Thanks for dropping by. More pictures to come.
I'm an electrical engineer so I know a thing or two about electronics. (Ok maybe I know a lot. But I definitely know more than is healthy) I'm a semi-competent wood worker. I can cut things... yeah. But don't expect me to be cutting fine art out of wood anytime soon.
I say first and a half build because I'm re-using drivers I had in my first build but making new cabinets and crossovers. I'll be making bookshelf sized 2-way with vifa XT25TG30-04 tweeters and P17WJ00-08 woofers. The cabinets will be around 15 liters / .52 ft^3 in volume and will be ported and tuned to 50Hz. The drivers will be crossed over at 2.5kHz LR4 acoustic. Crossovers will be designed and modeled with measurements I'll make of the drivers in the cabinets. I'll be using speaker workshop for modeling.
So here's what I got done over the Memorial Day weekend:
An externally hosted image should be here but it was not working when we last tested it.
MDF is cut for the cabinets. Even with a budget table saw, MDF cuts like butter.
(a large stock sheet of MDF cut into 1/3's fits nicely into the back of a toyota prius, just FYI.)
An externally hosted image should be here but it was not working when we last tested it.
Must... have... coffee...
An externally hosted image should be here but it was not working when we last tested it.
I prefer to cut braces with a router and guide. I think they're neater that way... well at least MDF man approves.
An externally hosted image should be here but it was not working when we last tested it.
I also prefer not to go bananas with clamps. It's glue and screw all the way for me. Besides, I can get 4 cabinets done an hour this way and you can actually move them after they're done.
An externally hosted image should be here but it was not working when we last tested it.
The dried glue scrapes off easily with my makeshift scraper tool.
I also use it to remove other imperfections like raised MDF fiber from countersinking.
An externally hosted image should be here but it was not working when we last tested it.
After that the screw holes are filled in and ready to be sanded (at a later time.)
I chose not to roundover the edges of the cabinet even though I have the bit for aesthetic reasons. The baffle is also non-removable because I plan to...
An externally hosted image should be here but it was not working when we last tested it.
veneer. (boy am I glad that ping-pong table finally got put to good use.)
This is my first time veneering so I'll be testing things out often.
An externally hosted image should be here but it was not working when we last tested it.
Here you can see the veneer in comparison with 3/4" MDF.
And...
An externally hosted image should be here but it was not working when we last tested it.
omg it bends! (not so nicely against the grain though)
And finally (for now) here are samples of the veneer with a few staining options.
An externally hosted image should be here but it was not working when we last tested it.
On the left is 'golden oak' followed by unstained and 'natural.'
Not sure which one I'll go with though.
I'll be sanding the cabinets next. I'll probably veneer today as well. Any tips on where to place the 'seams' of the veneer on the cabinets wo they look ok?
Thanks for dropping by.
More pictures to come.I'd love to have something like caribou coffee but starbucks is all we have around here. Not even the mom and pop shops exist around here.  But enough about me, let's talk about speakers.
Sanded the cabinets smooth this morning. They look...
...exactly like they should.
I did a quick iron on veneer test and it seems to bond strong enough. It's holding up the weight of the MDF. Impressive.
I also have some feathered company overhead in a nest. They must be freaks about diy speakers.... just look at their eyes.
Up next is veneering the cabinets, followed by routing the driver and port holes and rabbeting the edges for the driver flanges.
Actually no I lied, up next is lunch. I'll be back.
But enough about me, let's talk about speakers. Sanded the cabinets smooth this morning. They look...
An externally hosted image should be here but it was not working when we last tested it.
...exactly like they should.
An externally hosted image should be here but it was not working when we last tested it.
I did a quick iron on veneer test and it seems to bond strong enough. It's holding up the weight of the MDF. Impressive.
I also have some feathered company overhead in a nest. They must be freaks about diy speakers.... just look at their eyes.
An externally hosted image should be here but it was not working when we last tested it.
Up next is veneering the cabinets, followed by routing the driver and port holes and rabbeting the edges for the driver flanges.
Actually no I lied, up next is lunch. I'll be back.
Have you thought about something a bit more exciting than a simple box design ?
1/ How about a bass reflex speaker ? Start with a normal box but have a duct below the speaker to add in the sound from the rear of the speaker.
2/ Folded horn. I have the speaker facing rearwards and have ducts above and below to make the sound go forwards.
Both of these designs are more efficient than the standard box.
Attachments
Former MTM arrangement ?
Hi-
Interesting thread for me because I have a pair of DIY MTMs using the same woofers but with the Vifa D27TG-45-08s for tweeters.
If I had to guess, I'd say you were taking the drivers from your older MTM's, turning them into 4 two-way speakers. Thought of the same thing myself actually, only I'd replace my tweeters, never have been too happy with them. Maybe one of the well regarded but affordable Scan
Speak tweeters
Not much interest in these particular Vifa units anymore it seems. From what I can tell, they are probably 4-5 years beyond their technological prime, all the advanced DIYers have moved on to the latest. But, what the heck, they aren't bad, great for experimenting & learning.
Good luck- I look forward to seeing your crossover design process & final comments.
You bet a subwoofer is coming up next. 
What I'll be doing when I cut the holes is I'll be cutting out the inner diameter of the driver cutout with the router and jig and I'll use a 1/2" rabbeting bit to make the recesses. The flanges for the drivers fit perfectly with 1/2" rabbets.
I'm wearing a 3M respirator mask thing-a-ma-jig so no "MDF smoke for me."
I had a whole bunch of pictures taken since my last post but for some reason all but a few were wiped off the memory card when I put it into the reader. That might have been related to the blue screen of death I got upon booting my desktop up. Not much I can do about it now. Sorry guys.
On the bright side, I still have a picture of the latest progress on the speakers.
So between lunch yesterday and now, I've:
-Done a fine sanding of the cabinets with 320 grit sandpaper and did a little more spot filling.
-Cut the veneer into more manageable pieces and applied yellow glue to the back.
-Applied glue to the cabinets.
Right now they're drying and should be ready for ironing on tomorrow. I'll retake some pictures then and explain what I did in another post. More to come.
edit: Wow I just realized I committed sacrilege on the 'In Remembrance' section of the Washington Post in applying glue to the veneer. I thought it was strange with so many faces looking up at me.
What I'll be doing when I cut the holes is I'll be cutting out the inner diameter of the driver cutout with the router and jig and I'll use a 1/2" rabbeting bit to make the recesses. The flanges for the drivers fit perfectly with 1/2" rabbets.
I'm wearing a 3M respirator mask thing-a-ma-jig so no "MDF smoke for me."
I had a whole bunch of pictures taken since my last post but for some reason all but a few were wiped off the memory card when I put it into the reader. That might have been related to the blue screen of death I got upon booting my desktop up. Not much I can do about it now.
Sorry guys.On the bright side, I still have a picture of the latest progress on the speakers.
An externally hosted image should be here but it was not working when we last tested it.
So between lunch yesterday and now, I've:
-Done a fine sanding of the cabinets with 320 grit sandpaper and did a little more spot filling.
-Cut the veneer into more manageable pieces and applied yellow glue to the back.
-Applied glue to the cabinets.
Right now they're drying and should be ready for ironing on tomorrow. I'll retake some pictures then and explain what I did in another post. More to come.
edit: Wow I just realized I committed sacrilege on the 'In Remembrance' section of the Washington Post in applying glue to the veneer. I thought it was strange with so many faces looking up at me.
So today I tried putting the veneer on to some success, some failure, and some humiliation.
Here's my ultra-sophisticated veneer cutting apparatus.
My veneer ironing setup.
Here's the cracking you need to watch out for with the iron on veneer method. I think it's more a problem if you keep the iron on a certain area for too long. What's in the picture is the worst it ever got.
After heating the veneer I placed a board and weight to make sure the veneer made good contact. Yes, mine is so much bigger than yours .
(of course I'm referring to my massive transformer, what were you thinking of you dirty person you...)
A flush trim bit works wonders for trimming the excess veneer flaps. Don't set the RPM too low or else the bit tends to trim the wood while leaving the paper backing behind.
This is what I hope will be the end result of finishing the veneer on the speaker with several coats of poly.
Here's an idea of what the gloss finish will look like minus the shaky hand blurriness.
Of course no post would be complete without some humiliation.
If you've ever wondered what it's like to remove veneer you just spent 25 minutes putting on because the seam was way off vertical...
On the plus side, it took some work to get off so the iron method does result in a pretty good bond.
At the same time, it also wasn't that hard to get off either with the right method. I just heated the veneer back up like when I put it on whilst simultaneously ramming a spatula up the crack...
...between the veneer and the cabinet.
A little sanding and it'll be good as new for another pass with veneer. I hope to be done with both cabinets sometime tomorrow. More updates to come.
An externally hosted image should be here but it was not working when we last tested it.
Here's my ultra-sophisticated veneer cutting apparatus.
An externally hosted image should be here but it was not working when we last tested it.
My veneer ironing setup.
An externally hosted image should be here but it was not working when we last tested it.
Here's the cracking you need to watch out for with the iron on veneer method. I think it's more a problem if you keep the iron on a certain area for too long. What's in the picture is the worst it ever got.
An externally hosted image should be here but it was not working when we last tested it.
After heating the veneer I placed a board and weight to make sure the veneer made good contact. Yes, mine is so much bigger than yours .
(of course I'm referring to my massive transformer, what were you thinking of you dirty person you...)
An externally hosted image should be here but it was not working when we last tested it.
A flush trim bit works wonders for trimming the excess veneer flaps. Don't set the RPM too low or else the bit tends to trim the wood while leaving the paper backing behind.
An externally hosted image should be here but it was not working when we last tested it.
This is what I hope will be the end result of finishing the veneer on the speaker with several coats of poly.
An externally hosted image should be here but it was not working when we last tested it.
Here's an idea of what the gloss finish will look like minus the shaky hand blurriness.
Of course no post would be complete without some humiliation.
If you've ever wondered what it's like to remove veneer you just spent 25 minutes putting on because the seam was way off vertical...
An externally hosted image should be here but it was not working when we last tested it.
An externally hosted image should be here but it was not working when we last tested it.
On the plus side, it took some work to get off so the iron method does result in a pretty good bond.
At the same time, it also wasn't that hard to get off either with the right method. I just heated the veneer back up like when I put it on whilst simultaneously ramming a spatula up the crack...
...between the veneer and the cabinet.
A little sanding and it'll be good as new for another pass with veneer. I hope to be done with both cabinets sometime tomorrow. More updates to come.
That's nice. I'm sure Dewalt made more than one... others were bound to appear at some point.holy **** dude.. you have the same radial arm saw as I have !!!
Here's my veneering progress. I'm just about done with both of them.
An externally hosted image should be here but it was not working when we last tested it.
Wow photoshop had a field day with this picture. It turned everything pee yellow.
An externally hosted image should be here but it was not working when we last tested it.
Do not adjust your monitor, this picture intentionally left big to show detail...
I will be cutting holes into both the veneered cabinets and another pair of test cabinets I made.
Any tips on routing holes into veneered cabinets? There's no scrap mdf backing piece so if I cut all the way through, I'll probably mess something up. I figure I should cut almost but not all the way through and then punch the cut mdf out?
I thought I might add some pointers for veneer seeing as how it turned out pretty well even with it being my first time using it.
1. If you have considerable bumps on the surface of your substrate (mdf) they will most certainly show through (as bumps in the veneer). So make sure these are all sanded down and any holes are filled in.
2. When you heat the veneer up, I found the heat setting just below 'cotton' worked great. Don't use steam though.
3. You have to keep your iron moving. The longer you keep it in one spot, the more prone the grain is to cracking and splitting. The key is to heat the veneer enough so that the glue melts and no more. Once the glue has melted it's a matter of pressing the veneer down so it makes good contact. Heating up the veneer excessively won't help the veneer stick anymore. You have to make sure it's making good contact.
4. Once I get the piece roughly stuck on, I flip it over immediately while it's still hot so the veneer is pressed against the table by the weight of the cabinet. I then take the time to trim the edges off. This allows the veneer to make better contact because it's being pressed on while the glue is still soft. You also save time by trimming while it's cooling down. I find that using a clipboard and using it as a guide for my blade removes as much material as possible without getting too close.
5. Once the edges are trimmed, I flip the cabinet back over and reheat everything again, paying very close attention to the edges because they tend to curl up by nature and not make good contact when the glue is softened. I'll heat the edges and then press down by hand so they make good contact. I'll let the edges cool and then test them by tapping against the overhanging flap slightly. If they're not solidly glued down, I'll repeat the process until it is. This is IMPORTANT. Your edges will be prone to lifting if you don't.
6. To trim the final bit of overhanging veneer on the edges, I use a router with flush trim bit. Make sure you tape the veneer sides so you don't mar the surface when the bearing of the bit rides along it.
7. You'll probably have bit of paper backing and glue still along the edges. Use a blade to gently lift them up and use sandpaper to lightly scrub them off. Make sure you also sand the edges completely flush with the existing surface or else when you goto veneer that surface the protruding edges will push the veneer upwards.
8. When you get to the point where you're going to apply veneer on top of the edge of another piece of veneer (i.e. putting the top on when the sides are already on), it doesn't hurt to roll some more glue onto the edges of the existing veneer so the new veneer sticks better. Be sure to tape off the sides so the glue doesn't get on to the surface though.
After veneering, I haven't had any bubbling or grain cracking/splitting (I removed the only panel where it did). This stuff is really easy to use. Never used it before and it came out looking great.
oh!This is very hot lol(my country calls)
JLC7 i interest about how to use veneer. but i donot understand very much about the technic. i had been downloading the vdo but i have a problem with english lg too much. i still understand. i think that i will copy you pic and will translate the next week. i may be know a little.
thank for the pics
JLC7 said:
That's nice. I'm sure Dewalt made more than one... others were bound to appear at some point.
yes, but to have two that are still alive !!!!
did yours have the lifting handle towards the front at one time ?
.
.
You are doing a really nice job , btw.
Oh! did you realise that that old saw of yours can tilt and pan etc (I know, not the correct terms)
That means you can build things that aren't just rectangular boxes.
So this is a paper backed veneer? Really looks nice. I might have to take the plunge on my next build.
About routing the driver cut-outs: I have never routed driver cut-outs after the box is assembled. But the following things seem problematic:
1) when I route a cut-out I always drive my pivot nail into the substrate below and clamp the baffle really well. Otherwise when the bit is finished with the circle nothing holds the center material and it will likely screw up the edge of the cut-out.
2) considering #1 (and I don't see how you will get around this with an already glued baffle) I would route the flange first and then route the cut-out. This way if you screw-up the cut-out nobody will be able to tell. If you route the cut-out first it _has_ to be _perfect_. Any imperfection will get copied into your flange because the router bit's bearing runs on the cut-out.
- Status
- This old topic is closed. If you want to reopen this topic, contact a moderator using the "Report Post" button.
- Home
- Loudspeakers
- Multi-Way
- The story of my life: diy speakers (as told by an EE)