Found Wood!
Well, I've found my wood. Got a recommendation for a place about an hour from my house where they might sell me some good quality walnut. Went up there this morning, and sure enough, they had some 2" thick walnut slabs. I got a piece 2" thick, 9" wide, and 34" long for around $35. I just got back home, and I have to leave for work in only a few minutes, so I'll have pictures up tomorrow of the block.
Well, I've found my wood. Got a recommendation for a place about an hour from my house where they might sell me some good quality walnut. Went up there this morning, and sure enough, they had some 2" thick walnut slabs. I got a piece 2" thick, 9" wide, and 34" long for around $35. I just got back home, and I have to leave for work in only a few minutes, so I'll have pictures up tomorrow of the block.
Picture Update
Well, as promised, here are the pictures of the slab I bought.
Here's a picture of the slab placed next to the neck blank. As you can see, the slab has been lightly planed, but some work is still needed in order to get it flat.
Another shot showing the slab and the neck.
This picture shows some type of oil residue down the left hand side of the block, but you can also see the grain pattern running the length of the wood.
In this picture, I have lightly wetted the surface of the block to show the grain better. I believe the grain will look stunning when finished. I'm very happy with the purchase.
Well, as promised, here are the pictures of the slab I bought.
Here's a picture of the slab placed next to the neck blank. As you can see, the slab has been lightly planed, but some work is still needed in order to get it flat.
An externally hosted image should be here but it was not working when we last tested it.
Another shot showing the slab and the neck.
An externally hosted image should be here but it was not working when we last tested it.
This picture shows some type of oil residue down the left hand side of the block, but you can also see the grain pattern running the length of the wood.
An externally hosted image should be here but it was not working when we last tested it.
In this picture, I have lightly wetted the surface of the block to show the grain better. I believe the grain will look stunning when finished. I'm very happy with the purchase.
An externally hosted image should be here but it was not working when we last tested it.
Oops! I found a few pictures I had lost track of on my computer. The first two are pictures of the cut I made for my headstock. The last two will show the further cracking of my original walnut blocks, and why I needed to buy a new block.
An externally hosted image should be here but it was not working when we last tested it.
An externally hosted image should be here but it was not working when we last tested it.
An externally hosted image should be here but it was not working when we last tested it.
An externally hosted image should be here but it was not working when we last tested it.
Brion55 said:Nice looking chunk of walnut you have there. Looks like the other walnut wasn't quite dry when you got it.
Should be a beautiful project when finished. What are you going to finish it with?
Yes, the new block is very nice; kiln dried this time so I know it's good. The other block should have been dry; I really don't know what happened to them. They were over 25 years old, air dried in a nice shed/barn in a loft with spacers between all of the wood, and they were protected from the elements very well. The man I got the wood from has plenty of other walnut that is perfectly fine under the same conditions; only the thick blocks seemed to crack, so the drying methods needed must be different. I guess the blocks just weren't going to cooperate with me.
Yes, I'm hoping it will turn out as beautiful as I'm envisioning. Right now, I'm thinking a tung oil or similar finish since I believe a matte finish will look better than a high gloss finish will.
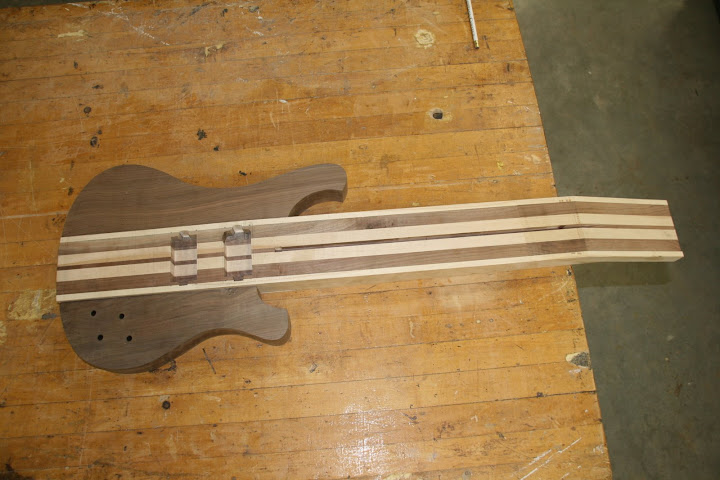
Well, here are the pictures showing the results of cutting the body out. I cut the rough shape out with the band saw, then did the smoothing of the curves with a drum sander, and last i flattened the side which will be attached to the neck with a disk sander. I'll be sending that edge through the edge jointer next time.
The first picture shows the body shapes cut out of their blocks. I'm keeping the cut away parts so that I will be able to clamp the body to the neck with a fairly even pressure and so that the clamps have parallel surfaces to clamp against.
The next two pictures show the wings with the neck blank. It's finally starting to look recognizable as a guitar.
An angled shot showing the wings with the neck blank.
And a closeup.
I did manage to make one mistake. I cut the end of the block off before positioning my templates and cutting the blocks out. The wood has some small splits on the lower wing. The two splits to the right hand side I think are positioned in a place where I can drill them out in order to place my jack and jack plate/cup. The one on the left I'll have to fill with epoxy or something.
As always, questions, comments, & criticisms are welcome. I need to learn somehow.
The first picture shows the body shapes cut out of their blocks. I'm keeping the cut away parts so that I will be able to clamp the body to the neck with a fairly even pressure and so that the clamps have parallel surfaces to clamp against.
An externally hosted image should be here but it was not working when we last tested it.
The next two pictures show the wings with the neck blank. It's finally starting to look recognizable as a guitar.
An externally hosted image should be here but it was not working when we last tested it.
An externally hosted image should be here but it was not working when we last tested it.
An angled shot showing the wings with the neck blank.
An externally hosted image should be here but it was not working when we last tested it.
And a closeup.
An externally hosted image should be here but it was not working when we last tested it.
I did manage to make one mistake. I cut the end of the block off before positioning my templates and cutting the blocks out. The wood has some small splits on the lower wing. The two splits to the right hand side I think are positioned in a place where I can drill them out in order to place my jack and jack plate/cup. The one on the left I'll have to fill with epoxy or something.
An externally hosted image should be here but it was not working when we last tested it.
As always, questions, comments, & criticisms are welcome. I need to learn somehow.
PS. I have all of these pictures and more on Picasa Web Albums. I didn't want to clutter this site with more photos than necessary. You can see this build log here .
I also have a few pictures of the guitar I built this past summer in a class put on by the high schools in my area. I don't have nearly as many pictures of this guitar or the building process. You can see those photos here.
I also have a few pictures of the guitar I built this past summer in a class put on by the high schools in my area. I don't have nearly as many pictures of this guitar or the building process. You can see those photos here.
Second Forum log
Today I started another build log on projectguitar.ibforums.com. I'll do my best to keep both sites' updated the same and to bring comments, suggestions, and crticisms back and forth.
http://projectguitar.ibforums.com/index.php?showtopic=34978
Today I started another build log on projectguitar.ibforums.com. I'll do my best to keep both sites' updated the same and to bring comments, suggestions, and crticisms back and forth.
http://projectguitar.ibforums.com/index.php?showtopic=34978
Well today, I didn't get a whole lot done. I'm sort of waiting with anything until next week when I am going to a local college where I can use their edge jointer to cut the neck angle before I progress much further. I decided to draw out the basic layout today to keep me busy and thinking. The hardware I will be using is chrome, not the black shown in the picture. That hardware belongs to a friend who is building a through neck Mockingbird (maple neck, purple heart strips separating the neck from the mahogany body).
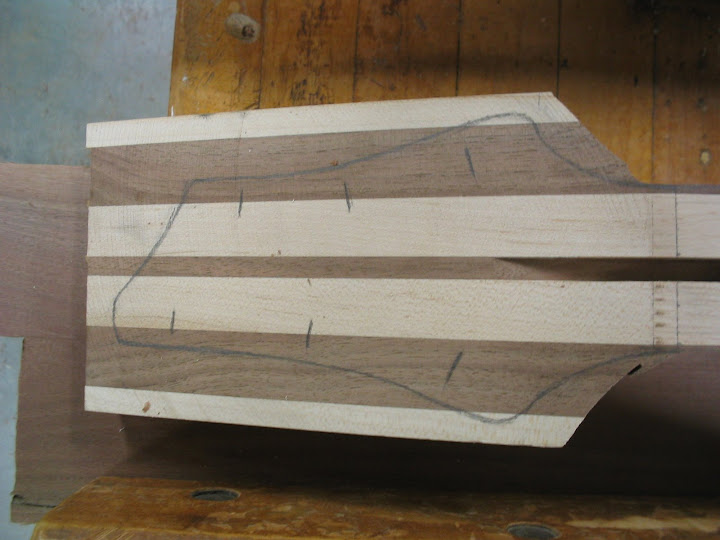
Anyway, I'm not sure about all the layout yet, just trying a few things out. This picture shows the possible placement of pickups and knobs, though I'm not sure whether to do four inline or a 2x2 grid like on SG's and LP's. I've also drawn out the cuts to bring the neck down to the correct width and where I plan to bevel the two cutaways.
Here is a closeup showing the lines bit better.
And here's a picture of my buddy and I with our guitars. I'm on the right.
Anyway, I'm not sure about all the layout yet, just trying a few things out. This picture shows the possible placement of pickups and knobs, though I'm not sure whether to do four inline or a 2x2 grid like on SG's and LP's. I've also drawn out the cuts to bring the neck down to the correct width and where I plan to bevel the two cutaways.
An externally hosted image should be here but it was not working when we last tested it.
Here is a closeup showing the lines bit better.
An externally hosted image should be here but it was not working when we last tested it.
And here's a picture of my buddy and I with our guitars. I'm on the right.
An externally hosted image should be here but it was not working when we last tested it.
Well, I'm finally getting around to posting more updates... My stupid camera is old and eats through batteries, so I haven't had a camera to take pictures with for a while, but I finally was able to borrow my brother's.
Well, here's the progress up until the beginning of class today (I had the camera last time, track meets kept me from updating until today)
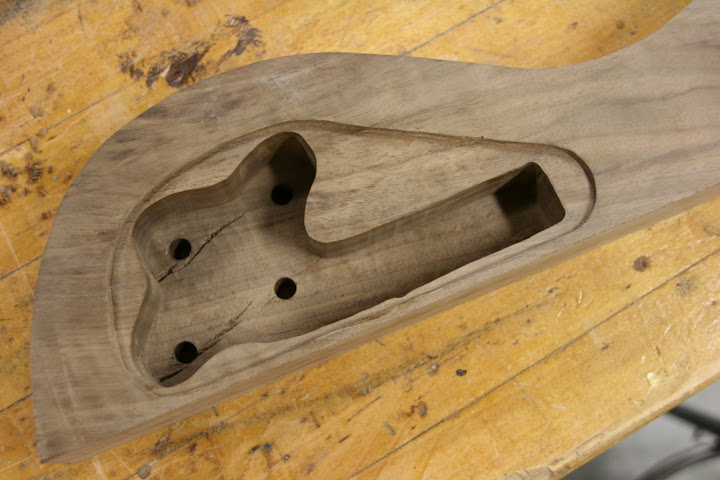
The front hasn't changed a whole lot... all that you can see from the front is that I have planed the wings flat, routed the cavities for the humbuckers, and drilled the holes for the pots. However, I've also routed the electronics cavity and the slot for the battery box to reside in.
First, the humbucker cavities. I ended up routing the cavities by hand with a router using only a 1/4" bit and a 1/2" with no bearings, so theres a couple spot where I lost a bit of control and the line got a bit off track. I also had to chisel quite a bit to get the humbuckers to fit properly, especially around the two ears (? where they mount with the bolts).
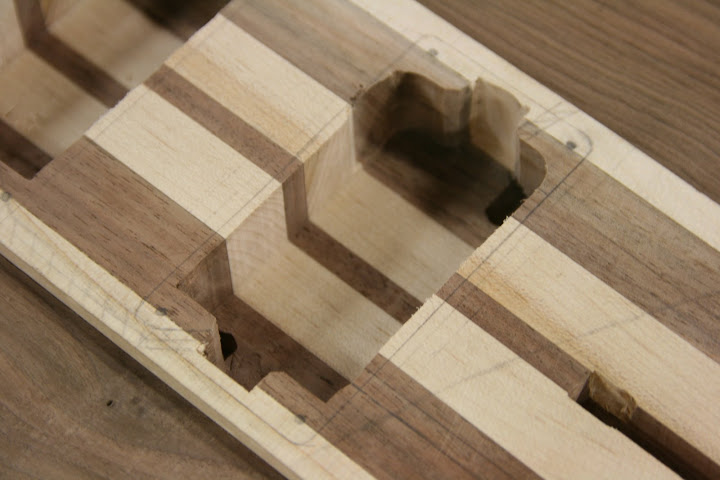
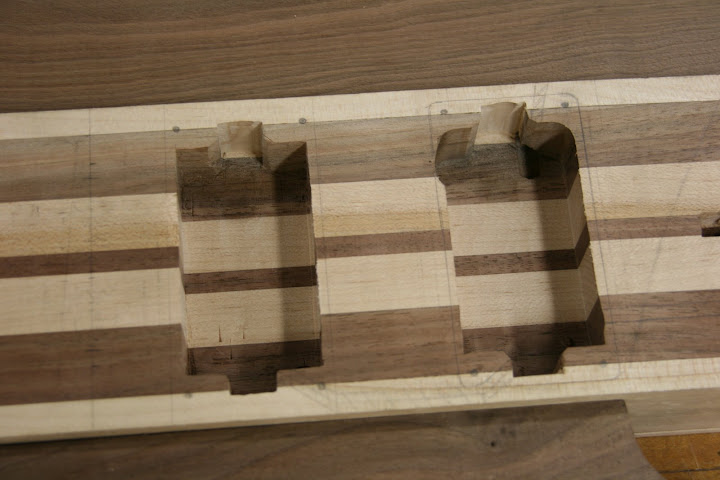
As you can probably see, I routed the neck pickup first. By the time I had finished that, I had gotten a technique figured out so my second cavity went a lot better.
I also routed my truss rod cavity.
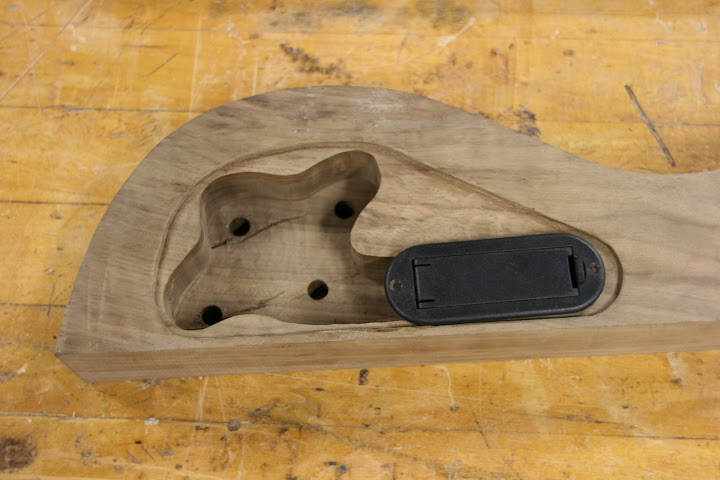
Now the back of the guitar is where I've spent more time. I've gotten the electronics cavity routed. The battery box is going to be located right next to the control cavity, so I routed one large cavity. I will be mounting the battery box to the cavity cover. The cavity will also be routed slightly larger; the cavity cover will be slightly larger and more round, and I'll be routing out a little more room for the pots so that things aren't so cramped.
Once again, the cavities were routed by hand.
Today, I did a rough cut of my neck. I cut both the taper width-wise, and the thickness of the neck. I'll be spending quite a bit of time getting them straightened up since I used the bandsaw to make the cuts, but it's really starting to look like pieces of a guitar now. (I'll get pictures as soon as I can).
Well, here's the progress up until the beginning of class today (I had the camera last time, track meets kept me from updating until today)
The front hasn't changed a whole lot... all that you can see from the front is that I have planed the wings flat, routed the cavities for the humbuckers, and drilled the holes for the pots. However, I've also routed the electronics cavity and the slot for the battery box to reside in.
First, the humbucker cavities. I ended up routing the cavities by hand with a router using only a 1/4" bit and a 1/2" with no bearings, so theres a couple spot where I lost a bit of control and the line got a bit off track. I also had to chisel quite a bit to get the humbuckers to fit properly, especially around the two ears (? where they mount with the bolts).
As you can probably see, I routed the neck pickup first. By the time I had finished that, I had gotten a technique figured out so my second cavity went a lot better.
I also routed my truss rod cavity.
Now the back of the guitar is where I've spent more time. I've gotten the electronics cavity routed. The battery box is going to be located right next to the control cavity, so I routed one large cavity. I will be mounting the battery box to the cavity cover. The cavity will also be routed slightly larger; the cavity cover will be slightly larger and more round, and I'll be routing out a little more room for the pots so that things aren't so cramped.
Once again, the cavities were routed by hand.
Today, I did a rough cut of my neck. I cut both the taper width-wise, and the thickness of the neck. I'll be spending quite a bit of time getting them straightened up since I used the bandsaw to make the cuts, but it's really starting to look like pieces of a guitar now. (I'll get pictures as soon as I can).
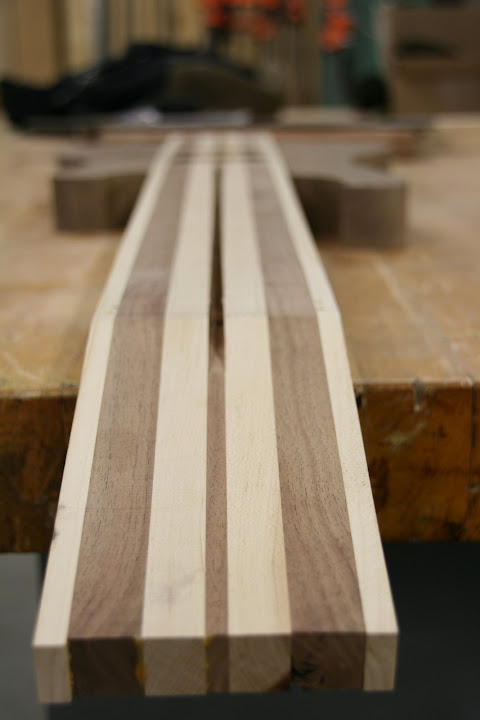
Well, I got some work in yesterday during class and this morning before school started. I managed to make the rough cut of the neck, the taper width-wise and the thickness, and I've done a bit of work to smooth it out on the drum sander this morning.
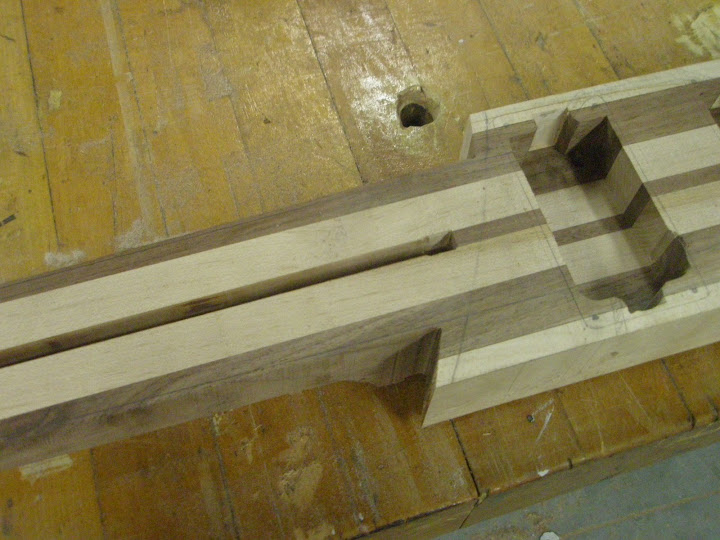
Here's an overall view of the cutout. I managed to make the cuts on the band saw, though it was hard because of the small base and the small amount of clearance on the left hand side (that is why there's such a large amount of wood left at the headstock/neck joint.
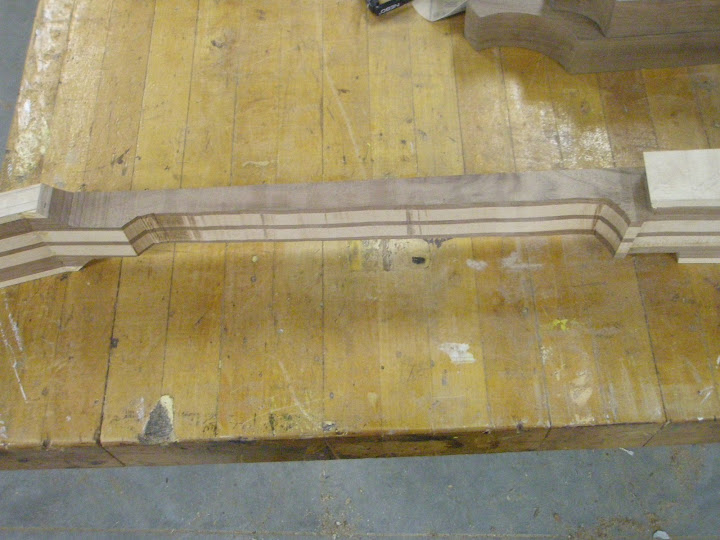
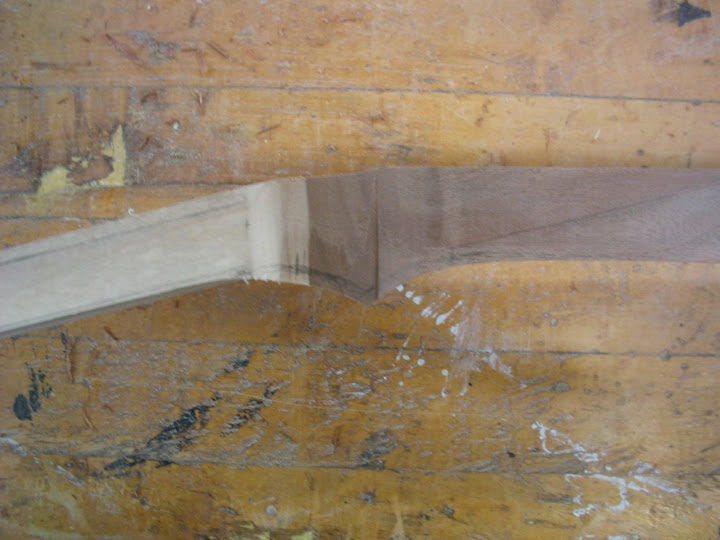
Here you can see the closeup the cut into the headstock area, and the large piece of wood left at the joint.
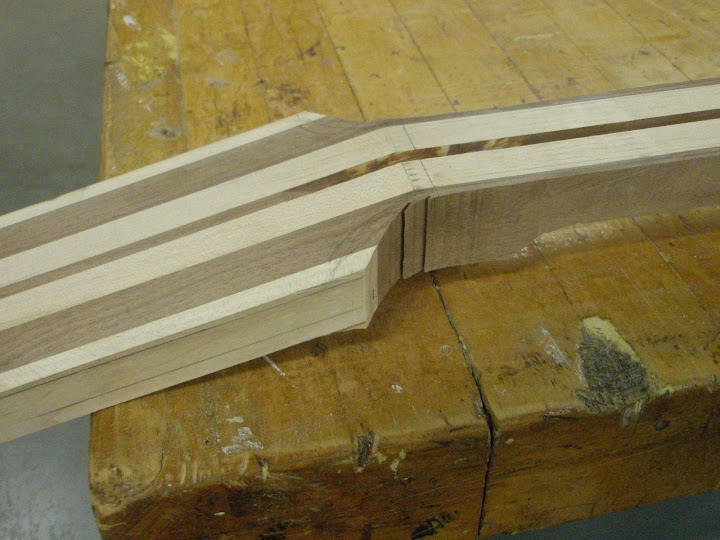
Here's what the neck to body join will look like somewhat. It's a combination of the normal Schecter/Fender join where the two horns join at different fret positions, but I'll be making a straight line across much like a PRS has.
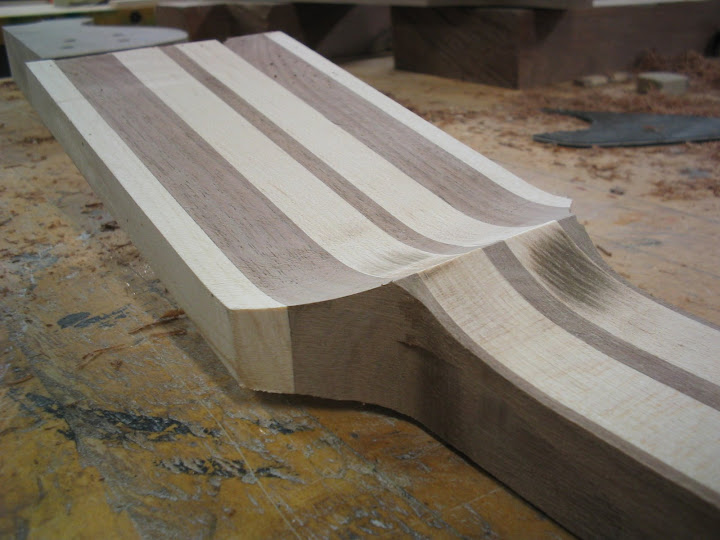
Then, I set up a guide and used a router to trim the rough edges down to a nice straight line. This was only done on the width of the neck. I didn't think it would be wise to attempt to wield the router on the side of the neck. I think I'll be block sanding the thickness down (40 grit seems to have eaten through pretty well in a couple minutes, so I'll probably continue with that).
Then this morning when I came to school, I used the drum sander to carve out the block of wood at the headstock/neck joint (I really don't like the taste of walnut and maple dust). I think it turned out pretty well, though I still have some work to do on it.
Is there a name for the extra wood left at the neck/headstock joint? I've referred to it as a thumb stop, but what do you call it?
Here's a sketch of the possible headstock design. It's loosely modeled after the Schecter headstock. I'm not sure if it's too fat at the top because the strings will have to bend outward to reach the tuning pegs. I might need to skinny it up a bit to create a straighter line on either side of the nut.
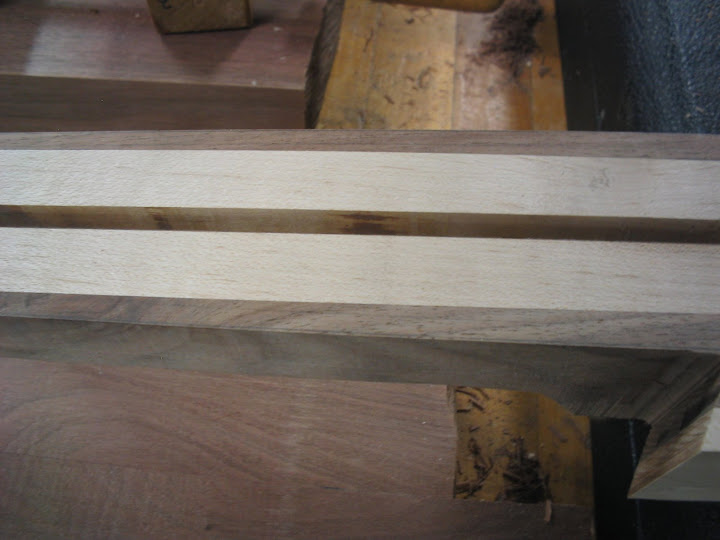
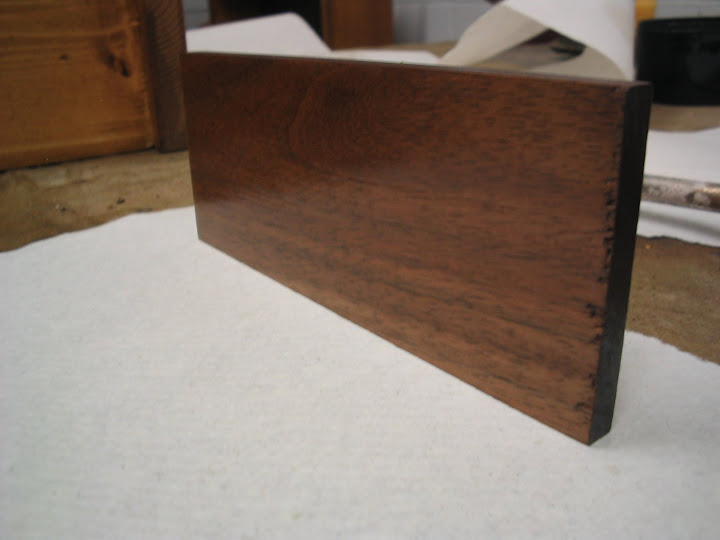
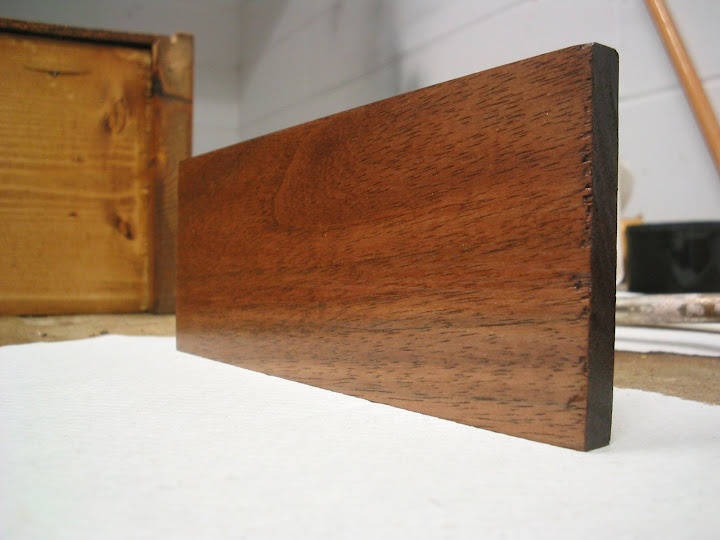
Lastly, here are two shots of a piece of scrap walnut that I have applied tung oil to. These shots show the piece after only 2 coats of oil. Since then, I took these pictures, I've sanded the finish with 400 grit sandpaper and have applied another coat of oil. I'll be doing this a number of times more to see if I like the finish. I haven't fully decided whether I want a satin or gloss finish. If anybody has recommendations for finishes that may look good, I have a few more scraps I could try the finish on. (though, I need to be able to acquire the finish in small enough quantities so that I'm not wasting money.)
Here's an overall view of the cutout. I managed to make the cuts on the band saw, though it was hard because of the small base and the small amount of clearance on the left hand side (that is why there's such a large amount of wood left at the headstock/neck joint.
Here you can see the closeup the cut into the headstock area, and the large piece of wood left at the joint.
Here's what the neck to body join will look like somewhat. It's a combination of the normal Schecter/Fender join where the two horns join at different fret positions, but I'll be making a straight line across much like a PRS has.
Then, I set up a guide and used a router to trim the rough edges down to a nice straight line. This was only done on the width of the neck. I didn't think it would be wise to attempt to wield the router on the side of the neck. I think I'll be block sanding the thickness down (40 grit seems to have eaten through pretty well in a couple minutes, so I'll probably continue with that).
Then this morning when I came to school, I used the drum sander to carve out the block of wood at the headstock/neck joint (I really don't like the taste of walnut and maple dust). I think it turned out pretty well, though I still have some work to do on it.
Is there a name for the extra wood left at the neck/headstock joint? I've referred to it as a thumb stop, but what do you call it?
Here's a sketch of the possible headstock design. It's loosely modeled after the Schecter headstock. I'm not sure if it's too fat at the top because the strings will have to bend outward to reach the tuning pegs. I might need to skinny it up a bit to create a straighter line on either side of the nut.
Lastly, here are two shots of a piece of scrap walnut that I have applied tung oil to. These shots show the piece after only 2 coats of oil. Since then, I took these pictures, I've sanded the finish with 400 grit sandpaper and have applied another coat of oil. I'll be doing this a number of times more to see if I like the finish. I haven't fully decided whether I want a satin or gloss finish. If anybody has recommendations for finishes that may look good, I have a few more scraps I could try the finish on. (though, I need to be able to acquire the finish in small enough quantities so that I'm not wasting money.)
The colour is nice on that wood...
Personaly, I would go for a clear two part epoxy. It totaly fills those pores in a few coats and come out with the total gloss texture of plastic. Sprayed or applied with a small disposable foam roller.
It is also very durable - sometimes used to cover handles of tools.
Can you explain the shape of the truss rod cavity a bit... I just can not visualise it. I'd love to make my own guitar as well.
Recently got a new one, but it is clear a good quality one of the shelf is not going to fit my budget.
Especialy with a few special preferances to the shape which I have not seen on a commercial axe.
Ultimatley if I can figure out how to keep the sustain and loose the weight I would like to make expoy cast resin one.... but that is way in the future.
The baby ESP I have now, is styled on the Jackson Dicky, thin neck (feels great but I can bend the neck with little effort, not good in my book), very fast obviously, very strong output on pickups, but the sound of the thing is tainted... like a $10 steel guitar... may be a usefull sound for blues.... but not for me.
I would like to go for a neck through design too... allows me to get rid of more body... I don't know why people keep copying the shape of old guitars...
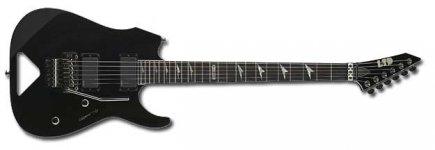
For now I am planing on modifying my new or maybe my old guitar into something like the attached pic... except with wider bottom curve. I like this shape... no visual obstructions while playing. No top curve to fight when you want to get your head in there... And weight reduced (bad back).
Kept a bit of the classic look as I don't feel the look of more general metal guitars suit me, but it still looks egdy and not girly.
Personaly, I would go for a clear two part epoxy. It totaly fills those pores in a few coats and come out with the total gloss texture of plastic. Sprayed or applied with a small disposable foam roller.
It is also very durable - sometimes used to cover handles of tools.
Can you explain the shape of the truss rod cavity a bit... I just can not visualise it. I'd love to make my own guitar as well.
Recently got a new one, but it is clear a good quality one of the shelf is not going to fit my budget.
Especialy with a few special preferances to the shape which I have not seen on a commercial axe.
Ultimatley if I can figure out how to keep the sustain and loose the weight I would like to make expoy cast resin one.... but that is way in the future.
The baby ESP I have now, is styled on the Jackson Dicky, thin neck (feels great but I can bend the neck with little effort, not good in my book), very fast obviously, very strong output on pickups, but the sound of the thing is tainted... like a $10 steel guitar... may be a usefull sound for blues.... but not for me.
I would like to go for a neck through design too... allows me to get rid of more body... I don't know why people keep copying the shape of old guitars...
For now I am planing on modifying my new or maybe my old guitar into something like the attached pic... except with wider bottom curve. I like this shape... no visual obstructions while playing. No top curve to fight when you want to get your head in there... And weight reduced (bad back).
Kept a bit of the classic look as I don't feel the look of more general metal guitars suit me, but it still looks egdy and not girly.
Attachments
- Status
- This old topic is closed. If you want to reopen this topic, contact a moderator using the "Report Post" button.
- Home
- Live Sound
- Instruments and Amps
- Custom Guitar Build Log