I can't see any reason why a instrument build thread would not fit in this forum. Mind you I sometimes do have a different way of looking at things than others. If it offends any sensibilities, well look away. 
This started out in response to a 2x4 contest but I got discouraged by the site that was running it from the results of the previous contest, not that it really matters anymore. It seems there are enough people in other forums interested what a guitar built from a 2x4 will turn out like. I am guessing a few here would also. It starts with this.
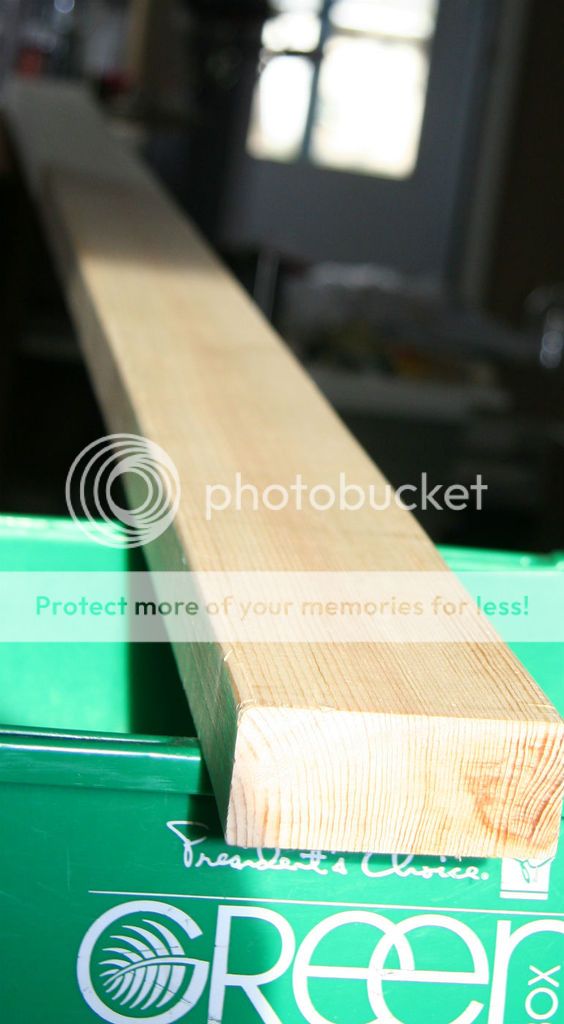
A minimal knot reasonably quartered wall stud. I roughly figured out what I thought I needed for the components and cut the stud in two, then I started resawing.
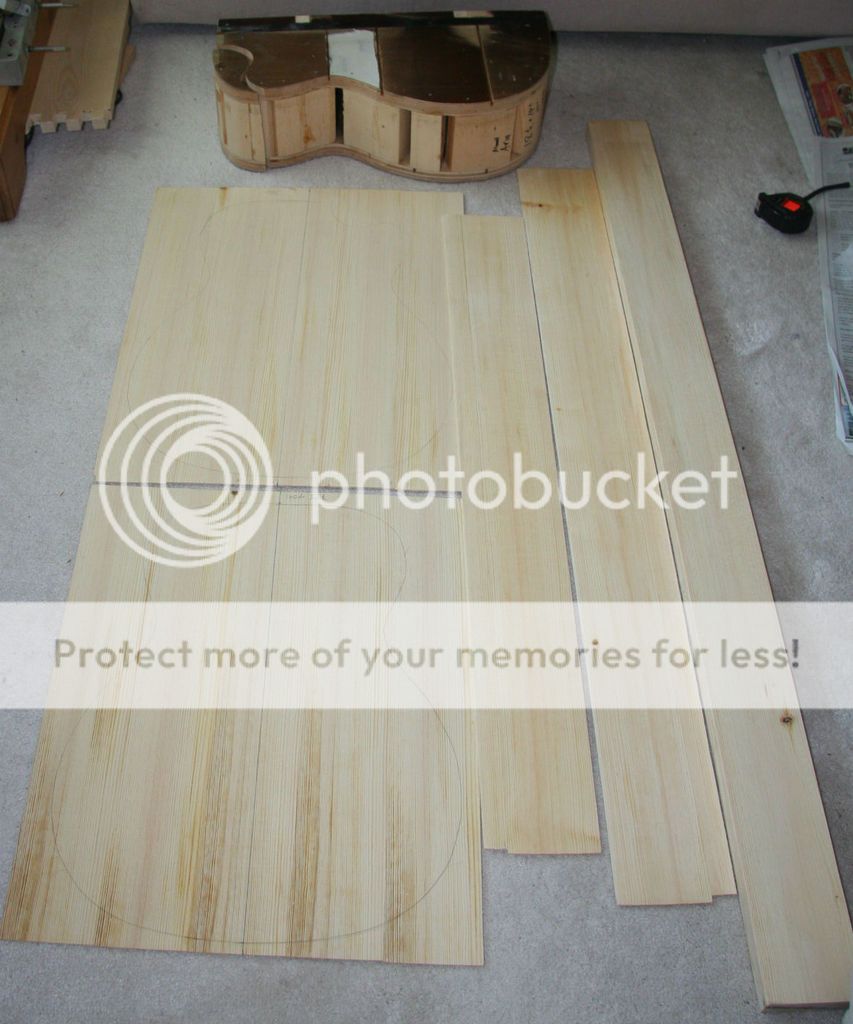
I planed the edges with a router running along a straight edge.

Glued up a back, top and sides. A solid piece left over to do the neck, linings and braces.
Anybody interested?
This started out in response to a 2x4 contest but I got discouraged by the site that was running it from the results of the previous contest, not that it really matters anymore. It seems there are enough people in other forums interested what a guitar built from a 2x4 will turn out like. I am guessing a few here would also. It starts with this.
A minimal knot reasonably quartered wall stud. I roughly figured out what I thought I needed for the components and cut the stud in two, then I started resawing.
I planed the edges with a router running along a straight edge.
Glued up a back, top and sides. A solid piece left over to do the neck, linings and braces.
Anybody interested?

Well ok. Tried bending a cutaway at 0.070",
found out that was too thick, also I think I tried bending a little dry.
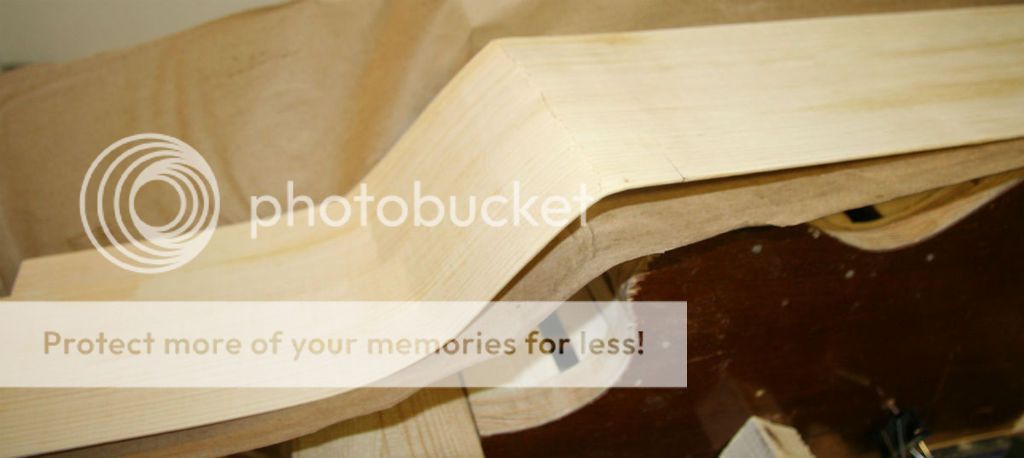
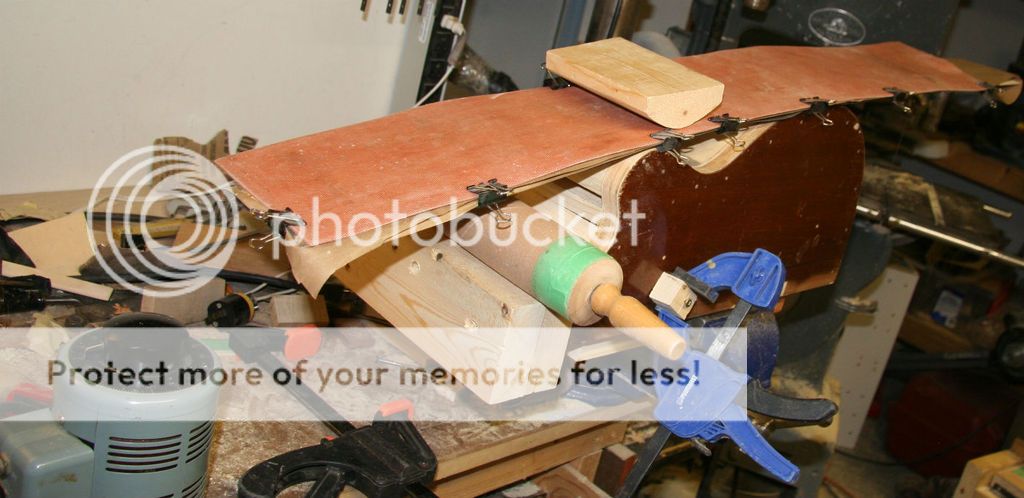
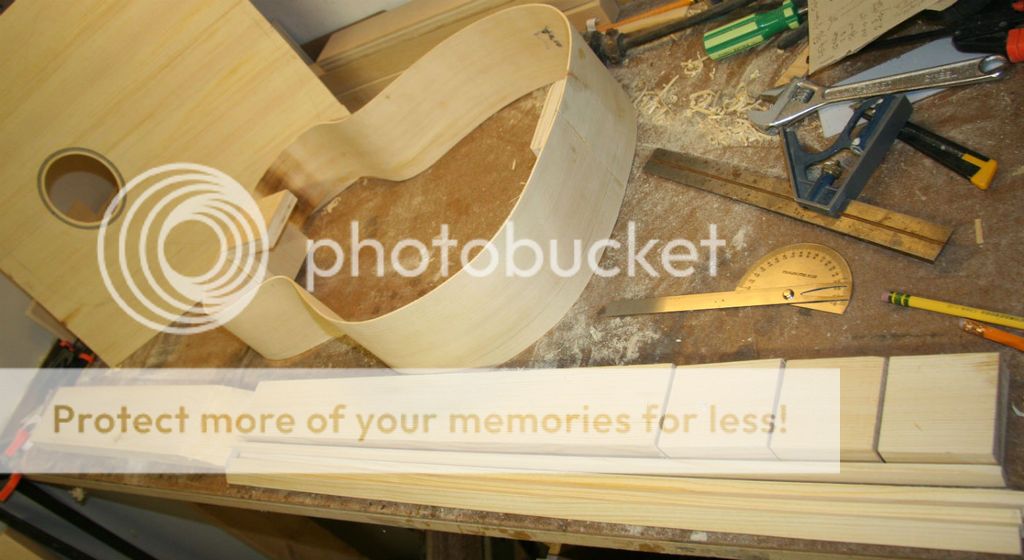
Good thing I made the sides a little longer, just went with a non-cutaway. Since a 2x4 is only 3 1/2" wide I but joined them before bending. Use Titebond III as it holds up to the water and heat better.
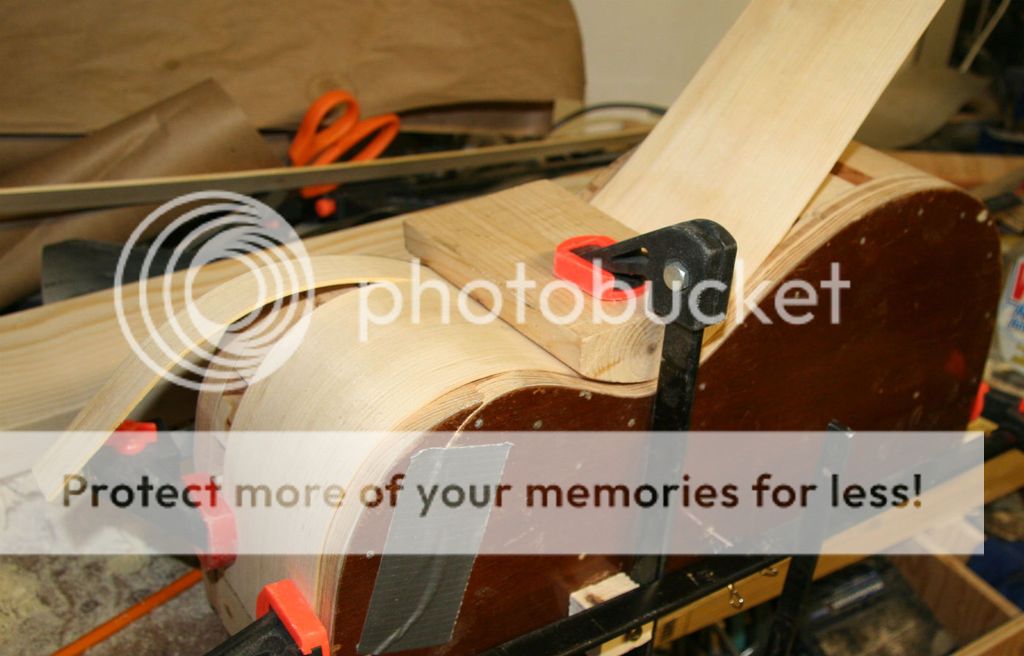
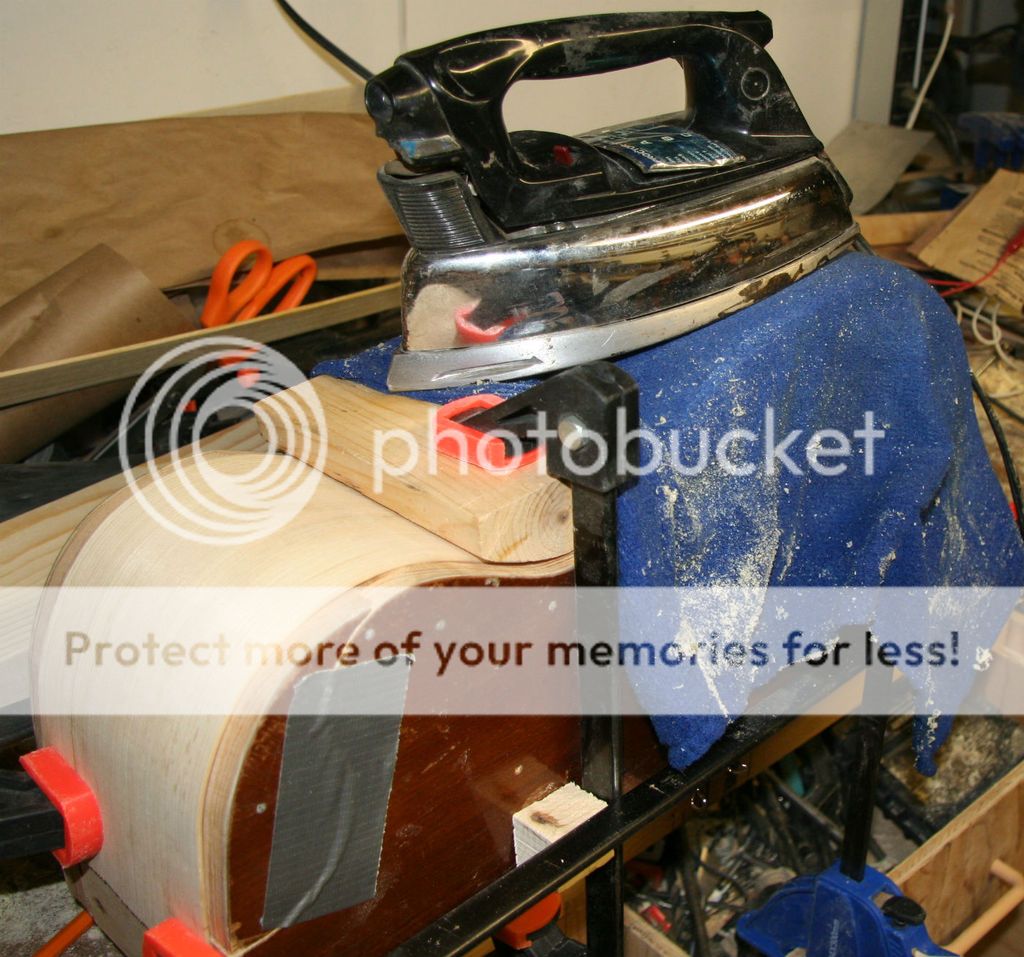
I also used a product called SuperSoft II, without it bending the waist can cause crushed wood and creases in softwoods. I bent the upper bout and waist on a pipe with a damp rag on it, seems to work better than spritzing the wood and bending without a rag. You also do not get burn marks, you can see where I did in other pictures. I bent the lower bout on the form with a rag and an old clothes iron.
found out that was too thick, also I think I tried bending a little dry.
Good thing I made the sides a little longer, just went with a non-cutaway. Since a 2x4 is only 3 1/2" wide I but joined them before bending. Use Titebond III as it holds up to the water and heat better.
I also used a product called SuperSoft II, without it bending the waist can cause crushed wood and creases in softwoods. I bent the upper bout and waist on a pipe with a damp rag on it, seems to work better than spritzing the wood and bending without a rag. You also do not get burn marks, you can see where I did in other pictures. I bent the lower bout on the form with a rag and an old clothes iron.
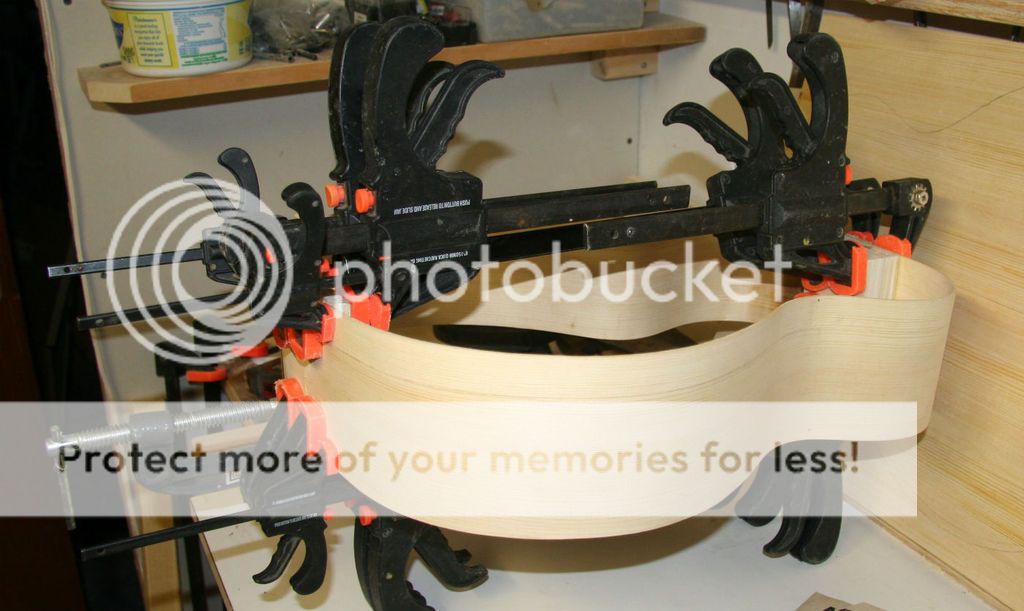
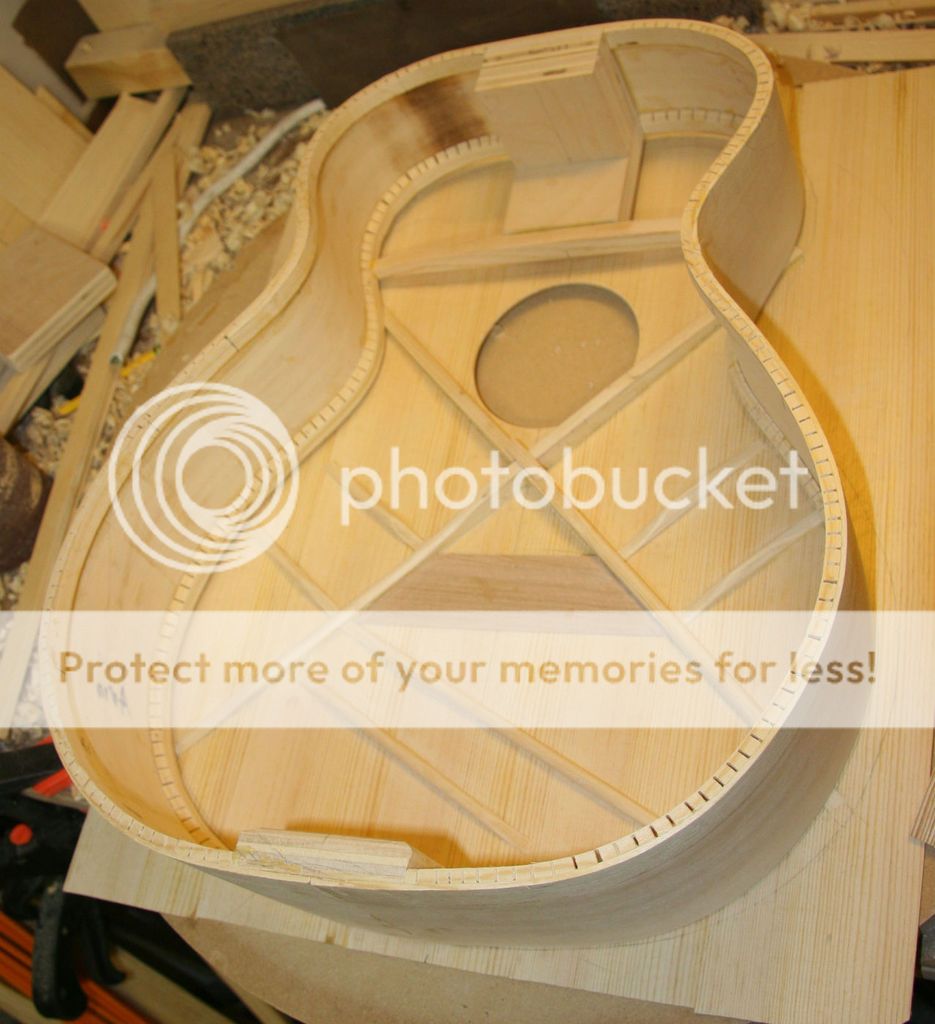
I let it sit a day and the lower bout sprung back a little and I had to touch up the bend on the hot pipe. I do not use an outside mold and just build in the air as it seems. Gluing the neck and butt blocks on.
I put a simple herringbone rosette in the top.
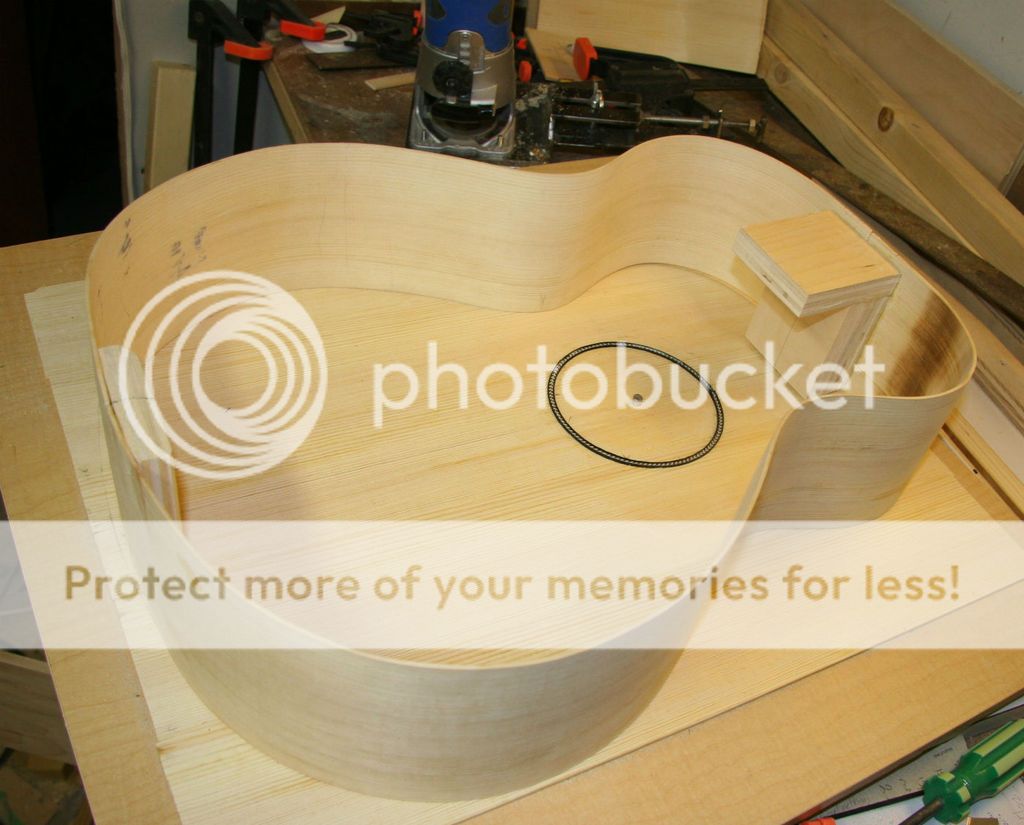
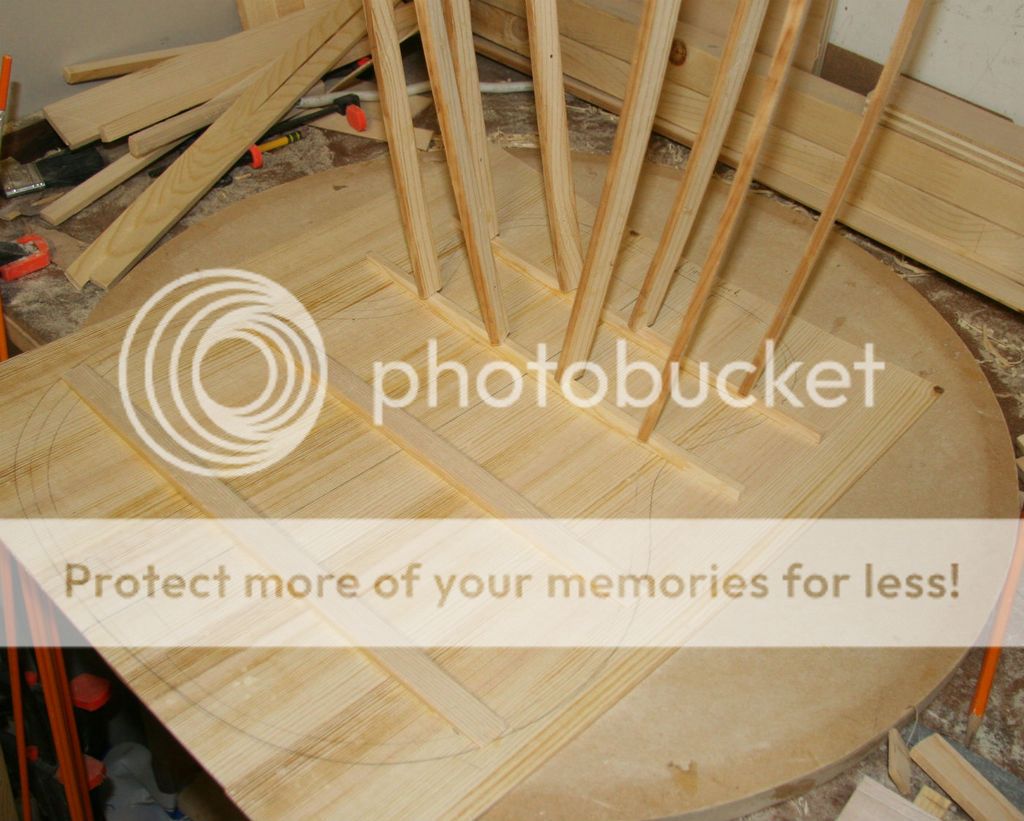
I started cutting up my remaining wood. A scarf joint headstock and a stacked heel. Also cut the strips for my linings. Realized I should have used these pieces for my braces as the leftover pieces were not long enough for the x braces. I used some pine strips I already had but if done properly I would have had enough from the single 2x4.
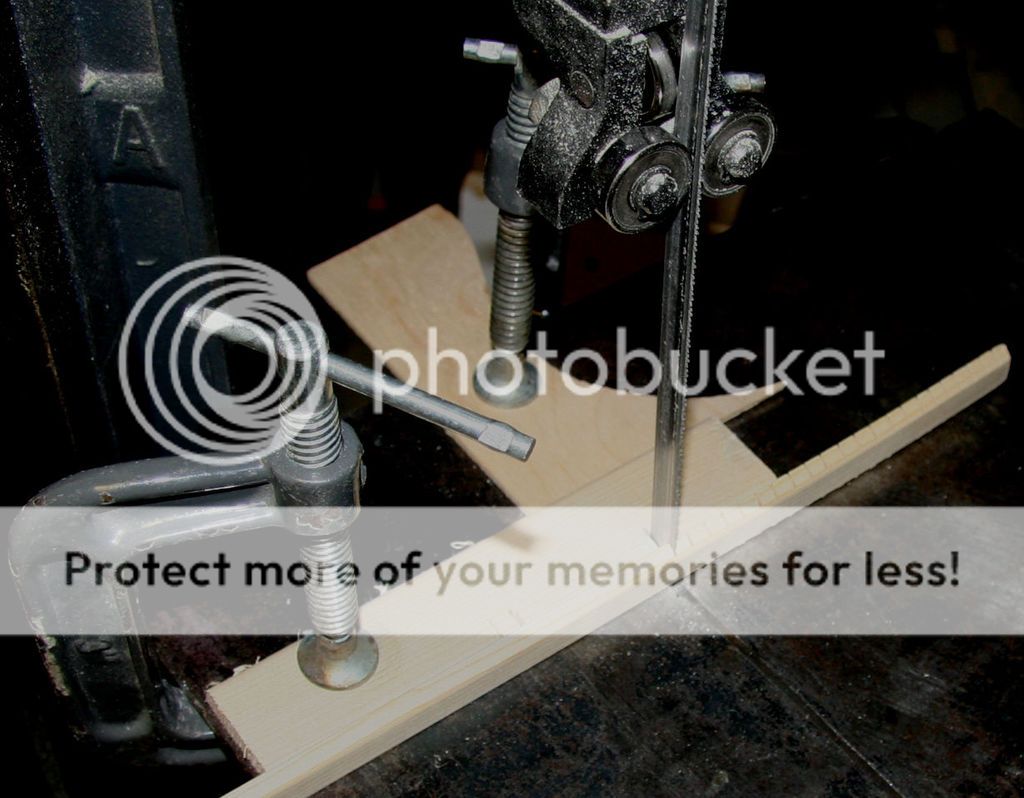
Poor picture but how I cut my kerfs in the linings. I put the strips through my drum sander and they end up being the same width. then I adjust the wooden stop so that the bandsaw cuts a bit shy of all the way through.
Almost caught up in pictures compared to where I am now.
I put a simple herringbone rosette in the top.
I started cutting up my remaining wood. A scarf joint headstock and a stacked heel. Also cut the strips for my linings. Realized I should have used these pieces for my braces as the leftover pieces were not long enough for the x braces. I used some pine strips I already had but if done properly I would have had enough from the single 2x4.
Poor picture but how I cut my kerfs in the linings. I put the strips through my drum sander and they end up being the same width. then I adjust the wooden stop so that the bandsaw cuts a bit shy of all the way through.
Almost caught up in pictures compared to where I am now.
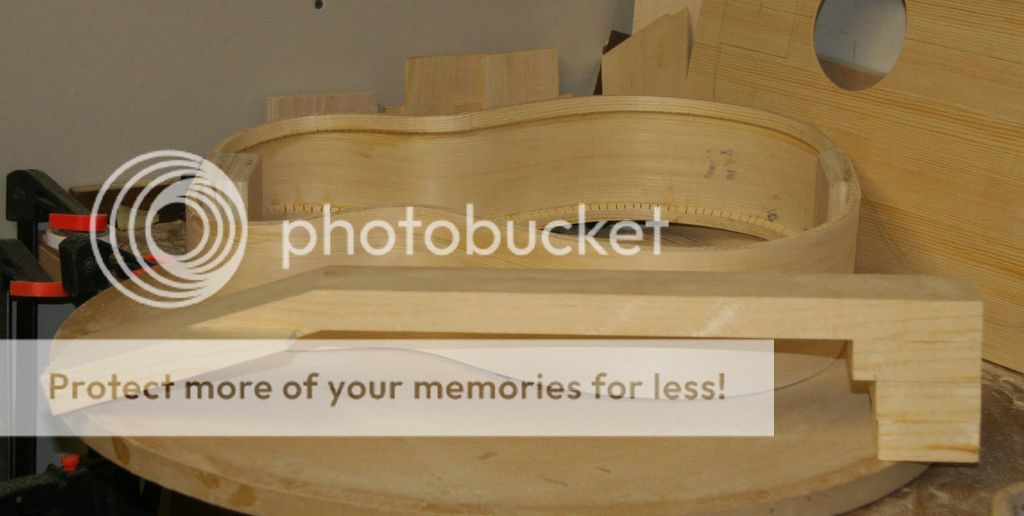
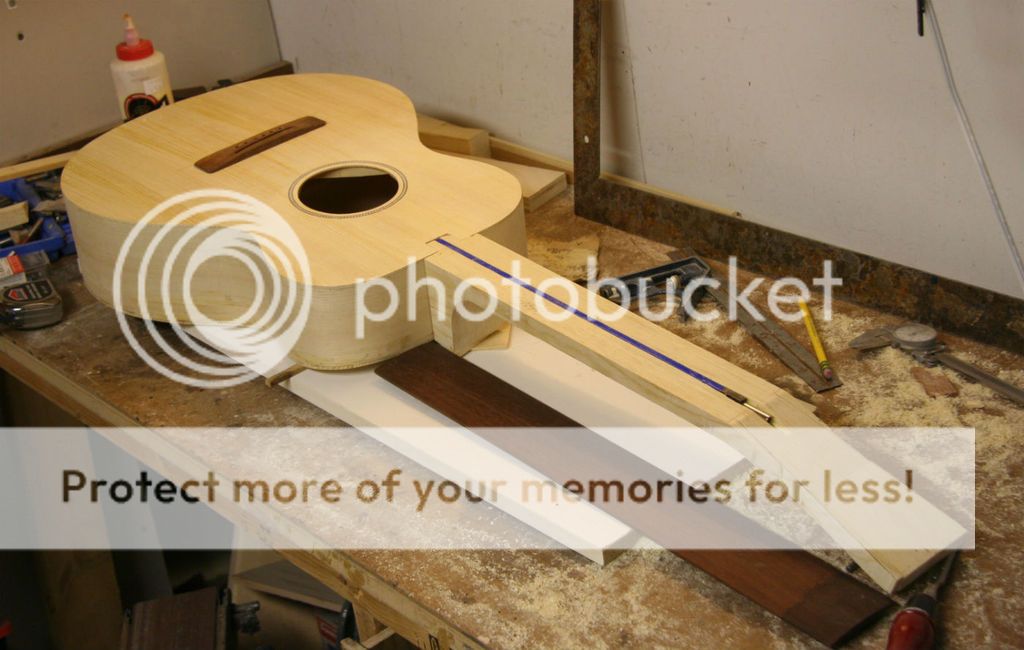
Top and back are on. For size comparison, a Martin size 5 pine (not a 2x4) guitar I was building before I embarked on my poor man's resonator guitar. I did maple binding on this one but might go a darker binding on the 2x4. I could not find a steel string bridge to give a sense of size but did find a classical bridge. Not sure which one I want to finish first now.

Neck slotted for the truss rod. Mortise and tenon cut, went fairly wide on them with the softwood neck and full sized guitar. Trimmed the headstock, took down the neck and headstock thicknesses to close to their final dimension. Cut a bridge, using some Jatoba I baked (to see if I can get it to look more like rosewood) for the fretboard and bridge. As is a straightedge on the fretboard lines up with the top of the bridge, mind you nothing is glued down yet.
I was not going to bother with binding, this is not a guitar that will take the knocks like one with hardwood back and sides, it probably won't do much traveling. Then I thought maybe some black ABS binding. I'll have to mull it over some more.
I was not going to bother with binding, this is not a guitar that will take the knocks like one with hardwood back and sides, it probably won't do much traveling. Then I thought maybe some black ABS binding. I'll have to mull it over some more.
Wy thank you.
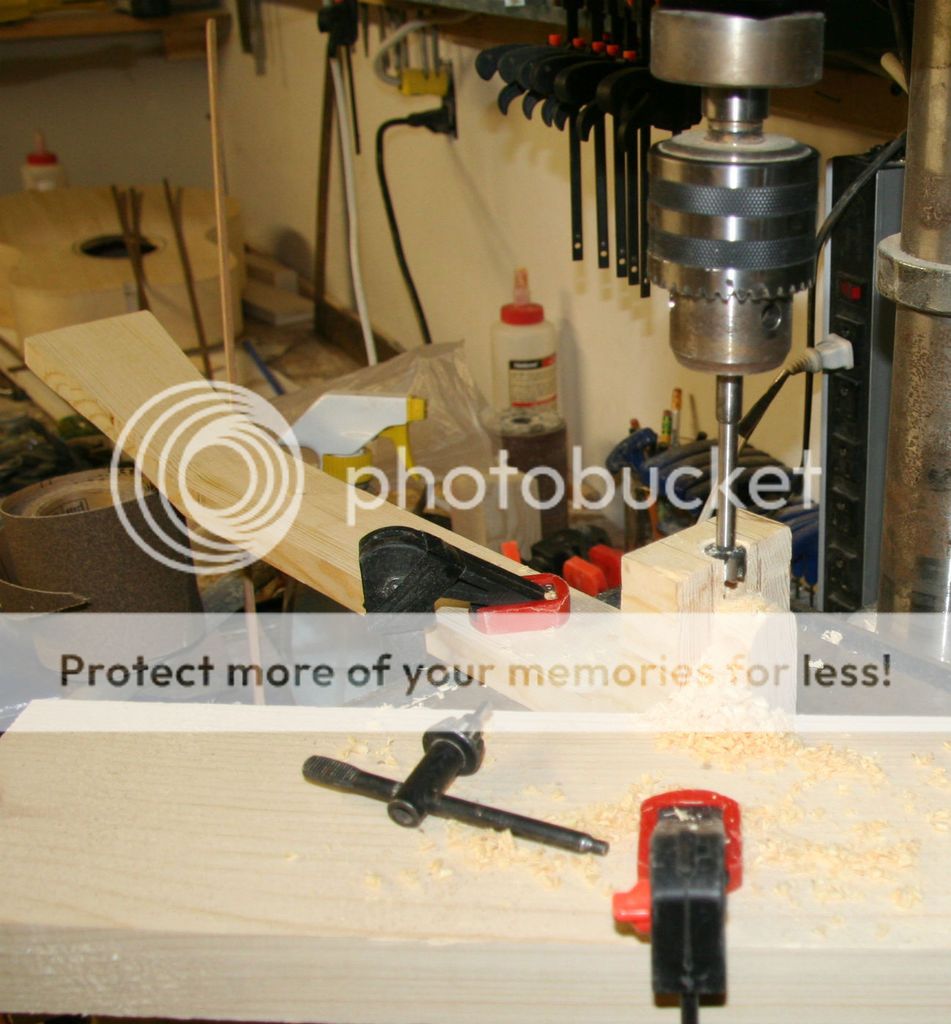
Drilled a hole to put a piece of dowel in so the anchor bolts (is that what they are called, doesn't sound right today) have something more than softwood endgrain to grab hold of.
I did some bodies last year but did not get time to finish them. Routered the binding ledge along with the pine body. Took some time.
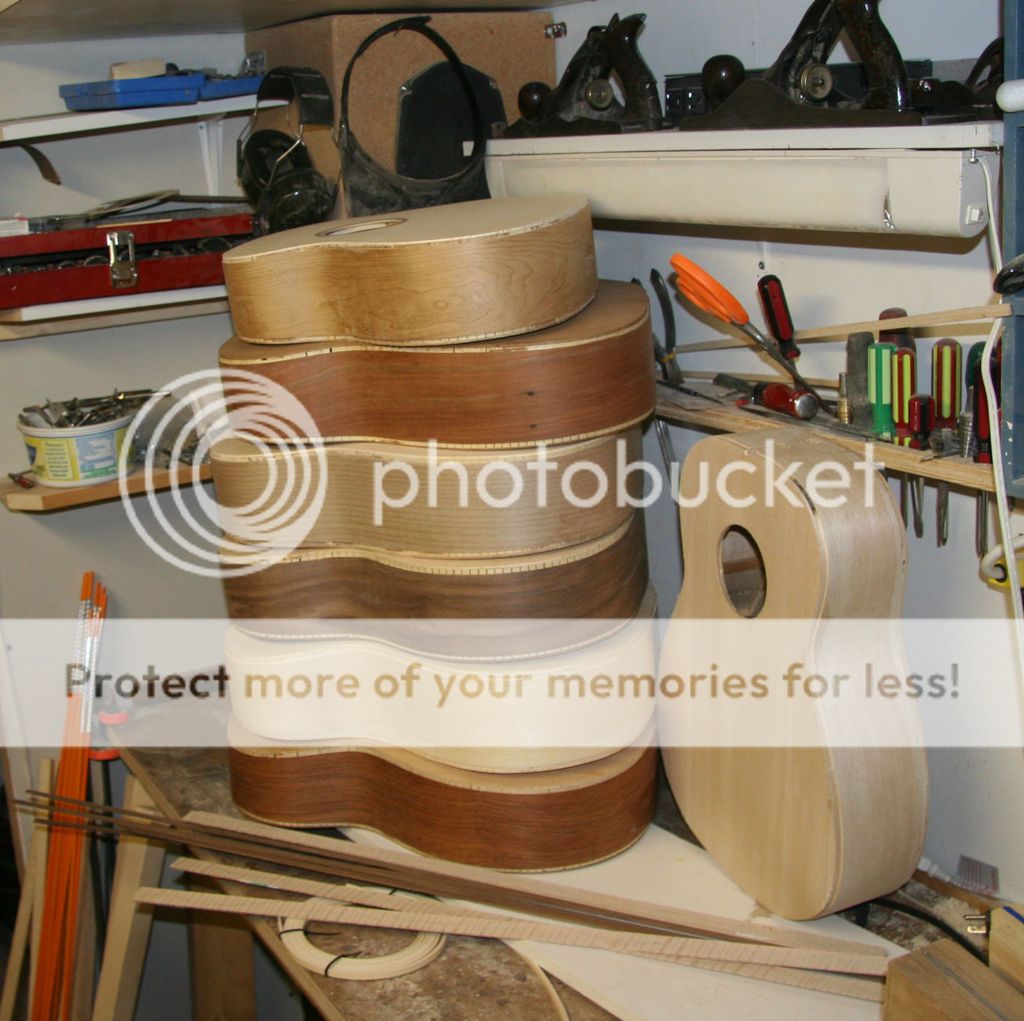
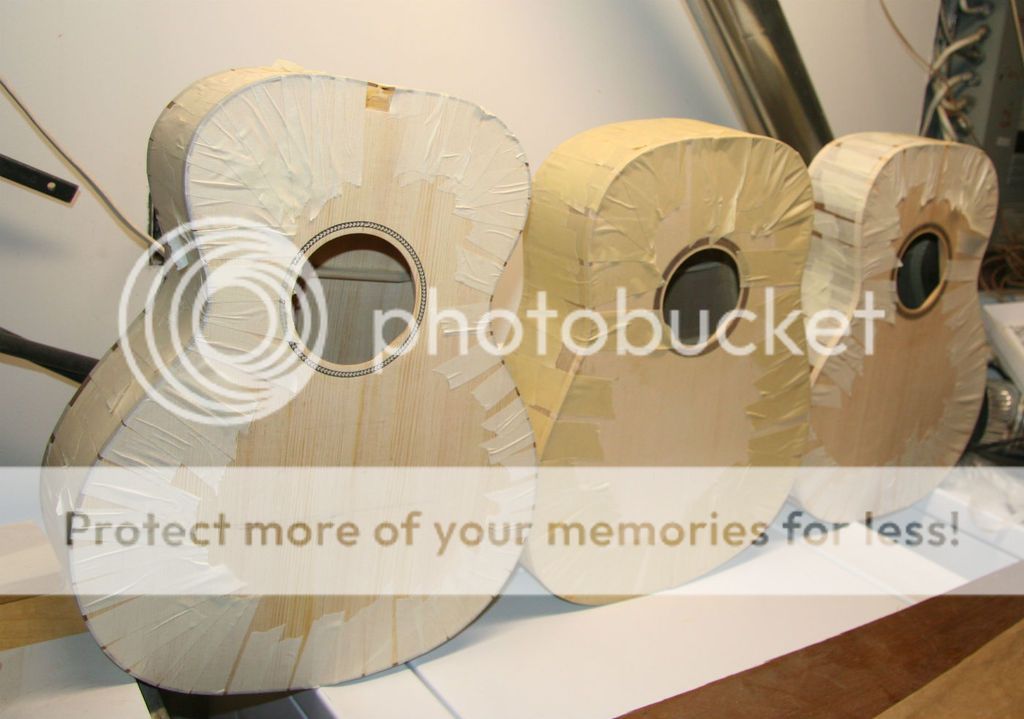
Well got three bound today. Two with flamed maple and the pine with the walnut. Used fish glue so it will be tomorrow before I find out where I screwed up. I did not go crazy on the jointery, these are not that kind of guitars. Giveaways to family, I just want them to sound ok and play decently. I know I am going to have some trouble with the walnut. When I was routing the binding ledge bits splintered off and I have some spots to repair.
One thing I had to do is sand the edges of the binding. I ripped them on the table saw and the edges were not al nice and pristine. I clamped two thin sheets of wood on either side of the binding on top of a sheet of sandpaper. The binding had minimal rock in it as I sanded the edges. Nothing earth shattering, just another step needed to be done.

Bent the binding on a hot pipe, glued it on. Bend another, glue. Then another. And another. Was glad when I got the last one done. No shortage of tape.
Drilled a hole to put a piece of dowel in so the anchor bolts (is that what they are called, doesn't sound right today) have something more than softwood endgrain to grab hold of.
I did some bodies last year but did not get time to finish them. Routered the binding ledge along with the pine body. Took some time.
Well got three bound today. Two with flamed maple and the pine with the walnut. Used fish glue so it will be tomorrow before I find out where I screwed up. I did not go crazy on the jointery, these are not that kind of guitars. Giveaways to family, I just want them to sound ok and play decently. I know I am going to have some trouble with the walnut. When I was routing the binding ledge bits splintered off and I have some spots to repair.
One thing I had to do is sand the edges of the binding. I ripped them on the table saw and the edges were not al nice and pristine. I clamped two thin sheets of wood on either side of the binding on top of a sheet of sandpaper. The binding had minimal rock in it as I sanded the edges. Nothing earth shattering, just another step needed to be done.
Bent the binding on a hot pipe, glued it on. Bend another, glue. Then another. And another. Was glad when I got the last one done. No shortage of tape.
- Status
- This old topic is closed. If you want to reopen this topic, contact a moderator using the "Report Post" button.
- Home
- Live Sound
- Instruments and Amps
- A 2x4 Acoustic Guitar, For Something Completely Different.