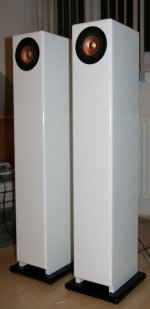
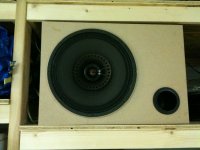
Hi, my first DIY attempt. Sound is decent - good enough for kitchen") It's a kit from lautsprechershop.de.
It's a kit from lautsprechershop.de.
I'm not satisfied with the finish though...but I only had two days for the whole project and ran out of paint. I think I'll redo it when it gets warmer so that I can paint them outside.
It's a kit from lautsprechershop.de. I'm not satisfied with the finish though...but I only had two days for the whole project and ran out of paint. I think I'll redo it when it gets warmer so that I can paint them outside.
An externally hosted image should be here but it was not working when we last tested it.
An externally hosted image should be here but it was not working when we last tested it.
An externally hosted image should be here but it was not working when we last tested it.
Reminds me a bit of an old style mantle clock.
Was also my "inspiration"
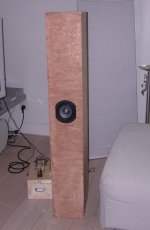
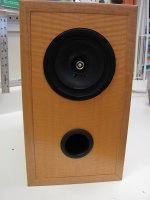
My first project after a gap of more than 20 years:
Needle Deluxe (with CHR-70, kit from www.oaudio.de).
Needle Deluxe (with CHR-70, kit from www.oaudio.de).
Attachments
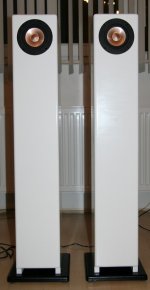
Yes, called Needles Deluxe with the CHR-70. The dimensions are a little bit different from the original Cyburgs-Needle.
You can find them at blue planet acoustic Needle DeLuxe Bausatz - Lautsprecher Selbstbau by blue planet acoustic including a datasheet with dimensions.
For me the price-performance ratio is outstanding. Very balanced sound including enough bass (for me).
For sure I cannot compare this kit with my old high end speakers but they cost many times more than the needle deluxe.
Regards
Norbert
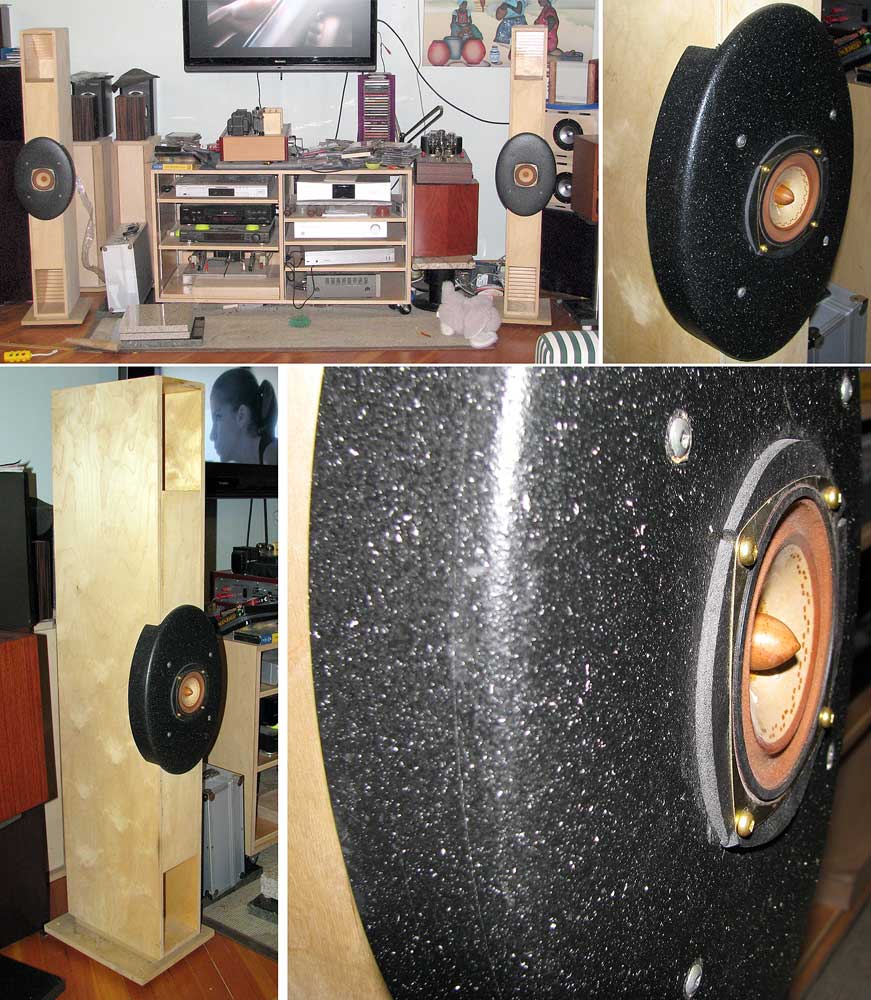
I'll start... This is my 3rd pair of "T-Horns"; too bad I couldn't keep them, because I sold it...
WOW! Those are BEAUTIFUL! Maybe my brother should hire you to build something. I'm amazed how much the side sculpted pieces make it so much more artistic-and probably break up panel resonance to boot.
Whatever happened to them, and what driver went inside?
Boom Bench
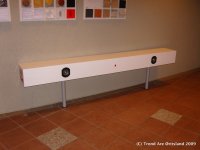
Hi Guys,
Here is a I-pod bench I built out of two TangBand W4 bamboos and [FONT=Verdana, Helvetica, Arial, san-serif]TQWT calculator on the zillaspeak BiB site They are built of cheap 16mm plywood reinforced with 12mm MDF on the top and bottom. Between the speakers I have built inn a small amplifier I pulled from a pair of computer speakers.
[/FONT]
Hi Guys,
Here is a I-pod bench I built out of two TangBand W4 bamboos and [FONT=Verdana, Helvetica, Arial, san-serif]TQWT calculator on the zillaspeak BiB site They are built of cheap 16mm plywood reinforced with 12mm MDF on the top and bottom. Between the speakers I have built inn a small amplifier I pulled from a pair of computer speakers.
An externally hosted image should be here but it was not working when we last tested it.
[/FONT]
Attachments
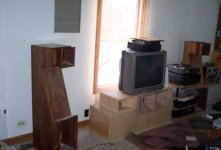
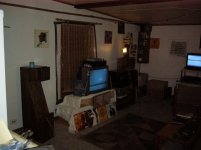
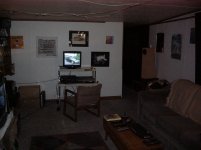
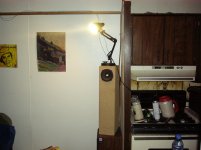
This is my current set up! All very temoporary of course. The big Wallnut compound horns have two 4 inch woofers and one piezo tweeter in each the big box under the TV is a Tapped horn with a 12" JBL woofer the center speakers are just some cheap 3"ers that either came from some computer speakers of a junk store for a buck or two a piece. My rear speakers (not shown) are Frugal horns with some 5" Aiwa drivers I got at a junk store that put out considerably more bass than the FE126Es did (but of course can't even compare with the mid and highs of the Fostexes). Oh yeah it all sounds pretty fantastic, though the Harmon kardon receiver sounds slightly harsh and bright compared to the Marantz amp I had them hooked to before.
Attachments
Hi Guys,
Here is a I-pod bench I built out of two TangBand W4 bamboos and [FONT=Verdana, Helvetica, Arial, san-serif]TQWT calculator on the zillaspeak BiB site They are built of cheap 16mm plywood reinforced with 12mm MDF on the top and bottom. Between the speakers I have built inn a small amplifier I pulled from a pair of computer speakers.
An externally hosted image should be here but it was not working when we last tested it.
[/FONT]
So how does it sound?
Well they are very clear and beautiful for jazz and female vocals. The bass is good down to 70Hz but sinks of slowly from the midrange. Soundstage is good. The elements are about 150cm apart and 70 cm above the floor, and I have lightly stuffed the boxes so there is some lower midrange reflecting out of the bass port, which contributes a airyness to the sound.
Before I made them into a bench I used them as ordinary towers, I powered them with a Spud SET amp on the 13em7. With that amp they were beautiful all the way through the spectrum, but a bit strong around 2000-3000Hz which i dropped 5dB with a notch filter. THe cheap computer amp obviously cant provide the same sweet sound the SET had, but is OK.
Before I made them into a bench I used them as ordinary towers, I powered them with a Spud SET amp on the 13em7. With that amp they were beautiful all the way through the spectrum, but a bit strong around 2000-3000Hz which i dropped 5dB with a notch filter. THe cheap computer amp obviously cant provide the same sweet sound the SET had, but is OK.
Attachments
Recent speaker projects
I recently took on tube amp building as a hobby and felt I needed to build some speakers as well. Woodworking is also a hobby of mine so I gave it a shot.
I have built 4 sets of speakers. The first one is a set of small coax bookshelves using vifa drivers from APEX JR. Used the recommended crossover and they sound pretty good for the size.
I then built a set of 2.8 CF full range with Audio Nirvana Super Cast 12. These are big, they have a stained teak veneer. To my ears they sound amazing.
I then found a pair of University drivers at the TRW Swap meet in LA and put them in the recommended size enclosure that came with the drivers (they were brand new from 65 in their box with instructions). I have these in my garage and are unfinished MDF.
Lastly I built a pair of full range speakers using some tiger maple covered doors that someone put in the trash. The drivers are cheap radioshack 40-1909 that i got on ebay for 5 bucks. Took the dustcaps off and put a 3/8 socket with a brass endcap inside as a phase plug. I am using them on a 3.5w homebuilt tube amp and they also sound very decent, plenty loud if desired.
Attachments
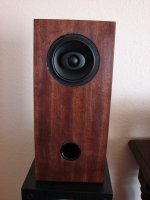
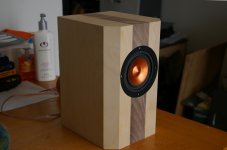
A little something new I've been working on!
Made from birch-ply with an inlay of maple. Since the veneer is all pre-applied, this box is entirely miter joints!
This was a challenge! Unlike some of you I /don't/ have a background in woodworking, so I'm learning all this as I go. Lots of planning and trial and error.
This is a first prototype of a design I want to do more with. It's definitely a little rough around the edges, but I think I have most of the problems worked out! The next one should be much cleaner, and come together faster!
Driver: MarkAudio CHR-70
Attachments
A little something new I've been working on!
Made from birch-ply with an inlay of maple. Since the veneer is all pre-applied, this box is entirely miter joints!
Looks nice! Can you explain more about the construction? How is the darker stripe there? That's not pre-applied, is it? It's another piece??
Looks nice! Can you explain more about the construction? How is the darker stripe there? That's not pre-applied, is it? It's another piece??
Sure!
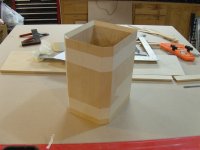
First, the box:
The main material is 1/2 "Birch Ply" which is just MDF sandwiched with Birch veneer. It's inexpensive, but looks decent! Since the veneer is pre-applied, the whole box has to be mitered. I've attached a picture of a test-fit so you can see a bit of how I built it.
One of the trickiest parts was making sure the box was square. This means I had to get the 45degree angle "bevel" pieces exactly the right length, so the front of the speaker is the exact same with, including the bevel, as the back. A little bit 'o Pythagorean theorem gave me the width I needed, then it was just a matter of getting my table saw to make the cut accurately. My fence isn't that accurate, so this involved lots of measuring and re-measuring from the teeth on the blade to the fence with a little 1/32nd inch ruler
The second big challenge was cutting the 45 degree corners on the top and bottom pieces. I can't say I fully succeeded on this. It's a compound miter cut that has to be perfectly accurate and I just didn't have a good enough point of reference to get the depth of the cut right, and I usually overshot it. my solution here is just going to be building a special jig for this.
There's a couple braces in there, and I doubled up the 1/2" ply on the front baffle just to give the speaker more to mount to and to make it a bit more rigid
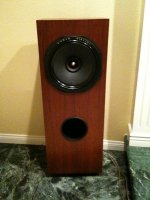
The inlay: (Oops! yeah it's it's Walnut. Sorry! I don't know why I keep saying maple)
This was pretty simple, actually. The inlay is a 1/4" thick piece of walnut. I cut one piece of the ply down to the width and length needed to eventually make both the front and top pieces, and built myself a ghetto little guide-fence for my router so route out a groove in the ply a specific distance from the edge. Did one groove from each edge then routed out the middle, then cut the walnut down to size so it fit nice and snug (cut a little wide first, then trim down until it's perfect). Glue the inlay in place, then shape the board into the individual panels.
Problems:
This is in bold because I'd like some advice if any of you guys have solved these. There are only two problems that I haven't solved. The main problem that I consistently have with building speakers is accurately drilling the holes for mounting the drivers. I have a good drill press, but I just cannot get them quite perfect, and there always seems to be a bit of tweaking/tension on the driver because one screw isn't quite perfect.
This one came out decently, but not totally perfect, and I drilled the holes WITH THE DRIVER MOUNTED IN THE CAB, which obviously I don't want to normally do. I only did that this time because the driver is my test mule and it's been dropped and is already mildly damaged. Any advice out there on accurately placing holes? making templates, using fences on the drillpress, etc. I just need to try a bunch of stuff.
The other problem is that a bit of glue tends to seep out onto the veneer. Since I'm "clamping" them with tape, some of it seeps under the tape so I can get it off, and it soaks into the veneer and no amount of sanding will remove it. I'm assuming this is going to make the speaker un-stainable. I'm pretty sure I just need to figure out exactly how much glue I need and not use too much, but that will always change based on how tight the angle is, etc. Hmm!
Attachments
Last edited:
- Home
- Loudspeakers
- Full Range
- Full Range Speaker Photo Gallery