Hi Everyone,
I have been a long time lurker on the diyaudio forums and have been given a fair bit of advice in considering my build. As a bit of background, this is my second speaker build. The first was an Overnight Sensation MTM which was pretty simple and does a great job out on the patio as a pair of outdoor speakers.
I wanted this build to push the woodworking and audio envelope a bit further and I decided upon a Microtower build. I have linked below my initial thread. This outlines a lot of my thought processes and how I got to this point. Funnily enough this current build is just a concept based practice run for a more complex curved build later!
http://www.diyaudio.com/forums/full-range/265369-alpair-7-3-microtower.html
I promised if I did a build I would log it here so the following posts will outline how I have gone through my particular process. I will post in the order I have gone along, you will see there is no real method to my process just ticking over on the next little idea that hits me as I complete one task and move onto the next.
I have a fair bit of catching up to do as I am a fair way through already but I have taken photos along the way. I will pot as much as I can, when I can.
I hope you all enjoy. Please feel free to comment, give advice, criticism etc. I'm in this to learn and get better!
Andy
Update:
Now that I have reached the end of the journey I thought I'd add some pics of the final result for those of you that are thinking about reading through this thread. Here is the link to the pics:
http://www.diyaudio.com/forums/full-range/270528-castle-microtower-build-9.html#post4302203
Enjoy!
Last edited:
As a big fan of the Castle microTowers, I must say you've made a good choice and I look forward to build progress.
I also have a great tip about how to make the bottom easily removable while maintaining a perfect seal when shut. I'll try to take some photos and write a description sometime soon. In the meantime, best of luck!
I also have a great tip about how to make the bottom easily removable while maintaining a perfect seal when shut. I'll try to take some photos and write a description sometime soon. In the meantime, best of luck!
Ok, here goes. First up are some pics of my scratchings on paper in no particular order. Shows some of my thoughts and all of the errors... Warts and all, clearly some mistakes, have a laugh when you see them. Going back to high school maths was fun!
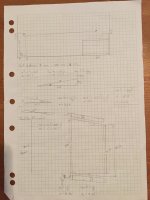
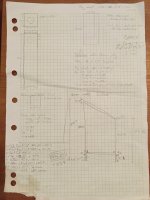
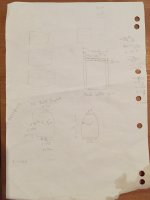
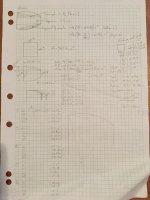
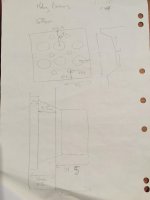
As you can see I'm thinking curved but will do a square box to see how it goes as it's my first full range build.
I have decided to do a CHR-70 Microtower build in a castle format. The cabinet will have a 5 degree backwards tilt and the top will be at 5 degree to horizontal facing forwards. With the rearward tilt this gives an 110 degree angle to the front baffle.
As this is a test run for both sound and my build skills (practice needed!) I am knocking it together in MDF. I would have gone, and had hoped to use, ply but too hard to find at reasonable prices around here. If I do another build it will be in ply.
Now onto construction. I have been lucky enough to get a load of hand-me-down tools from my father in-law. This includes a 1981 Triton Workcentre MK3 which has seen better days but fully functional. The biggest issue is that there is a 0.5 degree difference between the table on left and right side of the blade. I also got a jig saw, router and various other hand tools. In addition to my own stash this has enabled me to have the confidence to bite off more than I can chew.
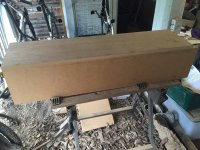
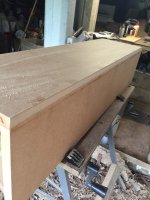
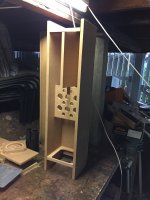
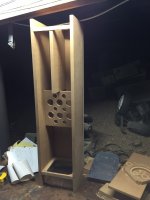
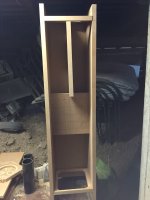
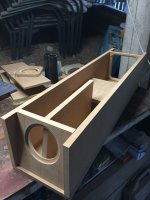
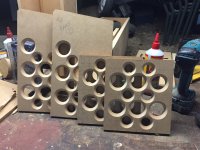
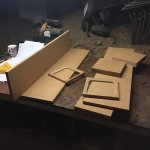
The first step was to cut the panels. As you can see I have planned to have a removable base and decided to leave the front baffle to last as I thought this would be easier with the gluing of the top driver panel. This may or may not have been a good idea as it will make getting the driver brace depth right much harder. Side panels have been made longer than necessary and will be routed down to the correct length when the box is finished. Back panel base has a 5 degree cut at the base and will be routed down with the sides at finish stage. Holey braces were also cut at this point.
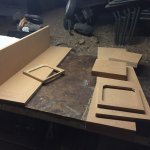
The next step was glue up, I used lots of clamps and a mitre clamp too keep things square to start with.
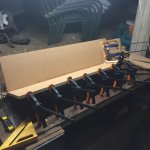
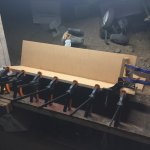
Here are the boxes and braces after glue up
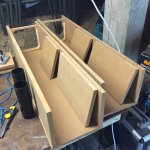
You can see from the light in the photos this was not all done at the same time!
The first step was to cut the panels. As you can see I have planned to have a removable base and decided to leave the front baffle to last as I thought this would be easier with the gluing of the top driver panel. This may or may not have been a good idea as it will make getting the driver brace depth right much harder. Side panels have been made longer than necessary and will be routed down to the correct length when the box is finished. Back panel base has a 5 degree cut at the base and will be routed down with the sides at finish stage. Holey braces were also cut at this point.


The next step was glue up, I used lots of clamps and a mitre clamp too keep things square to start with.


Here are the boxes and braces after glue up

You can see from the light in the photos this was not all done at the same time!
Last edited:
Next step was to have a crack at the top baffle. This needed to have a 10 edge on each end to fit with the design. This presented some problems as my table saw can not do angle cuts. In the end I worked out the saw (its a standard circular saw attached to a sled in the workcentre) can be flipped and used as a crosscut saw. This enabled the circular saw blade to be angled and the pieces cut.
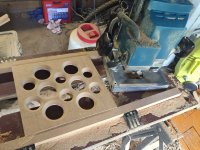
This was also my opportunity to use my new jasper circle jig so I did a quick practice to see how it went. Pretty easy and a great result when using a .25inch spiral upcut bit.
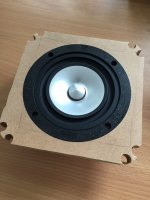
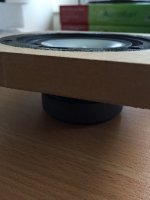
After what I considered a successful trial it was on to routing the top baffle which also went well.
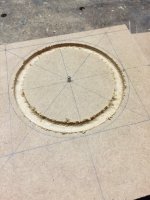
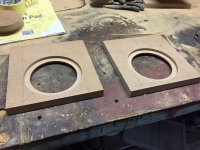
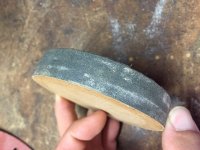
I did find that the fit was very tight and after a fair bit of reading the consensus seemed to be that the drivers should not have any force applied to the external surfaces so I made a round sanding disk from the driver cutout to cleanly sand the driver recess.
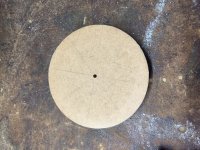
This was also my opportunity to use my new jasper circle jig so I did a quick practice to see how it went. Pretty easy and a great result when using a .25inch spiral upcut bit.


After what I considered a successful trial it was on to routing the top baffle which also went well.


I did find that the fit was very tight and after a fair bit of reading the consensus seemed to be that the drivers should not have any force applied to the external surfaces so I made a round sanding disk from the driver cutout to cleanly sand the driver recess.


Last edited:
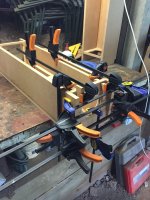
Thinking through how to accurately glue on the top baffle took some effort. In the end I used both of the top holey braces as a brave for clamping. I cut the top corner out so the glue would not stick to the brace and used a spacer between the sides and the brace for the same reason. The braces were clamped then the top baffle glued in and camped.
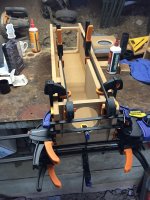
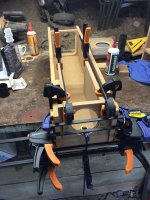
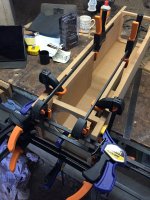
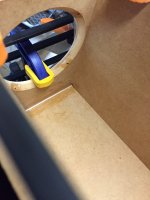


After the maze of clamps for the top baffle it was on to the removable base. For this I used threaded inserts (M6) which were placed in the bottom panel (routed out of a square panel) using a polyurethane glue. The idea here was to create a snug but not tight fit as mdf can split with inserts such as these. The nature of polyurethane glue to expand should create a good solid bond.
The removable panel had a 2.25inch hole routed for the port tube. The port tube was cut on the table saw to keep it square.
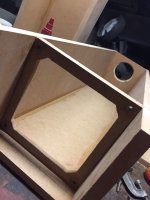
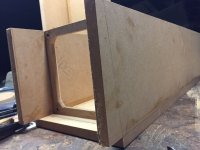
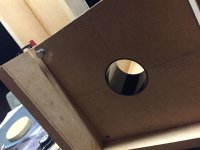
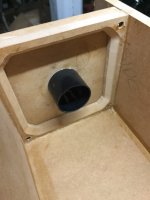
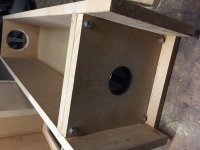
The removable panel had a 2.25inch hole routed for the port tube. The port tube was cut on the table saw to keep it square.


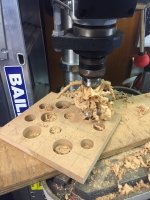
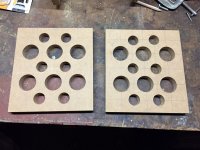
Hi Zman, thanks for the encouragement. Yep the rest have been drilled with forstner bits and I actually neatened up the routed holes with forstner bits as well...Great job on documenting the build, and it's coming along nicely.
You are going to do the holes on the upper holey brace with forstner bits, right?
Hi Zman, thanks for the encouragement. Yep the rest have been drilled with forstner bits and I actually neatened up the routed holes with forstner bits as well...
Cool!
What stuffing material have you got?
You are going to make the bottom removable?
Really interested to hear how you solved the removable bottom question. I have kept it simple. Instead of using cleats I routed out a panel and used threaded inserts and a closed cell foam window seal. Then had a removable panel with the port installed. Also means a different driver can potentially be used in the future.As a big fan of the Castle microTowers, I must say you've made a good choice and I look forward to build progress.
I also have a great tip about how to make the bottom easily removable while maintaining a perfect seal when shut. I'll try to take some photos and write a description sometime soon. In the meantime, best of luck!
Cool!
What stuffing material have you got?
You are going to make the bottom removable?
Bottom will be removable as per post above to Cogitech.
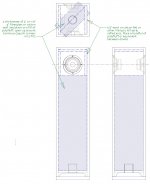
Stuffing is the next area I am looking into. I was intending on following the P10 advice and using a wool or felt lining around drivers and then using fibreglass down the main chamber. I've had a quick look at linings but Aus is a strange place and it's not obvious where to find any. Next stop will be visiting a carpet factory....
Last edited:
Member
Joined 2009
Paid Member
I used cleats but didn't try to seal the bottom. I figured that with fairly large cleats there really isn't much of a draft and with a great big port on the bottom there isn't going to be anything worth worrying about. They sound good.
http://www.diyaudio.com/forums/full-range/220047-martello-2-mini-tower-single-2-x-4-a.html
http://www.diyaudio.com/forums/full-range/220047-martello-2-mini-tower-single-2-x-4-a.html
I used cleats but didn't try to seal the bottom. [/url]
Bigun,
Please refer to pics at post #10 - looks like OP has the bottom fitting under control. Kind of similar to your approach with the Martello-2, but made from piece of MDF like a "window brace", instead of separate pieces. Just a bit of thin weatherstrip around the bottom of the brace (which is acting as cleats), he should have a very good seal.
Btw, your build of the Martello-2 was a good read, and nice looking pair.
Last edited:
- Status
- This old topic is closed. If you want to reopen this topic, contact a moderator using the "Report Post" button.
- Home
- Loudspeakers
- Full Range
- Castle Microtower Build
