Thought I might get a little more attention and bring my build thread in here for the masses.
Link to start of thread
http://www.diyaudio.com/forums/markaudio/210608-chr70-shoebox-70-3-a.html
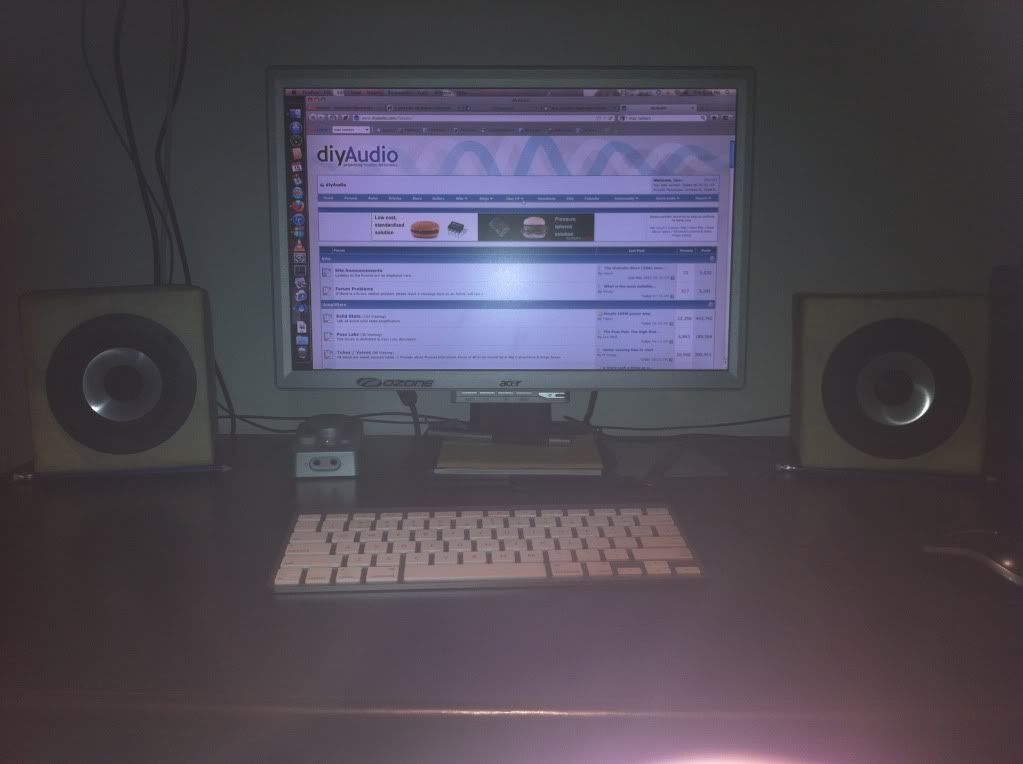
Cliffs - Building 2.1 setup as near fields for PC, going to power from 3 channel amp w/ DAC and DSP built in.
Ill add this is my first home DIY, after many years playing with car systems.
Todays work!
Stuff getting a little bit of matt white
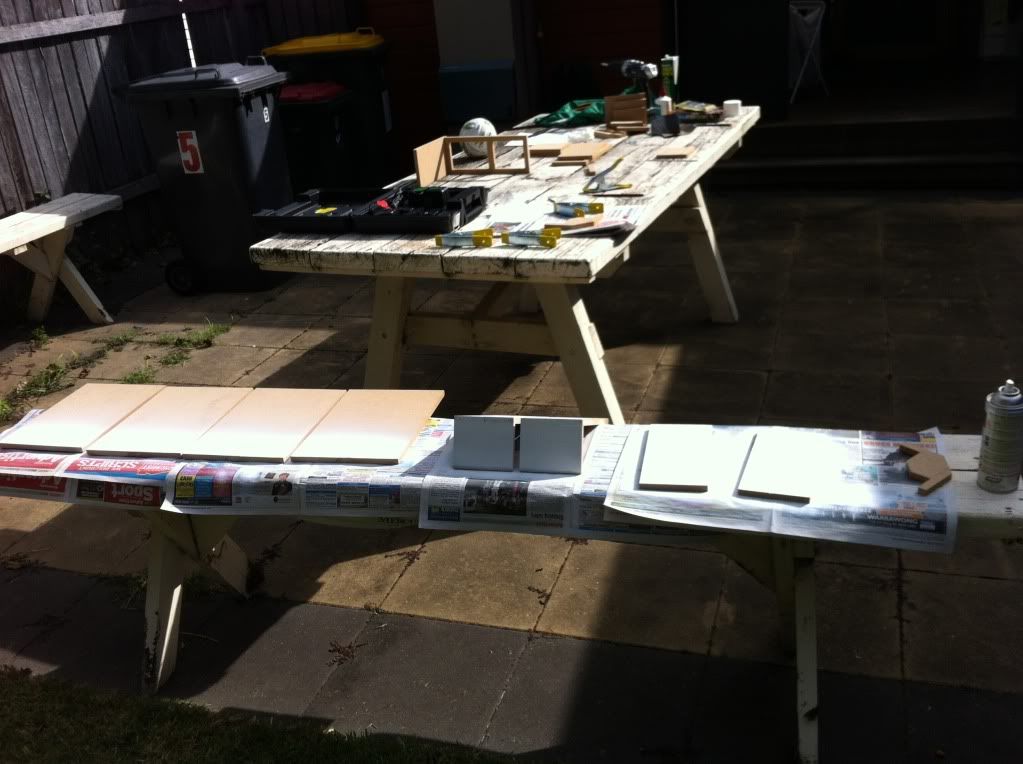
Cabinets getting assembled
I had some fiberglass reenforced filler sitting in the garage un opened, so Used some of it, Bad choice for building speakers, The fiberglass is a killer, The paint was also blocking up the 240gritt sandpaper I was using. Need to grab some more paper and give these a good sanding and primer filler paint for a good finish.

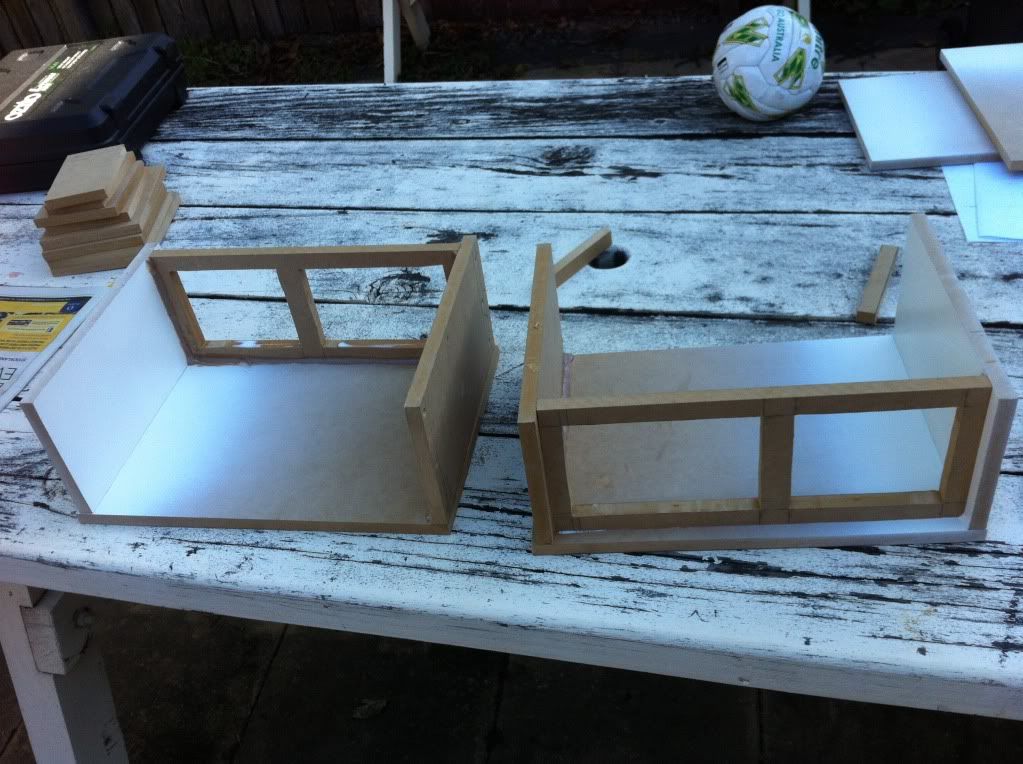
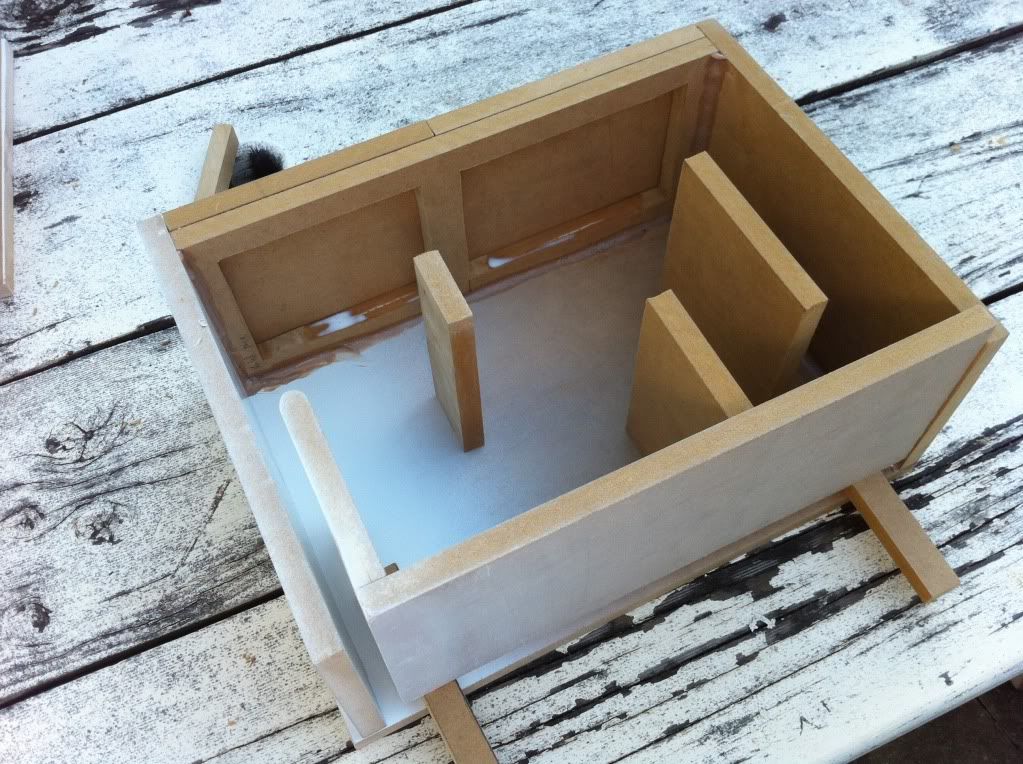
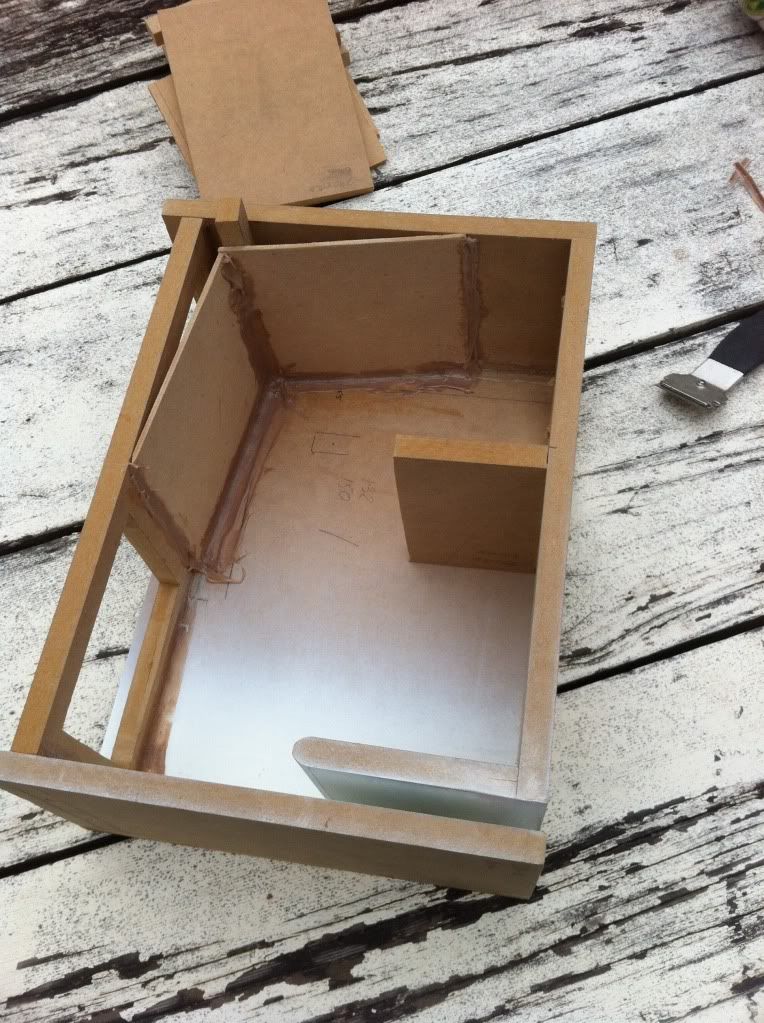
Roughly how the guts will look, the front face is held up just for the pic due to the wet liquid nails on the joints.
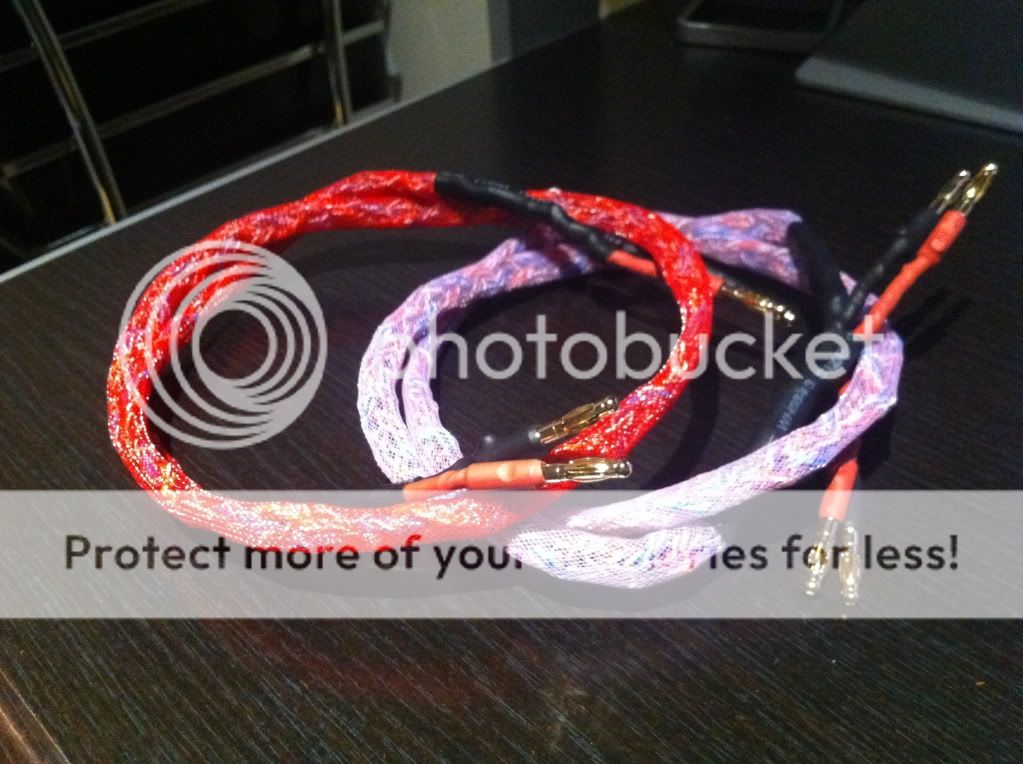
Made some 3x3 cat 5 speaker cables for this, Never again there was an easy 3 hours of braiding cables at work 😉
More work next week. Hopefully my router bits turn up so I can get the router running good again.
Up for discussion is the filling for the box. So far Im planning some body deadner pain thought out it, some sort of thicker foam on the flat surfaces and then stuffed with polly fill / dacron.
Link to start of thread
http://www.diyaudio.com/forums/markaudio/210608-chr70-shoebox-70-3-a.html
Cliffs - Building 2.1 setup as near fields for PC, going to power from 3 channel amp w/ DAC and DSP built in.
Ill add this is my first home DIY, after many years playing with car systems.
Todays work!
Stuff getting a little bit of matt white
Cabinets getting assembled
I had some fiberglass reenforced filler sitting in the garage un opened, so Used some of it, Bad choice for building speakers, The fiberglass is a killer, The paint was also blocking up the 240gritt sandpaper I was using. Need to grab some more paper and give these a good sanding and primer filler paint for a good finish.
Roughly how the guts will look, the front face is held up just for the pic due to the wet liquid nails on the joints.
Made some 3x3 cat 5 speaker cables for this, Never again there was an easy 3 hours of braiding cables at work 😉
More work next week. Hopefully my router bits turn up so I can get the router running good again.
Up for discussion is the filling for the box. So far Im planning some body deadner pain thought out it, some sort of thicker foam on the flat surfaces and then stuffed with polly fill / dacron.
Drivers have arrived 😀
Still waiting on router parts which have been posted, stocked up on sandpaper, Only time has been lacking this week, Should get some done on the weekend.
Obviously me being me, I just didnt want the drivers sitting in the box, Meet the $10 burn in box.
Cardboard 15cm cube, double wall, ex box from a furniture product.
2 rolls of $2 masking tape
Some off cuts foam door seal gasket
$3 rca lead (to plug into the sub of my logitec M4's)
$3 cheap *** poly filled pillow haha
I got a glue gun for $4 but it was crap haha
3 hours one night.
Filled them with the cheap pillow stuffing, Dont sound half bad connected to a cheap 2.1 system, Will do me for burning them in, The high pass on them is wayyyy to high, no mid bass at all, But I cant adjust it.

Sorry about the dismal pic
More work this weekend I hope.
Still waiting on router parts which have been posted, stocked up on sandpaper, Only time has been lacking this week, Should get some done on the weekend.
Obviously me being me, I just didnt want the drivers sitting in the box, Meet the $10 burn in box.
Cardboard 15cm cube, double wall, ex box from a furniture product.
2 rolls of $2 masking tape
Some off cuts foam door seal gasket
$3 rca lead (to plug into the sub of my logitec M4's)
$3 cheap *** poly filled pillow haha
I got a glue gun for $4 but it was crap haha
3 hours one night.
Filled them with the cheap pillow stuffing, Dont sound half bad connected to a cheap 2.1 system, Will do me for burning them in, The high pass on them is wayyyy to high, no mid bass at all, But I cant adjust it.
Sorry about the dismal pic
More work this weekend I hope.
More updates, Going along some what slowly.
Router parts arrived, bearings were replaced and what not 😀 All good and just like new again.
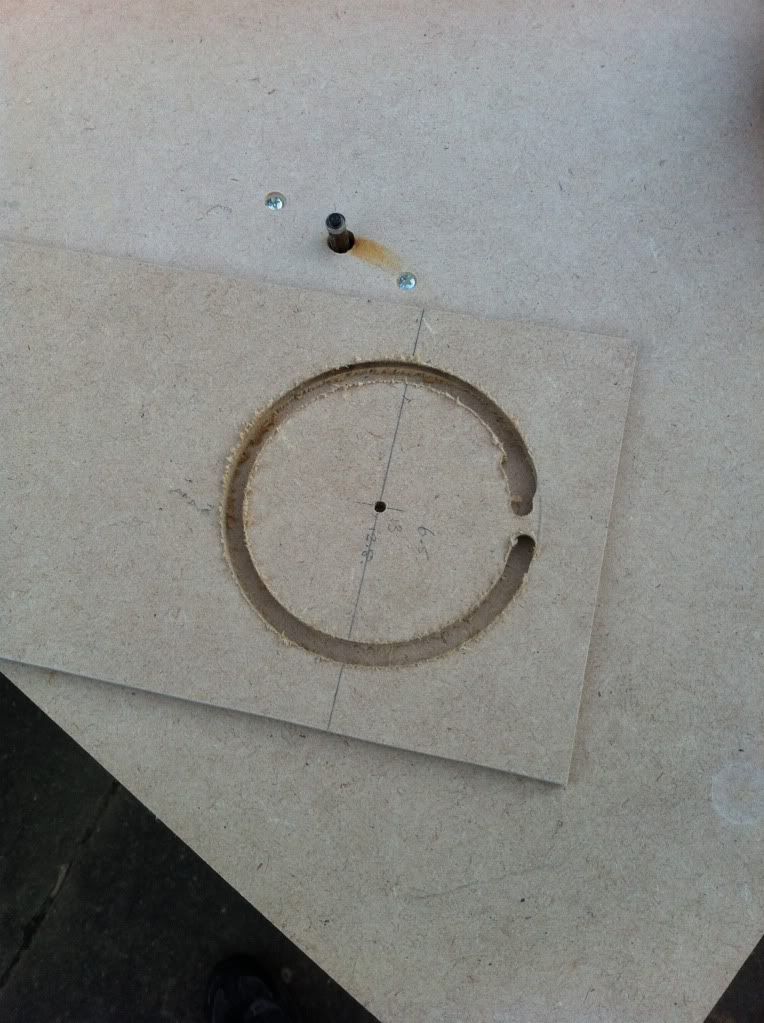
So cutting the front face out for a flush driver. Made 2 of them, they were a little big for the driver, so made another hole on the jig and it was perfect! 😀 But ran out of 6mm MDF to make a 2nd perfect one, Will get some more next week and do that again.
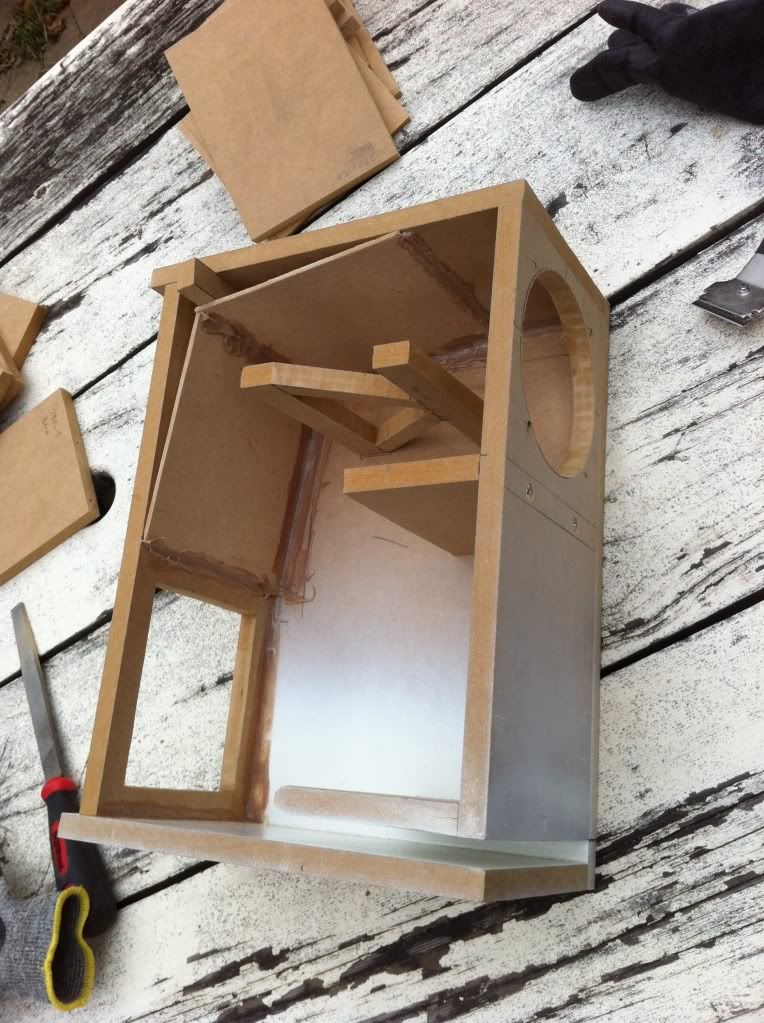
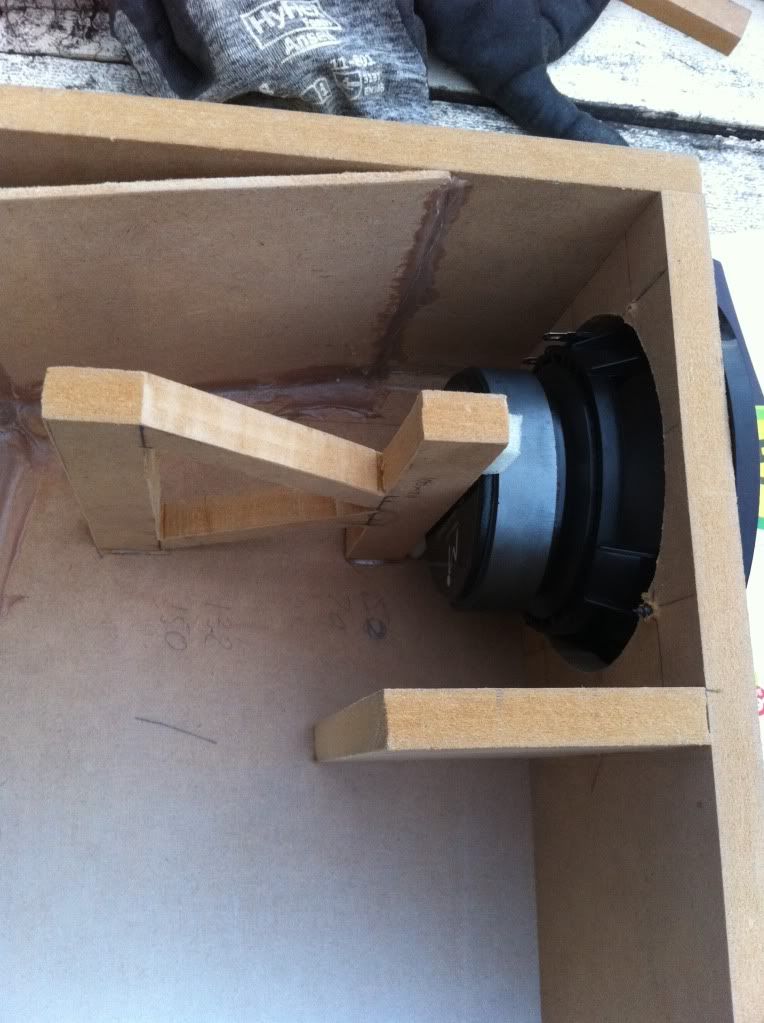
And one of the box's so far.
You can see the woofer brace I did in this one, I didnt go for the conventional holey brace, I just made a braced brace lol Its solid, and will be screwed into the box at 4 points.
It also looks like a circuit diagram label for a speaker as well haha
The other box it a little more behind, I had cut out the hole for the driver in the front face I has attached the port baffle to and was using a 45deg chamfer bit on the router to chamfer the inside of it. And well went too deep and the edges of the circle made the front face way to week, and the bearing dropped below the timber and it got all messed up.
So I will need to make another face for that box, not bothering chamfering them now, it makes the front face too weak in this particular box. I was able to save the port baffle so its all ready to be remade, just need to get to dads where the drop saw and left over timber is.
Next week should see a heap more progress hopefully lol
Router parts arrived, bearings were replaced and what not 😀 All good and just like new again.
So cutting the front face out for a flush driver. Made 2 of them, they were a little big for the driver, so made another hole on the jig and it was perfect! 😀 But ran out of 6mm MDF to make a 2nd perfect one, Will get some more next week and do that again.
And one of the box's so far.
You can see the woofer brace I did in this one, I didnt go for the conventional holey brace, I just made a braced brace lol Its solid, and will be screwed into the box at 4 points.
It also looks like a circuit diagram label for a speaker as well haha
The other box it a little more behind, I had cut out the hole for the driver in the front face I has attached the port baffle to and was using a 45deg chamfer bit on the router to chamfer the inside of it. And well went too deep and the edges of the circle made the front face way to week, and the bearing dropped below the timber and it got all messed up.
So I will need to make another face for that box, not bothering chamfering them now, it makes the front face too weak in this particular box. I was able to save the port baffle so its all ready to be remade, just need to get to dads where the drop saw and left over timber is.
Next week should see a heap more progress hopefully lol
Good to see things moving along.
Instead of a chamfering with a router bit, perhaps you can a make a roundover with a rasp? Also keep the wood intact where the screws will go throug and hold the driver frame to the baffle - you do the roundover around that.
Instead of a chamfering with a router bit, perhaps you can a make a roundover with a rasp? Also keep the wood intact where the screws will go throug and hold the driver frame to the baffle - you do the roundover around that.
Last edited:
Yeh Zman, Might do that. When I routed it, I was stopping and leaving part of where the screws screw in.
Some more work has been done, Getting it done in dribs and drabs.
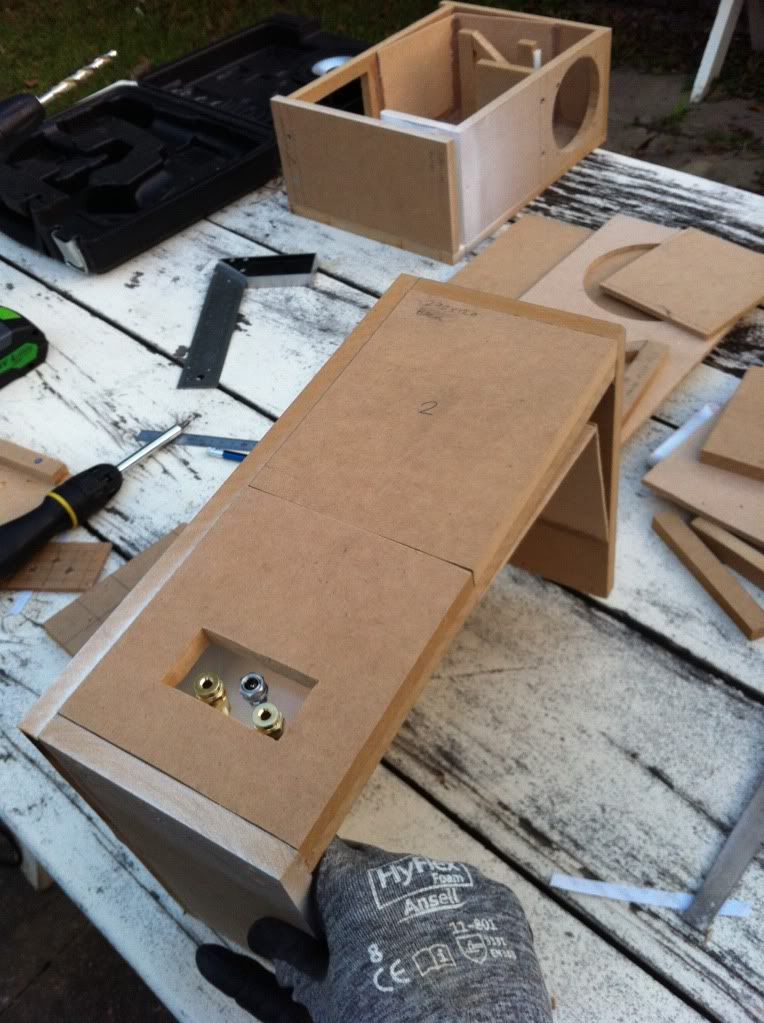
One cabinet it pritty much finished, Just needs a sanding of the front face around the port, and the screws puttied over.
Attached the speaker brace.
I couldn't find any half decent terminal plates that suited my needs, So DIY time, Had the perspex sitting around.
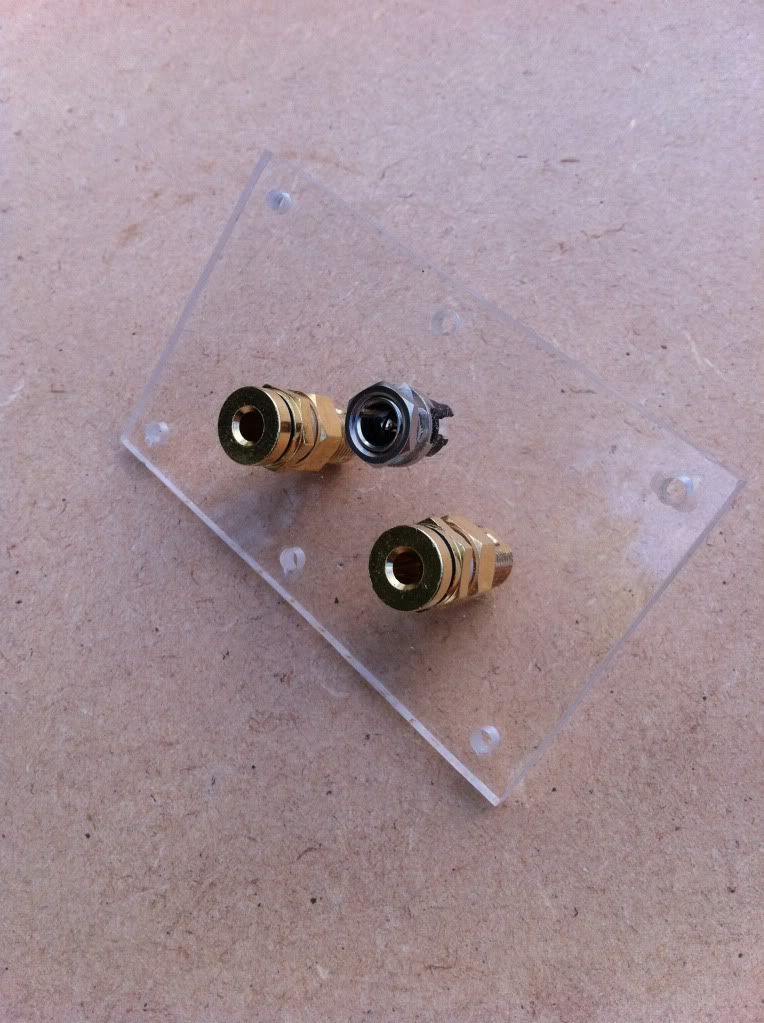
Sitting on the removable rear piece
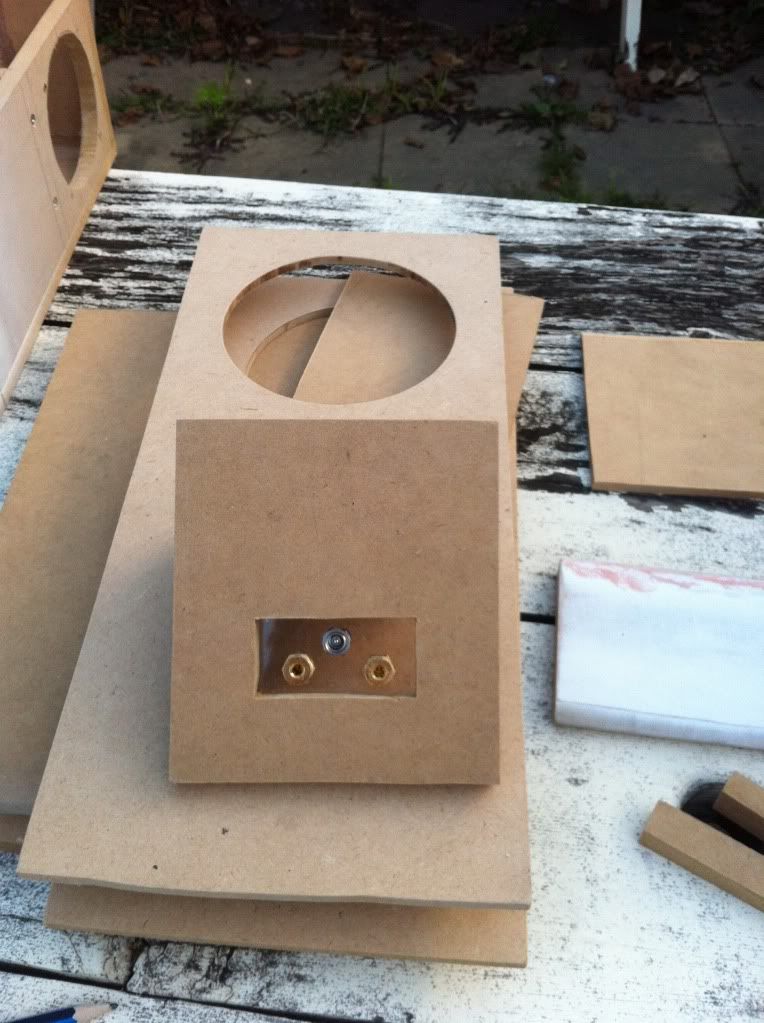
Back parts sitting in the box.
The rear bits will be painted matt black after a little primer. The rest of the box is going to be veneered in bamboo
Some more work has been done, Getting it done in dribs and drabs.
One cabinet it pritty much finished, Just needs a sanding of the front face around the port, and the screws puttied over.
Attached the speaker brace.
I couldn't find any half decent terminal plates that suited my needs, So DIY time, Had the perspex sitting around.
Sitting on the removable rear piece
Back parts sitting in the box.
The rear bits will be painted matt black after a little primer. The rest of the box is going to be veneered in bamboo
Decided I wanted to get one of the box's screwed together and throw a driver in to have a listen to see how they would sound so far.
It was just screwed for a listen in, Leaked like a sieve, but was listenable.
First impression was woahhhh, sooo bright, the treble was insanely loud, cymbals from drums cut so clean, it was like there was a high hat in front of me.
Obviously there was no dampening in the cabinet ect. But the enclosure did sound nice, The low end was good well detailed, It didnt play low loud , obviously being a small driver in a 59Hz tuned box, but there was a bassline there, The kick drum was so solid and clean, fast as well (remember I listen to heavy metal) I was well surprised, I turned my sub on, and it just sounded so dull and muddy, it was horrible compared to the MA drivers.
These are going to sound excellent once finished, A bit of high pass, and a FAST style woofer thrown in for my need for a decent bassline will be well worth the time and money I have spent.
Another thing I did notice I was surprised how loud they got. I only have a small house with very small rooms, and it was well audible though the house, and this was one single driver.
This is the first decent full range I have ever played with and I think im going to be hooked.
I was planning some Pioneer BIBs next, but I might head for some alpair's next. Some Pencils and CHR-70s would be sweet for the bedroom as well haha a nice little T amp or valve amp should be good.
Hi Spec, nice to see your projekt!
If not, I updated my filter
http://www.diyaudio.com/forums/markaudio/207240-chr-70-bass-reflex-3.html#post3055261
I think (other thread) you will use an amplifier with integrated DSP!?...
It was just screwed for a listen in, Leaked like a sieve, but was listenable.
First impression was woahhhh, sooo bright, the treble was insanely loud, cymbals from drums cut so clean, it was like there was a high hat in front of me.
...
If not, I updated my filter
http://www.diyaudio.com/forums/markaudio/207240-chr-70-bass-reflex-3.html#post3055261
Yeh going to use an amp with DSP.
Still working on them, Weather has been a bit crook here in AU, And now I copped a nice winter cold lol
I got the 2nd box progressed a heap more, Just need to sand and paint the port on the new front face, then I can think about paining them with the car deadener paint.
Still working on them, Weather has been a bit crook here in AU, And now I copped a nice winter cold lol
I got the 2nd box progressed a heap more, Just need to sand and paint the port on the new front face, then I can think about paining them with the car deadener paint.

- Status
- Not open for further replies.
- Home
- Loudspeakers
- Full Range
- CHR70 ShoeBox 70.3 BR Build