This will be my long term build thread for my spheres in the form the IKEA Blanda. However it will be a modular system, as over time I will keep adding and adding to it to make it a multiway plus extras style system. The stands have been made in order to hang extra units on over time, giving me something to build with the excuse of making the system better instead of having just loads of random speakers. The first module to go on is the medium bowl and my fe103e’s. These I’ve feel have never ‘reached’ my subwoofer, whose top crossover is 85hz. Therefore here’s a list of what I hope to hang from the ‘pole.’
• Speaker floor spikes etc, cables to sub.
• A large bowl containing a 5 inch woofer to bridge the gap and add some much needed ‘insert audio term here’ to the upper LF’s.
• This of course is going to need a crossover, so a small flat box in the same shape as the base
• Rebuild the stands using aluminium/ steel poles (hollow to run the cables down) and high thickness Perspex for the bases and also the arms that hold the sphere’s.
• Tweeters (already have one to play with) or supertweeter (extended future), who knows, an excuse to build something.
• Possibly the largest metal Blanda bowls for multiple subwoofer set up.(very extended future)
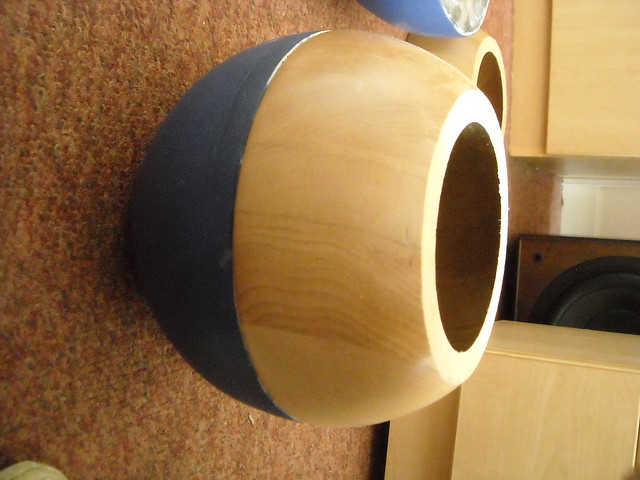
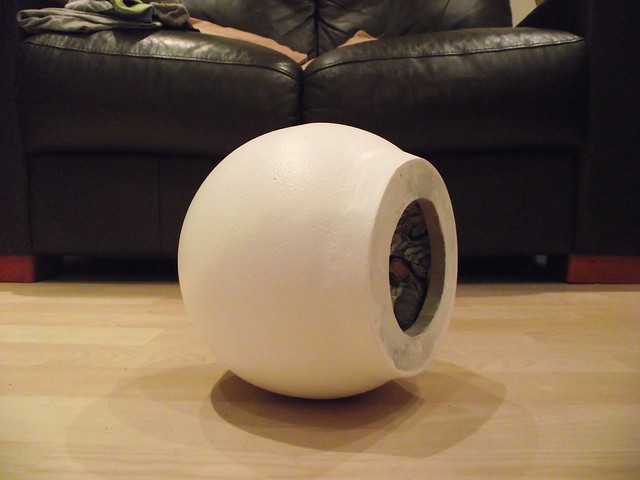
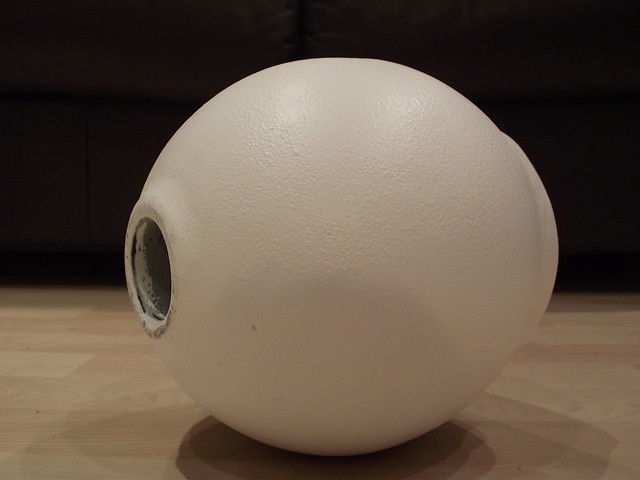
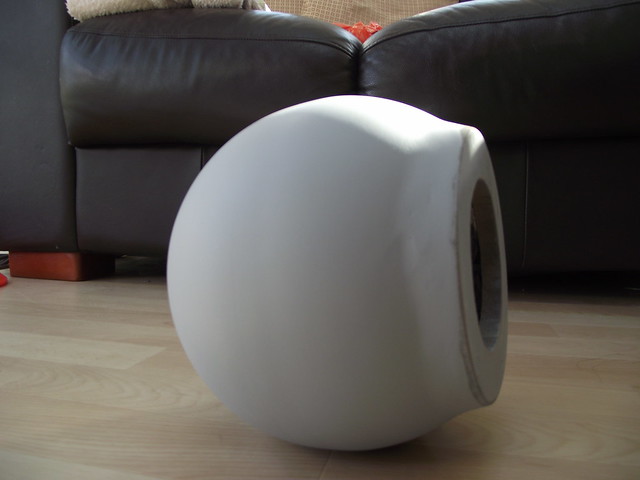
Images below are the first spheres. Decided to add an extra circle of wood to the front as the drives don’t have a round chassis, plus I wanted extra strength. Therefore that left an angle gap between the two surfaces, so I’ve had to fill it in... The port is the best I could do as I wanted some ‘trumpet’, so they had to be smoothed into the wood, as well as the joins between the spacer and bowls.

First cuts by Simply_Ginniff, on Flickr
Glueing by Simply_Ginniff, on Flickr
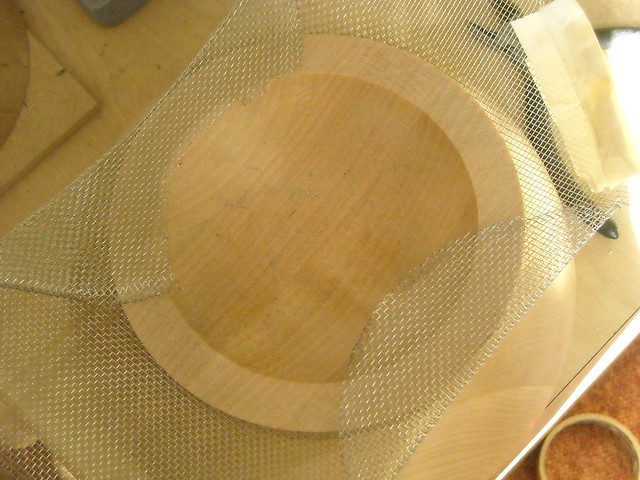
Experimenting for the grilles by Simply_Ginniff, on Flickr

Cutting out rear port. by Simply_Ginniff, on Flickr
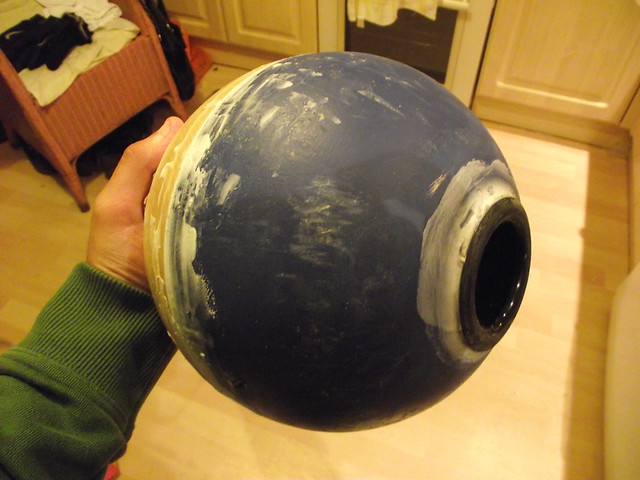
Rear port and smoothing. by Simply_Ginniff, on Flickr
The stands are relatively simple: two pieces of 18mm ply screwed and glued together. Then a very solid piece of broom handle screwed and glued again. The whole thing is extremely solid and I could barley drill through the pole it was that dense. Great! Then a simple similar shaped arm is then cut out form 18mm ply and screwed on.
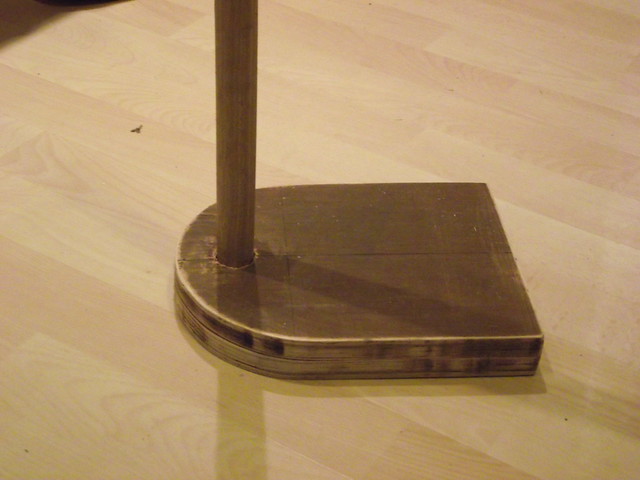
Base of stand. by Simply_Ginniff, on Flickr
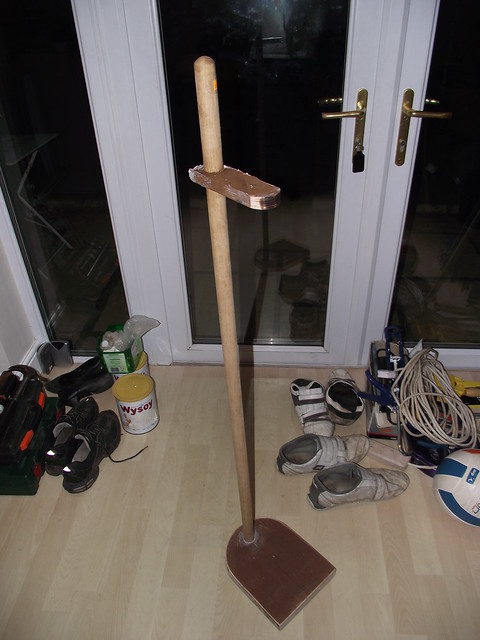
The stand in progress. by Simply_Ginniff, on Flickr
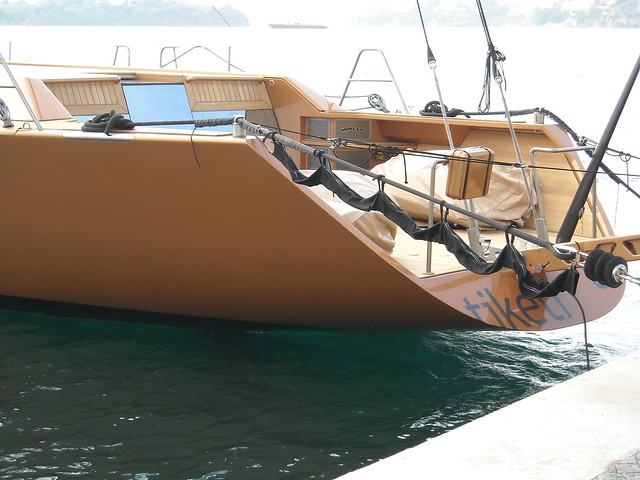
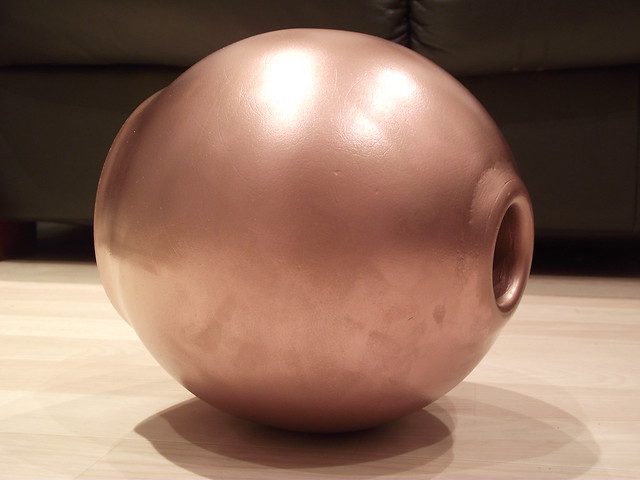
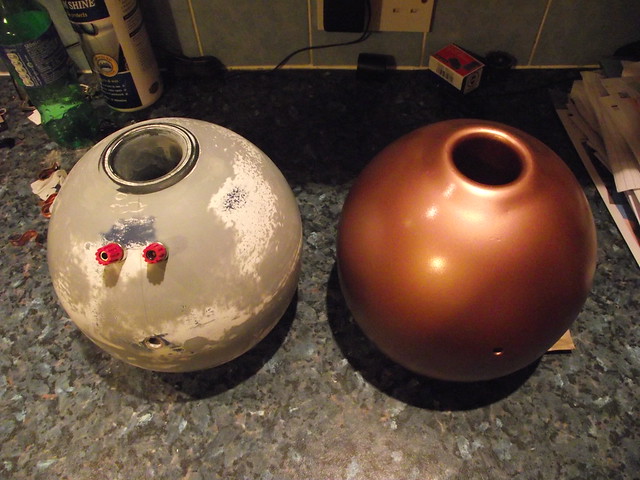
The colour of the first bowls is a copper, inspired by one of my favourite yachts I managed to see on holiday: Tiketitoo. No idea about the stands yet and I don’t have long to decide, never mind do them.
DSCN1086 by Simply_Ginniff, on Flickr
Over time is a quick mock up Google sketch up model of what hopefully it will start to look like over time, with more 'stuff' being added.
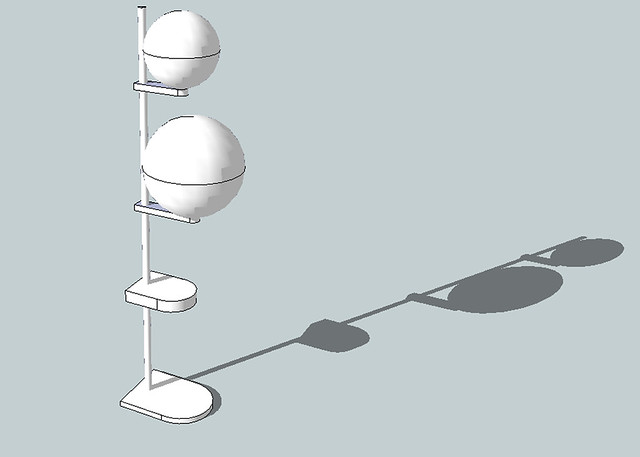
speaker mock up by Simply_Ginniff, on Flickr
That'll do for now, thanks for reading")
• Speaker floor spikes etc, cables to sub.
• A large bowl containing a 5 inch woofer to bridge the gap and add some much needed ‘insert audio term here’ to the upper LF’s.
• This of course is going to need a crossover, so a small flat box in the same shape as the base
• Rebuild the stands using aluminium/ steel poles (hollow to run the cables down) and high thickness Perspex for the bases and also the arms that hold the sphere’s.
• Tweeters (already have one to play with) or supertweeter (extended future), who knows, an excuse to build something.
• Possibly the largest metal Blanda bowls for multiple subwoofer set up.(very extended future)
Images below are the first spheres. Decided to add an extra circle of wood to the front as the drives don’t have a round chassis, plus I wanted extra strength. Therefore that left an angle gap between the two surfaces, so I’ve had to fill it in... The port is the best I could do as I wanted some ‘trumpet’, so they had to be smoothed into the wood, as well as the joins between the spacer and bowls.
First cuts by Simply_Ginniff, on Flickr
Glueing by Simply_Ginniff, on Flickr
Experimenting for the grilles by Simply_Ginniff, on Flickr
Cutting out rear port. by Simply_Ginniff, on Flickr
Rear port and smoothing. by Simply_Ginniff, on Flickr
The stands are relatively simple: two pieces of 18mm ply screwed and glued together. Then a very solid piece of broom handle screwed and glued again. The whole thing is extremely solid and I could barley drill through the pole it was that dense. Great! Then a simple similar shaped arm is then cut out form 18mm ply and screwed on.
Base of stand. by Simply_Ginniff, on Flickr
The stand in progress. by Simply_Ginniff, on Flickr
The colour of the first bowls is a copper, inspired by one of my favourite yachts I managed to see on holiday: Tiketitoo. No idea about the stands yet and I don’t have long to decide, never mind do them.
DSCN1086 by Simply_Ginniff, on Flickr
Over time is a quick mock up Google sketch up model of what hopefully it will start to look like over time, with more 'stuff' being added.
speaker mock up by Simply_Ginniff, on Flickr
That'll do for now, thanks for reading
Unless you plan to bolt that base to the floor, I can't even begin tell you how unstable that is going to be. A stiff breeze, nevermind a dog or visiting child, will send it falling like the tower of Babel. Either make the stands MUCH wider and out of stone or sand filled boxes with far stronger supports, or run a support wire up to the roof.
I dropped one of those Ikea bowls once, fortunately not with a driver in it, and is shattered almost like glass. I ended up using a normal cabinet from 18mm birch plywood in the end, far more rigid.
I dropped one of those Ikea bowls once, fortunately not with a driver in it, and is shattered almost like glass. I ended up using a normal cabinet from 18mm birch plywood in the end, far more rigid.
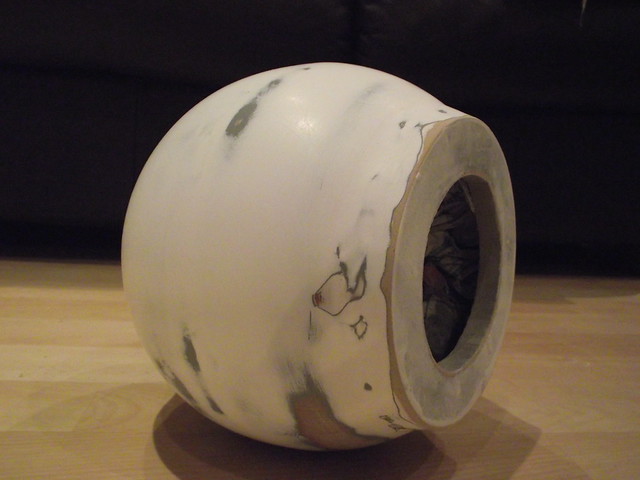
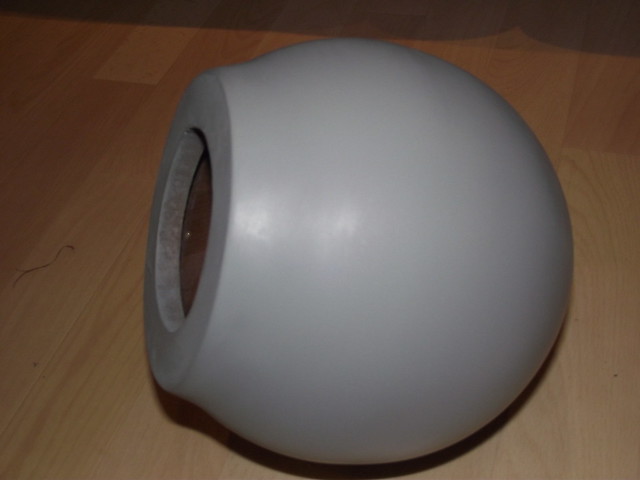
Currently experimenting with the base coats to get a smooth finish as they were slight pits/ bumps around the joins and either end. Will obviously still need sanding down.
Overview of new basecoat by Simply_Ginniff, on Flickr
Another overview of the new basecoat by Simply_Ginniff, on Flickr
Overview of new basecoat by Simply_Ginniff, on Flickr
Another overview of the new basecoat by Simply_Ginniff, on Flickr
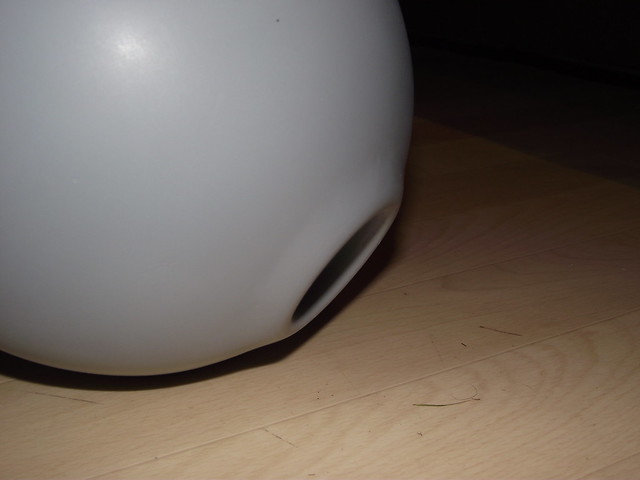
2 hours of sanding resulted in this. Primer tomorrow and the the copper-chrome if it all goes well. The a whole other sphere to do and then the stands.
Finished sanding to get my smooth surface. by Simply_Ginniff, on Flickr
Rear after sanding by Simply_Ginniff, on Flickr
Finished sanding to get my smooth surface. by Simply_Ginniff, on Flickr
Rear after sanding by Simply_Ginniff, on Flickr
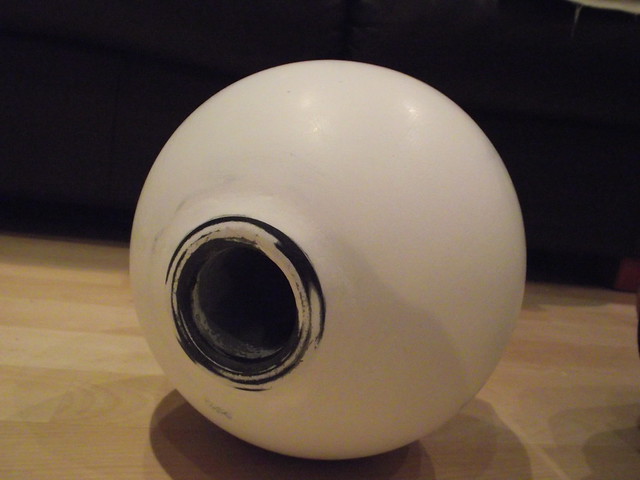
Some more progress. First of all the primer was applied:
Primer on by Simply_Ginniff, on Flickr
Primer on by Simply_Ginniff, on Flickr
And then the copper. I realise I have used a colour which needs a very good surface and is hard to paint with, so there are some imperfections(I'm picky, but so you should be else you will never improve). However there will be a matte varnish to be applied, which hopefully will help. Anyone have any suggestions to further help the paint?

Damn finger prints by Simply_Ginniff, on Flickr
Yes there's a few imperfections.. by Simply_Ginniff, on Flickr
Primer on by Simply_Ginniff, on Flickr
Primer on by Simply_Ginniff, on Flickr
And then the copper. I realise I have used a colour which needs a very good surface and is hard to paint with, so there are some imperfections(I'm picky, but so you should be else you will never improve). However there will be a matte varnish to be applied, which hopefully will help. Anyone have any suggestions to further help the paint?
Damn finger prints by Simply_Ginniff, on Flickr
Yes there's a few imperfections.. by Simply_Ginniff, on Flickr
Anyone have any suggestions to further help the paint?
Yes
more primer and more sanding until mirror shine
Last edited:
Yes
more primer and more sanding until mirror shine
What grade sand paper would remove the scratches?
A bolt going through a hole in the sphere and through the arm in the stand. I may change the size of the arm if I don't feel it's good enough. In the sphere there will be a rubber washer to seal it. Then between the sphere and stand a anti-vibration grommet style 'thing' from a computer. Then of course a nut holding it all together below the arm. Naturally this is only my first thoughts and things might change over time.
P.s At the end of the project(first part) I will change the pictures to uploads.
P.s At the end of the project(first part) I will change the pictures to uploads.
Completely striped it all back with 1000grit(highest I could get) to remove all the imperfections and surface scratches. Now with the first coat of primer on it is so much better. A touch up with filler in a couple of places and another coat or two of primer and ready for paint all over again. All the scratches and pits around the port have gone. Yay.
What grade sand paper would remove the scratches?
when i was working on my very first speakers about 15 years ago, my brother in law was helping me. we finished with 3 coats of primer, first coat 800 grid, 2nd coat 1200 wet sanding and last was 1600 grid wet sanding
but the finish was like mirror, really shiny, but the speakers had bumps on them...anyway, even the bumps were shiny
I have just seen your post about getting a go again on the finish...
congrats!!!
i have used 1600 grid, was available from my brother in law (mechanic with own garage, car painter)
please do share photos....
Ah well the best I could get was a 1000. I might have to get some more a couple of grades up. Well my spray booth consists of the garage and a Black and Decker Workmate with some newspaper on it and backboard. And me using Rattle cans, albeit good quality paints. It will be a few hours before primer pics are up and hopefully it will go ok. I'm also working against the clock as they need to be finished before the end of the week.
So here is the primer on, version 2. Totally smooth and 99% pit/ imperfection free. There's a slight odd bump or two around the front, but there's a deadline and I would be here to Christmas getting rid of them.
Primer mk2 by Simply_Ginniff, on Flickr
Primer mk2 by Simply_Ginniff, on Flickr
And a close up:

Primer mk2 by Simply_Ginniff, on Flickr
Primer mk2 by Simply_Ginniff, on Flickr
Primer mk2 by Simply_Ginniff, on Flickr
And a close up:
Primer mk2 by Simply_Ginniff, on Flickr
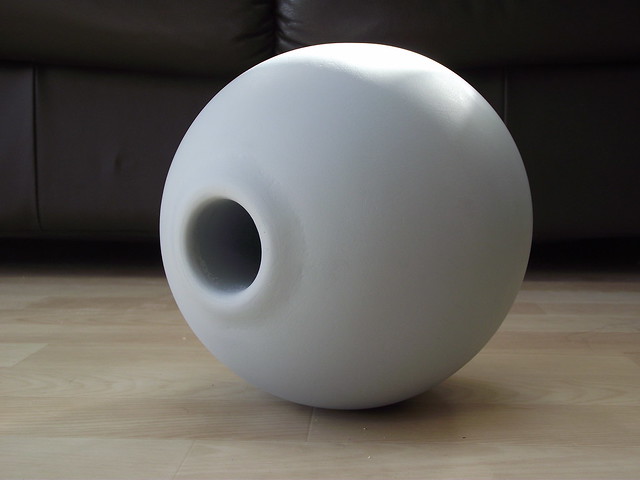
Nearly there now, well for phase 1. In the end as I forgot to mention, I went down to 2000 grit to get my smooth finish. Still a few things left to do:
1)Paint one sphere, however I may run out of paint and will be a near disaster as I will have to waste more money/time and the lacquer takes ages to dry, as it obviously need to be put on afterwards.
2)Assemble second stand and prepare and paint both. These two points both need to be done before Saturday(when I go back).
3)Minor things like attaching and wiring up banana connectors. Stuff speakers and screw in drivers.
4)Work out the way to connect stand and sphere. I have a way, but need to make sure it works.
I think that's it for phases 1. I also have some grilles, but they need working out and covering with white speaker cloth.
Some quick photos as the cameras not working properly.

Nearly there... by Simply_Ginniff, on Flickr
Nearly there... by Simply_Ginniff, on Flickr
1)Paint one sphere, however I may run out of paint and will be a near disaster as I will have to waste more money/time and the lacquer takes ages to dry, as it obviously need to be put on afterwards.
2)Assemble second stand and prepare and paint both. These two points both need to be done before Saturday(when I go back).
3)Minor things like attaching and wiring up banana connectors. Stuff speakers and screw in drivers.
4)Work out the way to connect stand and sphere. I have a way, but need to make sure it works.
I think that's it for phases 1. I also have some grilles, but they need working out and covering with white speaker cloth.
Some quick photos as the cameras not working properly.
Nearly there... by Simply_Ginniff, on Flickr
Nearly there... by Simply_Ginniff, on Flickr
Joe, please at the end, don't use screws for wood :S I mean the gold ones, with V shaped head. I have seen a lot of drivers screwed down (up) with these...They don't sit properly, are ugly and can damage the mounting holes on drivers.
I presume its OK to use screws for wood, but with half circle head, or there are even wood screws with Allen key heads...
Just my €0.02
Danny
P.S.: now looking better at your enclosures...they came out pretty good...I like very much....one could mistake them for some metal domes
nice nice nice
with these...They don't sit properly, are ugly and can damage the mounting holes on drivers.I presume its OK to use screws for wood, but with half circle head, or there are even wood screws with Allen key heads...
Just my €0.02
Danny
P.S.: now looking better at your enclosures...they came out pretty good...I like very much....one could mistake them for some metal domes
nice nice nice
- Status
- This old topic is closed. If you want to reopen this topic, contact a moderator using the "Report Post" button.
- Home
- Loudspeakers
- Full Range
- Sphere modular system build thread