It's Christmas, I like traditional Christmas's so not being one to break with tradition I thought I'd do another build over the Christmas holidays... 2006 was WD88VA. 2007 was the MLTL's and this year it's a pair of Saburo's.
This has come about because a) I like building things b) Any foole knows 4" FR drivers are the best thing ever (!) c) I have some leave d) I'm an anti-social bugger specially over Christmas... e) Scott bought a pair to an Eggborough Fest and I'd never heard anything sound quite like them, all that music coming from that funny little driver....getawaywithya")
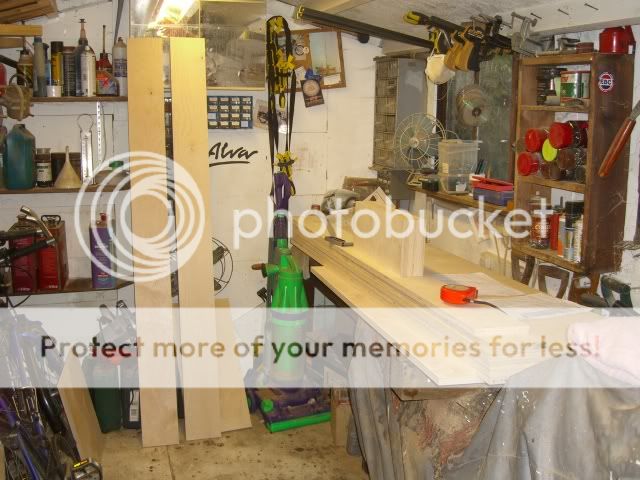
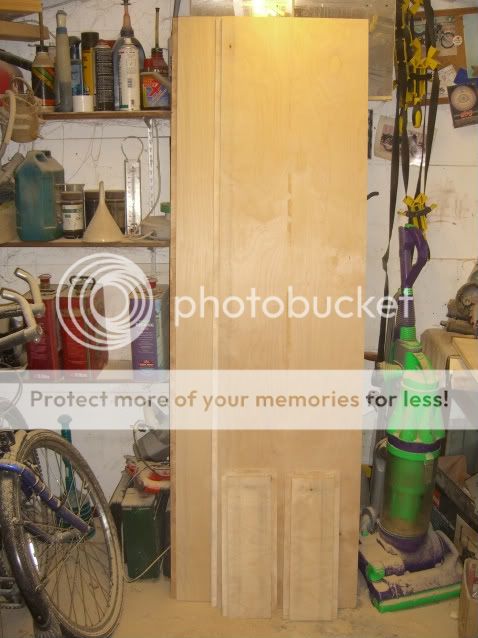
Anyway, after months of planning and deliberating I've finally got all the wood cut today.
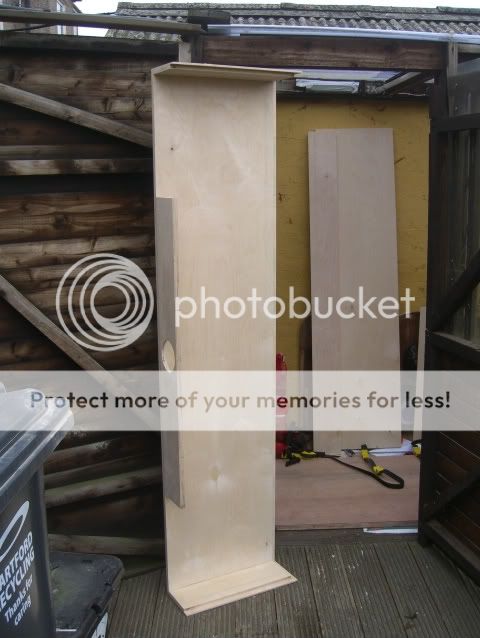
Oooooo...enough wood to make a pair of Sab's...
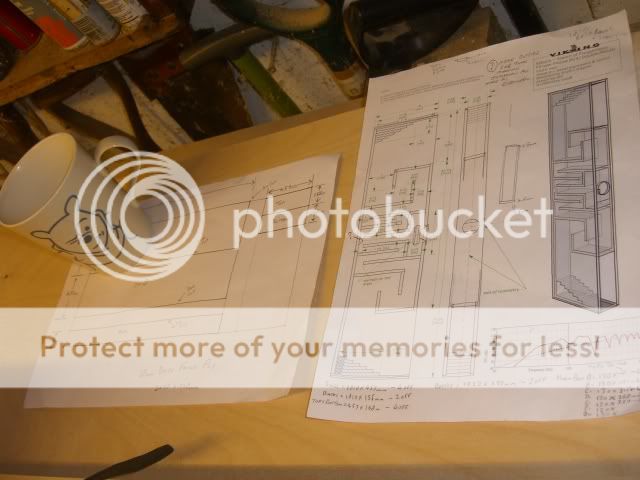
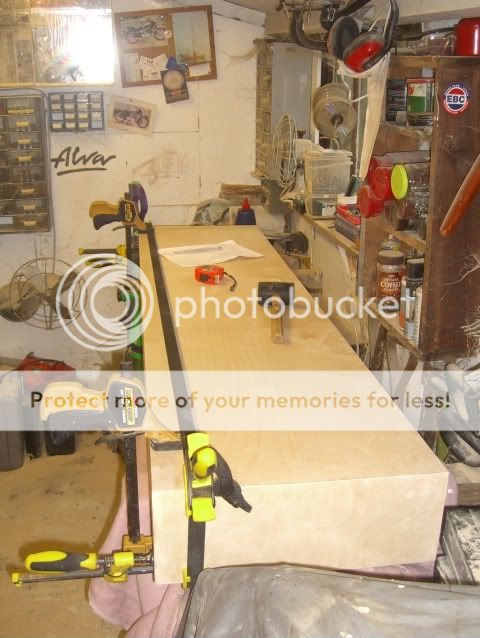
The nerve centre...
....and until I make a start (very soon) it'll all stay clamped to try and reduce warping the freshly cut yummy 18mm BP.
More silly pics and posts as they're made, well, it's a tradition innit :wink:
DTB
This has come about because a) I like building things b) Any foole knows 4" FR drivers are the best thing ever (!) c) I have some leave d) I'm an anti-social bugger specially over Christmas... e) Scott bought a pair to an Eggborough Fest and I'd never heard anything sound quite like them, all that music coming from that funny little driver....getawaywithya
Anyway, after months of planning and deliberating I've finally got all the wood cut today.
Oooooo...enough wood to make a pair of Sab's...
An externally hosted image should be here but it was not working when we last tested it.
The nerve centre...
An externally hosted image should be here but it was not working when we last tested it.
....and until I make a start (very soon) it'll all stay clamped to try and reduce warping the freshly cut yummy 18mm BP.
An externally hosted image should be here but it was not working when we last tested it.
More silly pics and posts as they're made, well, it's a tradition innit :wink:
DTB
Scottmoose said:Nice one Dave. Keep us up to date (not that I reckon you'll need any encouragement.
I'm envious of your workspace.
It's just a shed Scott, a not very tall one though...as I found out trying to manhandle 6ft lengths of ply in it today.
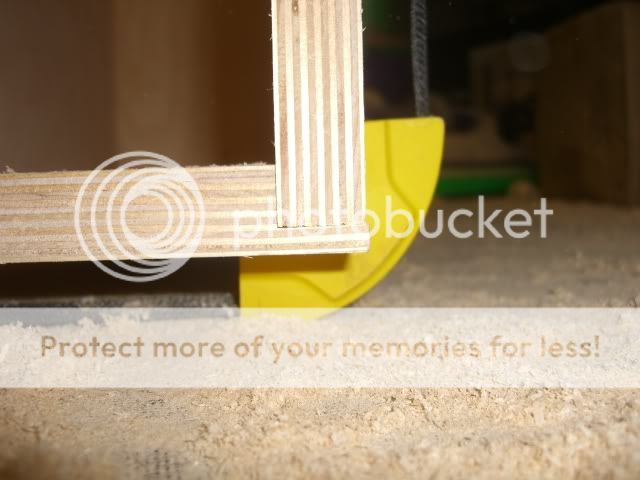
Expect your PM box to be filled with questions this Christmas matey! Talking of which, I've a question already. Directly behind the driver on the back wall of the cabinet is an angled piece that appears to deflect sound into either of the 2 horn chamber thingys (techtalk). Any dimensions on that?
And secondly, cabinet damping, woolfelt?... and if so how much and where?
Thanks for inspiring me again Scott,
All the best
DTB
Trust me, it's more than I've got mate.
Triangular deflector / splitter = 1 1/4in tall x 1 1/4in deep.
Very little damping should be needed. Top, one side & rear of the filter chamber (not blocking the throat, obviously... ) with 1/2in wool felt & that should be it. The folding works with the chamber to filter off everything over ~290Hz.
Triangular deflector / splitter = 1 1/4in tall x 1 1/4in deep.
Very little damping should be needed. Top, one side & rear of the filter chamber (not blocking the throat, obviously...
) with 1/2in wool felt & that should be it. The folding works with the chamber to filter off everything over ~290Hz.Scottmoose said:Trust me, it's more than I've got mate.
Triangular deflector / splitter = 1 1/4in tall x 1 1/4in deep.
Very little damping should be needed. Top, one side & rear of the filter chamber (not blocking the throat, obviously...
What part is the 'filter chamber' Boss? Sorry for all the questions.
DTB
soundsinthestix said:You are going to love them. I now have over 100 hours on mine with Dave Planet-10 126eN's. They are incredible......I have not been able to stop listening to them long enough to write a proper review (which I promised Dave I would do). Keep us posted on your progress.
Yup, I heard Scotts a few years ago and it was the first time I'd ever heard a single FR driver in a bigish cab, I was gobsmacked. I know what to expect
I've done 100's of hours with the Fonkens and I only built them about 6 months ago. DaveD's 127eN's in those, lovely. We even take them on holiday with us, we listen to a lot of music in our house.Scottmoose said:It's the chamber the driver is mounted in.
Cheers Scott.
DTB
No worries pal.
If you're going on the MK1 Harvey's I brought to the last Eggfest a couple of years back, I think you're going to be in for a surprise...
I know what to expect
If you're going on the MK1 Harvey's I brought to the last Eggfest a couple of years back, I think you're going to be in for a surprise...
Scottmoose said:I think you're going to be in for a surprise...
Yes they could've been the Harvey's. A fetching shade of greeny/blue I seem to remember, I was still wet behind the ears at that first Eggfest (still am a bit!!) .....oh....so they're gonna be crap then..... !!!

DTB
Scottmoose said:Yes, that was them. You'll find these are a trifle 'different.'
Hey Scott.......What's more intense than GOBSMACKED???? I don't have a descriptive for the sound of these things. The "brother with the opera company" was here last night to audition the Saburo's. We didn't have much conversation other than........"play this one next". We were up most of the night just blown away by the sound. You really have hit a home run with this design, and Dave's mods take them to the moon.
'Compact and bijou'.....
 ...are not word to describe a Saburo! Temp lash up. I'm going to glue the top/bottom and one side tomorrow but leave the other side open so as to facilitate easy fitting of the internals and the driver bracing, we're going 'whole-hog' BTW, hence all the routing. I'm going to be using Scott's old 126's for now, if the Sab's work out well in my room I'll then decide about going with the P10 all-singing-all-dancin' 126's. I've had 167eN's and still have those bootiful 127eN's in the Fonkens, love 'em.
I've been making expensive saw dust again today. Tops and bum's are routed 12mm deep by 18mm wide to increase the gluing area and make the whole cabinet strong and hunky (can a cabinet be 'hunky'?)
More piccies as they're made tomorrow.
DTB
I've been making expensive saw dust again today. Tops and bum's are routed 12mm deep by 18mm wide to increase the gluing area and make the whole cabinet strong and hunky (can a cabinet be 'hunky'?)
More piccies as they're made tomorrow.
DTB
...check out today’s progress.
Hoovered the whole house this morning...yeah...rock 'n' roll :roll:
Then had PM to myself to play with sharp things down the shed.
1st thing to do was to finish off the 18mm wide by 12mm deep x 1810mm (really) long rout's. Lots of dust was made... most of which seems to land on me causing me to look grey and older than my tender years would suggest. Following on with this reasoning...would it be wise for old' Granpappy Phil do build a pair !!!

But all the loooooong routing is now done...
It's a lot of work doing it this way but I think it's worth it. Next up was to dry assemble to make sure everything lined up OK, it did. Phew!
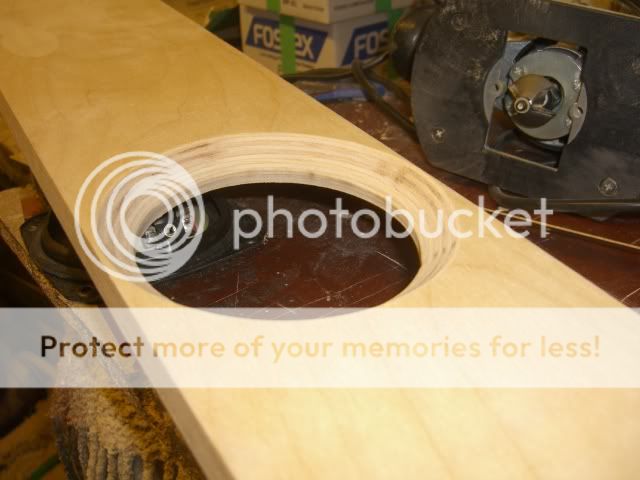
Then it was time to select 2 pieces that are going to be the front baffle area and cut them to size and cut the holes for the driver, not forgetting the chamfer on the back... see... I'm learning.
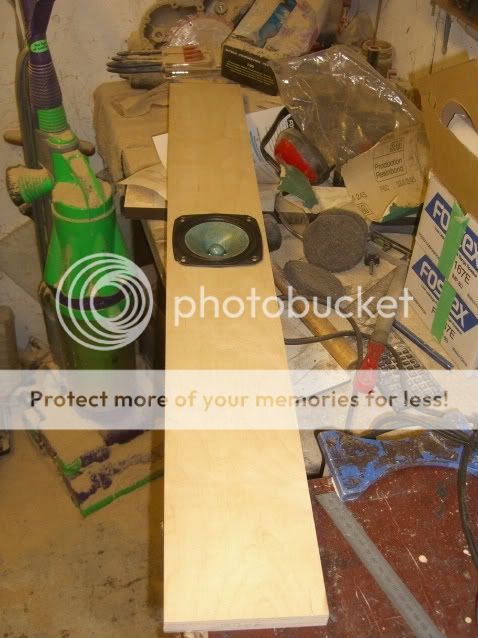
Chamfer.
Then dry assemble again to make sure the cab is true (square) and the internals measure right.
Yup, bang on...

...but working on 6ft tall cab in a shed is tight, look at the gap between the clamp handle and my roof!!!

So, seeing as I wanted to get the gluing underway today I shifted the whole caboodle into the bike garage where I had a smidge more room. I've glued only the top end panel and one side of the baffle as it's quite difficult to manhandle such lump of speaker on my own. I've decided to glue little bits over a period of days thus ensuring they're in the the right place and super strong. Dull but sensible!
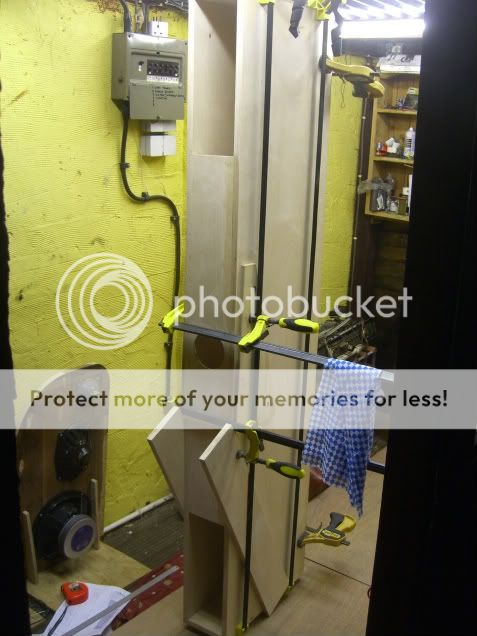
And that's how far I've got today, not bad achally. Both cabs are now at the preliminary glue-up stage, I'm leaving a side off each cab so I can faff-in the horn bits. Quite long-winded but worthwhile methinks.
Time for bed, night night!
DTB
Hoovered the whole house this morning...yeah...rock 'n' roll :roll:
Then had PM to myself to play with sharp things down the shed.
1st thing to do was to finish off the 18mm wide by 12mm deep x 1810mm (really) long rout's. Lots of dust was made... most of which seems to land on me causing me to look grey and older than my tender years would suggest. Following on with this reasoning...would it be wise for old' Granpappy Phil do build a pair
!!!
But all the loooooong routing is now done...
It's a lot of work doing it this way but I think it's worth it. Next up was to dry assemble to make sure everything lined up OK, it did. Phew!
Then it was time to select 2 pieces that are going to be the front baffle area and cut them to size and cut the holes for the driver, not forgetting the chamfer on the back... see... I'm learning.
Chamfer.
Then dry assemble again to make sure the cab is true (square) and the internals measure right.
Yup, bang on...
...but working on 6ft tall cab in a shed is tight, look at the gap between the clamp handle and my roof!!!
So, seeing as I wanted to get the gluing underway today I shifted the whole caboodle into the bike garage where I had a smidge more room. I've glued only the top end panel and one side of the baffle as it's quite difficult to manhandle such lump of speaker on my own. I've decided to glue little bits over a period of days thus ensuring they're in the the right place and super strong. Dull but sensible!
And that's how far I've got today, not bad achally. Both cabs are now at the preliminary glue-up stage, I'm leaving a side off each cab so I can faff-in the horn bits. Quite long-winded but worthwhile methinks.
Time for bed, night night!
DTB
^^^^ Thanks for the praise Gent's, very kind of you all.
-20/-30 Blimey! I cease to exist at anything below 2 degrees! I hate the cold. We've had a very cold winter (for the UK) so far but in the last few days it's been very mild +11/+14-ish making it a good time to work with the doors of the garage and shed open. Pure luck really.
Got lots of Christmas related stuff going-on today so doubt I'll get much done in the Sab's dept today
DTB
Grasp said:Totally Jealous? Me. For sure. I would really like to be doing this right now, but it's -20 to -30 these days and my workshop is the great outdoors. I'm looking forward to your listening impressions!
Great skills by the way - I can't wait to see them finished
-20/-30 Blimey! I cease to exist at anything below 2 degrees! I hate the cold. We've had a very cold winter (for the UK) so far but in the last few days it's been very mild +11/+14-ish making it a good time to work with the doors of the garage and shed open. Pure luck really.
Got lots of Christmas related stuff going-on today so doubt I'll get much done in the Sab's dept today
DTB
As suspected not much got done yesterday what with the food shopping and a collection of 36 pints of fresh Ale from a local brewery...yummy <slurps lips>
But i did manage to glue in the bottom and back panel first thing in the morning.
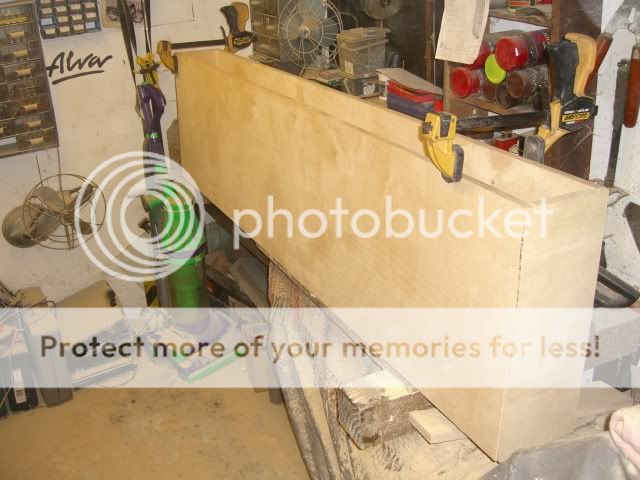
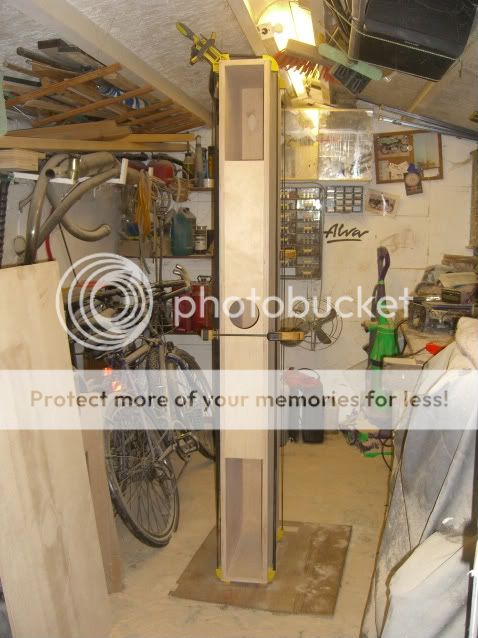
Meet my new mate, Arfur.... or 'Mr Arfur Speaker-Cab' as he's more formally known...
Then it was time to get the back panel glued on, laborious all this innit but it is a sure-fire way to stop anything slipping out of alignment while it's all gluing. Down the shed I'm really push for space but this seemed the easiest place to get the back glued on, thing is... a 6 ft cab on a 4ft work bench mean's balancing and propping things up!
Clamps came of the this morning. Looking good. Should have a bit more gluing and cutting down by tonight, orf down the shed again...
TTFN,
DTB
But i did manage to glue in the bottom and back panel first thing in the morning.
Meet my new mate, Arfur.... or 'Mr Arfur Speaker-Cab' as he's more formally known...
An externally hosted image should be here but it was not working when we last tested it.
Then it was time to get the back panel glued on, laborious all this innit but it is a sure-fire way to stop anything slipping out of alignment while it's all gluing. Down the shed I'm really push for space but this seemed the easiest place to get the back glued on, thing is... a 6 ft cab on a 4ft work bench mean's balancing and propping things up!
An externally hosted image should be here but it was not working when we last tested it.
Clamps came of the this morning. Looking good. Should have a bit more gluing and cutting down by tonight, orf down the shed again...
TTFN,
DTB
- Status
- This old topic is closed. If you want to reopen this topic, contact a moderator using the "Report Post" button.
- Home
- Loudspeakers
- Full Range
- Saburo's Vs. DTB