Well, this is what I think Bobby Byrd and James Brown are saying at the beginning of the well-known Funk track 'Make it Fonken"
BB. "What chu gon make now?"
JB. "Bobby...I don't know...but whatever I makes it's gots to be Fonken...1...2...3...Make it Fonken..." Etc etc etc")
Hello, I'm a new member to this forum, I'm about to make a pair of Planet10 FE127eN fuelled Fonkens.
This is only the 2nd pair of proper HiFi speakers I've made so feel free to point out any ooppsies I've made or could make. My first build was over the Christmas break, a pair of fully tweaked/eNAbled Fostex 167 in Scottmoose designed MLTL cab's. I'm mega-sooper-dooper-happy with them. They're used almost everyday and look and sound amazing (IMO).
The full build can be seen here for anyone wanting to cure insomnia and see what a wally with power tools can do. I'd never cut or routed accuaratley before so it was a steep learning curve for me... http://www.wduk.worldomain.net/forum/showthread.php?t=3700
...and so it begins....
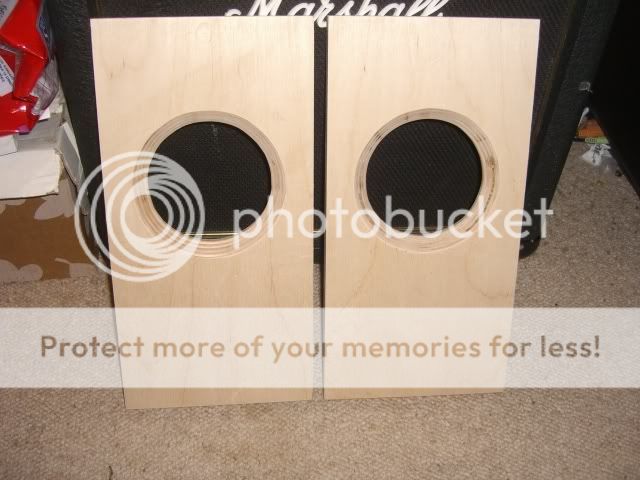
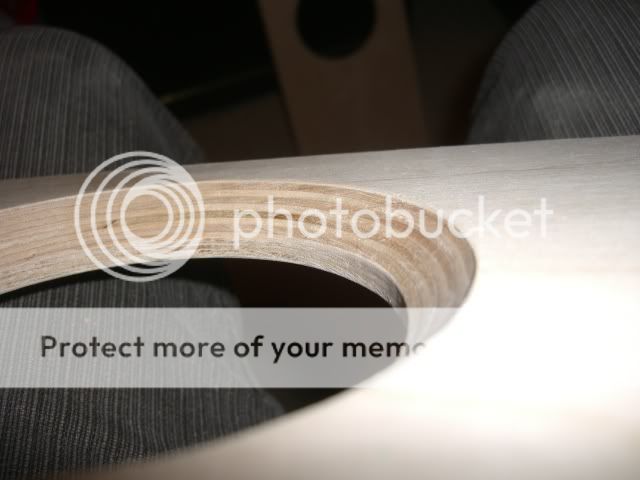
Busy down the shed tonight. Baffles cut today and speaker 'oles and all-important chamfer for the little 127's to breath in. (I missed this on the MLTL build, I'll get round to doing it one day when I find the correct router bit).
Front view.
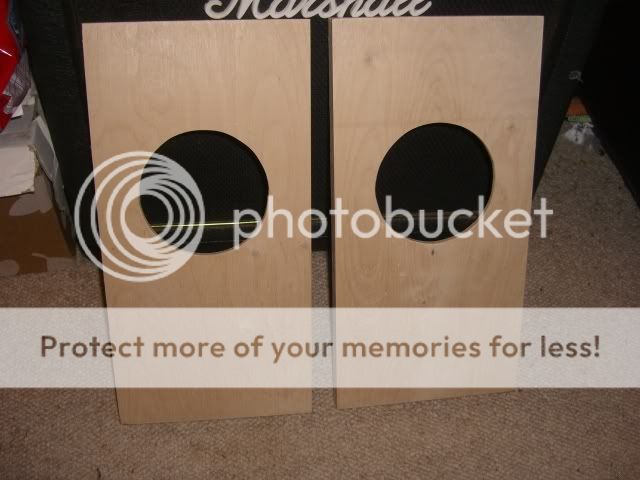
Back view.
Shamfa view...
Thats all I can do for now as the baffles are 18 mm whereas the rest of the cab is in 12mm BB. Pick up 12mm BB Ply on Saturday from the local timber Merchants.
More progress next week hopefully.
DTB
BB. "What chu gon make now?"
JB. "Bobby...I don't know...but whatever I makes it's gots to be Fonken...1...2...3...Make it Fonken..." Etc etc etc
Hello, I'm a new member to this forum, I'm about to make a pair of Planet10 FE127eN fuelled Fonkens.
This is only the 2nd pair of proper HiFi speakers I've made so feel free to point out any ooppsies I've made or could make. My first build was over the Christmas break, a pair of fully tweaked/eNAbled Fostex 167 in Scottmoose designed MLTL cab's. I'm mega-sooper-dooper-happy with them. They're used almost everyday and look and sound amazing (IMO).
The full build can be seen here for anyone wanting to cure insomnia and see what a wally with power tools can do. I'd never cut or routed accuaratley before so it was a steep learning curve for me... http://www.wduk.worldomain.net/forum/showthread.php?t=3700
...and so it begins....
Busy down the shed tonight. Baffles cut today and speaker 'oles and all-important chamfer for the little 127's to breath in. (I missed this on the MLTL build, I'll get round to doing it one day when I find the correct router bit).
Front view.
Back view.
Shamfa view...
Thats all I can do for now as the baffles are 18 mm whereas the rest of the cab is in 12mm BB. Pick up 12mm BB Ply on Saturday from the local timber Merchants.
More progress next week hopefully.
DTB
Dave: having just got started on my 12th or so pair of Fonken enclosures this week (actually 4 pairs on the work bench at the moment) - the sticker on the wall by my bench reads:
"it ain't good 'til it's Fonken good"
I'd be interested in how Jules likes the midrange imaging and soundstaging vs the FE167s.
Did you ever try thinner wire from the amp, or inside the enclosure on the MLTL's?
p.s.
Actually, in case you haven't seem them elsewhere, I do have some suggestions, the first of which before you cut all the material:
1) Extend the slats forming the slot dividers far enough to act as bracing to the back panel.
2) After gluing up the outside panel, slot dividers and internal slot panel as a sub assembly, add the felt damping material to the inside panel before next glue-up step. No matter your assembly sequence, it gets pretty tight inside that box before the last panel back goes on. As I have access to a big-a$$(technical trade term) sliding table saw that can cut the side bevels after the boxes are fully assembled, I attach the side panels assemblies to the front, then the top, driver brace, bottom, leaving the back last.
3) Screw the driver to the front baffle panel and lay carefully down on a soft surface before marking and cutting the vertical driver brace to fit tightly against the magnet. After allowing for gasket compression, I tend to add an extra mm or so (1/32") clearance that can be sealed with PSA draft exclusion (weather-strip) foam tape. If the driver brace is cut too shallow, you've got a huge problem once the box is all glued up.
4) Offset the vertical driver brace from enclosure centre line by the material thickness
5) Install cleats of 12mm plywood where the back panel meets the top and bottom panels, and cut notches or 45's on the vertical driver brace for it to clear. This will add extra glue surface area for the rear panel, as well as increase bracing betwen the side panels.
Sooner or later I need to compile an assembly photo log, to add to the number of them out there.
Most importantly - enjoy it, and try to wipe that goofy grin off your face when you play the fully broken in pair the first time for your friends.
cheers
Glad to know I'm not the only daft 'fonken' making them
Re- MLTL wiring, no I haven't experimented further with thin wire bassically 'cos they sound soooo good with the stuff I'm using at the moment Chris. I was toying with the idea of running 2 individul strands of equal length Cat5 to each speaker then A/B for any differences at a later date. Problee be a winter project when the weather turns gloomy again. I've been playing with room positioning and floor coupling though, I like them toe'd in a bit, lovely sound.
Back to the Fonkens.
1. Slot dividers, oooh. Thanks for pointing that out, nope, I was going to cut them flush with the inner panel. I'll extend them as per your instructions, cheers.
2. Yes, I was going to to make the side panel and slot panels as a sub assembly like you advised, I've got some pukka 12mm wool felt left over from the MLTL build that I'll damp the internals with, talking of which, do I apply the wool felt to the baffle rear and back panel too? Also, what about the driver brace? Does that need covering too?
3. Re- Driver brace, the foam strip you're talking about goes betwixt the brace and the driver magnet yes? To hold the whole caboodle rigid and solid I'm guessing yes? I was a bit wary of the metal of the magnet piece butting up against the brace and rattling at a later date. Re- big bummed table saw, yes....luckilly I work next door to a Joiners workshop and they reckon they can do that 45 degree chop for me OK on a finished cabinet.... <fingers crossed>.
4. Brace offset, ah, now I saw that in the plans on the P10 site, why is it offset? I'm a newbie to all this. See, I told you I'd probably be asking lots of questions
5. Aha, now, I saw on another thread where a chap in Ireland has made a pair and fitted little pieces (cleats?) to screw/glue the back panel onto but I didn't want to do that. Now, seeing as I learn't to rout and rebate when making the MLTL's I was going to rout out a 12mm x 8mm recess in the top/bottom and side panels to increase rear panel glue area and increase the cab strength like I've seen in some of the pro type builds you've done in bamboo ply. I wanna be 'pro' like you big boys!!!!
6. Photolog, I'll post up mine as I go if I have time. Feel free to use any of my piccies and comments if it helps you (as long as you don't say "now look what this plonker has done.....")
I always have a silly grin on my face Chris, I think it's down to a good veggie diet, English Real Ale and still skateboaring at 42 years old
Many many thanks for all the advice so far. Scott, Colin and Ed over on WD advised me lots when I was making the MLTL's, I really needed it. Looks like I still do!
DTB
Originally posted by Dave the Bass
...and still skateboaring at 42 years old
Amen Brother. I'm 34 and still rock the stuntwood whenever I can. Plus building halfpipes is a good way to get your wood skills built up.
gurley123 said:
Amen Brother. I'm 34 and still rock the stuntwood whenever I can. Plus building halfpipes is a good way to get your wood skills built up.
Ah! I've built one of them before....
http://i195.photobucket.com/albums/z109/davethebass1/Miniramp1.jpg
....but I sold it 'cos after 5 years of Public Campaigning we've got this in concrete, it's Rad.
http://www.randombmx.com/blogger/uploaded_images/dart_02-713125.jpg
34!? A young 'n then
DTB
Ahh yes, Google sketch-up is not just good for speakers!
Here is a plan for my really tiny backyard. If you think talking your wife into a big set of speakers is hard, try to get her to agree to a couple of tons of concrete in the garden.

And here is a Fonken Rip-off for the Hemptone FR5". It's in the works now. I'll let you all know how it sounds. Also a companion woofer is planned.

Here is a plan for my really tiny backyard. If you think talking your wife into a big set of speakers is hard, try to get her to agree to a couple of tons of concrete in the garden.
And here is a Fonken Rip-off for the Hemptone FR5". It's in the works now. I'll let you all know how it sounds. Also a companion woofer is planned.
Dave the bass said:Glad to know I'm not the only daft 'fonken' making them
Re- MLTL wiring, no I haven't experimented further with thin wire bassically 'cos they sound soooo good with the stuff I'm using at the moment Chris. I was toying with the idea of running 2 individul strands of equal length Cat5 to each speaker then A/B for any differences at a later date. Problee be a winter project when the weather turns gloomy again. I've been playing with room positioning and floor coupling though, I like them toe'd in a bit, lovely sound.
Back to the Fonkens.
1. Slot dividers, oooh. Thanks for pointing that out, nope, I was going to cut them flush with the inner panel. I'll extend them as per your instructions, cheers.
2. Yes, I was going to to make the side panel and slot panels as a sub assembly like you advised, I've got some pukka 12mm wool felt left over from the MLTL build that I'll damp the internals with, talking of which, do I apply the wool felt to the baffle rear and back panel too? Also, what about the driver brace? Does that need covering too?
We apply felt damping material to all internal panels, including approx 1/2 the driver brace immediately behind the driver. Leave clearance for "breathing room" at the internal openings of slots.
3. Re- Driver brace, the foam strip you're talking about goes betwixt the brace and the driver magnet yes? To hold the whole caboodle rigid and solid I'm guessing yes? I was a bit wary of the metal of the magnet piece butting up against the brace and rattling at a later date.
A fundamental aspect of virtually all of Dave D's non BLH type designs is coupling of the mid/bass or full range drivers to the enclosure via magnet brace. In the the case of the Fonken, this brace is vertically oriented and serves to rigidly couple 4 of the panels and driver. I wouldn't be concerned with rattling of the metal cover on the FE127's magnet. For over 2 years, I've been using a dead driver for as a dry-fit model which has suffered some serious abuse in the shop. Aside from scratches in the paint, the magnet cover has yet to come loose or mis-shaped.
The relatively weak stamped frame on all of the FE & FF series (as compared to the FX & FW and Sigmas, for example) is another story altogether. That's where the concern over cutting the magnet brace too shallow arises. I've found out the hard way that if you over torque the mounting screws and/or add extra compressible weatherstripping in attempts to close a minor gap that would result if the brace is too shallow, you run serious risk of warping the thin stamped frame, even if it's been reinforced with epoxy or ceramic doped damping fillers. This is not a good thing.
With the FW or FX models, you're more likely to snap the head off a screw if overtorqued than bend or crack the frame, but please don't anyone test that thesis.
Re- big bummed table saw, yes....luckilly I work next door to a Joiners workshop and they reckon they can do that 45 degree chop for me OK on a finished cabinet.... <fingers crossed>.
4. Brace offset, ah, now I saw that in the plans on the P10 site, why is it offset? I'm a newbie to all this. See, I told you I'd probably be asking lots of questions
One of the effects of this type of bracing is to subdivide the panels into smaller panels with higher resonant frequencies. Offsetting the braces redistributes this resonant energy over multiple frequency bands, each with lower and more quickly dissipated energy levels. Depending on the size of enclosure, multiple braces may be required, and there are some geometries that we've found work better than others.
5. Aha, now, I saw on another thread where a chap in Ireland has made a pair and fitted little pieces (cleats?) to screw/glue the back panel onto but I didn't want to do that. Now, seeing as I learn't to rout and rebate when making the MLTL's I was going to rout out a 12mm x 8mm recess in the top/bottom and side panels to increase rear panel glue area and increase the cab strength like I've seen in some of the pro type builds you've done in bamboo ply. I wanna be 'pro' like you big boys!!!!
As noted earlier, having built quite a few pairs of this enclosure, I've had the opportunity to experiment with a few variations on construction / joinery techniques, and don't claim to have found the magic / perfect way. The rabbets and dadoes used on the Bamboo enclosures was chosen to accent the patterns available with the exposed edge grain of the material. It certainly added to the complications of build, and I wouldn't recommend if using more conventional materials.
On the current flock of 4 pairs underway, plywood cleats will be used across the top and bottom of the back panel .
6. Photolog, I'll post up mine as I go if I have time. Feel free to use any of my piccies and comments if it helps you (as long as you don't say "now look what this plonker has done.....")
I always have a silly grin on my face Chris, I think it's down to a good veggie diet, English Real Ale and still skateboaring at 42 years old
Many many thanks for all the advice so far. Scott, Colin and Ed over on WD advised me lots when I was making the MLTL's, I really needed it. Looks like I still do!
DTB
Few of us ever stop benefiting from this type of sharing - and those who claim to not need any help or advice in their endeavors are generally the ones with whom I try to avoid conversations.

gurley123 said:A
And here is a Fonken Rip-off for the Hemptone FR5". It's in the works now. I'll let you all know how it sounds. Also a companion woofer is planned.
If you haven't already done so, check with Dave on the math for enclosure volume and port tuning for this driver. Its T/S parameters might require some adjustments. This was certainly the case for the HempAcoustics 4.5" driver - the standard box was a bit small for what the driver wanted.
Yes, they are on the small side. They are for desktop use. They look good on WinISD(For all that's worth). I derived the T/S from the published complience, moving mass numbers and ect, as described in the WinISD guide for entering T/S numbers.
On the computer, they start slowly tapering off at 100Hz and then turn down a little sharper to hit an F3 of 73Hz. Impedence looks good too. I don't have it in front of me right now though.
Here's a pdf of the Dims. I haven't shown a brace but I have planned for some bracing. Shown built with 1/2" Ply.
Attachments
chrisb said:
We apply felt damping material to all internal panels, including approx 1/2 the driver brace immediately behind the driver. Leave clearance for "breathing room" at the internal openings of slots.
Ok thanks, I understand now. Yes I remembered the chap that got some damping material in the way of the ports suffered from poor bass. I've made a note to my self to be careful there.
Again, thanks for explaining Chris, I'll make sure I get the barce right up tight and close to the magnet housing and pay special attention to clamping down the speaker.Originally posted by chrisb A fundamental aspect of virtually all of Dave D's non BLH type designs is coupling of the mid/bass or full range drivers to the enclosure via magnet brace. In the the case of the Fonken, this brace is vertically oriented and serves to rigidly couple 4 of the panels and driver. I wouldn't be concerned with rattling of the metal cover on the FE127's magnet. For over 2 years, I've been using a dead driver for as a dry-fit model which has suffered some serious abuse in the shop. Aside from scratches in the paint, the magnet cover has yet to come loose or mis-shaped.
The relatively weak stamped frame on all of the FE & FF series (as compared to the FX & FW and Sigmas, for example) is another story altogether. That's where the concern over cutting the magnet brace too shallow arises. I've found out the hard way that if you over torque the mounting screws and/or add extra compressible weatherstripping in attempts to close a minor gap that would result if the brace is too shallow, you run serious risk of warping the thin stamped frame, even if it's been reinforced with epoxy or ceramic doped damping fillers. This is not a good thing.
Originally posted by chrisb One of the effects of this type of bracing is to subdivide the panels into smaller panels with higher resonant frequencies. Offsetting the braces redistributes this resonant energy over multiple frequency bands, each with lower and more quickly dissipated energy levels. Depending on the size of enclosure, multiple braces may be required, and there are some geometries that we've found work better than others.
Ah, I didn't know that was the reason, thanks for explaining.
Originally posted by chrisb As noted earlier, having built quite a few pairs of this enclosure, I've had the opportunity to experiment with a few variations on construction / joinery techniques, and don't claim to have found the magic / perfect way. The rabbets and dadoes used on the Bamboo enclosures was chosen to accent the patterns available with the exposed edge grain of the material. It certainly added to the complications of build, and I wouldn't recommend if using more conventional materials.
On the current flock of 4 pairs underway, plywood cleats will be used across the top and bottom of the back panel .
Oh bum, I've already cut the baffles to a size that pretty much commits me to the more complicated type of joints. I managed it Ok on the MLTL and saw how strong the (bigger) cabinet was using that type of construction. I'd got fairly confident using the router by the end of the build. This is the sort of joint I mean, sorry I don't know the technical term for it.

Ooo, I don't know what to do, a part of me wants to continue with the more complicated method of construction (I think it' looks good too actually) but I bow to your experience. I suppose I'll have enough to try again with the simpler construction method if I fail in the more complicated attempt. Would I upset you if I did it that way???!!!
Originally posted by chrisb Few of us ever stop benefiting from this type of sharing - and those who claim to not need any help or advice in their endeavors are generally the ones with whom I try to avoid conversations.
DTB
Dave, your picture shows a very nicely cut rabbet. . In this particular application, the cleat method could be considered a lazy-man's short cut to achieve the same result.
If you're confident enough to fully inlay the back panel with rabbets on all 4 edges, by all means.
Enjoy the project and the following ones.
cheers
If you're confident enough to fully inlay the back panel with rabbets on all 4 edges, by all means.
Enjoy the project and the following ones.
cheers
chrisb said:Dave, your picture shows a very nicely cut rabbet. . In this particular application, the cleat method could be considered a lazy-man's short cut to achieve the same result.
If you're confident enough to fully inlay the back panel with rabbets on all 4 edges, by all means.
Enjoy the project and the following ones.
cheers
Rabbet! Ah! So thats what it's called. Yes, I'm going to give it a try, if I fail I can only be publicly humiliated in front of my peers
Oh yes, I fully intend to enjoy the project. I loved building the MLTL's even though it was bloomin' cold down the shed...ahem... I mean workshop in the middle of winter.
"following ones..." You mean there's more to build afterwards?
Thanks again for help and advice Chris.
All the best,
DTB
gurley123 said:Yes, they are on the small side. They are for desktop use. They look good on WinISD(For all that's worth). I derived the T/S from the published complience, moving mass numbers and ect, as described in the WinISD guide for entering T/S numbers.
The factory specs are real close to the Fostex FE127. The measured specs fall about half-way between the FE127 & FE126 measures.
I ballpark the box size as needing to be a 1/3 larger than a similar FE127 box. I haven't pursued any boxes for these, because after a year i am still waiting for my replacement drivers -- makes it hard to get enthusiastic about HA drivers.
dave
Dave: I think gurley's drivers are the Hemptone, not PP Hemp Acoustics.
http://www.hemptonespeakers.com/pdf/Hemptone FR 5.pdf
There may well be independent tests that verify or modify the published T/S parameters listed above, but in the meantime how would you compare these to the average of your measures for the over 100 samples of FE127E to date, and what revisions if any would be appropriate for this driver in a Fonken-lite box?
gurley123 said:Yep, Thanks Chris, They are indeed Hemptone speakers. I was bitten by the ebay impulse buy bug.
I have a larger cab for these but I really wanted to use them in an office set-up.
As we've recently noted while playing around with the FF85K (microFonken) in small room/near-field / computer monitor etc applications, many of the limitations or "compromises" of an undersized box are not an impediment at all.
Sometimes a WAG / intuitive design works just fine, thank you very much!
chrisb said:There may well be independent tests that verify or modify the published T/S parameters listed above, but in the meantime how would you compare these to the average of your measures for the over 100 samples of FE127E to date
From memory those specs are close to factory FE127 (Vas is larger) and similar to measured FE126
dave
- Status
- This old topic is closed. If you want to reopen this topic, contact a moderator using the "Report Post" button.
- Home
- Loudspeakers
- Full Range
- As James Brown (almost) used to say... "Make it Fonken...!"