Day before yesterday I had taken the cabinets up topside and finished sanding them. I sat down to write up my experience to this, and spent almost an hour typing up what I thought to be an informative and funny post. Unfortunately, I had to backtrack a bit and look up some other information. When I returned, the post had 'timed out', and all of my post was suddenly gone. I was overwhelmed with frustration, so I decided to take a break and just relax a bit until I actually felt like going on. So, I'm ready to try to play catch-up, and I have a lot to catch up on.
----------------------------
After I had trimmed the lengthy ends of the veneer in the basement to where the top and bottoms were close to the frame, I carried each one up as I needed them. I grabbed a retractable bladed knife and camera, and got ready to sand down the overhang to the first walls of each cabinet.
I might add that it was quite brisk outside, only a couple of degrees above freezing. while I was enjoying all this Anthropogenic Global Warming, I decided to get a hot cup of coffee, and then it was time to start the actual trimming process before sanding. 1/8 " overhand can be more than you want when sanding down a corner. It is best to get the overhang down to the smallest amount possible, short of cutting into the edge of the frame.
I started out having a bit of trouble, using the retractable blade. The trouble was that the blade kept retracting into the frame, and the blade did not cut through the veneer effortlessly. But I was into the first cabinet, I was shivering and didn't want to stop because I would not want to restart if I spent too much time in the warmer house looking around for something better. So I sucked up and kept going.
On the last side, I ran into another problem. One of the spots along the edge had not been adhered properly, as you can see on this next shot.
Here is what the other side looked like with a rough trim. In that shot, it is ready to be ironed again in order to make the veneer permanent with the corner.
Finally I got both sides trimmed and plugged in my belt sander. A word of caution about belt sanders. If you get carried away and press down too hard on the sander, or forget to keep it moving at all times, you will quickly ruin your veneer job, or any other job for that matter. Good belt sending is not for beginners.
I have two old Craftsman belt sanders, 3" x 21" belt, and have owned them since the 1970s. they are about 31-32 years old and look almost the same as new ones, except they have more aluminum on the body instead of plastic. If you are going to get one, make certain to turn it on and run it with a belt for a while to check it out. If the belt needs constant readjustment for it to stay on track evenly, look for another one of that model. Keep looking until you find one that is easy to accomodate you.
The one that will not cooperate is a female belt sander, and you do not want one in your shop, because it is 'high maintenance". Also, it can get hormonal on you at the drop of a hat. One of my sanders is female, and I almost never use it. The other one is male, and it has never given me a hard time all these years. The female one I loaned out to my crews when I was in construction management for obvious reasons.
Taking my trusty male sander I ran the belt along the edge, lightly so as not to over sand the veneer. It was very quick and a few quick passes, along with a little spot sanding and I was through with that side. Then I sanded the top and bottom even with the cabinet, and turned the cabinet around and did the same with that side as well.
Here it is sanded. If you will note, there is a little bit of veneer that is missing from a portion of the edge to the right. It looks worse than is it. The overlaping veneer should hide it completely. If not, I will fill in with sawdust and shellac.
After bringing up the second cabinet I looked at that retractable knife and finally decided that it was not giving me the proper support I needed.
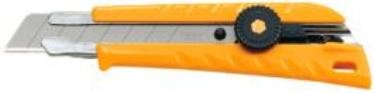
So I went back downstairs and started going through my tool cabinets and drawers for a better substitute. And finally I found what I was really looking for. It was a single sided razor blade cutter, with extra blades. Eureka!
With it in hand, I Practiced a bit and came up with a nice hand stance to use, in order to make quick work of the excess trim. My friend Michael was working down in my shop on one of his drapery orders for a client. Since he was there I dragged him up and had him hold the knife while I took a shot of how I used the blade.
Mike is not as good at things mechanical as I am, so I had to coach him on how to hold the knife, but he finally got reasonably close. Then I took over again and made a long single slice, and had him pretend to be me one more time before he started complaining about freezing out there, and wanting to get back to work.
One of the advantages of this, which you cannot see, is that the little finger is firmly grounded to the cabinet, offering support while the trimmer cuts the excess veneer. This allowed me to make a closer cut and do it quickly. with a little practice the supersharp blade makes mincemeat of the overhang.
But no matter how careful or experienced you are, you will not have everything work flawlessly, as the next picture shows.
Because walnut is an open grained and brittle veneer, it easily cracks and this spot cracked without any effort. The screwdriver highlights the crack. In this case, I just reironed the material, and then added titebond glue to the wood. Then I finished it off by taking a wet rag and wiping the excess glue off the surface. After that, I had no further problem with it.
Here are the two walls finished and standing next to each other.
After this initial veneering step, I must confess that there are some things I have definately learned about veneering a hexagon cabinet.
First and foremost, is not to seal the veneer first, before using heat bond and adhereing them to the walls. here is what I mean. The hot iron will melt the surface shellac on the veneer, and make it look absolutely horrible to see. In reality, it is not all that bad, because I took a clean rag, soaked in a little denatured alcohol , and gave one of the walls a quick rubdown to see if the white discoloration would disappear. It pretty much did. If you compare the two cabinets, the one on the right was the one I rubbed down. There is a slight difference so I am not worried about it being permanent. A good sanding will take care of the problem.
Secondly, using your iron on the sealed veneer will wind up giving your iron a generous amount of shellac stuck to the bottom of the iron. And with it there, even with a no-stick surface, it will not iron. Believe me, that is bad news. If you are using your wife's iron, you had better plan on NOT doing what I did, or you had better clean all that shellac off soonest, or you are in a world of hurt.
The least thing that could happen is that this will give her an excuse to go out, on your dime, and buy the most expensive iron out there. And I know all about irons, since I go through irons at least once a year in my business. That is why I don't even think about getting the High Dollar irons. none of them last the hard treatment a fabrication shop can give it. But this will not help you because she will be "Entitled" to a new iron, and you will be SOL. Oh, and she will never let you live it down either, if I know anything about women.
So get out the denatured alcohol and give the bottom of the iron a thorough cleaning, and about 45-60 minutes of effort. This will teach you a valuable lesson about experimentation and it's consequences. Mistakes, learned the hard way, will usually not be repeated if you are required to correct them. I know that I have learned mine here.
Thirdly, you do not need any fancy veneer trimmers to trim the edge of cabinets, expecially cabinets that are not at a 90 degree angle. All you need is a super sharp razor blade and good hand and eye coordination. The rest is just process and patience.
I'll continue on the next post.
----------------------------
After I had trimmed the lengthy ends of the veneer in the basement to where the top and bottoms were close to the frame, I carried each one up as I needed them. I grabbed a retractable bladed knife and camera, and got ready to sand down the overhang to the first walls of each cabinet.
I might add that it was quite brisk outside, only a couple of degrees above freezing. while I was enjoying all this Anthropogenic Global Warming, I decided to get a hot cup of coffee, and then it was time to start the actual trimming process before sanding. 1/8 " overhand can be more than you want when sanding down a corner. It is best to get the overhang down to the smallest amount possible, short of cutting into the edge of the frame.
An externally hosted image should be here but it was not working when we last tested it.
I started out having a bit of trouble, using the retractable blade. The trouble was that the blade kept retracting into the frame, and the blade did not cut through the veneer effortlessly. But I was into the first cabinet, I was shivering and didn't want to stop because I would not want to restart if I spent too much time in the warmer house looking around for something better. So I sucked up and kept going.
On the last side, I ran into another problem. One of the spots along the edge had not been adhered properly, as you can see on this next shot.
An externally hosted image should be here but it was not working when we last tested it.
Here is what the other side looked like with a rough trim. In that shot, it is ready to be ironed again in order to make the veneer permanent with the corner.
An externally hosted image should be here but it was not working when we last tested it.
Finally I got both sides trimmed and plugged in my belt sander. A word of caution about belt sanders. If you get carried away and press down too hard on the sander, or forget to keep it moving at all times, you will quickly ruin your veneer job, or any other job for that matter. Good belt sending is not for beginners.
I have two old Craftsman belt sanders, 3" x 21" belt, and have owned them since the 1970s. they are about 31-32 years old and look almost the same as new ones, except they have more aluminum on the body instead of plastic. If you are going to get one, make certain to turn it on and run it with a belt for a while to check it out. If the belt needs constant readjustment for it to stay on track evenly, look for another one of that model. Keep looking until you find one that is easy to accomodate you.
The one that will not cooperate is a female belt sander, and you do not want one in your shop, because it is 'high maintenance". Also, it can get hormonal on you at the drop of a hat. One of my sanders is female, and I almost never use it. The other one is male, and it has never given me a hard time all these years. The female one I loaned out to my crews when I was in construction management for obvious reasons.
Taking my trusty male sander I ran the belt along the edge, lightly so as not to over sand the veneer. It was very quick and a few quick passes, along with a little spot sanding and I was through with that side. Then I sanded the top and bottom even with the cabinet, and turned the cabinet around and did the same with that side as well.
Here it is sanded. If you will note, there is a little bit of veneer that is missing from a portion of the edge to the right. It looks worse than is it. The overlaping veneer should hide it completely. If not, I will fill in with sawdust and shellac.
An externally hosted image should be here but it was not working when we last tested it.
After bringing up the second cabinet I looked at that retractable knife and finally decided that it was not giving me the proper support I needed.
An externally hosted image should be here but it was not working when we last tested it.
So I went back downstairs and started going through my tool cabinets and drawers for a better substitute. And finally I found what I was really looking for. It was a single sided razor blade cutter, with extra blades. Eureka!
With it in hand, I Practiced a bit and came up with a nice hand stance to use, in order to make quick work of the excess trim. My friend Michael was working down in my shop on one of his drapery orders for a client. Since he was there I dragged him up and had him hold the knife while I took a shot of how I used the blade.
An externally hosted image should be here but it was not working when we last tested it.
Mike is not as good at things mechanical as I am, so I had to coach him on how to hold the knife, but he finally got reasonably close. Then I took over again and made a long single slice, and had him pretend to be me one more time before he started complaining about freezing out there, and wanting to get back to work.
An externally hosted image should be here but it was not working when we last tested it.
One of the advantages of this, which you cannot see, is that the little finger is firmly grounded to the cabinet, offering support while the trimmer cuts the excess veneer. This allowed me to make a closer cut and do it quickly. with a little practice the supersharp blade makes mincemeat of the overhang.
But no matter how careful or experienced you are, you will not have everything work flawlessly, as the next picture shows.
An externally hosted image should be here but it was not working when we last tested it.
Because walnut is an open grained and brittle veneer, it easily cracks and this spot cracked without any effort. The screwdriver highlights the crack. In this case, I just reironed the material, and then added titebond glue to the wood. Then I finished it off by taking a wet rag and wiping the excess glue off the surface. After that, I had no further problem with it.
Here are the two walls finished and standing next to each other.
An externally hosted image should be here but it was not working when we last tested it.
After this initial veneering step, I must confess that there are some things I have definately learned about veneering a hexagon cabinet.
First and foremost, is not to seal the veneer first, before using heat bond and adhereing them to the walls. here is what I mean. The hot iron will melt the surface shellac on the veneer, and make it look absolutely horrible to see. In reality, it is not all that bad, because I took a clean rag, soaked in a little denatured alcohol , and gave one of the walls a quick rubdown to see if the white discoloration would disappear. It pretty much did. If you compare the two cabinets, the one on the right was the one I rubbed down. There is a slight difference so I am not worried about it being permanent. A good sanding will take care of the problem.
Secondly, using your iron on the sealed veneer will wind up giving your iron a generous amount of shellac stuck to the bottom of the iron. And with it there, even with a no-stick surface, it will not iron. Believe me, that is bad news. If you are using your wife's iron, you had better plan on NOT doing what I did, or you had better clean all that shellac off soonest, or you are in a world of hurt.
The least thing that could happen is that this will give her an excuse to go out, on your dime, and buy the most expensive iron out there. And I know all about irons, since I go through irons at least once a year in my business. That is why I don't even think about getting the High Dollar irons. none of them last the hard treatment a fabrication shop can give it. But this will not help you because she will be "Entitled" to a new iron, and you will be SOL. Oh, and she will never let you live it down either, if I know anything about women.
So get out the denatured alcohol and give the bottom of the iron a thorough cleaning, and about 45-60 minutes of effort. This will teach you a valuable lesson about experimentation and it's consequences. Mistakes, learned the hard way, will usually not be repeated if you are required to correct them. I know that I have learned mine here.
Thirdly, you do not need any fancy veneer trimmers to trim the edge of cabinets, expecially cabinets that are not at a 90 degree angle. All you need is a super sharp razor blade and good hand and eye coordination. The rest is just process and patience.
I'll continue on the next post.
Sunday night, I took stock of what I had learned from my first application of veneer to the walls of my two cabinets. My origonal intent was to use the wider heartwood veneer for the back of the cabinet, and use the ones with more sap wood for the front. That way more contrast would be acheived. So I had purposefully started out with the sheet to go on the back, and use it to be my "lessons learned" application. And I had indeed learned some valuable lessons I mention directly above.
With lessons learned, I lined up the front of each cabinet and applied a liberal coating of glue to it by using my roller. Then I set up the two top pieces of veneer to be used with my front wall. When I had what I considered to be the best side facing forward, and determined the 'up' from the 'down', I turned them over and applied a good coating of glue to each. As I completed the application of glue, I picked up an end, turned it around, and sprayed it nicely with water, so as to keep the veneer from curling too much. Then I laid them out as flat as possible and went to bed.
The next morning I got up and eventually made my way downstairs to inspect my upcoming project with the second veneer wall. I took one of the sheets and set it on top of the cabinet as you see here.
Nothing out of the usual, so I got out the iron and fired her up. I have a female iron as well this time around. she leaks when she wants to, and can leave marks on $100 plus per yard fabric in a New York Minute. I've only had her in the house for about three months, so I hesitate to get a divorce from her so soon. But she is difficult to live with.
Once I had the veneer adhered, I put away the iron and gathered up the razor blade knife and bent down to make my cuts. Oh Lord!, I had the thing upside down, because now the grain was running outward, from left to right, instead of the way the first sheet went. Too late to correct any mistakes such as that. All of my sequential sheets having the most sapwood would have to be turned the exact same way, so I had to learn how to use the razor knife with the other hand. horrors!
However, before I had a chance to start trimming off the overhang, I notices another grain split on the surface of the veneer. This had happened to one of the sheets that were to be the rear wall. This gave me pause, but I knew that covering this sort of problem was straight forward. All I had to do was take sawdust from the sanding and fill in the crack with it, and then apply shellac into the buildup. Then when it dried and shrunk up, repeat the process and reshellac. The crack would be virtually undetectable.
Here is what I mean.
And this crack was a little further down the piece of veneer.
Here is a shot of the two cabinets roughly trimmed and ready to climb the steps to the back deck for sanding.
Here is one little spot where I got too causual and cut off just a bit too much veneer overhang. Hopefully, It should be hidden by the overlapping veneer.
And here are the two front walls veneered, trimmed, and sanded.
With lessons learned, I lined up the front of each cabinet and applied a liberal coating of glue to it by using my roller. Then I set up the two top pieces of veneer to be used with my front wall. When I had what I considered to be the best side facing forward, and determined the 'up' from the 'down', I turned them over and applied a good coating of glue to each. As I completed the application of glue, I picked up an end, turned it around, and sprayed it nicely with water, so as to keep the veneer from curling too much. Then I laid them out as flat as possible and went to bed.
The next morning I got up and eventually made my way downstairs to inspect my upcoming project with the second veneer wall. I took one of the sheets and set it on top of the cabinet as you see here.
An externally hosted image should be here but it was not working when we last tested it.
Nothing out of the usual, so I got out the iron and fired her up. I have a female iron as well this time around. she leaks when she wants to, and can leave marks on $100 plus per yard fabric in a New York Minute. I've only had her in the house for about three months, so I hesitate to get a divorce from her so soon. But she is difficult to live with.
Once I had the veneer adhered, I put away the iron and gathered up the razor blade knife and bent down to make my cuts. Oh Lord!, I had the thing upside down, because now the grain was running outward, from left to right, instead of the way the first sheet went. Too late to correct any mistakes such as that. All of my sequential sheets having the most sapwood would have to be turned the exact same way, so I had to learn how to use the razor knife with the other hand. horrors!
However, before I had a chance to start trimming off the overhang, I notices another grain split on the surface of the veneer. This had happened to one of the sheets that were to be the rear wall. This gave me pause, but I knew that covering this sort of problem was straight forward. All I had to do was take sawdust from the sanding and fill in the crack with it, and then apply shellac into the buildup. Then when it dried and shrunk up, repeat the process and reshellac. The crack would be virtually undetectable.
Here is what I mean.
An externally hosted image should be here but it was not working when we last tested it.
And this crack was a little further down the piece of veneer.
An externally hosted image should be here but it was not working when we last tested it.
Here is a shot of the two cabinets roughly trimmed and ready to climb the steps to the back deck for sanding.
An externally hosted image should be here but it was not working when we last tested it.
Here is one little spot where I got too causual and cut off just a bit too much veneer overhang. Hopefully, It should be hidden by the overlapping veneer.
An externally hosted image should be here but it was not working when we last tested it.
And here are the two front walls veneered, trimmed, and sanded.
An externally hosted image should be here but it was not working when we last tested it.
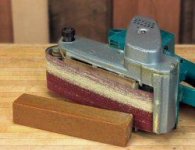
One of the side effects of using a belt sander to sand material that has shellac, glue, or any other material that melts under heat, is that the belt quickly becomes gummed up and in terrible shape. Most people will throw it away in disgust and start counting up the money needed to purchase more replacement belts.
However, that is not necessary. My belt was already pretty gummed up when I started this project, but it got even worse, and after finishing this second wall, it was time to make a trade. But before putting on the new belt, I had to clean the old one first.
Here is what the belt looks like after I have applied some denatured alcohol to the belt so as to soften up the melted shellac and glue.
In truth, I had already done a little bit of cleaning before I realized that I should be taking pictures of this for everyone to see. Knowing that you can rehabilitate your old belts will save you lots of money, so this is a good thing if you use a belt sander. So I just turned my trusty old male belt sander over on his back and used a wire brush on the belt.
But first I got out an old and small glass, that could hold the alcohol and not require a good deal of it. Then I dipped the brush in the glass and moved it to the belt and scrubbed the beJesus out of the belt. I did this about three times before moving the belt around by use of my hand. Having the sander plugged in is NOT a good idea. I learned the hard way about this at Plantation General in the late 70s when my crew went there and installed the casework elevations and nurses stations. But that's for another time.
As you can see, those belts can really build up a lot of gunk on them. And they take a bit of elbow grease and alcohol to dislodge it all. The white paint I left on, because it doesn't bother anything and was just too much work to clean off. I can be just as lazy as the next guy at times such as these.
And here is what my Good Old Boy looks like with a cleaned belt.
All I have to do is just remove it and allow it to dry out properly, and it is ready for another round of work.
And here is what another veneered wall looks like sanded. With a new belt, all I have to do is just set the sander on to the surface and watch it melt away the overhang.
Now here is my next problem.
Here are some more shots of the same piece.
this had happened to about three or four sheets and I was really wondering what I was doing wrong. So I stopped what I was doing and with this in the back of my mind, I went into the living room and meditated on my Lazyboy. I took out my latest John Ringo novel and started reading about the Kildar and his gals going after the bad Islamo-Kooks. I always do this sort of thing when I have to contemplate a problem. Keep the problem in the back of my mine and relax on something else.
Most of the time it works, because there was some comment in the book about traveling from Georgia(the country) to the hot Bahamas. That was it!! Heat! I had my answer and all in the first couple of pages.
With that in mind, the next pair of veneers I ironed on to the cabinets, I turned the heat setting of the iron from 5(cotton) to 3(wool), and the problem went away. It was all about using too much heat on the veneer.
One more lesson learned the hard way. I will not forget it either.
Here's todays job. Not a crack to be seen, and the veneering is starting to really take shape.
I did have one more cracked edge to worry about. this occured when I switched from belt sander to my random pheumatic orbital sander. Since the sanding disk rotates clockwise, when I sand from left to right, the leading edge moves downward in a clockwise motion, which is great. But the trailing edge is going upward, and it caught the overhand and tore it loose.
I quickly fixed it by reapplying heat from the iron, and adding glue to the area. If you look very closely, you can just barely see the fix in the picture. This is before I applied glue and wiped off the excess.
After this, I applied some glue over the chip and then used the wet clothe to clean away the surface glue. I looked later for the 'fix' and could not find it.
Here are the cabinets set up for glueing tonight. I used painters tape to keep glue from getting on to the existing veneer. Tomorrow morning I will remove the tape and adhere the veneer to the wall.
I have just two more walls to complete, and I should finish this stage tomorrow afternoon. After that I will start sanding the walls and collecting sawdust to put into the cracks where the grain has split apart. After that I will start sealing and roughly finishing them with more shellac. Then on to the two bases.
I am beginning to believe that I am almost over the hump here. I am finally starting to feel good about it already.
However, that is not necessary. My belt was already pretty gummed up when I started this project, but it got even worse, and after finishing this second wall, it was time to make a trade. But before putting on the new belt, I had to clean the old one first.
Here is what the belt looks like after I have applied some denatured alcohol to the belt so as to soften up the melted shellac and glue.
An externally hosted image should be here but it was not working when we last tested it.
In truth, I had already done a little bit of cleaning before I realized that I should be taking pictures of this for everyone to see. Knowing that you can rehabilitate your old belts will save you lots of money, so this is a good thing if you use a belt sander. So I just turned my trusty old male belt sander over on his back and used a wire brush on the belt.
But first I got out an old and small glass, that could hold the alcohol and not require a good deal of it. Then I dipped the brush in the glass and moved it to the belt and scrubbed the beJesus out of the belt. I did this about three times before moving the belt around by use of my hand. Having the sander plugged in is NOT a good idea. I learned the hard way about this at Plantation General in the late 70s when my crew went there and installed the casework elevations and nurses stations. But that's for another time.
An externally hosted image should be here but it was not working when we last tested it.
As you can see, those belts can really build up a lot of gunk on them. And they take a bit of elbow grease and alcohol to dislodge it all. The white paint I left on, because it doesn't bother anything and was just too much work to clean off. I can be just as lazy as the next guy at times such as these.
And here is what my Good Old Boy looks like with a cleaned belt.
An externally hosted image should be here but it was not working when we last tested it.
All I have to do is just remove it and allow it to dry out properly, and it is ready for another round of work.
And here is what another veneered wall looks like sanded. With a new belt, all I have to do is just set the sander on to the surface and watch it melt away the overhang.
An externally hosted image should be here but it was not working when we last tested it.
Now here is my next problem.
An externally hosted image should be here but it was not working when we last tested it.
Here are some more shots of the same piece.
An externally hosted image should be here but it was not working when we last tested it.
An externally hosted image should be here but it was not working when we last tested it.
this had happened to about three or four sheets and I was really wondering what I was doing wrong. So I stopped what I was doing and with this in the back of my mind, I went into the living room and meditated on my Lazyboy. I took out my latest John Ringo novel and started reading about the Kildar and his gals going after the bad Islamo-Kooks. I always do this sort of thing when I have to contemplate a problem. Keep the problem in the back of my mine and relax on something else.
Most of the time it works, because there was some comment in the book about traveling from Georgia(the country) to the hot Bahamas. That was it!! Heat! I had my answer and all in the first couple of pages.
With that in mind, the next pair of veneers I ironed on to the cabinets, I turned the heat setting of the iron from 5(cotton) to 3(wool), and the problem went away. It was all about using too much heat on the veneer.
One more lesson learned the hard way. I will not forget it either.
Here's todays job. Not a crack to be seen, and the veneering is starting to really take shape.
An externally hosted image should be here but it was not working when we last tested it.
I did have one more cracked edge to worry about. this occured when I switched from belt sander to my random pheumatic orbital sander. Since the sanding disk rotates clockwise, when I sand from left to right, the leading edge moves downward in a clockwise motion, which is great. But the trailing edge is going upward, and it caught the overhand and tore it loose.
An externally hosted image should be here but it was not working when we last tested it.
I quickly fixed it by reapplying heat from the iron, and adding glue to the area. If you look very closely, you can just barely see the fix in the picture. This is before I applied glue and wiped off the excess.
An externally hosted image should be here but it was not working when we last tested it.
After this, I applied some glue over the chip and then used the wet clothe to clean away the surface glue. I looked later for the 'fix' and could not find it.
An externally hosted image should be here but it was not working when we last tested it.
Here are the cabinets set up for glueing tonight. I used painters tape to keep glue from getting on to the existing veneer. Tomorrow morning I will remove the tape and adhere the veneer to the wall.
An externally hosted image should be here but it was not working when we last tested it.
I have just two more walls to complete, and I should finish this stage tomorrow afternoon. After that I will start sanding the walls and collecting sawdust to put into the cracks where the grain has split apart. After that I will start sealing and roughly finishing them with more shellac. Then on to the two bases.
I am beginning to believe that I am almost over the hump here. I am finally starting to feel good about it already.
A couple of tips John:
I compose my comments in a small notepad window as I read, then cut and paste them into the compose window.
For cheap, super sharp knives go to a big kitchen shop or a proper knife shop, Buy some Plastic handled Victorinox paring knives. they can be had for US$4 each.
They are sharp and strong enough to cut the handle off a wooden spoon easily. the blade shape is much better than stnley knives, like a long triangle not a short chamfer then a big flat lump of iron to support the edge.
These knives are used in commercial kitchens a lot, the handles arent that great and I;ve never tried sharpening one again, they usually get lost in veggie scraps before they go blunt.
MJL21193 said:Hi John,
I can't believe you are sanding veneer with a belt sander!
Here's the knife to get. Snap off segments for constant razor sharpness. Olfa is the brand.
I did not say that. You probably should go back and reread my post. I used the belt sander on those corners where the other adjoining wall did Not have my veneer adhered. On those joints where the two veneers came together I used an orbital sander that works on my air system. Now I did also use the belt sander on the tops and bottoms where it did not matter as well.
But I don't use a belt sander on the surface of veneers. I use both the random orbital pneumatic sander and then the electric palm hand sander. I may be very good with the belt sander, but I am not that adventurous.
Please give me just a little more credit here, ok?
And I will stick with the disposable razor blade knife. I can maneuver with it much better.
John L said:
Finally I got both sides trimmed and plugged in my belt sander. A word of caution about belt sanders. If you get carried away and press down too hard on the sander, or forget to keep it moving at all times, you will quickly ruin your veneer job, or any other job for that matter. Good belt sending is not for beginners.
John L said:
I did not say that. You probably should go back and reread my post.
But I don't use a belt sander on the surface of veneers.
Please give me just a little more credit here, ok?
And I will stick with the disposable razor blade knife. I can maneuver with it much better.
Sorry for misunderstanding you, it's just what I gathered from what you wrote. I'm probably not the only one.
Suit yourself on the knife issue. The Olfa can't be beat.
I noticed your belt cleaning method. You don't have a crepe rubber cleaning stick?
Attachments
I always use the 'heavy artillary' first and then use the small stuff to do mopping up. I sanded down on the raw unveneered ajacent side first, and then turned the cabinet around and finished the other side. If that side had two veneers joining, then I would break out the orbital sander, and proceed with caution.
With the first two applications of veneer(the front and rear ones) I used the belt sander on both sides to smooth the edges, because there was no adjourning veneers. And toward the end, I used only the orbital sander, because both sides had veneer adjourning.
I didn't get a chance to finish the last wall of each cabinet today, but will finish it off tomorrow. On them I will use only the orbital sander.
As for the cleaning stick, I used to have one, but misplaced it. It works nicely under normal circumstances, but on a buildup of glues and shellace, etc, it becomes an exercise in frustration. That is why I use a good wire bristle brush and alcohol, to dig in and root out the gunk. I'll admit that, when I finish, the belt's grit is not as sharp as new, but it is clean and works nicely that way. And I have actually cleaned a gunked up belt several times. I like to reuse my belts if possible.
I'm really looking forward to getting things done up to the dispersion horn for the top. I will be on the home stretch then.
I should have kept an accurate record of the hours spent on the project. It has been stretched out, but probably does not amount to the time it appears. Making the top piece will probably take up a nice portion of the total time toward completion of the project though.
John, I most certainly could have been a bit clearer with my explanation above, but there is a lot to put out and I sometimes fail to insert everything as I should. I will probably never make a scholar.
Unfortunately we only have a short time to edit our posts, and then the door closes for it, and the potential correction is impossible, should one wish to make a correction.
I don't like this restriction, and don't have it over at my own forum. The restrictions that hinder honest creativity are nowhere equal to the chance of adolescents to create mischief. And this forum is certainly more mature than others, so I wonder why this is a part of the Configuration here.
Hi John,
I can't believe I missed this project. You appear to be a kindrid spirit. I have worked on 4 omni projects over the past year and a half or so. I thought I would offer some links for you detailing these projects, in case there is something you can learn from my expereince. I was pretty much a noob when I started the first project and they all tended to morph from one concept to another as I learned the limitiations, so most of the good stuff is typically a bit later in these threads. The projects often looked quite different than the initial concepts. Perhaps you are much further in this hobby than I and there is little to learn from my expereinces. If so, please ignore his post!
The first link is my most recently completed project and where it is posted on this forum:
http://www.diyaudio.com/forums/showthread.php?s=&threadid=109772
Here is a link to a bit more detailed thread on this project over at HTguide. It is a hybrib omnidirectional speaker that uses a front firing tweeter.
http://htguide.com/forum/showthread.php4?t=26065&highlight=omnidirectional
Of more intereste to you might be my first two efforts. You might be able to learn something about diffusers and placement, shape, size, etc., from the pitfalls that I ran into. The first one is below and I post it becuase I started with the concept of doing something like the Duevel. I ran into some trouble with off axis roll off, FR and diffusers, etc. much of which is indicated with measurements, etc.
http://htguide.com/forum/showthread.php4?t=22445&highlight=omnidirectional
I did test some Duevel shaped diffusers in this project. the concave cone diffusers offer much more potenial, in my expereince than any ball shape, flat sided cone shape, etc. However, I think you may be disappointed in the results of the downfiring dome tweeter concept as used in the Venus. I tested this and the FR was not good at all. You can see the results buried somewhere in that thread.
I used a combination of diffusers and waveguides in next project I will link to next. It has been referred to as a waveguide omni. This project was not completed and only one prototype was built. This concept just did not surpass what I had achieved in the first project, so it was abandoned. Still, there is a lot of experimentation with measurements of difusers, their shape, size, height and in combination with waveguides to emulate what Duevel does in the Bella Luna. There might be something here that you will find helpful.
http://htguide.com/forum/showthread.php4?t=25074&highlight=omnidirectional
I'm underway with the 4th project now. It will be a passive 3way, designed to fit into the budget category at the IowaDIY (under $300 for crossover parts and drivers). I have a prototype mostly built and I'm tweaking the crossover. It is similar in approach to two of my other projects and is a WMTM configuration, except it uses a slot ported, up firing 8" woofer (f3 around 31hz) PVC tubes for the mids, one firing up and one down and a small neo tweeter firing forward, mounted to the end of a tube. The crossover points are about 450hz and 3600hz or so. I'm extremely happy with it's performance so far. Attached is a paint shop pro mock up of what it will look like. I have a photo of the preliminary prototype, but don't have it with me now and can post it later if you are intetested.
Good Luck!
An externally hosted image should be here but it was not working when we last tested it.
Ed LaFontaine said:Dan,
The casework doesn't look "budget"
Hi Ed,
That's your fault! You set the standard higher. This was the concept, before I started building it. It looks a little different due to some reality checks.

Drop me a line. I'd like to hear/see what you are working on.
Thanks Dan! I have breezed through the links, and can see that I will have to sit down and go through them slowly, when I have the time later.
But I well remember seeing your project before(at the PE board), and greatly admired your use of my favorite material: Santos rosewood/Bolivian rosewood. It is by far the most beautiful material I can think of, with Waterfall Bubinga a close second.
Anyway, thanks for the kind words of encouragement. I will definately seek help from you soon, as I am about to finish the last wall of each cabinet.
Fortunately there will not be much in the crossover department, as this is going to be a Single Driver project, and the additional tweater is to be a suppliment.
Hexagons
This hexagon reminds me of the old Empire line from the 1960's...
http://greensboro.craigslist.org/ele/532350640.html
Lookin good
This hexagon reminds me of the old Empire line from the 1960's...
An externally hosted image should be here but it was not working when we last tested it.
http://greensboro.craigslist.org/ele/532350640.html
Lookin good
John L said:Thanks Dan! I have breezed through the links, and can see that I will have to sit down and go through them slowly, when I have the time later.
But I well remember seeing your project before(at the PE board), and greatly admired your use of my favorite material: Santos rosewood/Bolivian rosewood. It is by far the most beautiful material I can think of, with Waterfall Bubinga a close second.
Anyway, thanks for the kind words of encouragement. I will definately seek help from you soon, as I am about to finish the last wall of each cabinet.
Fortunately there will not be much in the crossover department, as this is going to be a Single Driver project, and the additional tweater is to be a suppliment.
I'm going to mix figured Bubinga veneer for the dark areas of my latest project I posted above with solid maple on the light areas. I've always used backed veneer and contact cement and the bubinga I have is unbacked, so I may have to try the iron on method.
A couple things to note in regards to the drivers and the omni presentation. You may already be aware of these things, but in case your not, I will charge ahead. The manufacturers published frequency response (FR) graph will be in 2pi space, infinite baffle. Understand that with an up firing driver like you plan, the driver never transitions out of playing in 4pi space into 2pi. The upshot of this is that you lose a good 6db of sensitivity on the listening axis as compared to the published graphs. The good news is that you don't have to worry about baffle step, since the driver never transitions from 4pi to 2pi as it goes up in frequency as a normal, front firing speaker does.
Another major consideration is that there will be very significant driver roll off because you are listening essentially 90º off axis. Lets say the Pioneer is acceptably flat to you up to 5khz on axis. It may very well turn out that at 5khz, 90º off axis, it will be 10-15db down, having started to roll off naturally at 3.5khz (just a wild a.. guess). You might find that your tweeter will have to cover a bigger range of frequencies than you had anticipated, It may not be able to be just a "filler" in the omni presentation and bit more crossover attenuation may become necessary on the high pass to the tweeter.
The concave cone diffuser may help in this regard, by extending the useable freuency range a bit.
Also, the same types of performance issues occur with up firing tweeters. Your tweeter will naturally roll off, probably starting up around 6-8khz or so. Again, the diffuser will probably help some, but you might want to consider a tweeter with a rising FR that will end up flatter and more extended as it rolls off in the omni format. The other Dayton neo, the ND20FB, for example has a rising FR up through 20khz, where the ND20FA you are planning to use actually drops a bit from 10-20khz in a standard application and will drop a lot more in an omni application. Using the ND20FB, with a concave diffuser, you might get good extension out to about 17khz or so before it starts to roll off a bit.
I've got some FR plots I can post, if you like, that demonstrate these concepts with real measurements. They are also posted in those threads I linked.
Diffuser position is quite important (height from the drivers) and will have a significant effect on the drivers FR. It may turn out that the two drivers don't work best with the same diffuser height, which could present a challenge for you. The tweeter will generally have it's flattest FR, with the diffuser about as close as you can get it. Depending on the size of your diffuser, it's profile, the depth of the cone, etc. a position very close to the tweeter may not work with the woofer, essentially closing it off too much.
Anyway, this is some food for thought as you move on to the next step. I suggest you be prepared to play around a lot with diffuser size, profile and height, if you want the optimal results. It will be a much easier puzzle to work out if you have measurement gear.
I'll help in any way I can.
dlneubec said:
I'm going to mix figured Bubinga veneer for the dark areas of my latest project I posted above with solid maple on the light areas. I've always used backed veneer and contact cement and the bubinga I have is unbacked, so I may have to try the iron on method.
Using paper backed veneer makes things go much faster, but you naturally give up a lot in flexibility. I happen to like the raw veneer best. It is far thicker and is more forgiving. Plus, you can do things that you can't do with the former. I think you will like it quite a bit.
As for using the iron, I find it to be pretty easy, provided I am going the one piece per side scenerio. If you need to bookmatch, or put pieces together, perhaps using the glue in the regular fashion is best.
Also, the same types of performance issues occur with up firing tweeters. Your tweeter will naturally roll off, probably starting up around 6-8khz or so. Again, the diffuser will probably help some, but you might want to consider a tweeter with a rising FR that will end up flatter and more extended as it rolls off in the omni format. The other Dayton neo, the ND20FB, for example has a rising FR up through 20khz, where the ND20FA you are planning to use actually drops a bit from 10-20khz in a standard application and will drop a lot more in an omni application. Using the ND20FB, with a concave diffuser, you might get good extension out to about 17khz or so before it starts to roll off a bit.
This is good to know. For the tweater, I plan to install a phase plug on the B20 and post the tweat on the end but not have the phase plug come to a point. That should get the tweater right up to the tip of the horn.
Also, I will have to consider changing the cap to get the tweater to step in at a lower frequency. That will be quite easy.
Also, I may just get the ND20FBs and give them a try as well. They are dirt cheap and also perform very well. I haven't looked at the specs, but I think they are just a tab more sensitive.
I've got some FR plots I can post, if you like, that demonstrate these concepts with real measurements. They are also posted in those threads I linked.
Thanks Dan. I can use all the help I can get.
Diffuser position is quite important (height from the drivers) and will have a significant effect on the drivers FR. It may turn out that the two drivers don't work best with the same diffuser height, which could present a challenge for you. The tweeter will generally have it's flattest FR, with the diffuser about as close as you can get it. Depending on the size of your diffuser, it's profile, the depth of the cone, etc. a position very close to the tweeter may not work with the woofer, essentially closing it off too much.
I can see that there will be a lot of tweaking going on here. Perhaps two or more phase plugs of different length, and also anchoring rods for elevating or lowering the diffuser. This is going to be a real study.
Anyway, this is some food for thought as you move on to the next step. I suggest you be prepared to play around a lot with diffuser size, profile and height, if you want the optimal results. It will be a much easier puzzle to work out if you have measurement gear.
I'll help in any way I can.
As I mentioned earlier, I have a class this Saturday on wood lathe usage. Not only will I learn a lot on this, but I will also have the opportunity to make my own diffusers too. I expect them to be between 13.5" and 14" in diameter, and of an upper and lower piece. That way I can turn the pieces easier and perhaps custom cut the insides of the diffuser in the future. I'm trying to make an enclosure that is as flexible as possible.
And I don't have any measurement gear. Oh, I do have an older Woofer Tester that I never got around to working with. I bought it at the tail end of one of my speaker interest cycles, where I got tired of it and moved on to other interests. Now that I am back, I will have to call PE and ask for help using it.
But I don't have anything sophisticated. I don't have anything like SoundEasy either. Oh well, we will be able to work it out.
It's been a long weekend of various things, including the continued work on the Hexagon Enclosures.
After finishing the veneering job, and rough sanding, I finally got down to the fine sanding. As I went along, I discovered that the glue I used, the Heat Bond cement, dried a dark dark brown. The problem was that on the lighter sap wood of the walnut, it showed up on the edges, like a sore thumb to me. No matter how carefully I sanded, it still came out.
So another lesson learned was not to rely on this Heat Bond on regular veneer. I will go with Titebond II from now on. I have since learned that Titebond II will do the same thing if ironed on, and it is no different in color or darkness than that of wood carpenters glue. When it dries, it will dry a lighter color and shade.
On this picture, there are two things I wish to show you.
First, no matter how hard you try, it is virtually impossible to keep all the corners from showing a chip or two, or more. In this case, it happened to me twice, but I found a piece of walnut of the same shade, and custom cut it to match the chip, where I glued it on and managed to cover up this little problem.
But second, if you look a little further to the right, you can see the dark shade of the glue, where the two veneers overlap each other. I tried filling in with sawdust, but no change. It is just something I will have to live with. And fortunately it is not like there on most of the edges.
After I got all walls sanded and looking as nice as possible, I began the process of applying the Super Blond shellac for sealer and finish. After the first coat on two of the walls, I quickly realized that Super Blond made the dark glue at the corners stand out even more than they did without it.
What was I going to do? I had a choice of sanding it back down, or compromising by using the Orange shellac I had mixed up already. I decided on the Orange shellac.
The first heavy coat (3 pound cut) went well on each cabinet. I would rotate cabinets by doing two walls on one, then the corresponding two walls of the other cabinet. Then I would go back inside and do other things. After about 30 minutes I went back outside and rotated the cabinet two clicks over and repeated the process, until I had all six sides shellaced.
After I completed that, I decided to do this one more time, before letting it set up over night. I had planned on lightly sanding the shellac until everything was even and smooth.
As I started in on the second coating, I noticed that some of the veneer was bubbling up a little bit. Oh G-d!, what next? By the time I completed the second coat, there were about a dozen places on the two cabinets that had veneer loose and bubbling up. All that work for nothing, because the minute I reapplied the hot iron to attach the veneer, the fresh shellac would be ruined. I was right.
This mistake was not a result of the denatured alcohol causing the glue to come loose. What had happened was that I failed to keep the iron over the veneer long enough after turning down the heat, once I realized that the higher heat would cause the veneer to open the pores. By going back to heat level 3, from level 5, I needed to remain longer on the entire veneer surface. All that was needed was for me to reapply the heat to that loose spot. Unfortunately, the shellac was already on and correcting one mistake created another.
After that collosal fiasco, I wanted to cry, but came out of it after about ten minutes and almost losing my religion. But once I decided that I would have to remove all the Orange shellac, I brought the cabinets inside, broke out the fresh pack of 0000# steel wook and a new can of denatured alcohol, along with a pack of new work rags. Then I just started soaking the steel wool with alcohol and rubbing one side, top to bottom, and loosening the shellac.
One nice thing from this was that a good portion of the shellac managed to fill in the grain and add to the buildup of sealer. The rest I began wiping off with the new rags. As the shellac came loose, I would keep wiping, until I managed to get all of it off that wall. Then I turned the cabinet one click over, and repeated the process until I had cleaned off all the Orange shellac from both cabinets. In the process I managed to go through about 1/4 can of alcohol, half a pack of steel wool, and an entire pack of work clothes. Oh, and a great deal of humility as well.
What a Terrible Mistake to learn the hard way!
But I am a true believer that every set-back is another chance to shine in another area. Once I had succeeded in removing ALL the shellac, I noticed that the color and tone of the cabinets were a wonderful combination, AND the dark glue in the corners were greatly marginalized. What a stroke of fortune! All this work removing the Orange shellac had actually resulted in a sealed cabinet, along with just enough tone of the shellac to add enough character to blend in the dark glue. I don't know how I managed to luck up on this, but I will gladly accept it.
Oh, here is a picture of the veneer showing how it bubbled up. I almost forgot that.
I had taken several pictures of the bubbling, but they did not show up as good as this. And as you can see, the shellac had dried and come up with a nice shine. All to no avail. And as you can see, the dark glue does not show up as much either.
Last night I had a great deal of time to think about this, and finally decided to take the cabinets back outside today and reapply two thin coats of Super blond shellac, but in very thin coats. I wanted to just get enough on to give it a lustre and not build it up too much. I was not worred about bubbling again because I had ironed down the spots that had come up with the heavy shellac application before.
I applied two quick and thin coats, which dried quickly. Once I finished that, I brought them inside and started finishing the base to both cabinets.
I had not been too happy with my first attempt on a base, so I made some slight changes to the piece already cut out. First thing, I cut down the width of the base, so it would overlap the cabinet by only 1/2 inch instead of an entire inch. Then I used a 1/2" round over bit, set up on the router table which is part of my table saw extension. I rounded the six sides of the base, and bevel cut the stacked smaller piece that fit between the cabinet and the actual base. By cutting them at about a 40 degree angle (getting the blade mechanism cranked to 45 degrees was not worth the agrevation), they will be able to reflect the sound coming out of the cabinet's venting.
Here are the cabinets with the roughed out bases.
The bases are roughed because I had to fill in all the holes in the plywood, which will be sanded tomorrow if I have the time.
Also note that what appear to be horizontal blemishes at the bottom of the cabinet are really reflections off the cabinet. Most likely from my plastic ruler that is just outside the picture, but in the last picture.
Also, the two little coats of Super Blond shellac really brings out the shine in the cabinets. When I lightly sand them down with emory cloth, and apply a nice polish to the cabinets, they should really shine. Almost makes me want to apply two more thin coats just to make them shine more.
Here are what the bases look like.
For some reason my table saw blade just wouldn't cut the left part of the base without burning the wood. Perhaps I need to get a new blade? I don't know, but the cut was very hard to get to go through the cut and not catch on itself. I will have to check the alignment of the blade and also the rip fence. I haven't done that in some time either. Anyway, I will sand all that off, and it will be painted black when I finish getting it smooth.
If I discover that the beveled portion is not back far enough to accomodate the venting, I can always recut it, and attach it to the cabinet with bolts.
After I have sanded the base pieces, I will seal them with my good old shellac, and then paint them black.
Not sure what I should use. Any suggestions?
After that, it is on to the upper section, where the most skill will be required. All the rest of the work on the cabinet and base is just downhill work. Or as one of my constructions buddies once used to tell us on all our jobs together, "We're all through 'cept the finishin' up". How prophetic that is too. If you are in construction you will know exactly what he meant.
After finishing the veneering job, and rough sanding, I finally got down to the fine sanding. As I went along, I discovered that the glue I used, the Heat Bond cement, dried a dark dark brown. The problem was that on the lighter sap wood of the walnut, it showed up on the edges, like a sore thumb to me. No matter how carefully I sanded, it still came out.
So another lesson learned was not to rely on this Heat Bond on regular veneer. I will go with Titebond II from now on. I have since learned that Titebond II will do the same thing if ironed on, and it is no different in color or darkness than that of wood carpenters glue. When it dries, it will dry a lighter color and shade.
On this picture, there are two things I wish to show you.
An externally hosted image should be here but it was not working when we last tested it.
First, no matter how hard you try, it is virtually impossible to keep all the corners from showing a chip or two, or more. In this case, it happened to me twice, but I found a piece of walnut of the same shade, and custom cut it to match the chip, where I glued it on and managed to cover up this little problem.
But second, if you look a little further to the right, you can see the dark shade of the glue, where the two veneers overlap each other. I tried filling in with sawdust, but no change. It is just something I will have to live with. And fortunately it is not like there on most of the edges.
After I got all walls sanded and looking as nice as possible, I began the process of applying the Super Blond shellac for sealer and finish. After the first coat on two of the walls, I quickly realized that Super Blond made the dark glue at the corners stand out even more than they did without it.
What was I going to do? I had a choice of sanding it back down, or compromising by using the Orange shellac I had mixed up already. I decided on the Orange shellac.
The first heavy coat (3 pound cut) went well on each cabinet. I would rotate cabinets by doing two walls on one, then the corresponding two walls of the other cabinet. Then I would go back inside and do other things. After about 30 minutes I went back outside and rotated the cabinet two clicks over and repeated the process, until I had all six sides shellaced.
After I completed that, I decided to do this one more time, before letting it set up over night. I had planned on lightly sanding the shellac until everything was even and smooth.
As I started in on the second coating, I noticed that some of the veneer was bubbling up a little bit. Oh G-d!, what next? By the time I completed the second coat, there were about a dozen places on the two cabinets that had veneer loose and bubbling up. All that work for nothing, because the minute I reapplied the hot iron to attach the veneer, the fresh shellac would be ruined. I was right.
This mistake was not a result of the denatured alcohol causing the glue to come loose. What had happened was that I failed to keep the iron over the veneer long enough after turning down the heat, once I realized that the higher heat would cause the veneer to open the pores. By going back to heat level 3, from level 5, I needed to remain longer on the entire veneer surface. All that was needed was for me to reapply the heat to that loose spot. Unfortunately, the shellac was already on and correcting one mistake created another.
After that collosal fiasco, I wanted to cry, but came out of it after about ten minutes and almost losing my religion. But once I decided that I would have to remove all the Orange shellac, I brought the cabinets inside, broke out the fresh pack of 0000# steel wook and a new can of denatured alcohol, along with a pack of new work rags. Then I just started soaking the steel wool with alcohol and rubbing one side, top to bottom, and loosening the shellac.
One nice thing from this was that a good portion of the shellac managed to fill in the grain and add to the buildup of sealer. The rest I began wiping off with the new rags. As the shellac came loose, I would keep wiping, until I managed to get all of it off that wall. Then I turned the cabinet one click over, and repeated the process until I had cleaned off all the Orange shellac from both cabinets. In the process I managed to go through about 1/4 can of alcohol, half a pack of steel wool, and an entire pack of work clothes. Oh, and a great deal of humility as well.
What a Terrible Mistake to learn the hard way!
But I am a true believer that every set-back is another chance to shine in another area. Once I had succeeded in removing ALL the shellac, I noticed that the color and tone of the cabinets were a wonderful combination, AND the dark glue in the corners were greatly marginalized. What a stroke of fortune! All this work removing the Orange shellac had actually resulted in a sealed cabinet, along with just enough tone of the shellac to add enough character to blend in the dark glue. I don't know how I managed to luck up on this, but I will gladly accept it.
Oh, here is a picture of the veneer showing how it bubbled up. I almost forgot that.
An externally hosted image should be here but it was not working when we last tested it.
I had taken several pictures of the bubbling, but they did not show up as good as this. And as you can see, the shellac had dried and come up with a nice shine. All to no avail. And as you can see, the dark glue does not show up as much either.
Last night I had a great deal of time to think about this, and finally decided to take the cabinets back outside today and reapply two thin coats of Super blond shellac, but in very thin coats. I wanted to just get enough on to give it a lustre and not build it up too much. I was not worred about bubbling again because I had ironed down the spots that had come up with the heavy shellac application before.
I applied two quick and thin coats, which dried quickly. Once I finished that, I brought them inside and started finishing the base to both cabinets.
I had not been too happy with my first attempt on a base, so I made some slight changes to the piece already cut out. First thing, I cut down the width of the base, so it would overlap the cabinet by only 1/2 inch instead of an entire inch. Then I used a 1/2" round over bit, set up on the router table which is part of my table saw extension. I rounded the six sides of the base, and bevel cut the stacked smaller piece that fit between the cabinet and the actual base. By cutting them at about a 40 degree angle (getting the blade mechanism cranked to 45 degrees was not worth the agrevation), they will be able to reflect the sound coming out of the cabinet's venting.
Here are the cabinets with the roughed out bases.
An externally hosted image should be here but it was not working when we last tested it.
The bases are roughed because I had to fill in all the holes in the plywood, which will be sanded tomorrow if I have the time.
Also note that what appear to be horizontal blemishes at the bottom of the cabinet are really reflections off the cabinet. Most likely from my plastic ruler that is just outside the picture, but in the last picture.
Also, the two little coats of Super Blond shellac really brings out the shine in the cabinets. When I lightly sand them down with emory cloth, and apply a nice polish to the cabinets, they should really shine. Almost makes me want to apply two more thin coats just to make them shine more.
Here are what the bases look like.
An externally hosted image should be here but it was not working when we last tested it.
For some reason my table saw blade just wouldn't cut the left part of the base without burning the wood. Perhaps I need to get a new blade? I don't know, but the cut was very hard to get to go through the cut and not catch on itself. I will have to check the alignment of the blade and also the rip fence. I haven't done that in some time either. Anyway, I will sand all that off, and it will be painted black when I finish getting it smooth.
If I discover that the beveled portion is not back far enough to accomodate the venting, I can always recut it, and attach it to the cabinet with bolts.
After I have sanded the base pieces, I will seal them with my good old shellac,
and then paint them black.Not sure what I should use. Any suggestions?
After that, it is on to the upper section, where the most skill will be required. All the rest of the work on the cabinet and base is just downhill work. Or as one of my constructions buddies once used to tell us on all our jobs together, "We're all through 'cept the finishin' up". How prophetic that is too. If you are in construction you will know exactly what he meant.
- Status
- This old topic is closed. If you want to reopen this topic, contact a moderator using the "Report Post" button.
- Home
- Loudspeakers
- Full Range
- Hexagon Pioneer B20FU20 Enclosure