Cutting, drilling, mouting etc. for the absolute beginner
All this is quite exciting but very new to me. I bought Randy Slone's Audiophile Sourcebook which after a couple of chapters made me realise I needed to learn about basic electronics. So, I'm now working through his guide to electronics which has me building a lab power supply. In this book, he makes no assumptions about your electronics abilities which is lovely, but I've absolutely no mechanical or metal work abilities either. So, I'm finding the whole process fairly daunting. I'm hoping someone can point me to a straight forward guide or book that'll handhold me through what to most people here is probably the easy bit.
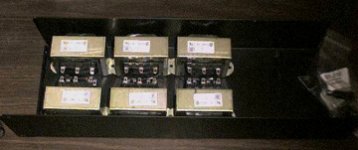
For example, I'm right at the beginning. I've got a nice metal case and a transformer and I need to mount the transformer in the case... and I'm stuck. Do I go out and buy appropriate sized nuts and bolts, drill holes in the bottom of the case and just bolt if straight down flush to the bottom of the case or should the transformer be raised slighty and if so how? A washer, a stack of washers??? I hope this imparts enough of my frustration and uselessness here so you might be able to help and I'm sorry if this is a little off topic, thanks.
All this is quite exciting but very new to me. I bought Randy Slone's Audiophile Sourcebook which after a couple of chapters made me realise I needed to learn about basic electronics. So, I'm now working through his guide to electronics which has me building a lab power supply. In this book, he makes no assumptions about your electronics abilities which is lovely, but I've absolutely no mechanical or metal work abilities either. So, I'm finding the whole process fairly daunting. I'm hoping someone can point me to a straight forward guide or book that'll handhold me through what to most people here is probably the easy bit.
For example, I'm right at the beginning. I've got a nice metal case and a transformer and I need to mount the transformer in the case... and I'm stuck. Do I go out and buy appropriate sized nuts and bolts, drill holes in the bottom of the case and just bolt if straight down flush to the bottom of the case or should the transformer be raised slighty and if so how? A washer, a stack of washers??? I hope this imparts enough of my frustration and uselessness here so you might be able to help and I'm sorry if this is a little off topic, thanks.
Got a camera?
If you can illustrate any difficulties, you'll get the help you need here.
Learning all the different skills necessary to build a clone, all at the same time? Do-able, and probably the most challenging fun you've had for a while. Just be patient and be sure to put it down, for a while, the second it stops being fun.
Planning is key. Good drawings help. Measure everything twice...
Good luck
E
I started by looking, seeing, watching examples, investigate how other equipments are made. Then you may start to see a pattern of ways that things are done. Then you may begin to ask yourself why they have to be this way or that way...etc etc... nothing beats by examine real live examples...
Hope this help
Chris
Hope this help
Chris
Now this is something I can relate to, being a klutz who is still learning.
Mounting things in an enclosure:
-----------------------------------------
First you need some feet. This is because effect the aestheics if you put them in odd places and once put in place they add a constraint to where anything else can go. I like just ordinary rubber feet - either stick on or screw on. (You can spend $100 for gold plated spikes if you like but the idea is the same.)
If you are not hyper fastidious like the TV detecive "Monk", lay the components out in postions that make sense. Look for mounting holes in the components. Some things like transformers and especially bridge rectifiers can be attached directly to the floor of the case. PCB shoild use short spacers. Here is an ecample from the digikey catalog- http://www.keyelco.com/kec/pdfs/p44.pdf
(I find 4-40 thread sixed nuts, bolts etc. are the most generally useful for almost everything.) You only need the long enough so that the bottom of the PCB stands no chance of contacting the case.
I use ordinary "pan head" bolts or "machine screws" that come up from below the enclosure. I don't usually worry about aesthetics since you can't normally see these. If you need a flush surface and the sheet metal is aluminum here is a cheap trick: find a washer whose inside diameter is about the same as the diameter of a "flat head" machine screw. Drill the hole. Run the screw in from the outside. Place 1 or 2 of the washers over the screww on the inside. Put a nut on the screw and tighten and keep tightening untill the sheet metal is deformed enough that the flat head is flush with the surface. This works best with 2-56 and 4-40 screws; larger ones are a bit touchy. Practice first on a piece of scrap metal. Throw away the nut and screw as they are often damaged by the process and use fresh ones for rhe actual mounting.
Cutting large round holes. As the diameter of a hole gets bigger than than the thickness of the sheet metal, it gets harder and harder to drill a nice round hole. There is a gadget called a "Unibit". I thought these were just snakoil but they really work for making nice clean large diameter holes in sheet aluminum. Pricey but worth it if you make very many holes.
Rectandular holes: avoid if possible. If you can't avoid, try a "nibbler" plus a Dremel (or Craftmab's equivalent). It takes a few to get the hang of it.
"D" shaped holes. Either spend a load of money on a punch or fogeaboudit! I hav'nt made one yet that looks decent.
Finish: If you have little money to spare you can get a real nice paint job from you local body shop. DIY painting is possible but takes patience. Satin or brushed finishes are doable. You need wet and dry (get several grade of increasinf fineness) emery paper soap and water. Get a sandinf block. Decide which way the grain should run and start sanding after dipping the paper in soapy water. Make all you strokes in one direction only. Each stoke goes from edge to edge. Work slowly. Change paper frequently and move up step by step to finer grade until you like what you see. When done you can leave it as is or if you want to protect it from fingerprints and oxydation do a search on this forum foe "alodine". Anodyne may be possible if you have a shop in your area.
General rule for metal: measure very carefully. The take a deep breath, stretch, walk around the room and remeasure - repeat. Only the do you cut or drill. Careful measurement is really, really key with metal.
Second general rule: use a bigger enclosure than you think you need. It's starts getting really cramped after a couple of components are mounted.
General rule three: decide up front where the wires are going and be sure your layout won't block you from access to terminal block or solder tabs that you will need to get at. This is the audio diy equivalent of painting yourself into a corner!
Hello,
don't forget about good ole fashioned chain drilling, saw and file, especially in ally, it doesn't take much effort to remove quite a lot of material with a file. Chain drilling is where you go round the inside of the shape to be cutout by drilling lots of holes next to each other, then the rough shape can be cleaned up by filing, and finished with emery wrapped round a dowel.
Then again you could always send the panel off to be cnc'd or laser cut, but not really much point.
I never liked punches that much.... good if you have rucks of holes to make that don't have to be that neat, but they don't keep very clean flat edges.
Steve
"D" shaped holes. Either spend a load of money on a punch or fogeaboudit! I hav'nt made one yet that looks decent.
don't forget about good ole fashioned chain drilling, saw and file, especially in ally, it doesn't take much effort to remove quite a lot of material with a file. Chain drilling is where you go round the inside of the shape to be cutout by drilling lots of holes next to each other, then the rough shape can be cleaned up by filing, and finished with emery wrapped round a dowel.
Then again you could always send the panel off to be cnc'd or laser cut, but not really much point.
I never liked punches that much.... good if you have rucks of holes to make that don't have to be that neat, but they don't keep very clean flat edges.
Steve
Now this train is moving! ")
When chain drilling, take the time to lay out the holes carefully and center punch well. This makes it easier and quicker.
Also, use wide masking tape to allow you to draw the layout directly on the case. It makes accurate punching easy. and you can see if you have punched the wrong place before you drill. Better to have a stray punch mark, than a stray hole.
I'm currently laying out first my GC... will post the progress over the weekend to illustrate.
Any constructive criticism will be most welcome.
E
Attachments
or a scriber on the back face.
Also when chain drilling try not to let the holes run into one another, leave a small gap between them, that can be snipped out with sidecutters (if the material is thin enough). The gap can be quite small, but it makes sure the drill doesn't wander into the hole drilled just before it.
Steve
Also when chain drilling try not to let the holes run into one another, leave a small gap between them, that can be snipped out with sidecutters (if the material is thin enough). The gap can be quite small, but it makes sure the drill doesn't wander into the hole drilled just before it.
Steve
its nearly 2am here but i really wanna go make stuff now!!!
more little holes means less filing too
And once you move onto thicker panels (if you do, like front panels, that kinda thing) you can mill them out then. You could on a thinner panel too if you screw it to some jig/mounting plate thingy of some kind.
steve
more little holes means less filing too
And once you move onto thicker panels (if you do, like front panels, that kinda thing) you can mill them out then. You could on a thinner panel too if you screw it to some jig/mounting plate thingy of some kind.
steve


And also leave some material after drilling to file off. Drills always drill oversize, more so as they wear out, so if you say drill 6mm, and you mark exactly 3mm in from the line where you want to end up (for the centerline of the pop marks pop=punch=center punch for marking out stuff) youll end up with a wobbly line where the drill took out more material than you wanted. So leave half a mm or a mm or so spare to take off with a file later.
anything we haven't covered for chain drilling? hehe
Steve
anything we haven't covered for chain drilling? hehe
Steve
its the place to be man!! then you get some punkass with a plasma cutter walk in with a funky swagger n all hell breaks loose! Were just peace loving chain drillers here....oh the humanity!
hmmm anyway. Ooooo one thing with ally, if you heat it up until just before it melts, around 500-550degC i think (hard to judge as it doesnt glow red like steel does before it melts, normally ends up using soap to gauge the temperature, it turns black when its hot enough) and let it cool slowly, it will be annealed and softer and a bit easier to work with. It will however time harden in a few days back to its original harder state, though this time hardening property can be slowed down by keeping the work in a freezer when you're not working on it. Pretty pointless for most things, but you may find it useful one day.
Steve
hmmm, never tried an automatic center punch. are they worth it? ive always got on fine with a normal one.
one thing about center punching, do it on a hard surface, or the punch will dent the surrounding area, which may or may not be a problem, depending on where and how much material around the mark is to be removed. it feels better doing it on a hard surface anyway. (did that just come out right?)
Steve
baggystevo82 said:!
hmmm anyway. Ooooo one thing with ally, if you heat it up until just before it melts, around 500-550degC i think (hard to judge as it doesnt glow red like steel does before it melts, normally ends up using soap to gauge the temperature, it turns black when its hot enough) and let it cool slowly, it will be annealed and softer and a bit easier to work with. It will however time harden in a few days back to its original harder state, though this time hardening property can be slowed down by keeping the work in a freezer when you're not working on it. Pretty pointless for most things, but you may find it useful one day.
Steve
Nope, aluminium works the other way around, you must shock cool it to get the above mentioned effect.
Also, if aluminium is heated in a dark room, it glows red. What you need is approx. 125 C to get the above effect.
Magura
Plasma Punks!!
I know I look like a pretty gentle guy, and I try... But, when those plasma guy come around... something just snaps in me! Know what I mean?
Lotsa history there, man. None of it good...
Good tip. Didn't know that, and I'm gonna try it on a piece in my Sherline. Sooo accurate... Sooooo slow!...
Don't hesitate to use my email for OT stuff. I have a feeling we play with a lot of the same toys.
E
ekd said:Plasma Punks!!
I know I look like a pretty gentle guy, and I try... But, when those plasma guy come around... something just snaps in me! Know what I mean?
E
I use plasma cutting frequently (have acces to a plasma cutter for free), trust me, youre not missing out on anything. It cant possibly be used for anything youd like to make for an amp. The heat it generates is real harsh on the materials, so any sheet will work in all its possible axis's from it, plus the fact that its a relatively coarse way of metalworking.
Magura
Post #15
"hmmm, never tried an automatic center punch. are they worth it? ive always got on fine with a normal one.
one thing about center punching, do it on a hard surface, or the punch will dent the surrounding area, which may or may not be a problem, depending on where and how much material around the mark is to be removed. it feels better doing it on a hard surface anyway. (did that just come out right?)"
Yup. And, yup.
Magura, you *so* right!
E
Nope, aluminium works the other way around, you must shock cool it to get the above mentioned effect Also, if aluminium is heated in a dark room, it glows red. What you need is approx 125 C to get the above effecthmmmm i wouldnt dispute it too much, i used to make steam trains, so worked mainly in steel, and never had a need to anneal ally. it was a long time ago i was told about this time hardening property.
just done a bit of reading, and are you sure its as low as 125? this website says just over 280degC, could it just be the alloy theyre quoting? or is 125degC a minimum temperature to get any effect?
is this right?
Steve
- Status
- This old topic is closed. If you want to reopen this topic, contact a moderator using the "Report Post" button.
- Home
- General Interest
- Everything Else
- Cutting, drilling, mounting etc. for the absolute beginner