Hello,
I'd like to shere my ongoing speaker project revolting around ammunition box. Inspiration was drawn from Thodio products.
System expectations are at least 16 hr battery life at 80% power , bluetooth with aptx , usb charging capability and decent sound .
Speakers are some chinese no name brand that I picked up locally they are dirt cheep but actualy quite decent for the price . Nice stiff cone , soft rubber surround and decnt range of motion. The tweeter was the only thing that sucked hard but I've replaced it with some small but quite powerful infinity 1T and 2,2 uf cap for cut of.
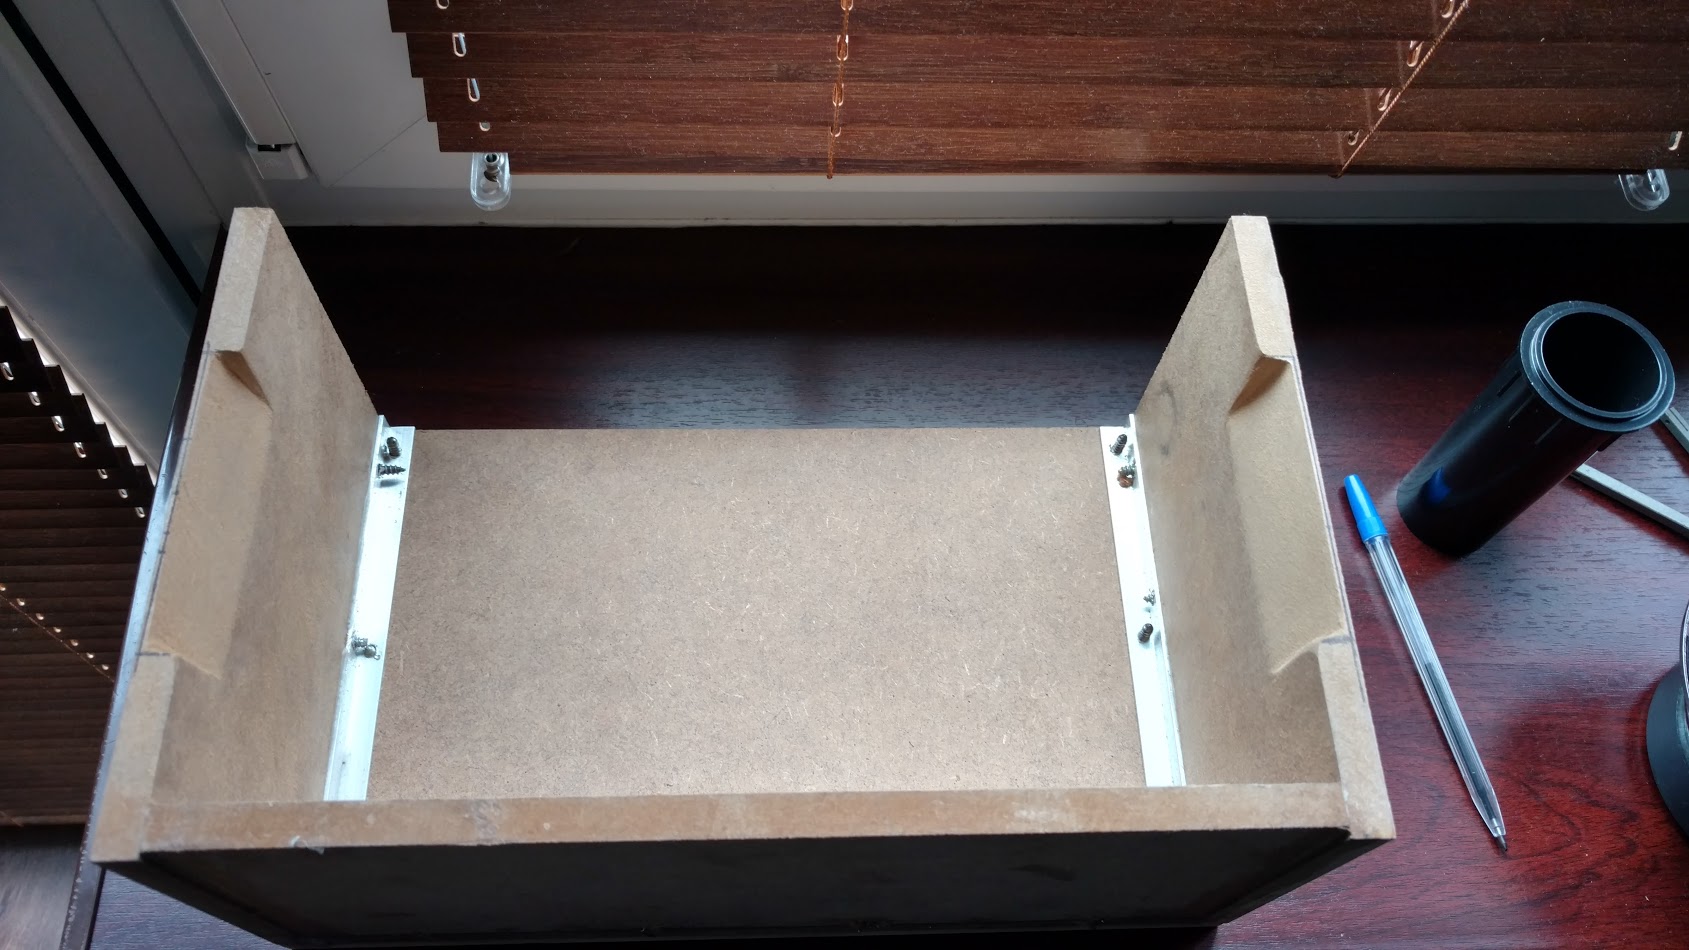
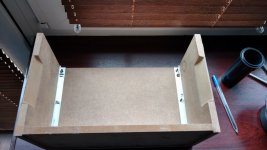
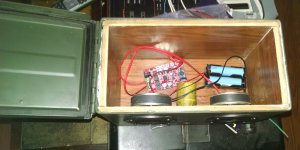
First major issue that comes up with speaker is steel amunition box is that, it will rattle around and wibrate like hell if you put bare speakers in it. As a solution I've decided to make an mdf inner box for better rigidyty and accoustic properties.
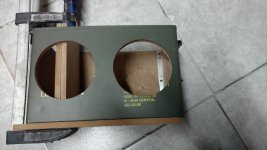
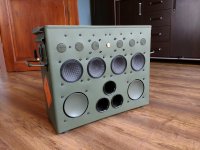
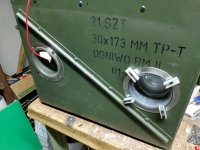
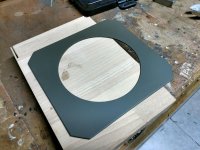
I started out with measuring and laying out all the holes

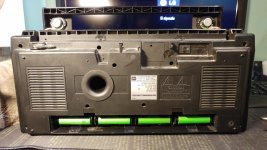
So before I made holes in front plate , the box looks like this .
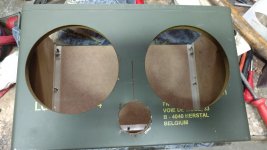
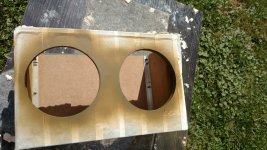
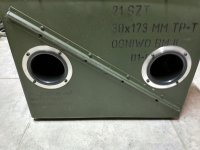
Holes in front plate were cut out with hand router and circle jig,and those in metal can were cut with water-jet. It's possible to make them with bi metal hole cutter , that's right size for your speaker drivers. nex up plate was glued on to the mdf box. After glue has fixed box was sanded down to tightly fit the metal can . I did have to press it in with my clamps to align the speaker holes.


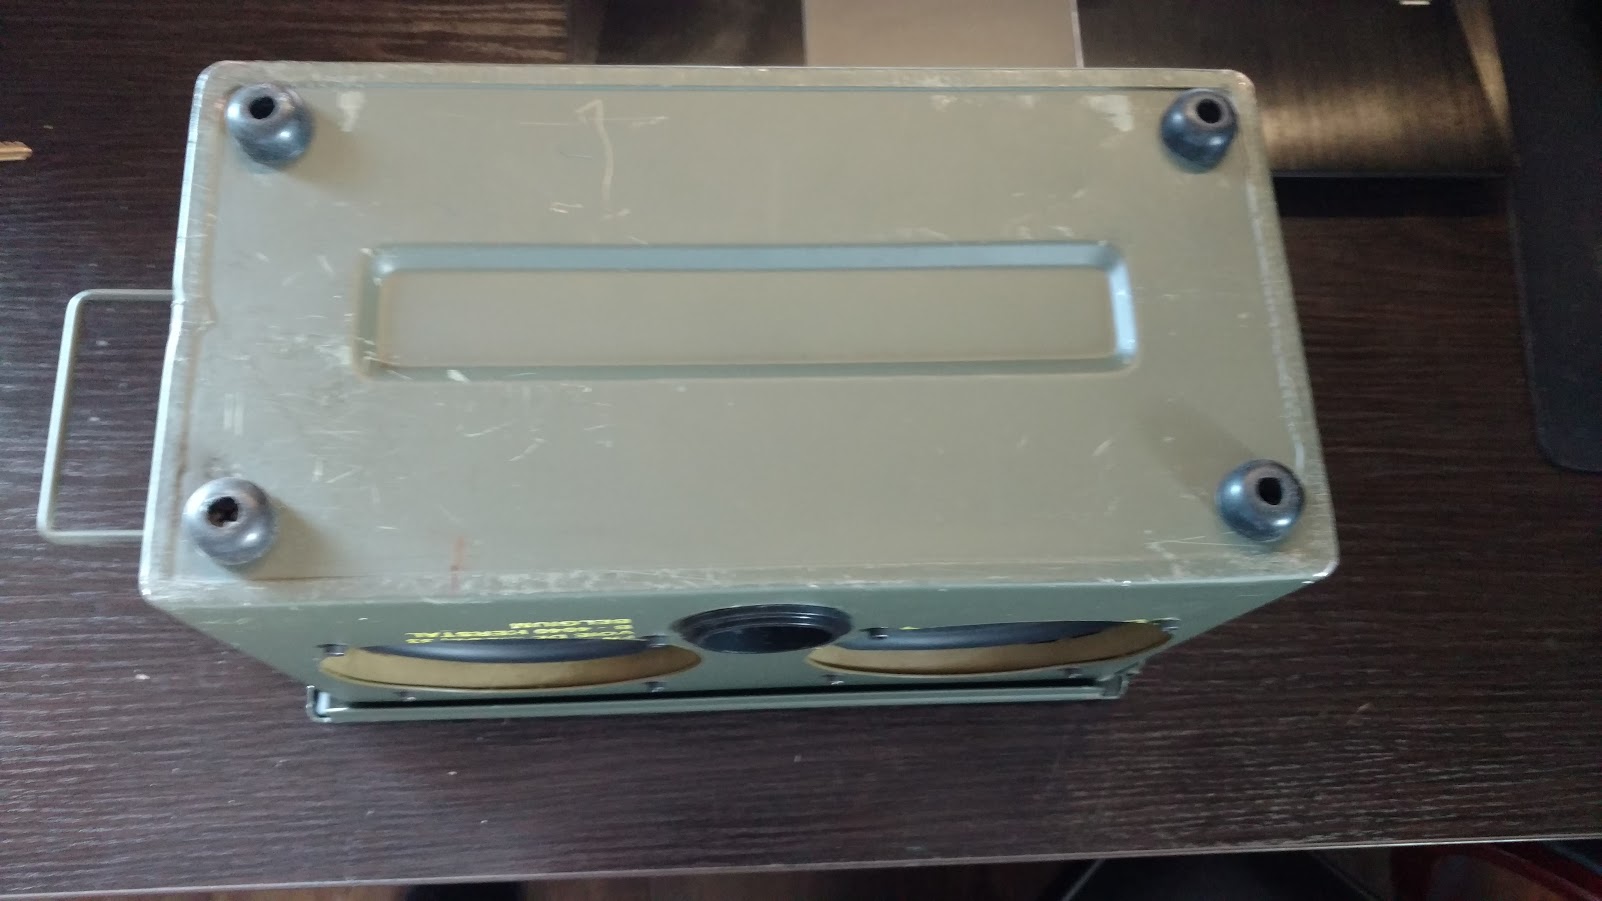
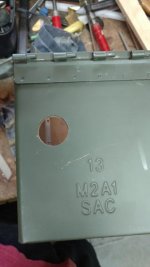
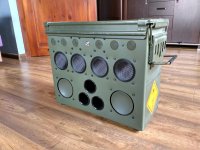
This tight fit ensures no box vibrations that will mess up the sound. Next things were some paint touch ups and cutting bass port hole as well as the hole for voltmeter/ usb charging module.


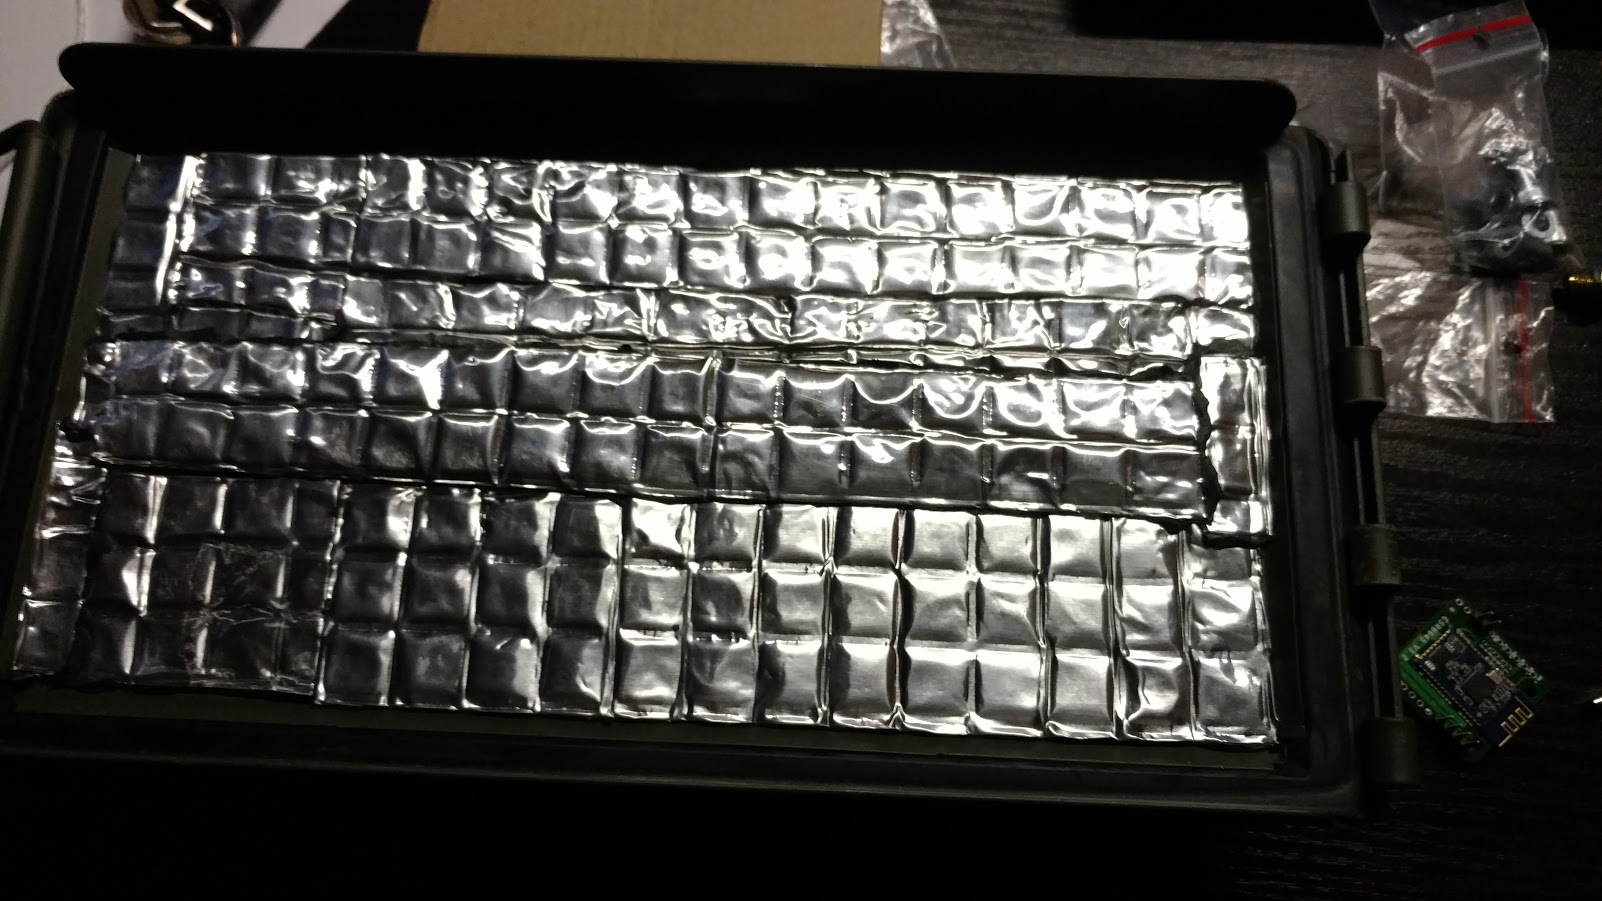
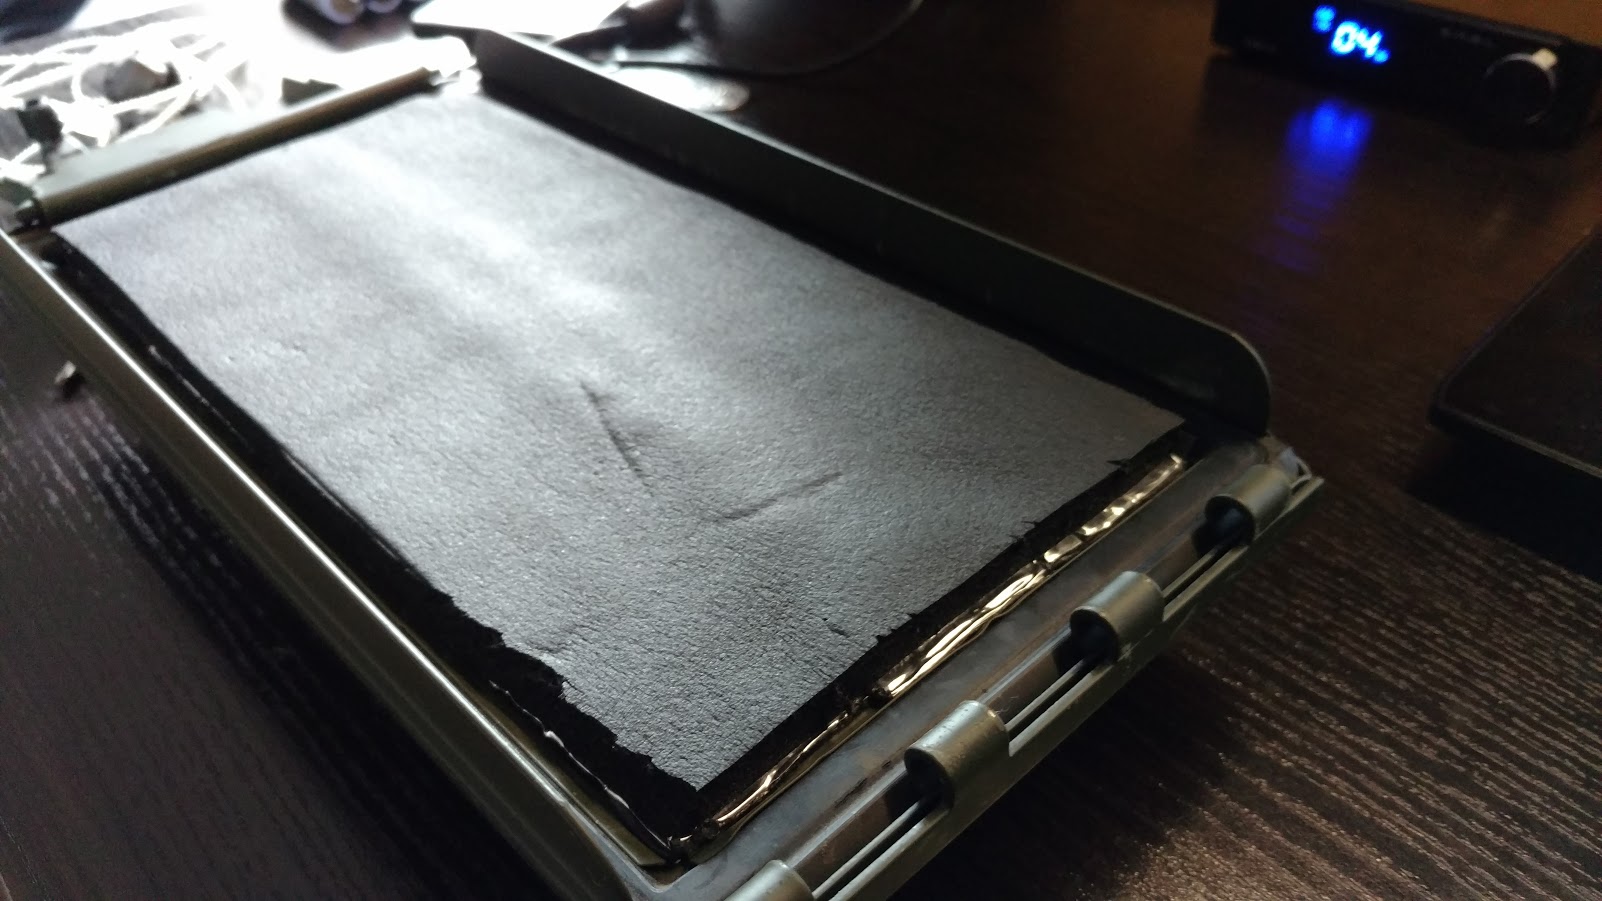
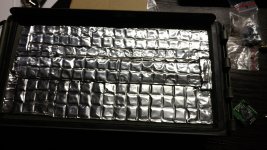
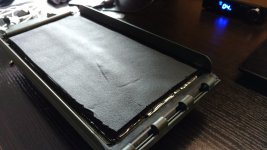
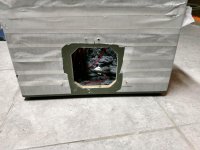
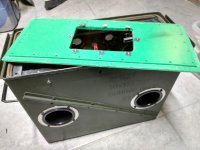
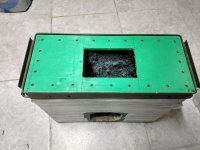
Top lid of the can needs some treatment to , so I've stuck some rubber?/aluminium insulation on it as well as some dampening foam.
Added some feet to the box :
I'd like to shere my ongoing speaker project revolting around ammunition box. Inspiration was drawn from Thodio products.
System expectations are at least 16 hr battery life at 80% power , bluetooth with aptx , usb charging capability and decent sound .
Speakers are some chinese no name brand that I picked up locally they are dirt cheep but actualy quite decent for the price . Nice stiff cone , soft rubber surround and decnt range of motion. The tweeter was the only thing that sucked hard but I've replaced it with some small but quite powerful infinity 1T and 2,2 uf cap for cut of.
First major issue that comes up with speaker is steel amunition box is that, it will rattle around and wibrate like hell if you put bare speakers in it. As a solution I've decided to make an mdf inner box for better rigidyty and accoustic properties.
I started out with measuring and laying out all the holes
So before I made holes in front plate , the box looks like this .
Holes in front plate were cut out with hand router and circle jig,and those in metal can were cut with water-jet. It's possible to make them with bi metal hole cutter , that's right size for your speaker drivers. nex up plate was glued on to the mdf box. After glue has fixed box was sanded down to tightly fit the metal can . I did have to press it in with my clamps to align the speaker holes.
This tight fit ensures no box vibrations that will mess up the sound. Next things were some paint touch ups and cutting bass port hole as well as the hole for voltmeter/ usb charging module.
Top lid of the can needs some treatment to , so I've stuck some rubber?/aluminium insulation on it as well as some dampening foam.
Added some feet to the box :
Attachments


Last edited:
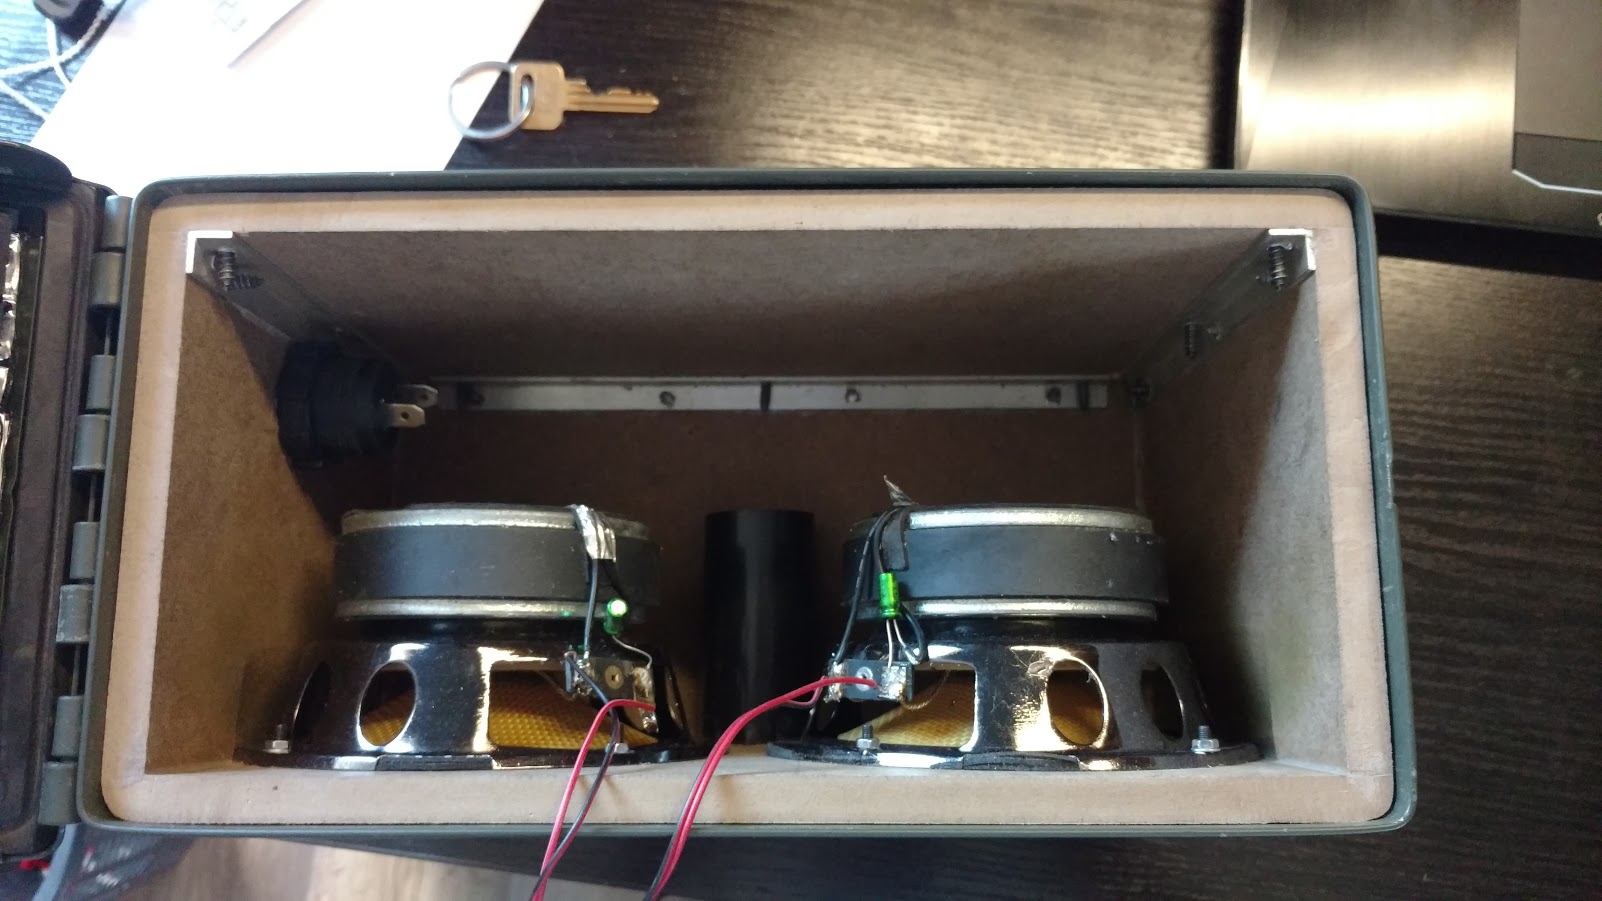
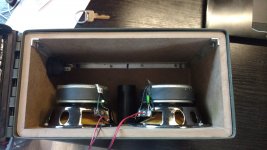
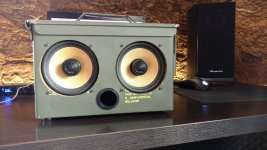
Moving further I added some speakers ,dummy module to plug the hole for voltmeter and bass port:
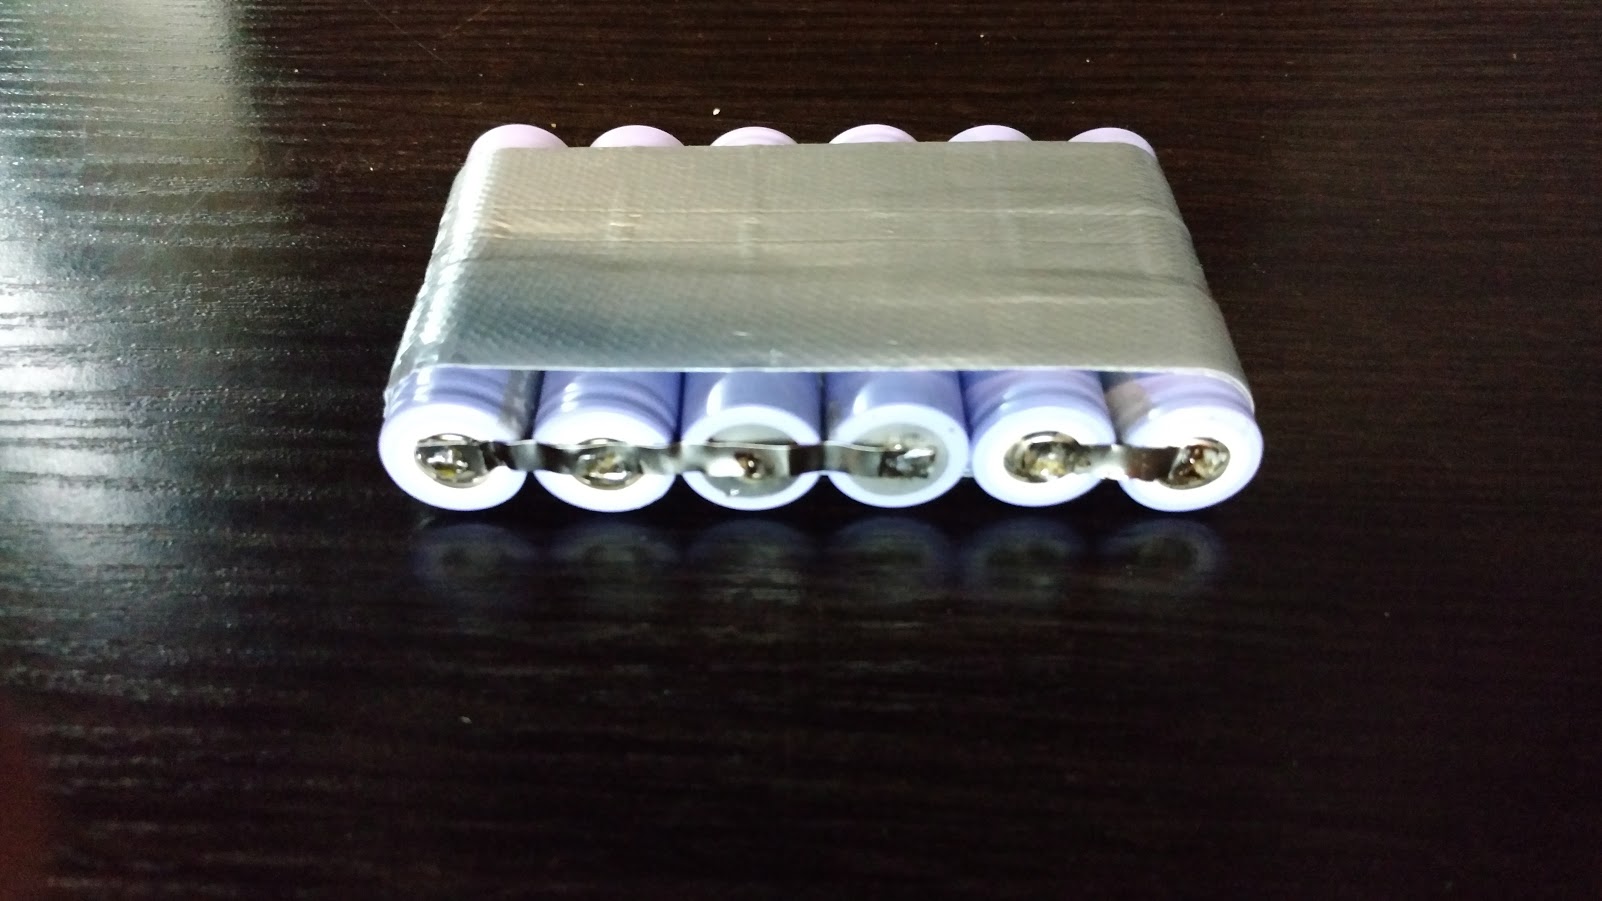
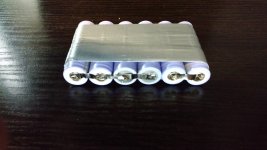
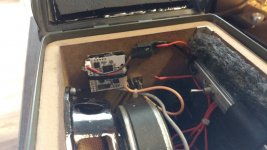
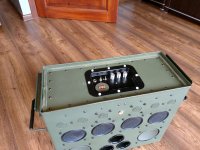
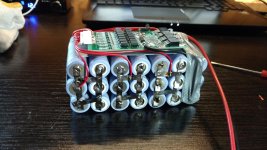
I'm still waiting for most of the electronics to arrive from china. So far I've put together 12,6 , 4,4ah battery made of samsung 18650 waiting for bms to finish it.
So far speaker looks like this :
TO BE CONTINUED.......
I'm still waiting for most of the electronics to arrive from china. So far I've put together 12,6 , 4,4ah battery made of samsung 18650 waiting for bms to finish it.
So far speaker looks like this :
TO BE CONTINUED.......
Attachments

a different take...
my nephew decided to make one. Amp module, motorcycle battery..4 tiny aluminum drivers from computer speakers). no bracing, no insulation , no port. Spacious sounding (wired the 2x's 2Ω speakers in series for each channel). Oh no wood box lining. Better sounding than a Bob Marley one that he has. Less apparent bass, but the Marley is overly exaggerated...with a good FR it would be very good. I think the box is for 7.62 Nato rounds (old). No divider separating the two channels of speakers.
I'll post a pic later...
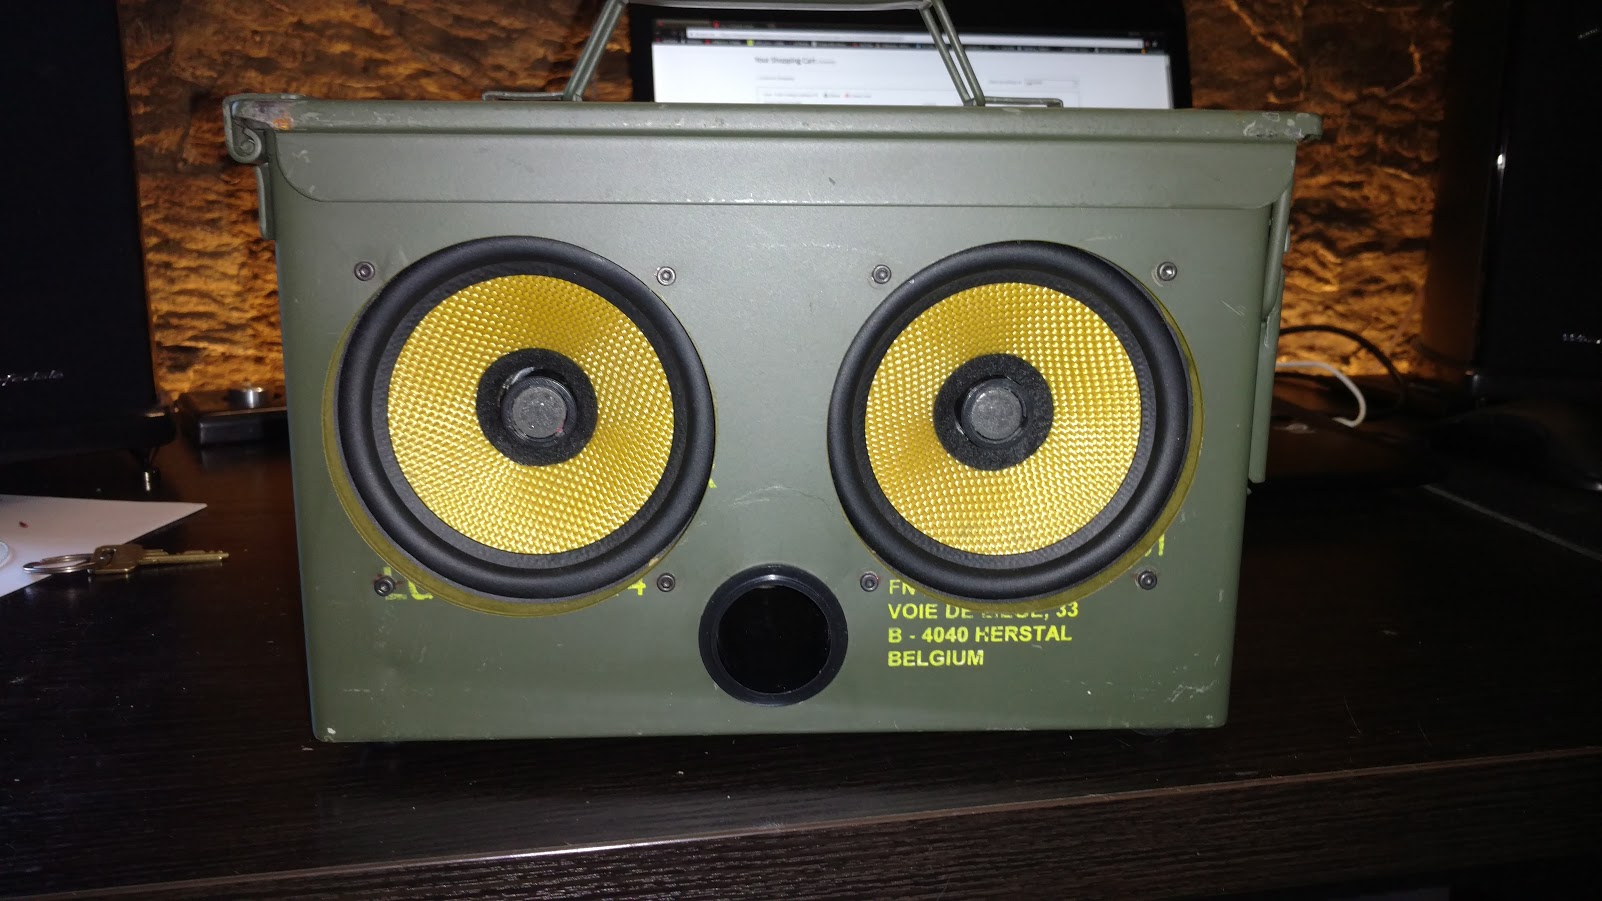
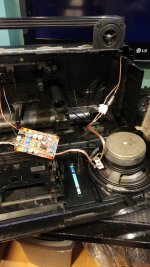
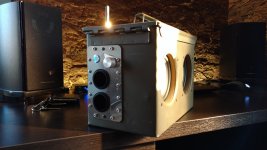
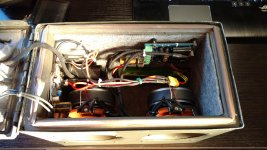
So there has been some development regarding the build , it's only missing parts are BT module and voltmeter/usb charger combo . All the cables and switches are figured out and managed , battery is complete with bms , amps is connected and signal is temporary fed from aux 3,5 jack input. I 've also installed BT antenna and dc input for charging the battery.
The Power button is hidden underneath locking handle.
So far I'm pleased with the performance amp is powerful enough and sounds quite decent. White noise is low enough to be tolerable , only bad thing realy is on/of power surge in speakers.
The Power button is hidden underneath locking handle.
So far I'm pleased with the performance amp is powerful enough and sounds quite decent. White noise is low enough to be tolerable , only bad thing realy is on/of power surge in speakers.
Attachments

Thanks , Speaker wise I would say some coaxial 4 -5 inch would work just fine , or If you want to make more holes some 4-4,5 woofers and 1-1,5 ich tweeters.
You can also go with pair of full range 4-4,5 ich speakers but they will be alwys lacking highs and volume in noisy enviroments.
As for the amplifier, best bang for the buck would be this sanwu blue tda7498 board :
Sale Class D 2X100W Dual Channel Audio Stereo Amplifier Hot TDA7498 Wild | eBay
Adjustable gain.
No noticible hiss in background at gain 20db.
No pop up sound when being turned on.
Pleasant sound , lots of power for system this size.
I would consider paring it with 16,8v or 21v lipo , it will run on 12V though.
As a bluetooth source I would recomend this Sanwu module :
Bluetooth 4.2 HIFI Stereo Amplifier Receiver Box CSR64215 Digital Audio Board | eBay
It has integrated dc-dc isolated converter so , it will help to avoid ground loop problem.
It has , Csra64215a chip which has stronger antena, also extension included, and it has native support of apx codec so better sound at your disposal.
For most bluetooth modules you would need a step down converter or LM7805 voltage regulator either one will be fine.
Mini DC 6.5~28V to DC 5V MP1584 3A DC-DC Step-down BUCK Module | eBay
Build fetured in this thread was finished some time ago (It was meade to order, for mate from work) I din't uptaded this thred because nobody was interested in it.
Attachments

Last edited:
Nice project! I've made some portables too. How did you build the charging interface? Those cells need to be equally charged a.k.a. balanced, right?
I've always taken out my li-ions and lipos and charged them with separate charger because I haven't found an easy and simple solution to do it in the enclosure itself.
I've always taken out my li-ions and lipos and charged them with separate charger because I haven't found an easy and simple solution to do it in the enclosure itself.
Thank you, your method is pretty much the most accurate and safest way to charge 18650s , although it requires the most attention and work every single time you want to charge your speaker.
cheep chinease bms bords seem to do the trick :
1PCS SAMIORE ROBOT 4S 30A Li ion Lithium Battery 18650 Charger Protection Board 14.4V 14.8V 16.8V 4S BMS-in Integrated Circuits from Electronic Components & Supplies on Aliexpress.com | Alibaba Group
And simple charger :
16.8V 1A polymer lithium battery charger, 16.8V Power Adapter Charger 16.8V1A, full of lights change,dc 3.5*1.35 free shipping-in AC/DC Adapters from Home Improvement on Aliexpress.com | Alibaba Group
I didn't have any issues with those bms boards yet and I've made couple batteries with them.
If you feel like posting some photos of your speakers feel free to do so.
This is not yet finished project , it has real potential to be ultimate ammo box party speaker although it's not really mobile weighing at 21 KG and soon even more.
Attachments
@H8T3R thanks for the recommendations. I ordered the amp already nice deal.
I'm probably going to use the TDA7492P that I already have for now.
TDA7492P 25W+25W Wireless Bluetooth 4.0 Audio Receiver Digital Amplifier Board Sale - Banggood.com
But it's the on-board bluetooth so range will probably be an issue. I can always switch it out later.
I'm going to use a pair of Fountek FE83 3" Full Range Driver 8 Ohm that I already own. The recommended ported volume is right on for the ammo box. Small I know, but they should be "ok".
That large ammo case project looks sweet!!! 21kg wow!
One more question if you don't mind: In project from post #7, how did you get the rolled edges on the speak holes?
Thanks!
A tip for martyparish, I your amp has hiss or other unwanted noise, you might want to check this out: How to prevent popping sound on power on on TDA7492P Amp?
I needed to bypass the opamp stage to make my amp silent.
And I might as well tell something else about that project cause I started:
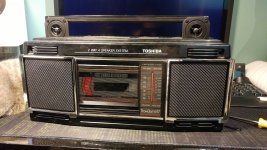
-Case from an old Toshiba cassette radio (my grandad got it for his 60th birthday in 1990 )
)
-Low range is some cheap GGEC 640709/13448, guessing it is used in some OR speakers back in the day and they are in discount now
-Tweeters TANGBAND 13-1264S (just a cap for highpass)
-Amp TDA7492P
-Battery 4x 18650
Project wasn't as easy as I thought it was, needed to seal so many holes and add some damping matt for more rigid enclosure. Still have some minor things to do, but I say it's mostly done.
I needed to bypass the opamp stage to make my amp silent.
And I might as well tell something else about that project cause I started:
-Case from an old Toshiba cassette radio (my grandad got it for his 60th birthday in 1990
)-Low range is some cheap GGEC 640709/13448, guessing it is used in some OR speakers back in the day and they are in discount now
-Tweeters TANGBAND 13-1264S (just a cap for highpass)
-Amp TDA7492P
-Battery 4x 18650
Project wasn't as easy as I thought it was, needed to seal so many holes and add some damping matt for more rigid enclosure. Still have some minor things to do, but I say it's mostly done.
Attachments
Dr1v3n , thanks for kind words and for your service .
martyparish ,happy to help , I've read lot's of good things about Fountek FE83 drivers , they can actually be really nice fit for the build.
I don't mind at all , so the edges of the speaker holes in mdf were rounded off with hand router. The holes in metal box were cut around 10mm smaller than those in mdf. After pressing in mdf box i used small hammer and some rounded steel rood to fold them over the mdf . I basically hammered them down till they folded nicely , minding not to damage the mdf. Next I smoothen out everything with sand paper , after that there were 3 coats of primer paint and some sanding it down, to even out surfece for the flat forest green paint.
Nenola you got some old school stuff going on there , I like it.
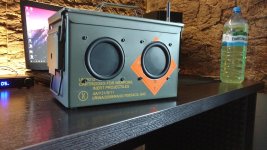
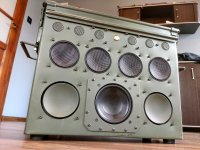
A while ago I mentioned that I'm planning on adding some more weight to the speaker and I'm going to deliver on that promise by adding one more woofer ( faital pro 5fe120) , changing bass ports , making new top cover and some other cosmetic changes.
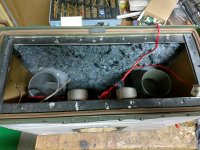
So far I have managed to install new bass ports 70mm inner diameter at the opening , I've added some 90 degree bends from pvc pipes to mix it a little bit. I have also cut some beauty/reinforcement rings from 1mm thick steel.
The small dark green plate was cut on water-jet from 2mm h17 steel and was later painted with some camo spray paint. It's meant to be a mounting bracket for the woofer.
This large green plate was cut from PE1000 , 10mm thick and it will work as a top cover. It was cut using hand router and some ratchet *** jigs, like lose a finger type deal
I'm still waiting for the woofer to arrive so TO BE CONTINUED .....
Attachments
-
 IMG_20180111_184445628_HDR.jpg602.5 KB · Views: 149
 -
 IMG_20180117_172846378_HDR.jpg844.4 KB · Views: 148
 -
 IMG_20180117_172910166_HDR.jpg703.2 KB · Views: 47
 -
 IMG_20180111_184831681_HDR.jpg488.1 KB · Views: 40
 -
 IMG_20180111_184502166_HDR.jpg507.1 KB · Views: 44
 -
 IMG_20180111_184451957_HDR.jpg640.7 KB · Views: 48
 -
 IMG_20180111_184439699_HDR.jpg725.1 KB · Views: 39
 -
 IMG_20180117_172827296_HDR.jpg447.3 KB · Views: 33
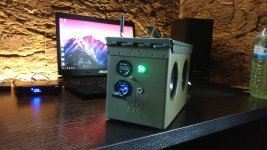
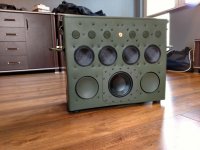
So I finished upgrading the large speaker a while ago and it looks like this now. Aside of it getting heavier the bass is much deeper and more pronounced , depending on the room it could become overwhelming at times , off course it could be adjusted by proper knob. Overall I would say that it's a fun speaker to listen too although I wouldn't crank it up in smaller rooms .
Attachments

Wow that ammo can looks like a real room shaker! Very awesome!
Is the woofer mounting plate designed for rigidity or is it covering a larger-than-needed hole
Would you mind telling us the specs of the drivers and amp(s)?
By the way, I have built my ammo can as well. It's still needing some finishing touches like power switch, securing the innards and maybe some damping material. I am pretty happy with it so far. Will post up a pic soon.
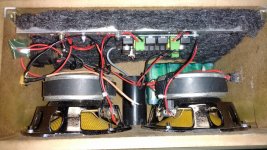
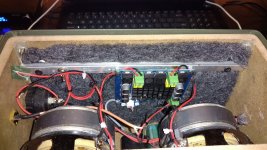
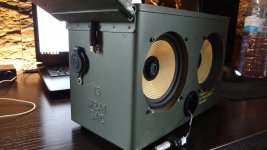
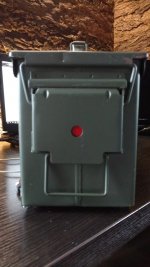
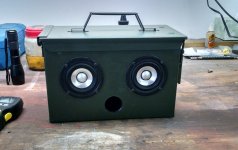
Here is my humble version. 50 cal ammo box with 2 Fountek FE83 and Sanwu TDA7492 amp. It's running on 4 18650 li-ion. Roughly 1.5x2.5 inch port made from cardboard tube lol.
The inner wood lining is made from snap together flooring that I had laying around. It is glued in with latex caulk. I put the wood in one piece at a time instead of building a box to fit the case.
It has decent bass for such small speakers but I already want to make another with larger speakers! LOL
Attachments
@martyparish
Thanks for sharing your project with us.
Looks really nice definitely better than my first one , which was a mess cables every were and I f***ed up the cut for the bass port so I had to cover it up with the ss plate. I don't have photos from before tidying it up .
Adding some dampening should further improve the sound. I'm currently using a combination of felt and some synthetic cotton like material for the back wall , back corners and bottom lining.
So about the hole and the plate , the hole was cut to match the outer dimentions of the speaker driver which is bolted on to the plate and than the plate is glued and bolted on to the body of the box it's both a mounting point and reinforcement.
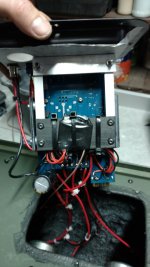
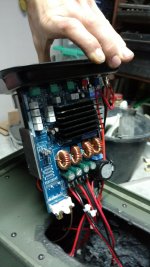
Box is using TAS5613, 2.1 Amplifier with CSRA64215 module , battery is made of 21, samsung 18650s configured as 7s with BMS board ( I don't use one shown on the photo anymore it was garbage , I changed it for better one. I'm planning to make a change for 7 liitokala 26650s 5ah each ,to make battery lighter.
Thanks for sharing your project with us.
Looks really nice definitely better than my first one , which was a mess cables every were and I f***ed up the cut for the bass port so I had to cover it up with the ss plate. I don't have photos from before tidying it up .
Adding some dampening should further improve the sound. I'm currently using a combination of felt and some synthetic cotton like material for the back wall , back corners and bottom lining.
So about the hole and the plate , the hole was cut to match the outer dimentions of the speaker driver which is bolted on to the plate and than the plate is glued and bolted on to the body of the box it's both a mounting point and reinforcement.
Box is using TAS5613, 2.1 Amplifier with CSRA64215 module , battery is made of 21, samsung 18650s configured as 7s with BMS board ( I don't use one shown on the photo anymore it was garbage , I changed it for better one. I'm planning to make a change for 7 liitokala 26650s 5ah each ,to make battery lighter.
Attachments

- Status
- This old topic is closed. If you want to reopen this topic, contact a moderator using the "Report Post" button.
- Home
- Loudspeakers
- Full Range
- AmmoCan Bluetooth aptx speaker