The one in the knob of my 8340 is an M3. Grub screw, are you British?
A couple of links to power tube shootouts:
6L6-type vacuum tube shootout | Wall of Sound | Audio and Music Reviews
EL34-family Tube Comparison! | Wall of Sound | Audio and Music Reviews
Cheers, Steve
A couple of links to power tube shootouts:
6L6-type vacuum tube shootout | Wall of Sound | Audio and Music Reviews
EL34-family Tube Comparison! | Wall of Sound | Audio and Music Reviews
Cheers, Steve
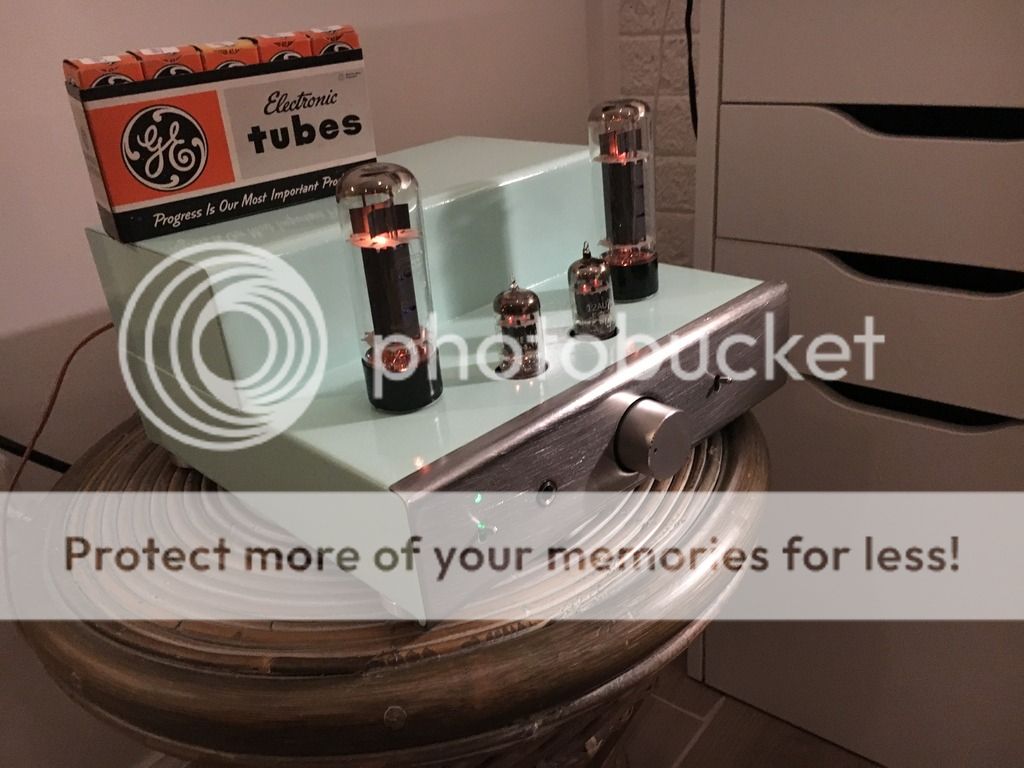
Great colour, same as my danelectro cool cat. Do you might sharing an outline of how you did the paint job? I only ask in the context of the unsuccessful paint attempt by Noam Bronstein of Wall of Sound Elekit TU-8600, Part 2: Building the Kit, and the Lundahl upgrade | Wall of Sound | Audio and Music Reviews
Wansmith,
Here's the painting process outlined and itemized for you.
Supplies Used:
-Sandpaper: 60 grit for faceplate, 150/800/1000 for body
-Paintstripper: I only used this on the faceplate--not the body.
-Primer/Paint: I used Rustoleum
-Simmichrome Metal Polish for the faceplate.
The Body:
I scuffed up the body pretty good with 150 grit sandpaper. The goal here is to get the shiny paint surface off the body to allow primer and paint to adhere to it. I didn't overdo it--I'm talking like 5 minutes of good, thorough sanding.
Next I rinsed the body off with water and blew it clean when done. Let it dry completely.
The next step is applying primer. Just follow the instructions. I let the primer dry per instructions and sanded it lightly with 400 grit. I think I did a wet sand (just warm water on the 400 grit paper).
Apply a second coat of primer--repeat the wet sanding process.
Now the fun part. Paint. Apply your spray paint. Literally follow the manufacturer's instructions to the letter. Spray paint cures differently than regular paint. So you can overcoat/top coat in short sessions. Just be sure to follow the number of minutes dry time they say.
Do at least one more paint coat (including the topcoats per the can's instruction). I did NOT worry about wet sanding in between paint coats. Why? Because I used a high gloss lacquer final coat. That final coat will smooth out anything (so long as the paint looks good coverage and color wise-no drips). I think that I may have done a very, very very light wet sand at 1000 grit of my first lacquer coat and then applied the second.
You're done.
The Faceplate:
I started sanding the faceplate down with 60 grit or lower paper and noticed that I didn't want a 2 hour workout of sanding. So I switched over to paintstripper.
Apply the paintstripper. A foam brush works best. Wait 10 minutes or whatever the product literature says. Remove it per instructions (likely a cloth and warm water). Wear gloves!
Next I pulled the 40/60 grit paper back out. I sanded the heck out of the faceplate by hand. The bare aluminum started shining through and looking great! Watch that you do this in one direction only as you can create scratches. You won't hurt anything but sanding down a scratch made by 40 grit paper is no fun. It could take an hour!
Once the faceplate is looking sweet and clean, I washed it in soap and warm water. After it dries, apply numerous coats of Simichrome. Simmichrome is $10 bucks for a tiny tube. It's powerful and you'll have plenty extra.
I buffed the faceplate with a soft pad and one of those microfiber cloths and watched an entire 30 minute show. I kept reapplying pea sized amounts of Simichrome after it got all buffed in.
As an aside, I started the project using vehicle engine primer and paint. It withstands heat up to 500 degrees and is rock solid. It cures harder when the amp gets hot. I used Pontiac Metallic Blue--retro GM color from the 60s. Everyone loved it but me so I went more intense.
Don't shy away from the Rustoleum products. They are fantastic.
Practice before you paint. I used a big amazon box for a spray booth. It wasn't huge--big enough to put 2 basketballs in it. I cut it up so one side was open. Again, practice smooth overlapping strokes. You can get pro results. Watch some youtube videos. Go gingerly but have confidence that the dude or dudette writing that review must have not planned, read instructions, and/or taken his/her time.
- Status
- This old topic is closed. If you want to reopen this topic, contact a moderator using the "Report Post" button.