Hi,
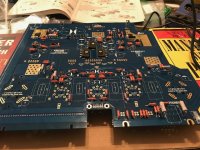
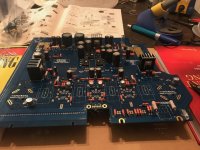
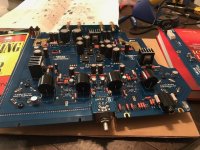
So thanks to the suggestions of the folks on here, I purchased and put together the Elekit 8600 in the past week, and I wanted to share my experience and a few photos. I'm totally new at this, so during my wait for the amp I researched and bought the following:
I selected the Lundhal option, and because it was the launch edition, I also got the Takman Resistors, and the Mundorf EVO Supreme caps (I can later upgrade those to the silver, gold oil). And selected the Genalex Tubeset.
The entire process took me about 20 hours from start to finish. I'd put the baby to sleep every night and sit on my bench and work until 11 at night or so, and it took 4 nights, plus a good 4 hours this Sunday to wrap it up.
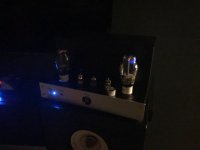
Victor was endlessly patient and responsive to all my dumb questions, but it's working now and "burning in" initially, the sound is about 10 steps above my T-Amp, and can get pretty antisocial with my Fostex 206eN setup without even hitting the halfway mark on the volume pot.
Things I learned:
Initial listening impressions - there's just so much "more" everywhere. I'm really only running digital music from my Mac Mini through a JDS Labs EL DAC - some of my mp3s are really terrible, but I have some FLAC and on good quality recordings everything just sounds more present. The bass is really strong, I can't imagine wanting a sub. The bass sounds tight, and the mids and highs are all clear and separate. I'm a total newbie to these things, and some of my music still sounds a bit "far away" but I don't know if that's a product of my digital files or not.
Hope this helps someone. Anyone that can give me pointers, I'm all ears. Can't wait to build the preamp when my wallet recovers from this.


So thanks to the suggestions of the folks on here, I purchased and put together the Elekit 8600 in the past week, and I wanted to share my experience and a few photos. I'm totally new at this, so during my wait for the amp I researched and bought the following:
- Hakko FX888 Soldering Station - I chose this one because it was the most reasonably priced station I could find with a precise temp setting
- WBT Silver Solder 4%
- Assorted pliers and tools
- PCB Clamp - ended up being useless because this thing is big, but honestly I did pretty well with a set of books on either side of the board to hold it up.
I selected the Lundhal option, and because it was the launch edition, I also got the Takman Resistors, and the Mundorf EVO Supreme caps (I can later upgrade those to the silver, gold oil). And selected the Genalex Tubeset.
The entire process took me about 20 hours from start to finish. I'd put the baby to sleep every night and sit on my bench and work until 11 at night or so, and it took 4 nights, plus a good 4 hours this Sunday to wrap it up.
Victor was endlessly patient and responsive to all my dumb questions, but it's working now and "burning in" initially, the sound is about 10 steps above my T-Amp, and can get pretty antisocial with my Fostex 206eN setup without even hitting the halfway mark on the volume pot.
Things I learned:
- Bless Victor for grouping the resistors according to their values and the instructions/steps - this made a big difference. I would pull out all resistors of one type, and bend them appropriately then place them in the board, flip, and solder in groups, it made it go a lot faster. For the Takman upgrade you have to bend them in a specific way, because they are slightly wider than the space for the standard resistors.
- The solder made all the difference. The unleaded solder (i bought a small practice board from Amazon to learn before I built the amp) needed higher temps and was harder to work with. Worth the price.
- You have to be careful but most of this stuff really isn't that delicate, and can take a fair amount of abuse - I was lucky and didn't have many mistakes to fix, but learning how to use the desoldering pump was a trip. You have to get REALLY close. On the final board review I found one capacitor with reversed polarity, and at one point i soldered the wrong power connector in the wrong spot.
- There's a separate PCB for the power items, plug, switch, fuse, etc. Make sure you find the one for your country.
- If you have the Lundhal upgrade and the upgraded Alps pot, look for the threads on this forum to see how to install. The volume pot needs a different approach with spacers to fit correctly
Initial listening impressions - there's just so much "more" everywhere. I'm really only running digital music from my Mac Mini through a JDS Labs EL DAC - some of my mp3s are really terrible, but I have some FLAC and on good quality recordings everything just sounds more present. The bass is really strong, I can't imagine wanting a sub. The bass sounds tight, and the mids and highs are all clear and separate. I'm a total newbie to these things, and some of my music still sounds a bit "far away" but I don't know if that's a product of my digital files or not.
Hope this helps someone. Anyone that can give me pointers, I'm all ears. Can't wait to build the preamp when my wallet recovers from this.


Hi all, I just finished my TU8600 build and couldn't be happier with it.
Further to the OP's post, I wanted to add in my experience as a relative beginner building this kit.
I found it significantly more difficult than the TU8200 and TU8500. I'll set out the hurdles I faced along the way in case it assists anyone.
1. I used lead-free WBT silver solder 0805. The instruction manual stated "ideal temperature of the soldering tip ca 290 degress Celcius (554 Fa)". I set my Hakko 888d to that temperature and it barely melted the solder. Having asked around, I was advised that I should use a significantly higher temperature (~400-440 Celcius (752-824 Fa)). This worked much better. Victor recommended having the Hakko 888d set to max (but being very quick and having a short dwell time).
2. The photocouplers' pins are very close to each other and i obsessed for quite a while to confirm there was no solder bridges. Taking photos with my iphone and zooming in assisted in giving me comfort there were no bridges.
3. The Hakko 1.2D tip did not have a high enough mass to heat the heat sink pin and pad. I had success after changing to a much thicker chisel tip.
4. Occasionally I found some solder joints would heat/cool inconsistently and form "icicles". When I tried to reheat and reflow the solder, the solder would take on a different texture and form a 'skin'. I ended up sucking up/wicking these joints and starting again.
5. Stupid mistake - if you have bought Mundorf upgrade capacitors and are clumsy like me, I would recommend you installing them last. I installed them in the order called up in the instructions, and a few times I accidentally touched the outer casing of the mundorfs with the barrel of my soldering iron and melted a bit of plastic. Nothing too serious, luckily.
6. For the 3 pin toggle switch on Unit 4, really make sure it is sitting as close as possible to the pcb, because otherwise it becomes a tight fit when you insert it into unit 5/6.
7. Lundhal/steel bar installation. I ordered the elekit from my local dealer and ordered the lundhal upgrade separately from Victor. Victor supplied the Lundhals with M4 standoffs and M4 screws and a steel bar to strengthen the rack and enable it to support the Lundhals. I had some difficultly with this initially - the M4 screws weren't going through the holes steel bar and I didn't want to force them through until i knew for sure I was installing it correctly. Victor confirmed that the M4 screws will go through, and after trying again applying more pressure, the screws went through.
I'd say it took me around 40 hours to complete, which seems on the slow end. If I can give some advice, I would recommend really trying to be patient and take your time with it. If you are anything like me, you'll get a strong urge to race to the finish about when you are just about to finish soldering unit 1. Try your best to resist this because the road ahead to completion is finicky and you'll be more likely to make small mistakes here and there.
A big shoutout to Victor for his monumental and tireless efforts in the elekit community. I probably emailed him 8 times during the build and received a response within hours. His service and dedication is unbelievable.
Whilst it definitely hasn't burnt in yet, my (very) initial impressions are that its a significant step up from the TU8200 for driving speakers. Although the output power is marginally higher than the TU8200 in UL mode per the spec, the TU8600 feels like it has more gain and power behind it.
Cheers
Last edited:
- Status
- This old topic is closed. If you want to reopen this topic, contact a moderator using the "Report Post" button.