Sure : items 253492520781 and 253336657183. In Europe by the way")
cant find it. are this still aviable?
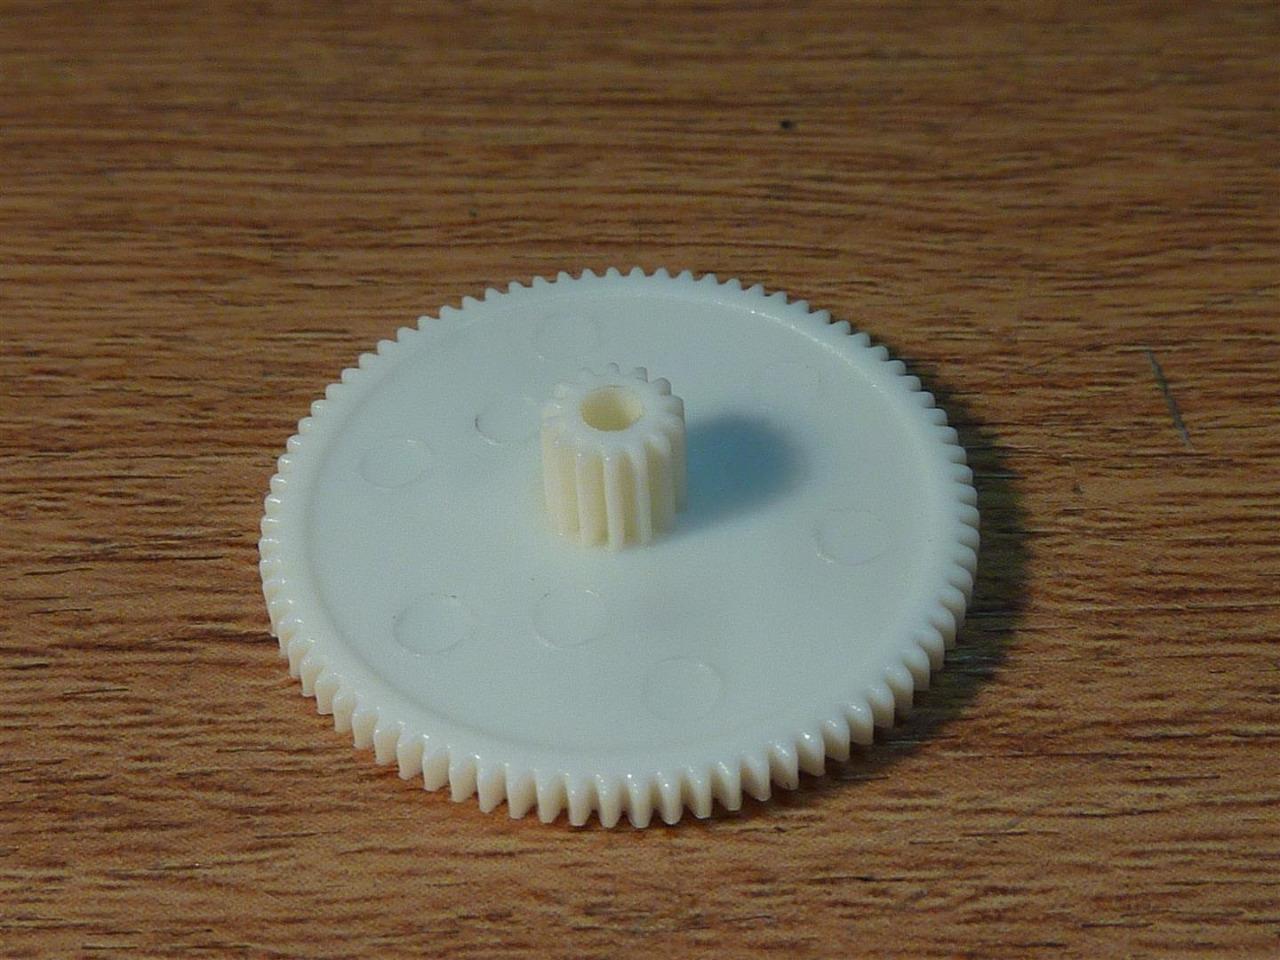
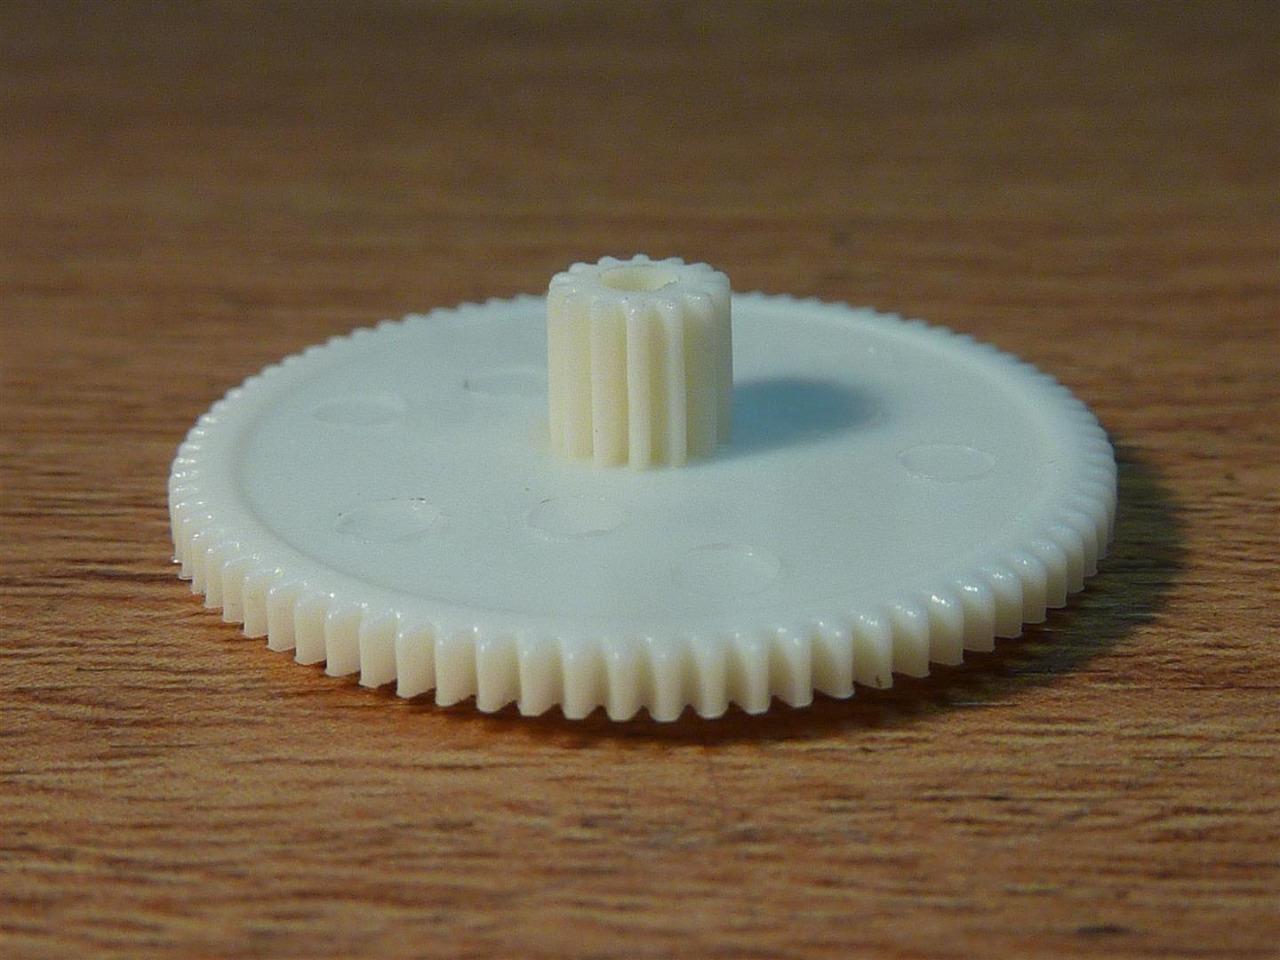
teac gear
to all, here is the response of the supplier I asked to:
Part number M02646000A, is currently available, cost is $12.47 each.
Prices do not include tax or shipping. We accept Visa, MasterCard, American Express, Discover, or money orders. If you would like to order, please contact the parts department below.
Prices quoted are only for SHIPMENT WITHIN THE U.S. or its territories.
Prices are valid for 30 days from the date of this price quote and are subject to change without notice.
Thank you for your inquiry,
Parts Department
TEAC America
1834 Gage Road
Montebello, CA 90640
Phone: 323-727-4840
E-Mail: parts@teac.com
Available here - thank you.
TEAC VRDS Laser Sled Rack gear CMK-4 part 5801568801 Gear B Original | eBay
(ebay item number 132735180128 )
or just google :
TEAC VRDS Laser Sled Rack gear CMK-4 part 5801568801 Gear B Original
TEAC VRDS Laser Sled Rack gear CMK-4 part 5801568801 Gear B Original | eBay
(ebay item number 132735180128 )
or just google :
TEAC VRDS Laser Sled Rack gear CMK-4 part 5801568801 Gear B Original

to all, here is the response of the supplier I asked to:
Part number M02646000A, is currently available, cost is $12.47 each.
Thank you for your inquiry,
Parts Department
TEAC America
1834 Gage Road
Montebello, CA 90640
Phone: 323-727-4840
E-Mail: parts@teac.com
Update as of December 2018 - TEAC America no longer handles these parts.
They said that "Unfortunately this model is no longer being handled by TEAC, this model is being handled by Onkyo. To see if they still can get this part, call Onkyo (201)785-2600."
I called up Onkyo at the number above and they said that the part was in stock but they don't sell to individuals. But I could buy it from one of their service centers. You can find their service centers at:
Support | Onkyo USA
The California regional service center, Adams Electronics, in southern California ordered the part and shipped it to me. Part was about $15 and another $10 to cover shipping.
---Gary
Here's yet another update. I replaced the tray idler gear (part # 5801571100 / M02646000A) and the T1 worked fine for about a week or so. Then the laser sled gear (part # 5801568801) self destructed, so I've got one of those on order from one of the ebay sellers. So if anyone else still has one of these transports, I recommend replacing both gears once one bites the dust. It's only a matter of time before the other one goes.
---Gary
---Gary
Replaced my gear 17 (CMK-4 part 5801568801 Gear B). Bought from Germany on ebay...cheapest. Very quick delivery.
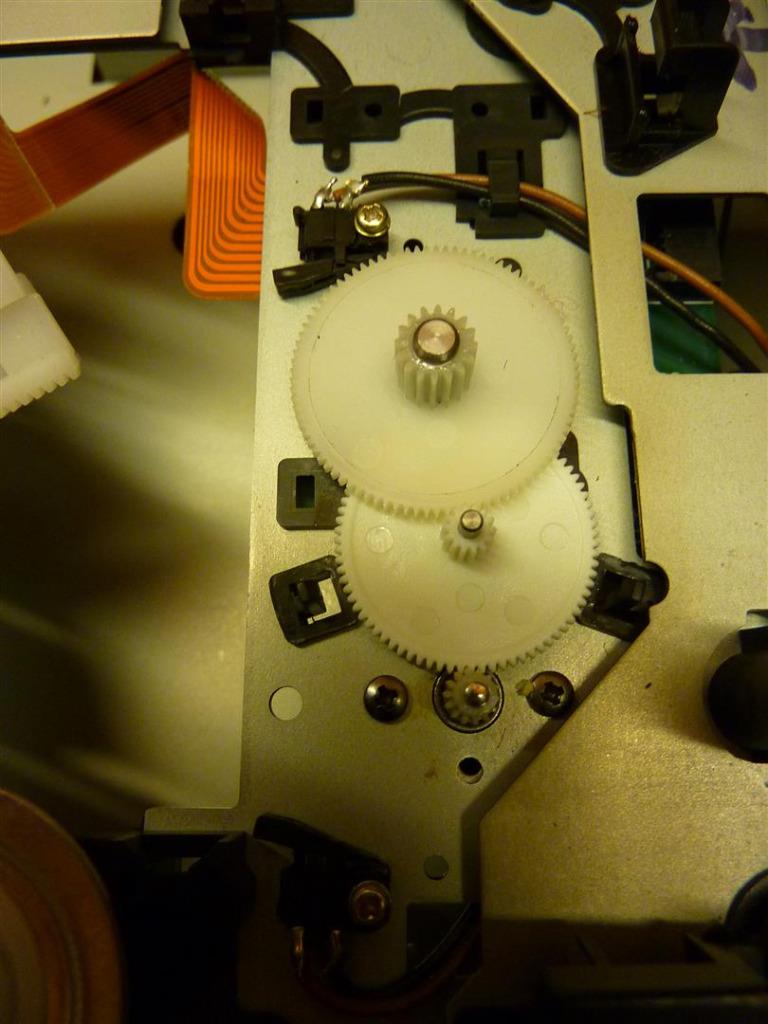
Struggling to get the main gear (13) in the correct position so the drawer opens and closes correctly as well as move the lever over. Anyone any ideas?
The gear was in the wrong place when dismantled because the gear had disintegrated.
Gear B
Struggling to get the main gear (13) in the correct position so the drawer opens and closes correctly as well as move the lever over. Anyone any ideas?
The gear was in the wrong place when dismantled because the gear had disintegrated.
Gear B
I have the same problem now on my other cda-288 (have two, one black, one silver).
Anyway, ordered a few spares for future use.
But: I cannot seem to find the correct position for the main gear (big black one).
Did you (Gforce) manage to find the right position?
The most annoying thing is, that I did it 9 years ago with success on my other cda-288 Copland cd-player...
Kind regards,
Jacques
Okay, so tried a variety of positions for the big black gear underneath the tray and problem solved. Plays back perfectly again.
So, now I am taking my vrds10 completely apart and modifying heavily. Analogue totally out, serious damping, other bolts instead of the nasty self-cutting screws, other connection socket, other internal cableing, more shielding, seperate 230 Volt socket, new and better 230 Volt cable and plug, out with components that are not used and a serious taking apart of the whole drive and stronger parts where I can do it. Ultimately, I'd like to make a whole new bridge and motorsuspension for the CMK 3,2 drive a bit a la the neo drives, different suspension etc. We'll see. I'll report back as it happens.
Cheers,
Redfox
Well okay, just installed a new laser for a CMK 4,0 drive on one of my Copland CDA-288 cd-players, as I played some cd's, and on some of them and in an increasingly manner, it had trouble focussing and sometimes just whirred and spun the disc for a while untill it gave up and parked the laser. so took a new laserunit in the spareparts box of all things vrds. Plays perfectly again for many years. Here's a small guide to do it yourself, if you are not familiar with the procedure beforehand:
1/ power off and connector out.
2/ undo cover
3/ undo 4 screws for the plastic top cover on bridge.
4/ undo 2 screws holding top of bridge and top spindel (big clamp).
5/ lift off big clamp with top of bridge and lay aside. No cable undoing needed.
6/ on my machine, it's easier to take out drive now, so undo 4 screws holding drive down.
7/ undo flat grey cable from laser to digital board.
8/ undo two small white, one black and oen red small multiconnectors at the front of digital board (servo board).
9/ with cd-tray closed, lift out the whole drive and place on table. Turb cdtray gear (big black one) by hand so that cdtray opens up and you have room to work on the unit. Do NOT pull the cdtray from start, and only very slowly and gently.
10/ turn laser sledge gear by hand. Do NOT push on the laser to move it.
11/ then after a bit of turning, stop when laser is in the middle of it's total travel.
12/ at rear end of long metal shaft that laser sledge slides on, press slightly down on a small horizontal tab, and pull rearward the metal shaft. But not all the way. Just so that the laser sledge is free.
13/ turn drive upside down and carefully undo the flat cable from laser sledge.
14/ turn drive around again and lift out the now free laser sledge by angleing it a bit.
15/ place old laser sledge on table and locate two springs horizontally locked between two small pins. Hold on to and undo both springs. Put aside.
16/ the outer gear of the sledge can now be moved a bit and released by positioning the gear so that it's at it's wide openings on location holes on two small tabs.
17/ repeat with inner gear.
18/ laser is now free and new laser have to have the inner gear with securing spring, and then outer gear with it's securing spring reinstalled.
19/ do this by placing inner gear over and down on laserunit, then move it to locked position.
20/ place ione end oof spring on to it's locating tab and hold on the spring while using a small flat screwdriver to compress the spring enough so that it can slip onto the other end's location tap. Spring is now in place.
21/ repeat with outer gear. Laser unit is now complete and can be installed on the long metal rod.
22/ clean gears and theeth with a cotton swap with isopropylalcohol and let dry for a moment.
23/ repeat cleaning on the long metal shaft. Make sure that no cotton bits and threads is left on parts.
24/ lubricate metal shaft and all gears on laserunit plus laserunit drive gears (and change if theeth broken) with a little teflon oil on the tip of a cotton swap. Do NOT spray oil or grease on to parts from can.
25/ locate laserunit on it's gear and puch the long metal shaft back through laserunits locating hole.
26/ push long metal shaft further so that it's other end (near front of drive, near front of cd-player), slips into it other end hole, and clicks when the small release tab at the rear end (the one you pressed down to release it in the first place), when it's fully home and reinstalled.
27/ eventually repeat lubrification. Just a bit as you may have touched lubed parts while reassembling.
28/ turn drive upside down and very carefully push in the small flat multicable for laserunit into it's socket on laserunits' circuit board. Turn drive around again.
29/ carefully spin the laser sledge gear so that laserunit slides to it's most rearward position (where it was before disassembling). Do NOT push on laserunit or it's sledge.
30/ Now move back the cdtray by turning a little the big black cogwheel underneath the cdtray itself. Do NOT start by pushing the cdtray itself. Gently and slowly.
31/ after the movement of the cdtray has begun, you can now gently push the cdttray home to it's "playing" shut position.
32/ reposition cdtray with complete drive into cdtray opening at cdplayer's frontpanel while observing eventual suspension. On mine there are two springs that sits underneath the whole cddrive's front.
33/ reinstall all 4 screws that holds complete cddrive unit into cdplayer.
34/ reposition topbridge with upper big clamp onto it's bridge and reinstall two holding screws.
35/ reinstall the plastic cover over bridge and tighten it's 4 screws.
36/ reconnect the flat grey multicable very carefully into it's socket on servo board (digital board).
37/ reconnect them two small white, the red and the black multiconnectors at the front of the servoboard as well.
38/ take a close look at everything and make sure everything is in it's tight place.
39/ repeat. Then connect powercable, turn on and observe if lasersledge moves correctly with gears and position. It will move forward, look for a disc and move up and down a few times before returning to it's rearward parking position.
40/ press eject and insert cd and press play. Observe if lower clamp clicks into positiona nd if laser sledge moved under cd and upper big clamp spins up and laser unit reads the toc and eventually starts playing.
41/ if okay, repeat eject and play a number of times to make sure lube is well moved on the gears and the long metal shaft that laser unit moved on.
42/ reconnect cdplayer to system, play a disc and have a cup of tea
That takes about ½ hour. 1 hour if you are a first timer. Eventually take some snap shots of assembly before dissasembling, and positioning of parts when undoing, springs etc. They can only be located one way, but it's worth doing anyway.
Most laseruinits come preadjusted, so no need for adjusting laserunit in very most cases. That is a scope job and you also need info of values for your unit and experience with that. But as said, normally they are ready to run. No need to ramp up the laserpower as it will burn out quickly.
Now take a close look at the old laserunit. I shook mine gently, and could clearly hear the laserdiode rattling, as the laser is far from burnt out, but it's suspension is shot.
This is a guide for all units that work with Teac VRDS CMK 4,0 such as VRDS 7, 9, T-1, similar Esoteric units, Copland CDA-288, Krell CAV-300, some Wadia units etc. Easy peasy
Hope this short guide can be of use to someone out there.
Kind regards,
Jacques.
ps: I wrote a guide to changing gears elsewhere on this page if need be.
Last edited:

I have a Teac VRDS 7 that started reading the Cds wrong. I tried to disassemble and verified that the straps and gears are OK. Not having the laser at my disposal I could not change it for the moment and so I reassembled everything. Initially I could not open and close the cart CD port properly, now it opens correctly but then it closes without I have given any command. It does this without CD and with CD, after sometimes it remains in the opening position and if I try to close it starts again to close and expel. The laser’s not moving. What could be the problem?
It is mid 2023 and I just got one of these TEAC transports to fix.
Very difficult to find the right gears.
Found some on UK eBay by a seller who actually is based in Poland and now I am waiting for delivery.
These are 3D printed from a guy that prints and sells a lot of that kind of stuff.
Will be interesting to see how they work.
Very difficult to find the right gears.
Found some on UK eBay by a seller who actually is based in Poland and now I am waiting for delivery.
These are 3D printed from a guy that prints and sells a lot of that kind of stuff.
Will be interesting to see how they work.
I thought that under TEAC brand there was only one transport, the VRDS T1 and this is what I have here for service (I fix CD players in my garage).
See www.hear.net.au or youtube.com/@hear-net-au.
Just posting the video about it now.
See www.hear.net.au or youtube.com/@hear-net-au.
Just posting the video about it now.
Hi Rockeater,
The T1 is a CMK-4,0 transport. Likewise in for example Copland CDA-288, Krell, Teac VRDS-7, Wadia 850 and more. CMK-3,2 with it's cast metal upper platter, was used in sat VRDS-10, 15, 20, 25, 25X, 25Xs, P700, Wadia 860, 861 etc. Then there are exceptions such as P500, which is magnetic rail but plastic upper platter. As you know, gears are not the same between the two types, and T1 used small gears for moving laser.
I've used gears for both types from the UK, now defunct, but also from china and Poland. All worked well. The red gears from Poland works well. There was also a guy in Thailand who made them in brass, but the were drilled off-axis and didn't work as good (I've tried them).
Kind regards,
Redfox.
- Home
- Source & Line
- Digital Source
- TEAC VRDS CD T1 gear broken