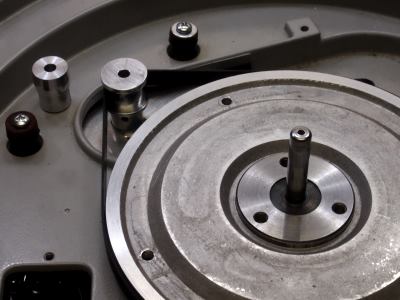
I wanted to make an experimental belt drive for a Thorens TD 124 turntable. I turned the small motor pulley out of aluminum stock, but I chose to cast the large platter pulley from scrap. I could have used 1/2" sheet aluminum, but I didn't have any. Besides I wanted to try out a new type of casting sand called Pertobond. I've done a fair amount of green sand home foundry casting in the past. Green sand is a mixture of course sand, clay, and wood flour. The sand and clay were given me by a potter and the wood flour is dust from the vacuum cleaner I have connected to a power sander. Water is added to the mixture and left to set for a day, and the mold is made from it. The problem is that when molten metal hits the wet sand a great deal of steam is produced. Unless this steam is given a release path the casting will be ruined. To counter this, course sand must be used and a minimum of clay. The surface of the part is rough and there are often defects because the mixture doesn't stick together real well. Petrobond replaces the water with oil and some "special sauce." Instead of large quantities of steam at high pressure Petrobond gives off a small quantity of smoke at low pressure. This means that fine sand can be used providing a much smoother surface. Petrobond sticks together better so it's easier to use and there are fewer defects. Petrobond does not cool the metal as quickly as green sand so thinner sections can be cast with less danger of metal freezing before it reaches all parts of the mold. Also, the burning oil next to the part sucks up the oxygen so the part comes out nice an shiny instead of dull from oxidation. The downside is that while green sand is literally dirt cheap, Petrobond "dirt" isn't. The quantity I used for this pulley cost 40 USD, but you get to use it over and over.
Here's the process:
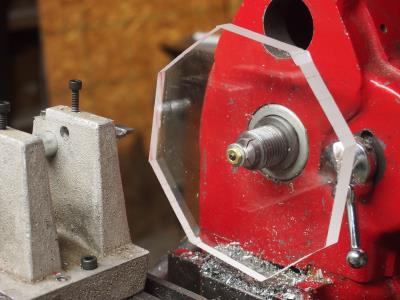
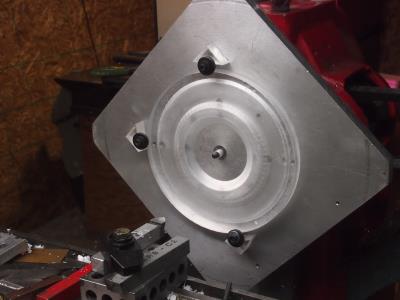
The first step is to make a pattern. It is a representation of the desired part. For this part I used 12mm thick sheet acrylic. The pattern is made 2% larger to account for the metal shrinking as it cools. Also, there is an allowance for areas that will be machined.
Mounting the acrylic blank.
Turning the first side.
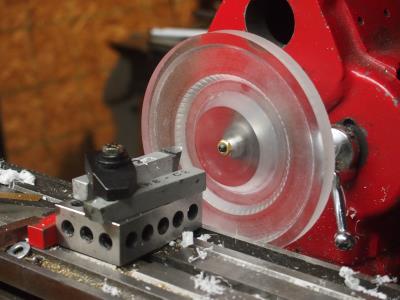
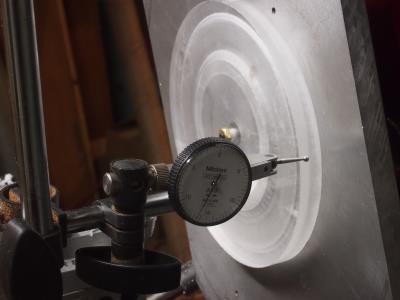
Centering the pattern for turning second side.
Turning the second side.
Last edited:
Now the fun part.
Scrap aluminum in iron pot:
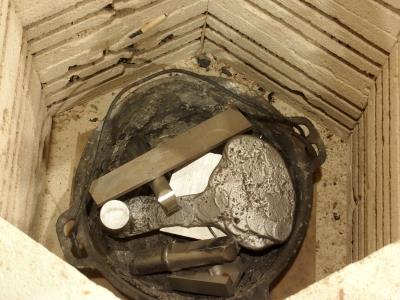
Melting the metal.
First the pattern is placed on a board that is dusted with parting dust. This helps prevent the mold from sticking to the board. The dust is finely ground sand. One should avoid breathing it. It can cause silicosis. Powered graphite is a safer but more expensive alternative. The dust is in a sock which is tapped to distribute it over the board and pattern. Then the bottom half of the flask is placed around the pattern.
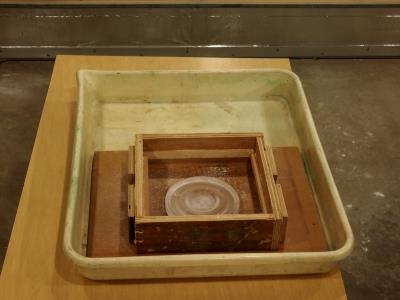
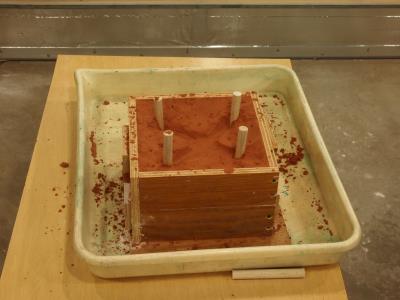
Sand is packed around the pattern in layers till over full.
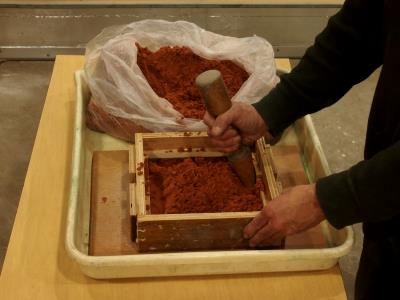
The excess is struck off with a straight board.
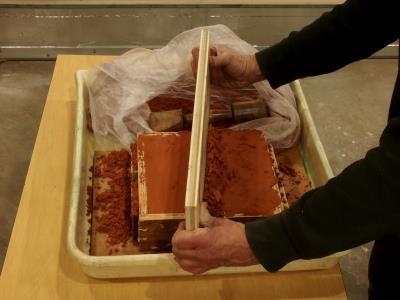
Another board is placed on top and the entire assembly is flipped over and the bottom board is set aside.
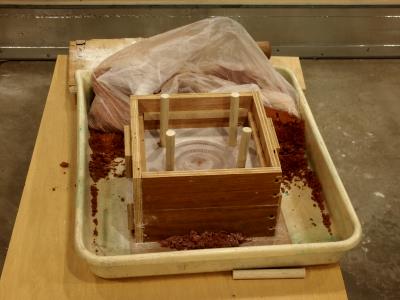
More parting dust is sprinkled on and the top half of the flask is placed. It is keyed to the bottom half. Next dowels are place to provide runners for the molten metal to enter the mold. Usually there is just one but because the part has thin areas it put in four. It proved unnecessary but better safe than sorry.
 \
\
Sand is packed into the top flask and channels are dug to connect the runners.
Now the dowels are removed and the top flask half is carefully removed and set aside. Sand is removed between the runners and the pattern to provide gates so the metal can reach the mold cavity. A bolt is screwed into a threaded hole in the center of the pattern. The bolt is tapped in several directions to enlarge the mold cavity slightly to make it easier to remove the pattern.
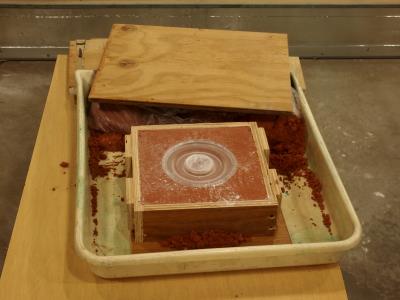
The pattern is lifted from the mold.
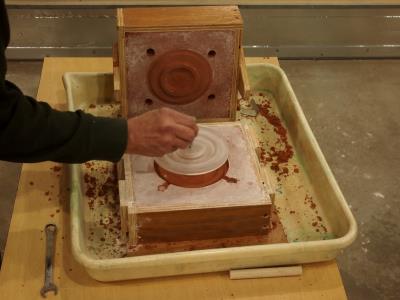
The top half of the mold is placed back on the bottom and the mold is complete.
Scrap aluminum in iron pot:
Melting the metal.
First the pattern is placed on a board that is dusted with parting dust. This helps prevent the mold from sticking to the board. The dust is finely ground sand. One should avoid breathing it. It can cause silicosis. Powered graphite is a safer but more expensive alternative. The dust is in a sock which is tapped to distribute it over the board and pattern. Then the bottom half of the flask is placed around the pattern.
Sand is packed around the pattern in layers till over full.
The excess is struck off with a straight board.
Another board is placed on top and the entire assembly is flipped over and the bottom board is set aside.
More parting dust is sprinkled on and the top half of the flask is placed. It is keyed to the bottom half. Next dowels are place to provide runners for the molten metal to enter the mold. Usually there is just one but because the part has thin areas it put in four. It proved unnecessary but better safe than sorry.
Sand is packed into the top flask and channels are dug to connect the runners.
Now the dowels are removed and the top flask half is carefully removed and set aside. Sand is removed between the runners and the pattern to provide gates so the metal can reach the mold cavity. A bolt is screwed into a threaded hole in the center of the pattern. The bolt is tapped in several directions to enlarge the mold cavity slightly to make it easier to remove the pattern.
The pattern is lifted from the mold.
The top half of the mold is placed back on the bottom and the mold is complete.
Now the funner part.
The Pour Video
Now the funnest part.
Shakeout!
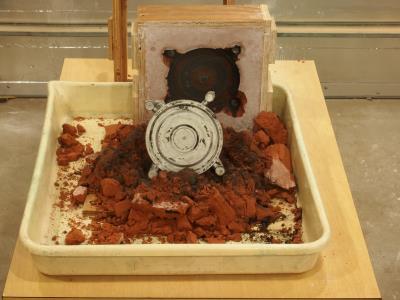
All that's left is to machine it to size and place the pulley into service.
The Pour Video
Now the funnest part.
Shakeout!
All that's left is to machine it to size and place the pulley into service.
Thank you Kevin. Indeed the woodworking/modelmaking skills required to make patterns take a while to acquire, but the casting process is simple. Petrobond eliminates much of the guesswork and frustration making it almost foolproof.
The great thing about this modern age is that now patternmaking can be computerized. A virtual solid model can be created with CAD software and realized with 3D printing. While 3D printing has limited use for actually making parts it's great for casting. One plastic pattern can make hundreds of parts.
Think of the possibilities: ultra rigid sculptural speaker baffles, really cool enclosures, stylized heat sinks, cool enclosures with integrated heat sinks and much more.
Thanks guys. ")
I've looked at your website before Evan, beautiful work. You certainly have the skills for casting.
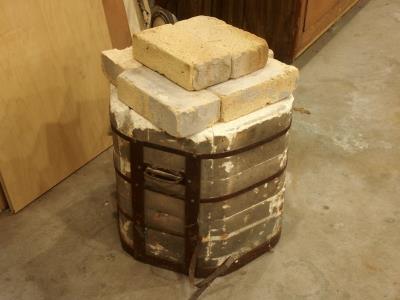
I'm using an old ceramics kiln which I picked up for free. It's big enough for anything I'd care to handle. Similar kilns run 300 to 500 USD new. One as beat up as mine and also missing its top should cost around 50. Insulating fire bricks like I'm using cost about 10 USD each. Most DIYers build their own furnaces. They often start with charcoal and move on to gas or oil. These methods require forced draft. There are tons of plans on the net. I'm using cast iron pots to melt in but ceramic, graphite or carbide crucibles are the traditional choice. I have a safety issue that I will soon address. I'm lifting the pot using the wire bale that comes on the pot. When the steel wire is red hot it softens and there is danger of it comming loose. It would be a bad day to drop a pot of molten metal. Most of the other stuff can be cobbled with bits of steel and wood. The most expensive tool are my Kevlar gloves.
I've looked at your website before Evan, beautiful work. You certainly have the skills for casting.
What is needed to melt scrap Al?
I'm using an old ceramics kiln which I picked up for free. It's big enough for anything I'd care to handle. Similar kilns run 300 to 500 USD new. One as beat up as mine and also missing its top should cost around 50. Insulating fire bricks like I'm using cost about 10 USD each. Most DIYers build their own furnaces. They often start with charcoal and move on to gas or oil. These methods require forced draft. There are tons of plans on the net. I'm using cast iron pots to melt in but ceramic, graphite or carbide crucibles are the traditional choice. I have a safety issue that I will soon address. I'm lifting the pot using the wire bale that comes on the pot. When the steel wire is red hot it softens and there is danger of it comming loose. It would be a bad day to drop a pot of molten metal. Most of the other stuff can be cobbled with bits of steel and wood. The most expensive tool are my Kevlar gloves.
I'm using an old ceramics kiln which I picked up for free. It's big enough for anything I'd care to handle. Similar kilns run 300 to 500 USD new. One as beat up as mine and also missing its top should cost around 50. Insulating fire bricks like I'm using cost about 10 USD each. Most DIYers build their own furnaces. They often start with charcoal and move on to gas or oil. These methods require forced draft.
Your kiln is electrical?
Yes the kiln is electric. It runs on 117VAC.
Ooooo, I need a bunch for my next project. A turntable chassis.
Yeah Cal, the stuff is amazing. I haven't cast in a decade, I was anxious to try it and I documented the process yet the part still came out great. How about a speaker baffle with integrated HF horn?
Thanks for the info! I'm saving all my scrap Al for you!
Ooooo, I need a bunch for my next project. A turntable chassis.
Yeah Cal, the stuff is amazing. I haven't cast in a decade, I was anxious to try it and I documented the process yet the part still came out great. How about a speaker baffle with integrated HF horn?
I am surprised your kiln is 117V.
Me too, yet it's never blown a fuse. It took less than an hour to melt for the pour.
Class A heat sinks?!
That's what I was thinking. Before I endorsed the idea I figured I should test the concept.
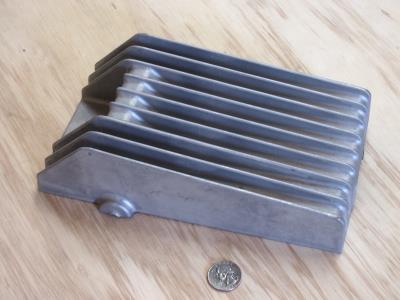
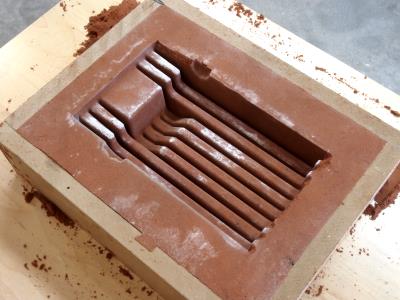
This is half of an enclosure it designed in the 90s. I didn't make the part. My green sand process would never work for such deep delicate fins. It was made by a commercial foundry using a plaster casting method. It works similarly but wet plaster is used instead of sand. The mold must be dried in a low temp kiln for a day or two before metal is poured into it. Anyway, I used it as a pattern and did a test ram up with Petrobond. Even without a lifting feature in the pattern I was able to pull it without damaging the fins. I'm sure It would also hold up to a pour.
Last edited:
Very Cool Stuff !!!
I used to do stuff like that many years ago in High School!!
Since then I have always wanted to build a small furnace and now I live in a house that has Natural Gas being piped in and this would be much cheaper than an electric powered oven!!
If you are making a Heatsink would there be much of a bonding issue if you were too incorporate a thick copper spreader plate to mount the devices to ?

jer
I used to do stuff like that many years ago in High School!!
Since then I have always wanted to build a small furnace and now I live in a house that has Natural Gas being piped in and this would be much cheaper than an electric powered oven!!
If you are making a Heatsink would there be much of a bonding issue if you were too incorporate a thick copper spreader plate to mount the devices to ?
jer
Last edited:
Indeed the woodworking/modelmaking skills required to make patterns take a while to acquire, but the casting process is simple.
I appreciate you sharing your work process, more please.
- Status
- This old topic is closed. If you want to reopen this topic, contact a moderator using the "Report Post" button.
- Home
- Design & Build
- Construction Tips
- Making Parts for the Price of Dirt