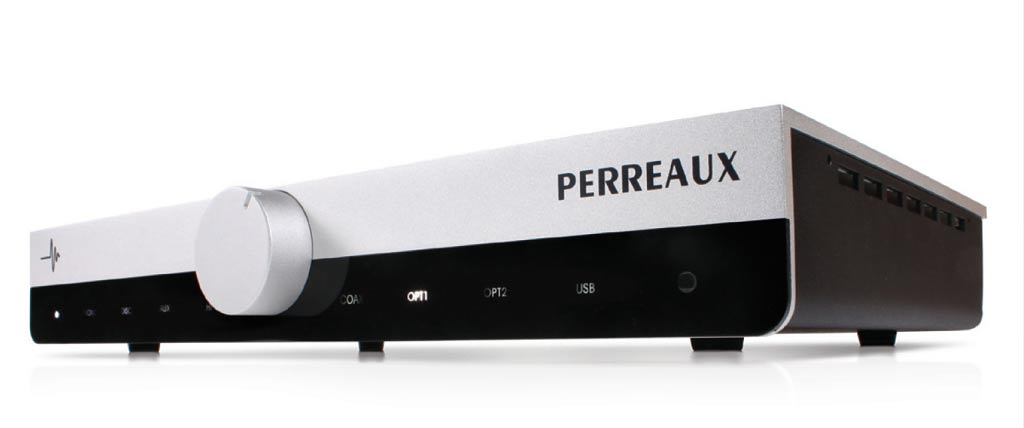
I'm designing an enclosure for a simple chip amp with a 4-input channel selector. I really like the idea of having a rectangle of some sort of plastic with the input named backit via LED when selected, similar to the Audiant 80i, pictured below:
My design so far looks like this:

I'm not really sure how I would create the plastic part. My only thought was to get it made at some 3D printing place like Ponoko, although I'm not sure if there's a better way to do it.
So a few specific questions:
1) What would be a good place to get a custom piece like this made?
2) What would be a good way to attach the LEDs to the back?
3) How would I fasten the plastic piece to the aluminum faceplace without screws? It would be nice if it could just snap into place.
Note: The TentLabs Hybrid Amplifier assembly manual has a similar plastic screen, but it's a little hard to tell from the images how it's actually fitting onto the faceplate.
Thanks for any insight you can give.
My design so far looks like this:
I'm not really sure how I would create the plastic part. My only thought was to get it made at some 3D printing place like Ponoko, although I'm not sure if there's a better way to do it.
So a few specific questions:
1) What would be a good place to get a custom piece like this made?
2) What would be a good way to attach the LEDs to the back?
3) How would I fasten the plastic piece to the aluminum faceplace without screws? It would be nice if it could just snap into place.
Note: The TentLabs Hybrid Amplifier assembly manual has a similar plastic screen, but it's a little hard to tell from the images how it's actually fitting onto the faceplate.
Thanks for any insight you can give.
I'm designing an enclosure for a simple chip amp with a 4-input channel selector. I really like the idea of having a rectangle of some sort of plastic with the input named backit via LED when selected, similar to the Audiant 80i, pictured below:
I'm not really sure how I would create the plastic part. My only thought was to get it made at some 3D printing place like Ponoko, although I'm not sure if there's a better way to do it.
So a few specific questions:
1) What would be a good place to get a custom piece like this made?
2) What would be a good way to attach the LEDs to the back?
3) How would I fasten the plastic piece to the aluminum faceplace without screws? It would be nice if it could just snap into place.
1) forget 3D printing, this has been done for , say, 70/80 years without them ... or hundreds if you consider engraved coloured glass in Cathedrals.
2) find a shop specialized in engraved nameplates so common in offices, Banks, etc. , which also usually handle trophies and such.
3) you need a piece of transparent acrylic, where they first spray black the back side, let it dry thoroughly, and then engrave the letters, also from the back.
Maybe even there is a commercially available "sandwich", mostly transparent acrylic with a thin black layer behind.
If you put a Led behind each label and light it, you'll see the word.
Make a PCB which supports and connects the LEDs in the proper place.
4) to mount it without screws, glue the engraved acrylic to a larger piece, and mount it from behind, so the engraved rectangle just fits in the window.
Apply your favorite glue to the surrounding (invisible) frame.
5) post pictures when you finish it.
You could also do the same thing with a small piece of Glass.
Spray paint black, Go to the craft store and buy an acid etching kit for glass, make a stencil and brush on the acid.
Then you just let the acid do the job and wipe it off when the instructions say to.
Spray paint black, Go to the craft store and buy an acid etching kit for glass, make a stencil and brush on the acid.
Then you just let the acid do the job and wipe it off when the instructions say to.
Wow, this does seem much easier than I was thinking. I could even do something simpler, like get some transparency film printed at Kinkos and sandwich it between the two pieces of acrylic.
You can print on special transparency film in an ordinary inkjet printer. The stuff we use for making PCB artwork.
If that's any use 🙂
Mega-UK - Artwork Films
If that's any use 🙂
Mega-UK - Artwork Films
At least the German representative of Front Panel Express (Schaeffer AG) has a prefabricated sandwich material especially for that purpose. Acrylic base and an opaque cover layer that can be removed in the engraving process.
Preparing the part is quite easy with the front panel designer software they provide.
Rundmaus
Preparing the part is quite easy with the front panel designer software they provide.
Rundmaus
LCDs are much more flexible, I suppose, but are far less cool than backlit text.
I guess the COOOOOOLEST way to do it would be to have some kind of backlit VU meter, although this is likely wishful thinking. Unless...anyone have any ideas on how to accomplish that?

I guess the COOOOOOLEST way to do it would be to have some kind of backlit VU meter, although this is likely wishful thinking. Unless...anyone have any ideas on how to accomplish that?
same way as using the backlit.............perhaps easier this way.
Open the VU meter, stick on the lettering. On the back, drill holes for the LEDs and wire up!
Open the VU meter, stick on the lettering. On the back, drill holes for the LEDs and wire up!
LCDs are much more flexible, I suppose, but are far less cool than backlit text.
maybe even a touch-panel........................
I think that probably sounds easier than it actually is; how would one just "open up" a VU meter? I'm looking at one now and it's a solid piece of plastic, plus the demarcations are screen-printed on the back of the VU.
It would be great if there was a VU meter that had a blank removable back so that it could be easily customized.
It would be great if there was a VU meter that had a blank removable back so that it could be easily customized.
strange. the VU meters I have seen can be 'popped' apart. Maybe look for a conventional meter that you can pry apart and change the scale?
- Status
- Not open for further replies.
- Home
- Design & Build
- Construction Tips
- Construction tips for an LED backlit input selector?