What is the best way (safest way) to remove a dust cap and not do harm to it or the driver cone?
Xacto knife and a pair of tweezers?
Prep with a solvant of some kind first?
Apply heat or cold?
Say a prayer to the Gods first?
Goal: I want to take a peek under the dust cap for some mods (adding a whizzer) I have in mind. However if there is something under there I don't like or does not apply to my intended mod, then I want to glue the original dust cap back down.
I have removed a couple of dust caps before, not always on purpose though.
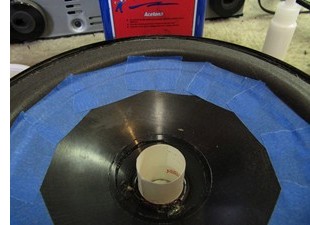
I have a small flatblade screwdriver that i ground down to a very fine chisel point. not too sharp but sharp enough to gently work my way around the dust cap in small increments. I will generally inspect the cap for any edge that hangs over a bit without glue and start there. But some caps that have glue all the way around well...I usually take an exacto and just cut the cap as close to the glue as i can and then work the glue off from the inside out once the cap is off. then replace the cap with a new cap and reglue...
Thanks Zero-Cool, that sounds like a slow and easy method.
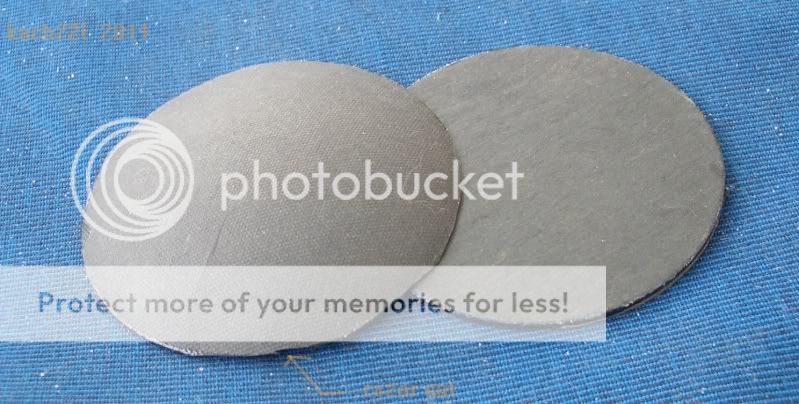
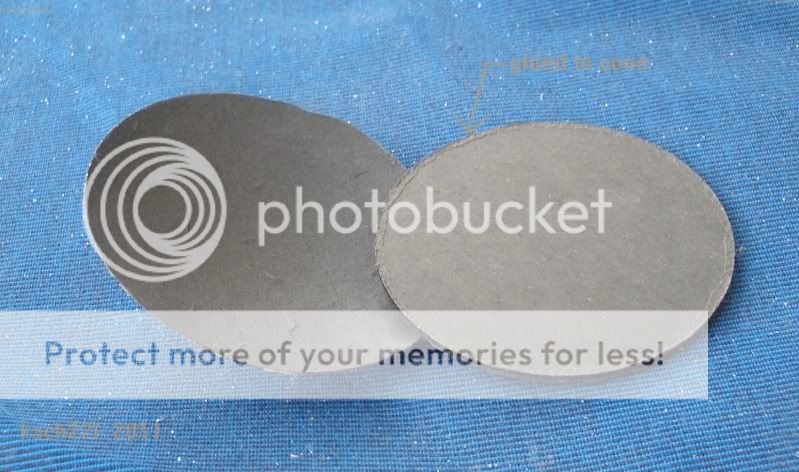
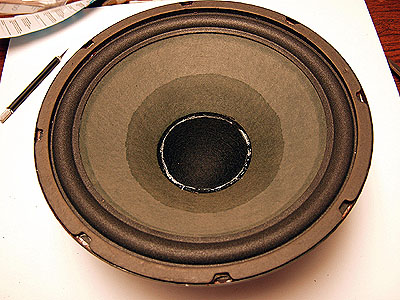
Most of the cheap driver dust caps I've removed have been vented fabric. However I did have to replace my Martin Logan Aerius 8" woofer at one time because it buzzed. I took apart the old driver a couple of years ago after having stored it for a dozen years and salvaged the dust cap. It had a thick flat plate under the dome cover, this was a surprise to me.
Is this double plate normal for a rear vented driver design?
http://s184.photobucket.com/albums/x295/kach22i/Stereo/
Last edited:
Is this double plate normal for a rear vented driver design?
They may have used it to add a bit of mass.
I refoamed some woofers and I just held the razor knife flat against the cone and ran it around perhaps 1/8" away from the glue joint, leaving a flap, then I just tacked it back in a few places, and when I tested them it didn't rattle so I left it. The cut and glue are only visible from a couple inches away.
tacked it back in a few places
So the glue joint is non-continuous?
Overall it sounds like how they do a breast implant - though the nipple surround.
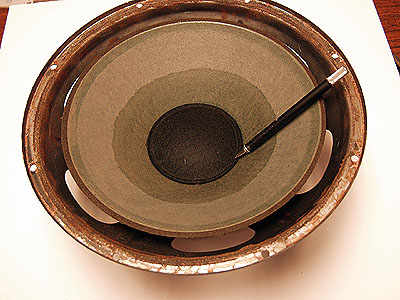
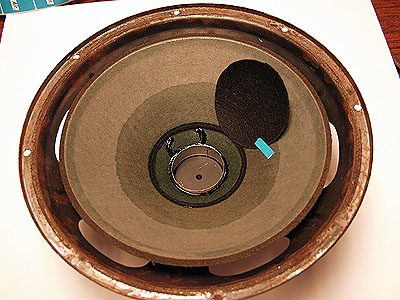
Do you have any photos?
Of the dust cap, not of breast implants.
This Decware post answers some of my questions.
Speaker Foam Edge Repair Online Instructions by DECWARE
Speaker Foam Edge Repair Online Instructions by DECWARE
Found another goodie.
May 2010: Speaker Rebuilding in 12 Easy Steps*
StereoMan Tips and Tricks
May 2010: Speaker Rebuilding in 12 Easy Steps*
StereoMan Tips and Tricks
Step 4 – Shim the voice coil. Carefully cut away the dust cap in the center of the speaker cone with a SHARP exacto knife or box cutter. Cut right at the perimeter to avoid damaging the voice coil, and don’t cut too deep or you’ll cut through the cone! In addition, I advise scoring a small (1/4″) radial line across the boundary between dust cap and cone, so you can tell exactly how the dust cap should be oriented when you glue it back on.
- Status
- This old topic is closed. If you want to reopen this topic, contact a moderator using the "Report Post" button.
- Home
- Design & Build
- Construction Tips
- How to remove a dust cap