Hi,
I would like to give this small contribution of my DIY acoustic panels build process.
They are very efficient, compact, looks very nice, good finish and extremely lightweight. You can do in any color combination you want.
I will post here the process for a 60x60cm 2" (5 cm) thick. But any other size the process is the same.
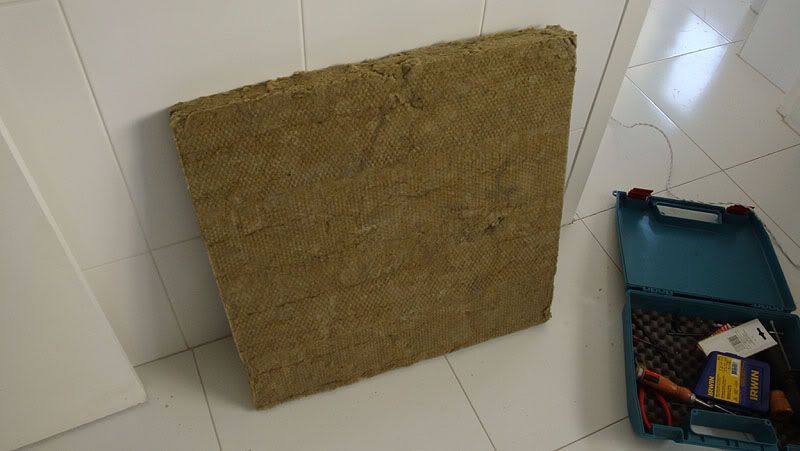
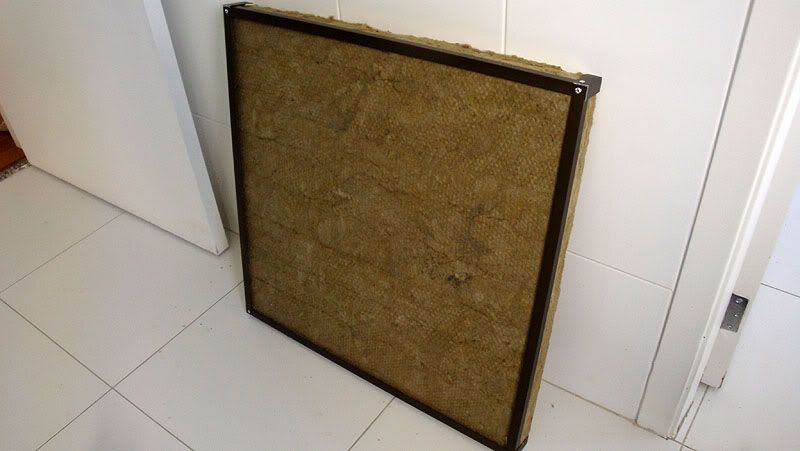
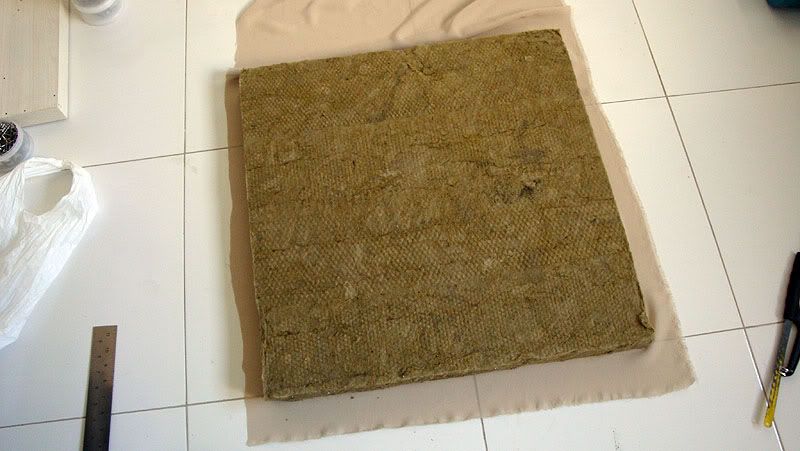
Absorber material: I use rockwool rigid panel, density 80, 60x60cm and 2" thick. They are very good for first reflection points. For corner basstraps, a minimum of 4" must be used. I bought them in 120x60 cm in my local market and use a bread knife to split them off easily. Rigid fiberglass can be also used. Avoid using foams.
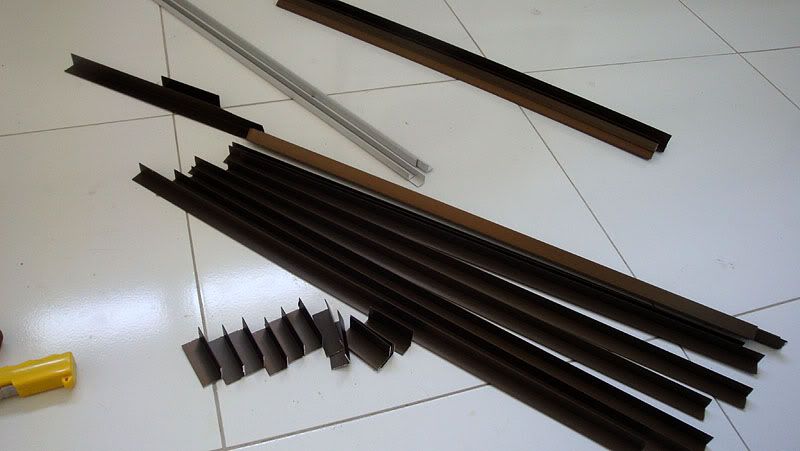
Framing: Aluminum corners used for protecting walls corners. There are a variety of sizes, colors and finishes. I choose a brushed dark brown.
Since the panels have 60x60cm/2" I used a small saw to cut the pieces. 8 pieces with 60cm and 4 with 5cm (2").
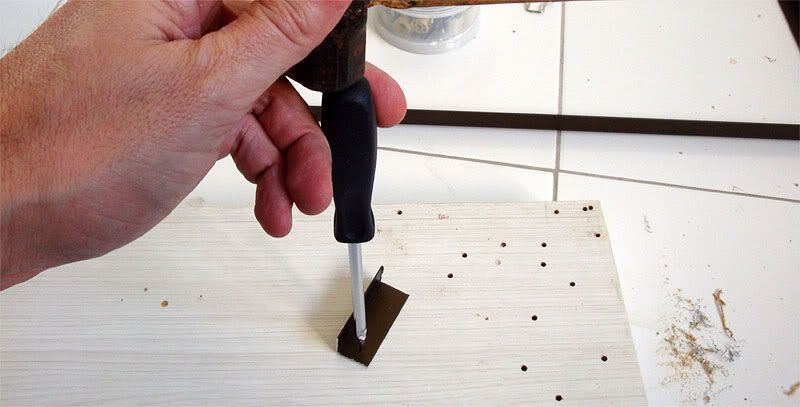
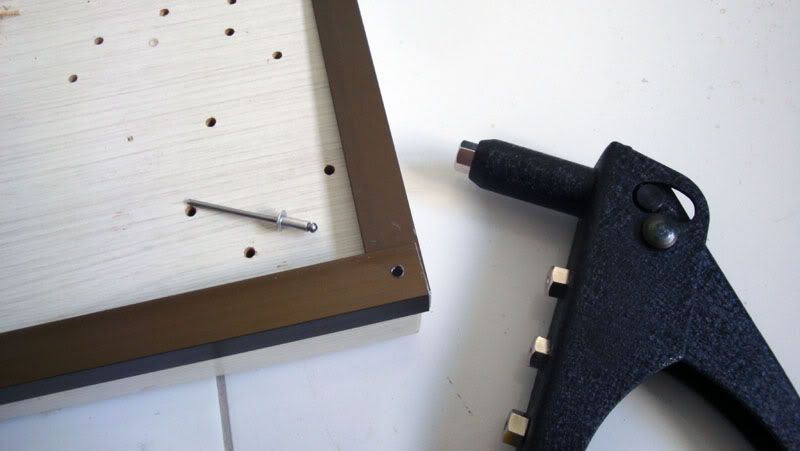
Use puncture tools to prepare the point where you want to make the holes.
We are going to use rivets to join the parts, so make sure the hole has the same rivet diameter.
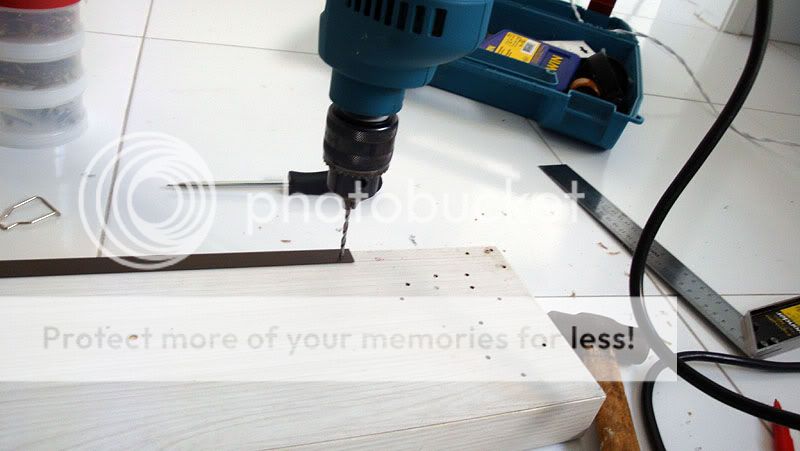
A riveter provides a very tight, yet adjustable, joint.
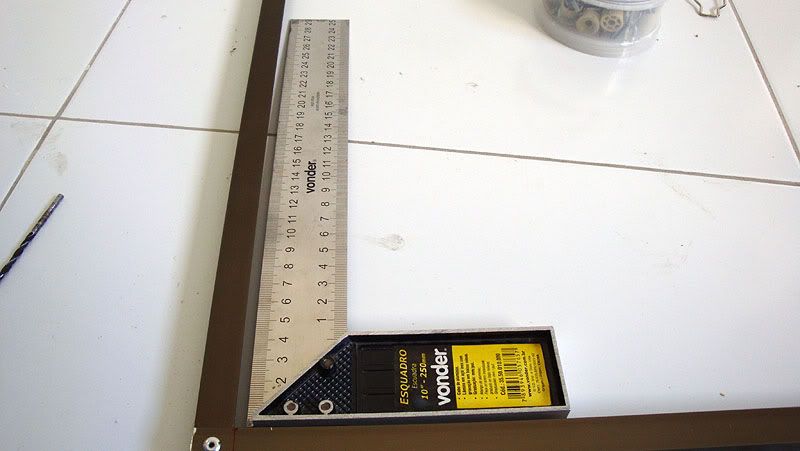
Make sure the first framing set is square. You can still adjust if needed.
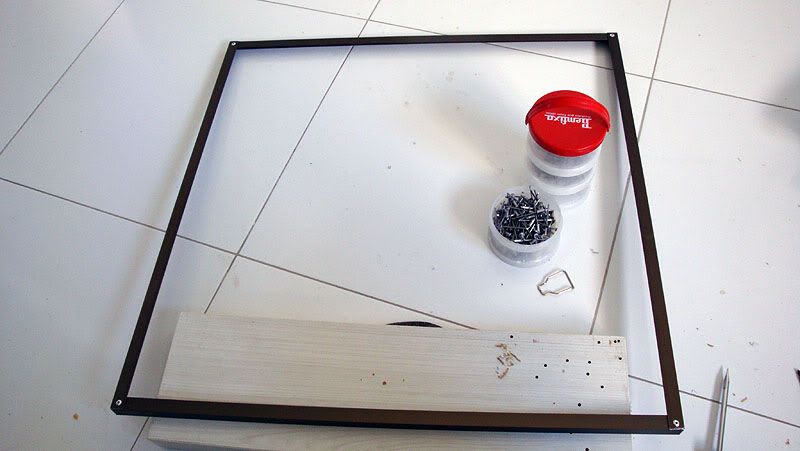
Put the 2" framing and prepare the second part of the framing. Of course, don't join them yet.
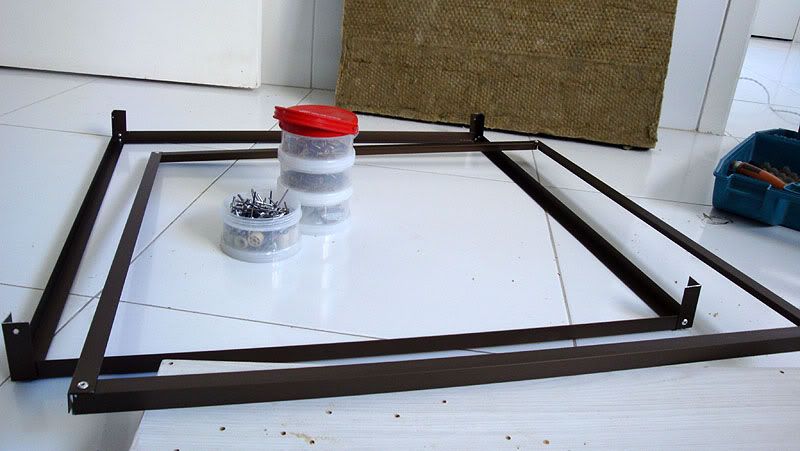
Do a pre-fit to make sure everything is ok.
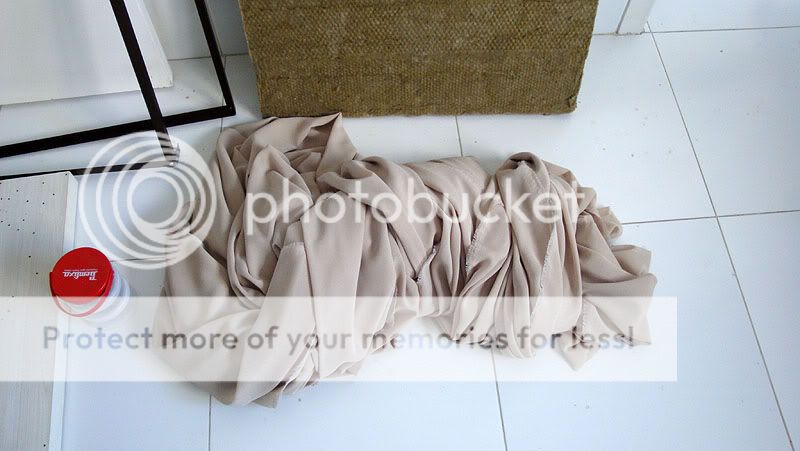
The fabric: Choose a soft and breathable fabric in the desired color. Be careful when choosing the fabric because it must not interfere in the absorption. Should be acoustically "transparent".
I used a very efficient softness tool to make sure it is suitable.
Cover the rockwool piece as shown, leaving enough fabric to close the sides.
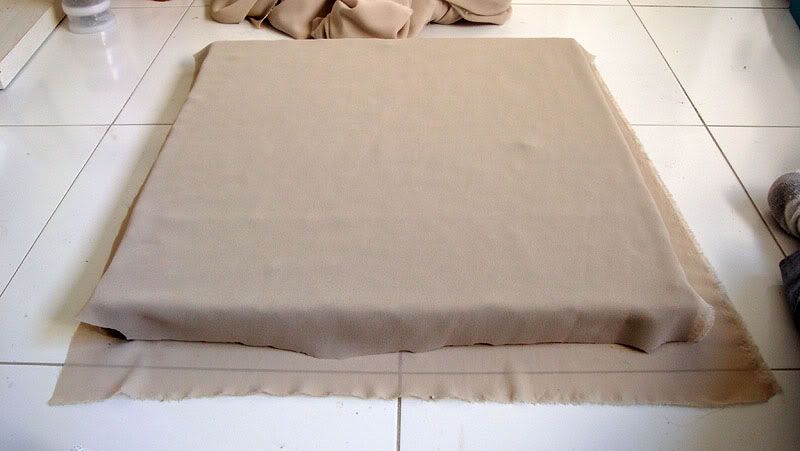
Pull slightly the fabric and cut along the corner as shown. Don't worry about the finish because it will be hidden by the aluminum frame.
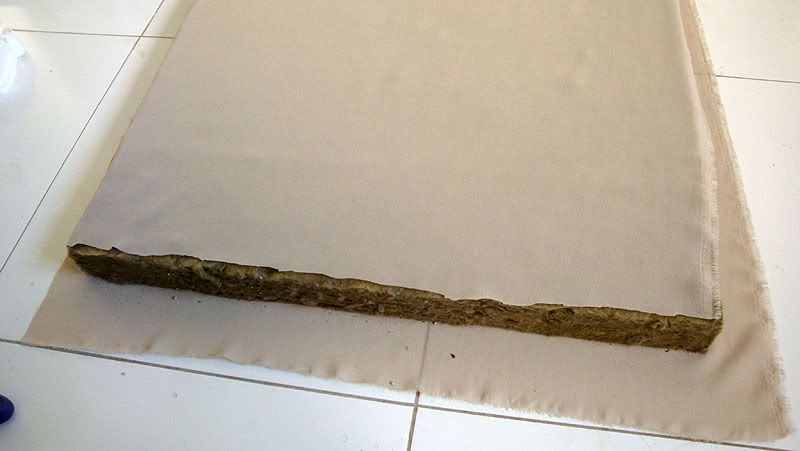
Using a glue gun, apply a row of glue, pull the fabric that come from the bottom and glue it. You should always pull the fabric stretching it to avoid wrinkles.

Cut the remaining material as close as possible to the glue. Again, don't worry about the finish since it will be hidden. The bottom line is to pack the rockwool with fabric being careful to make the joints in the corners so it can be properly hidden by the framing.

Fit the pack and rivet the final piece. You can use an old credit card to adjust the fabric that can wrinkle by stretching it to the corners.
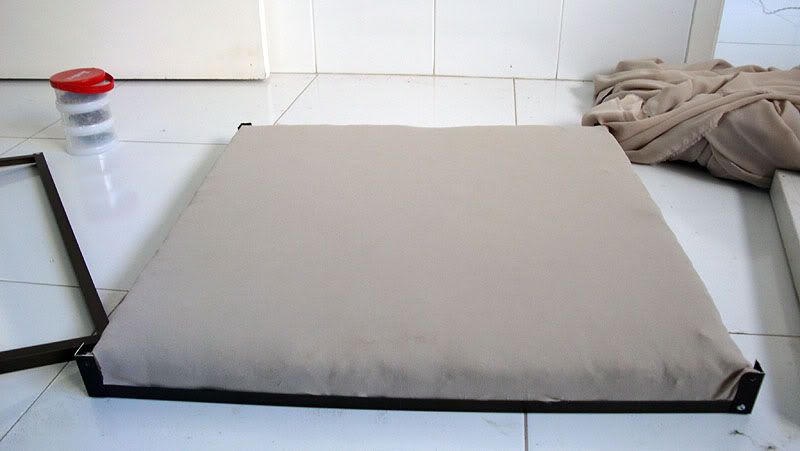
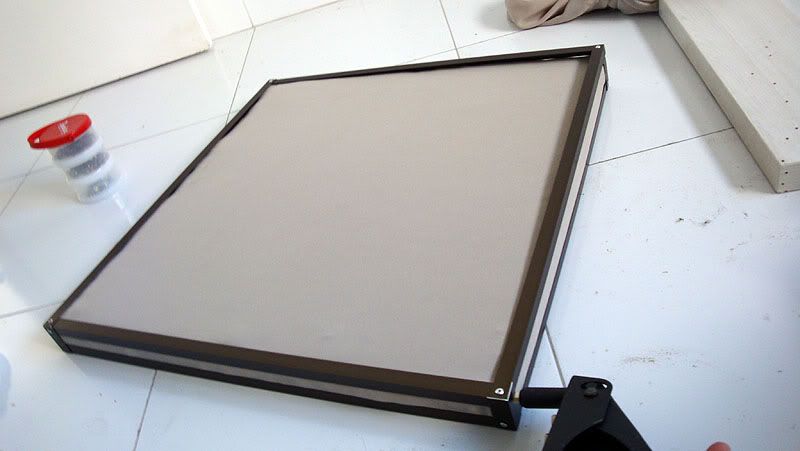
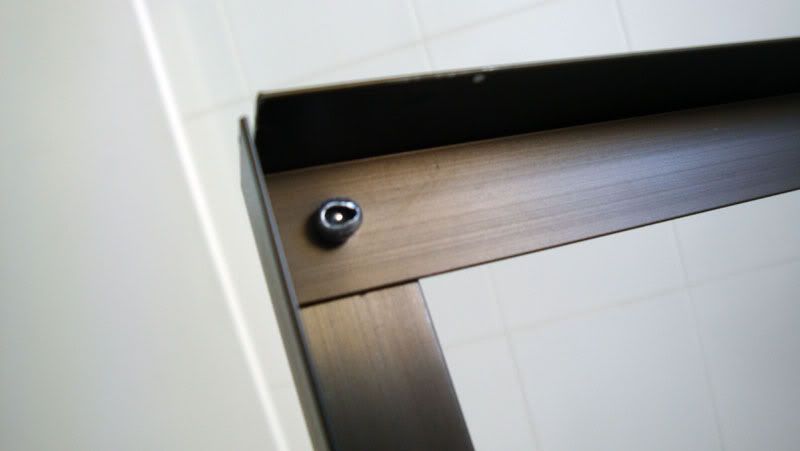
Here it is. A perfectly squared and nice finished acoustic panel. You can use furniture tri-corner protector to add additional finishing and hide the rivets.
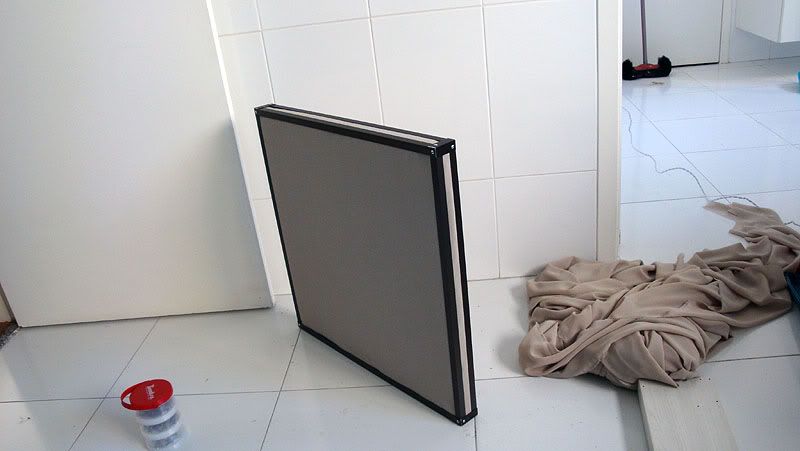
The final result is a very clean visual and a very good result for the sound.
I hope you enjoy it.
thanks
HF
I would like to give this small contribution of my DIY acoustic panels build process.
They are very efficient, compact, looks very nice, good finish and extremely lightweight. You can do in any color combination you want.
I will post here the process for a 60x60cm 2" (5 cm) thick. But any other size the process is the same.
Absorber material: I use rockwool rigid panel, density 80, 60x60cm and 2" thick. They are very good for first reflection points. For corner basstraps, a minimum of 4" must be used. I bought them in 120x60 cm in my local market and use a bread knife to split them off easily. Rigid fiberglass can be also used. Avoid using foams.
Framing: Aluminum corners used for protecting walls corners. There are a variety of sizes, colors and finishes. I choose a brushed dark brown.
Since the panels have 60x60cm/2" I used a small saw to cut the pieces. 8 pieces with 60cm and 4 with 5cm (2").
Use puncture tools to prepare the point where you want to make the holes.
We are going to use rivets to join the parts, so make sure the hole has the same rivet diameter.
A riveter provides a very tight, yet adjustable, joint.
Make sure the first framing set is square. You can still adjust if needed.
Put the 2" framing and prepare the second part of the framing. Of course, don't join them yet.
Do a pre-fit to make sure everything is ok.
The fabric: Choose a soft and breathable fabric in the desired color. Be careful when choosing the fabric because it must not interfere in the absorption. Should be acoustically "transparent".
I used a very efficient softness tool to make sure it is suitable.
Cover the rockwool piece as shown, leaving enough fabric to close the sides.
Pull slightly the fabric and cut along the corner as shown. Don't worry about the finish because it will be hidden by the aluminum frame.
Using a glue gun, apply a row of glue, pull the fabric that come from the bottom and glue it. You should always pull the fabric stretching it to avoid wrinkles.
Cut the remaining material as close as possible to the glue. Again, don't worry about the finish since it will be hidden. The bottom line is to pack the rockwool with fabric being careful to make the joints in the corners so it can be properly hidden by the framing.
Fit the pack and rivet the final piece. You can use an old credit card to adjust the fabric that can wrinkle by stretching it to the corners.
Here it is. A perfectly squared and nice finished acoustic panel. You can use furniture tri-corner protector to add additional finishing and hide the rivets.
The final result is a very clean visual and a very good result for the sound.
I hope you enjoy it.
thanks
HF
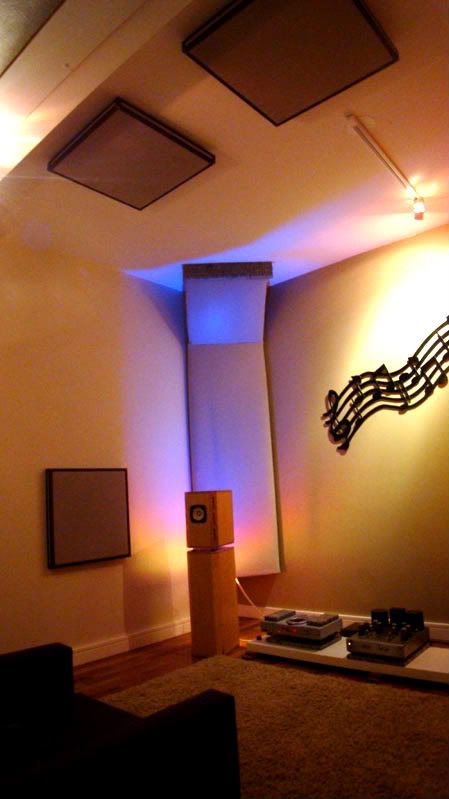
Nice work - with those high ceilings the room tends to sound pretty good already... I'd probably have opted for more side wall coverage with some diffusion.
The reason for that is that absorbers can be thought of as just "open windows" at frequencies where the absorption is high... otoh a larger area with diffusion eliminates a high percentage of direct HF reflection but keeps the overall reflected energy high enough to keep the sound field stable. In all cases the reflection time remains the same, only the amplitude and angle of reflection can change...
Some absorption with diffusion can be good...
Compare the wall with the floor, and then with the ceiling, that is always interesting.
_-_-bear
Hey... I'd have opted for the side walls to be diffuse and slightly absorptive, and the rear wall to be more absorptive than diffuse... making the rear wall seem to be sort of farther away, but if it sounds good, it is good. This according to Count Basie I am told... 
_-_-bear
_-_-bear
Very nice panels. I like the idea of using the metal frames. Just a suggestion, if you space them about the width of the material you'll improve their functional range. I actually work a lot with acoustics, but I'm a poor physics student so I build all of my own treatments to save monies.
Thanks.
How many hours on the panels? Or the whole megillah? The diffuser took a long time, but the panels weren't too bad. The smaller panels were faster, less sanding and I could use a bit to drill the holes. The bass trap I had to route the holes and took more time to sand. I was pretty lazy with the sanding tho. I could of done a lot more, I just did enough that it wouldn't look bad. If you are talking about everything, I get tired thinking about it as well, lol. It's been a long ongoing project. On the other hand I haven't spent that much compared to most high end setups that I've worked with, the results won't come close to some of the 500k+ setups, but for what I spend on it I'm really happy.
Your post reminded me I had a rivet gun years ago and I have no idea where it is now.
- Status
- This old topic is closed. If you want to reopen this topic, contact a moderator using the "Report Post" button.
- Home
- Design & Build
- Construction Tips
- Acoustic Panels (lot of pics)