C18 to C21
I see these are part of the second channel, why are they marked on the PCB?
In reply to the last post.
This kit is in full production, with generaly the highest aclaim under the GCs so far. You can order PCBs or kits from twisted pear just scroll back a page or 2 and look for a link in one of the signatures.
I have received mine way out in South Africa in about 2 weeks.
C18 to C21
I see these are part of the second channel, why are they marked on the PCB?
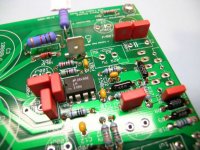
Not sure what you mean. Both channels are identical. Both use the same parts and have the same part numbers. Here are the parts mounted...
Attachments
http://www.diyaudio.com/forums/attachment.php?s=&postid=762840&stamp=1131546060
according to this diagram for instance, C18 and C19 are on the Positive rail to the left channel
But I looked at another one now, http://www.diyaudio.com/forums/attachment.php?s=&postid=762845&stamp=1131546741
which seems to have them in under the right channel
according to this diagram for instance, C18 and C19 are on the Positive rail to the left channel
But I looked at another one now, http://www.diyaudio.com/forums/attachment.php?s=&postid=762845&stamp=1131546741
which seems to have them in under the right channel
Nordic, there is only one channel in my Schematic. Make sure you refer to my schematic. Mauro's schematic is for a stereo pair and has different names for a few parts.
My circuit has a few extra (and optional) bypass caps which use the same names as a few caps on Mauro's second channel.
The second schematic in your post is the one you should use.
C18 and C19 are PS bypass caps.
Cheers!
Russ
My circuit has a few extra (and optional) bypass caps which use the same names as a few caps on Mauro's second channel.
The second schematic in your post is the one you should use.
C18 and C19 are PS bypass caps.
Cheers!
Russ
I would like opinions from those who have experience with this kits from Russ and Brian on how difficult or easy it is to put together for someone like me who has no electronic knowledge at all?
This projects sound rather interesting and my experience so far is populating a simple GC successfully.
Opinions will be most appreciated. Does the kit comes with simple detailed instructions and markings for the likes of me?
Thanks.
Shehzad
This projects sound rather interesting and my experience so far is populating a simple GC successfully.
Opinions will be most appreciated. Does the kit comes with simple detailed instructions and markings for the likes of me?
Thanks.
Shehzad
Safetyman:
I don't really think this amp is so complicated that it warrants detailed instructions apart from labeled components and PCB markings, as well the pdfs from Mauro. If you completed a GC then you should already know the basics like polarity of electrolytic caps and how to hook up transformers, etc")
Anyone care to comment on how high or low a voltage this thing can take?
I don't really think this amp is so complicated that it warrants detailed instructions apart from labeled components and PCB markings, as well the pdfs from Mauro. If you completed a GC then you should already know the basics like polarity of electrolytic caps and how to hook up transformers, etc
Anyone care to comment on how high or low a voltage this thing can take?
This is a very good kit. Parts are all labeled and all you do is look at the pcb which has the same number and also ie. the resistor value; cap polarity is indicated with a + sign on the pcb. Should have a vom to confirm r values. Read the whole thread, lots of info. there.
This is an amp with a unique personality; you will be happy to build and own it. The parts kit is of good quality and inmho very professional.
time to do chores!
cheers
doggy
This is an amp with a unique personality; you will be happy to build and own it. The parts kit is of good quality and inmho very professional.
time to do chores!
cheers
doggy
eVITAERC said:Safetyman:
I don't really think this amp is so complicated that it warrants detailed instructions apart from labeled components and PCB markings, as well the pdfs from Mauro. If you completed a GC then you should already know the basics like polarity of electrolytic caps and how to hook up transformers, etc
Anyone care to comment on how high or low a voltage this thing can take?
Thanks for the opinions and encouragements. I have completed what you mentioned above once, just recently.
I guess I should keep the passion going now that it's at it's highest. Yeah, what would be a good voltage to work with? I have 3 trannies that I can use. A 24-0-24 (5amps) or 24-0-24 (8 amps) and a 22-0-22 ( 10amps) ? Which would be a good choice or none at all?
If I do not implement any mods in this thread and build the amp as is from Twisted Pear's kit, how good would it be. I am trying to see how close it will get to the Aleph 3 or whether it can exceed the legendary porcupine.
Hi Nordic, I will see what i can do. there is a few items that i will have to check that is different to what i use.
1 bridge rectifier
2 .49 7W resistor (radial) will have to check if i can get that, might have to use a axial
3 1uf cap. i will need the pin spacing
the rest would be the same to what i am using
mail me your contact details and i will get the price for you. if we ar lucky we can have it to you by tuesday/wednesday depending if I get all the stuff. otherwise it is better to wait for the stuff on friday
 Wow!!! So that means I am still underpowering my existing GC with the 250VA 8 amps tranformer. Is that right?
there is a few items that i will have to check that is different to what i use.
1 bridge rectifier
The bridge we use is a Diodes GBJ804, if that makes the search any easier. That's the only model I could find with the correct pin spacing and an 8A rating (well, I did find another one for twice the cost, same specs).
- Home
- Amplifiers
- Chip Amps
- My "audiophile" LM3886 approach