I am seriously jealous of your CNC machining capability.
I was seriously thinking about taking some CNC classes. Man oh man, what I couldn't build then. I'm getting up in years though, and my eyesight is terrible. Plus I'm not going to buy a CNC lathe just for projects.
Nice work.
I was seriously thinking about taking some CNC classes. Man oh man, what I couldn't build then. I'm getting up in years though, and my eyesight is terrible. Plus I'm not going to buy a CNC lathe just for projects.
Nice work.
Hi Eddie,
Thanks for your comment!
It's a pity that you didn't took those classes, If you have access to machines like this, and you're able to program them properly using either CadCam or "ManualCam" there's not a lot that you can't make!
Perhaps adding a bunch of lights and good glasses might help?
Personally, i think milling is more interesting than turning. There's an extra dimension, and many products you think of making on a lathe can be milled as well.
The other way around is going to be a bit more difficult ;-)
Good luck on your projects! And if you're really in need of some parts, there will always be people willing to help you out. Feel free to ask me, or someone over there in the States.
- Peter
Small update
Hello everyone,
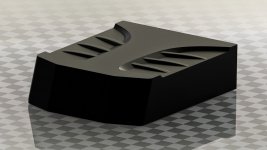
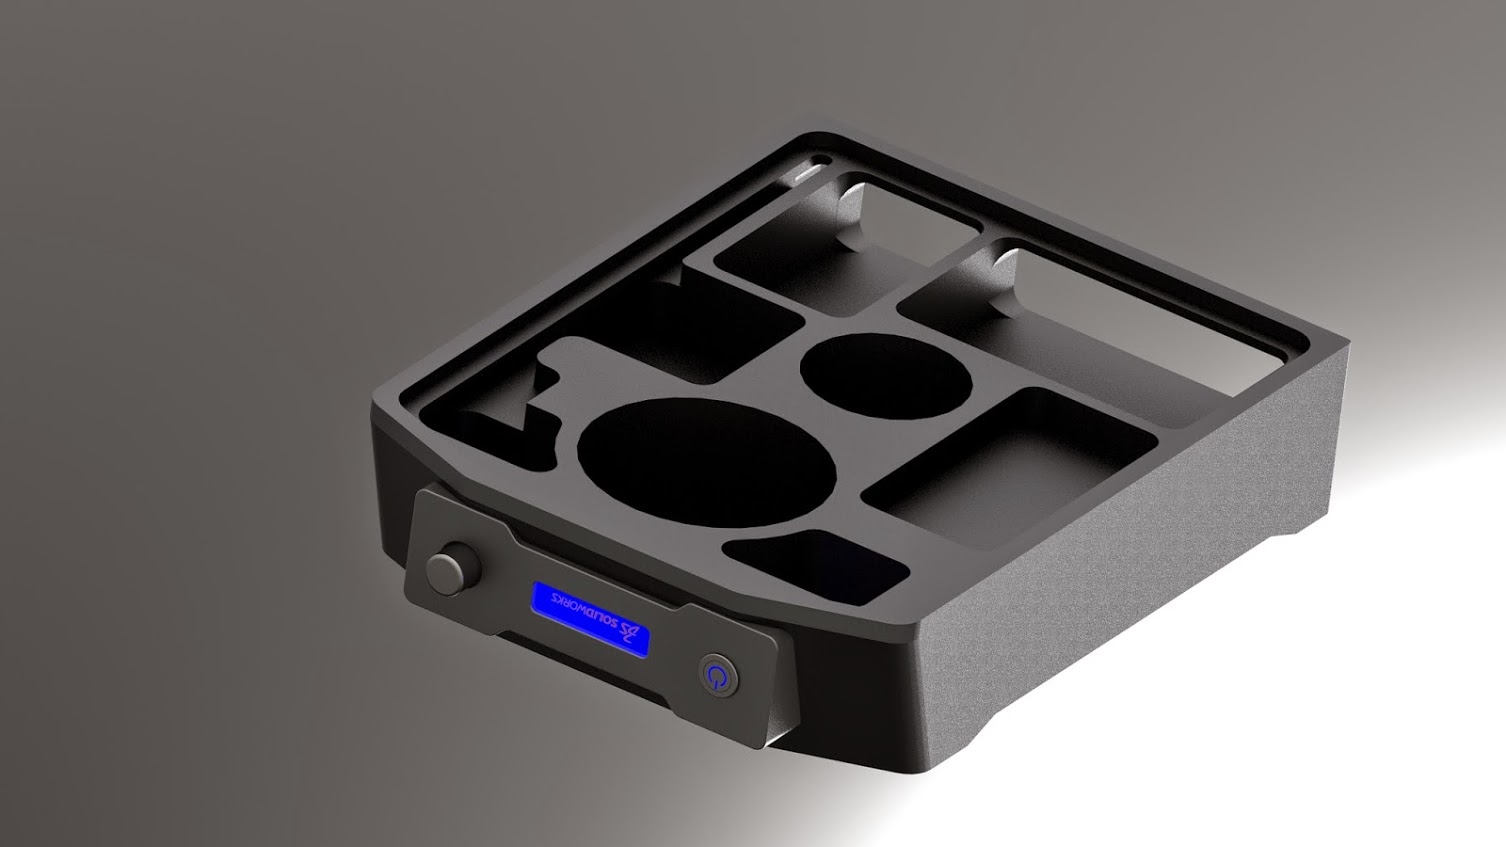
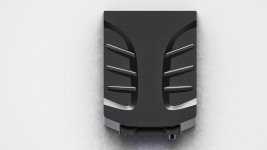
I've been playing around the past few days with an idea that i had in mind. It's not yet finished, but i'd like to show a rough model of what i'm thinking about.
It still misses some details, i think the sides are a bit boring and of course the edges aren't finished yet. But the major thing is the missing front.
Just let me know what you guys think, color? Shape? With, depth and height ratio?
Right now i'm at 300MM wide, 400MM deep and 100MM high. My Cad program calculated i'm at about 29KG right now.
This case will be on a diet, but it's definitively going to be heavy!
Enough talk, time for rendered pics!
I'd really like some feedback, feel free to let me know if it's terrible
Hello everyone,
I've been playing around the past few days with an idea that i had in mind. It's not yet finished, but i'd like to show a rough model of what i'm thinking about.
It still misses some details, i think the sides are a bit boring and of course the edges aren't finished yet. But the major thing is the missing front.
Just let me know what you guys think, color? Shape? With, depth and height ratio?
Right now i'm at 300MM wide, 400MM deep and 100MM high. My Cad program calculated i'm at about 29KG right now.
This case will be on a diet, but it's definitively going to be heavy!
Enough talk, time for rendered pics!
I'd really like some feedback, feel free to let me know if it's terrible
Attachments


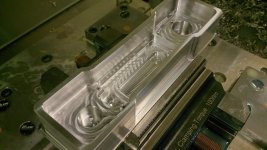
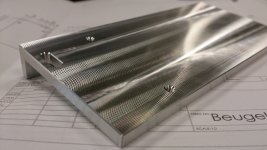
You...machined a heat sink out of solid stock? OK, I am officially impressed. The thing looks great!
Hi Bentsnake,
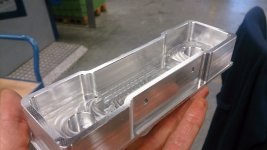
Yes I did, in fact, the whole amplifier will be machined out of solid stock.
I'll get one big chunk of aluminum and the whole case will be made out of one part...
:-D
Nice to hear your kind comment!
Hi!
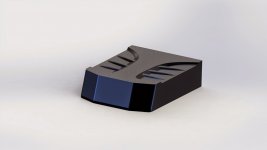
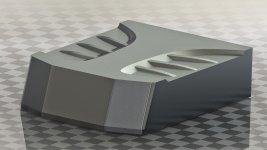
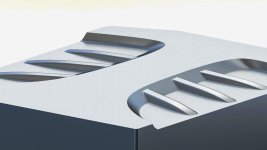
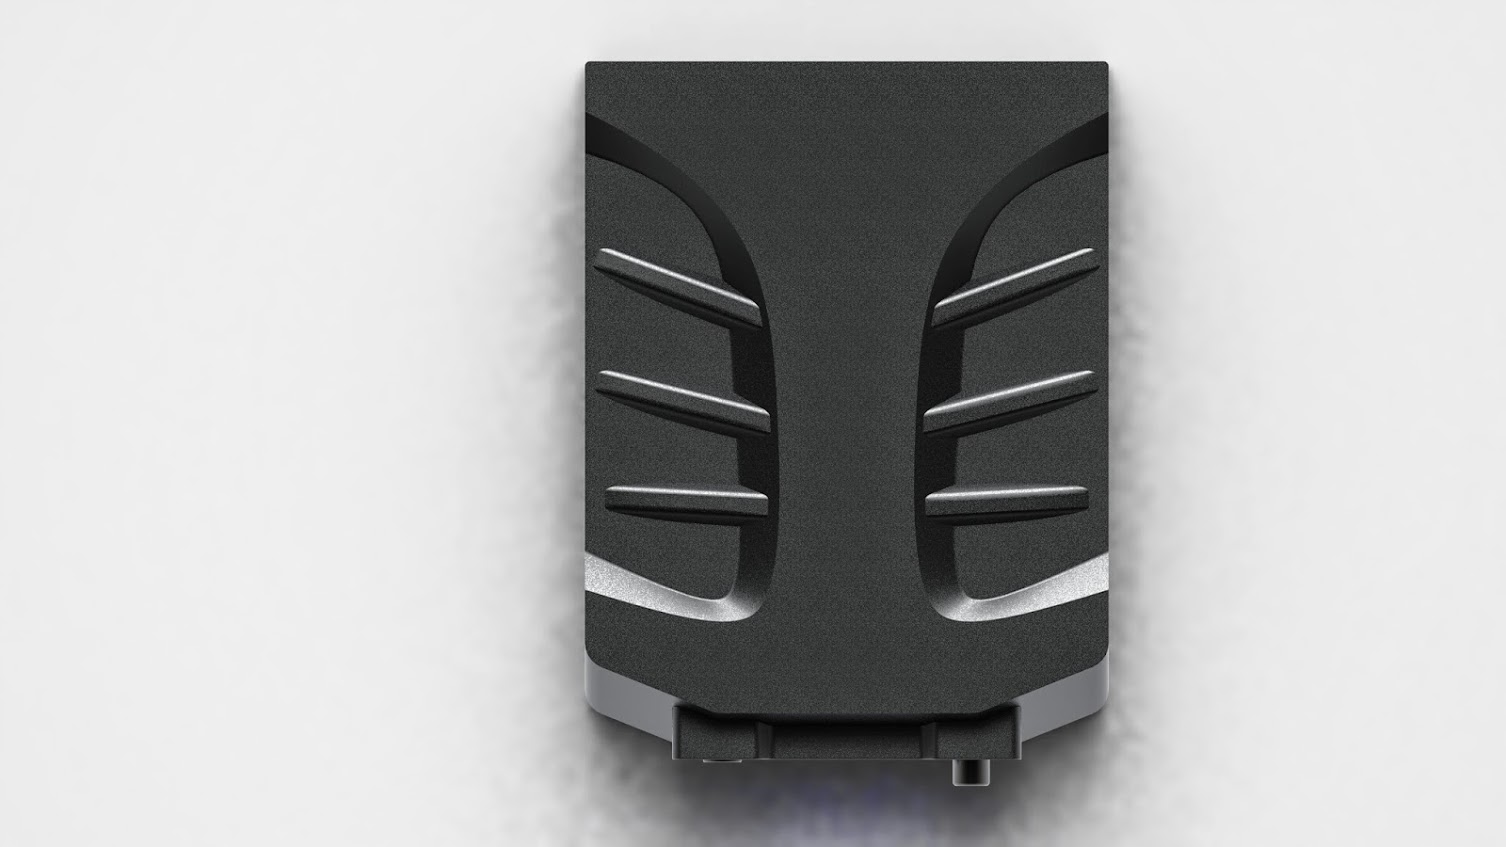
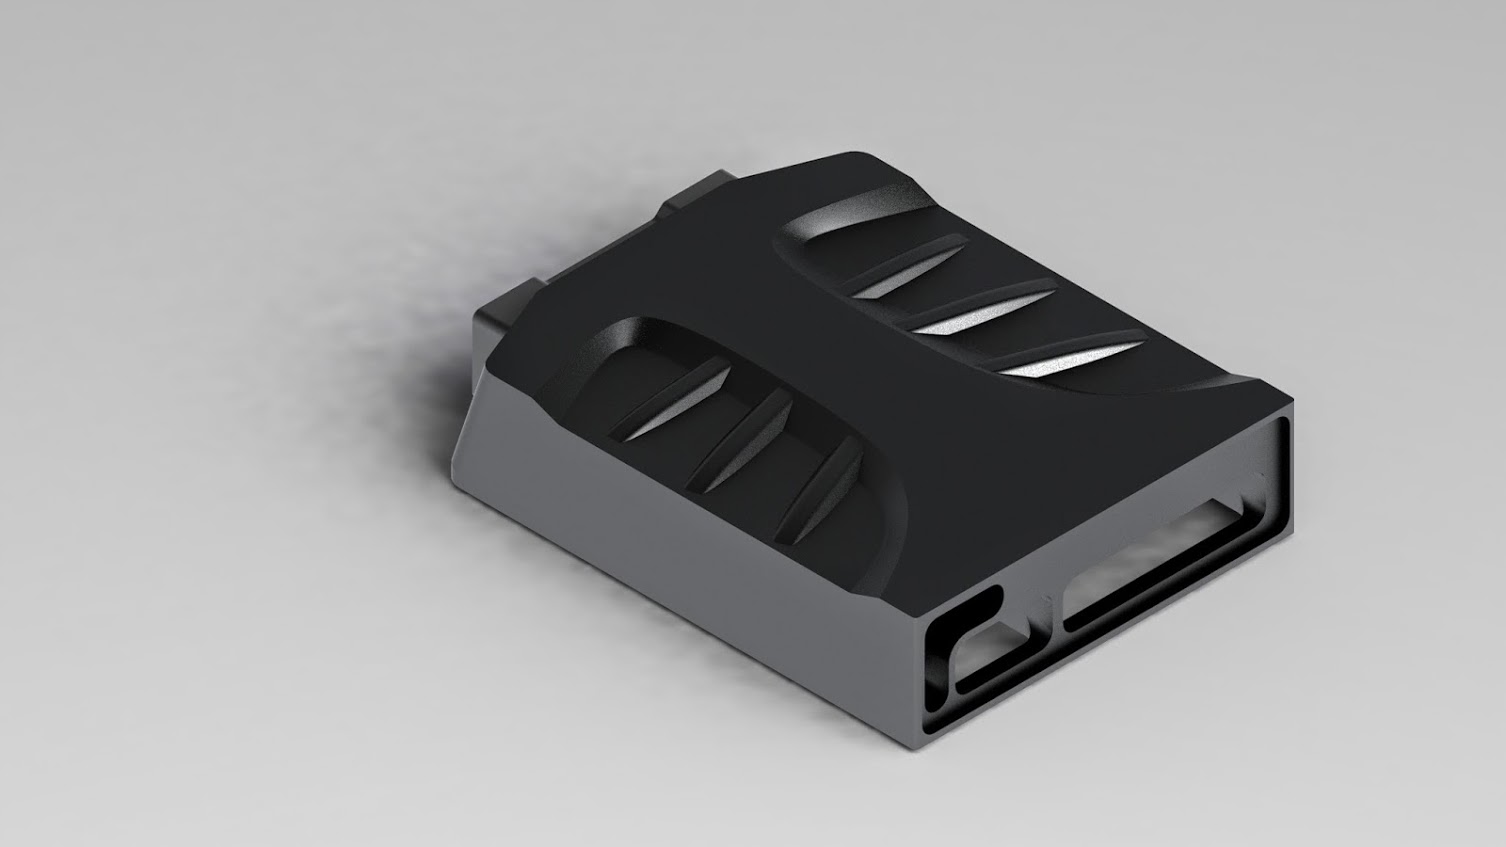
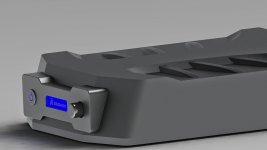
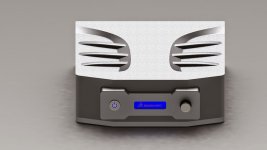
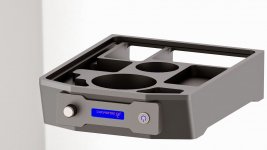
Just got back from vacation, started right away working (read: hobbying) on my amp again.
I've had some time to think about it in my vacation. And i've actually
set a goal: Get all hardware designs done this week.
I've included just a few pics of the progress.
I hope to start milling somewhere this month
I think i'll go for a dark grey anodizing for the body and a light (clear) anodizing for the front.
The colors on the renderings aren't perfect...
Attachments


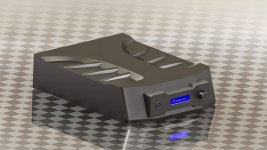
Very Cool! Insectoid and Darth Vaderish!
29 kg after milling!? Hefty!
Hi Etocynned,
Thanks!
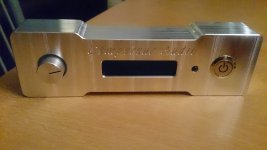
It was meant to have a bit of a futuristic look. I think it's an success if even a complete audio n00b sees within a second that it's something special ;-).
Material is ordered and should arrive probably tomorrow or the day after.
I'm really making progress on the rest of the designs but i'm also working on my baby's room (my first one is on the way
)I'll post as soon as i've got new updates...
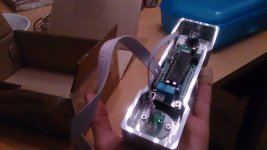
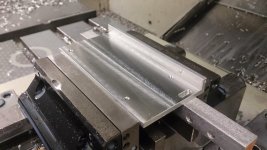
I've been working on some parts last week
I've made some parts last week.
two brackets to hold the PCB's and the front of the amplifier.
They came out really really nice!
I think you will also love them
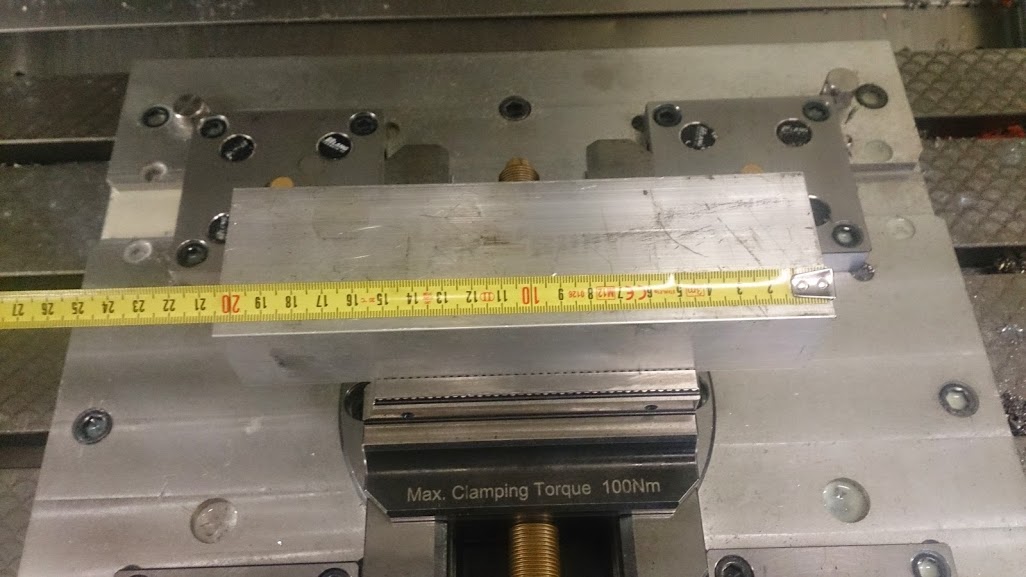
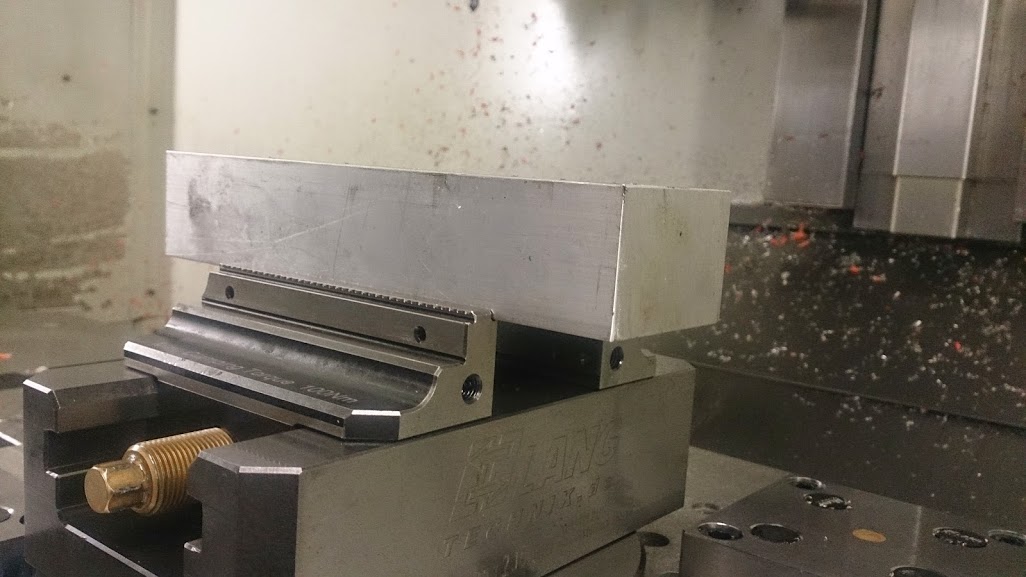


I think the result is better than i'd hoped for! Which is good!
I've made some parts last week.
two brackets to hold the PCB's and the front of the amplifier.
They came out really really nice!
I think you will also love them
I think the result is better than i'd hoped for! Which is good!
Attachments
-
 DSC_1249.JPG116.3 KB · Views: 638
 -
 DSC_1257.JPG88.6 KB · Views: 680
 -
 DSC_1254.JPG87.7 KB · Views: 649
 -
 DSC_1251.JPG85.8 KB · Views: 628
 -
 DSC_1247.JPG132.3 KB · Views: 626
 -
 IMG-20140903-WA0008.jpeg99.5 KB · Views: 629
 -
 DSC_1241.JPG131.4 KB · Views: 622
 -
 DSC_1239.JPG135.8 KB · Views: 642
 -
 DSC_1236.JPG96.2 KB · Views: 630
 -
 DSC_1235.JPG95.5 KB · Views: 639
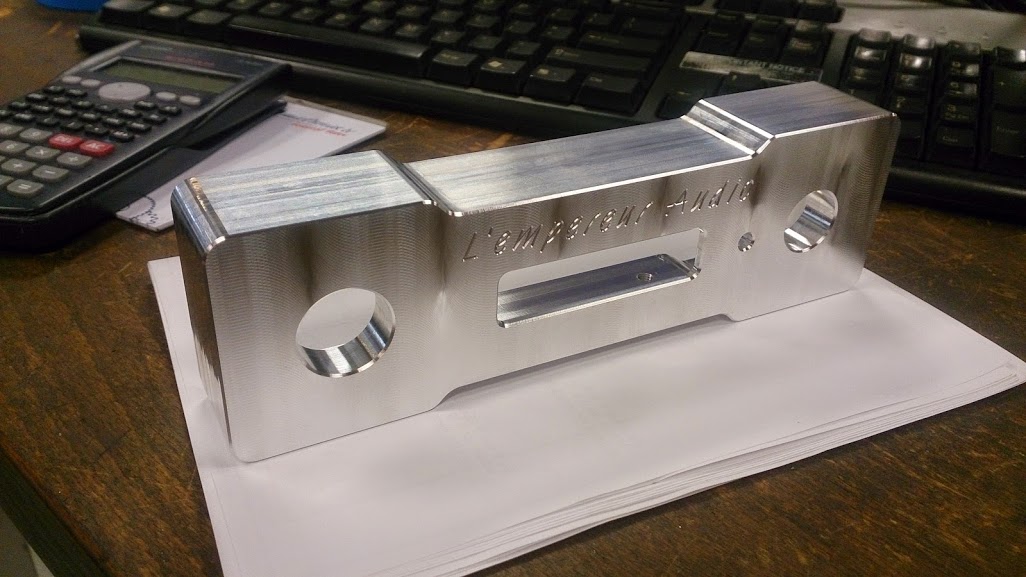
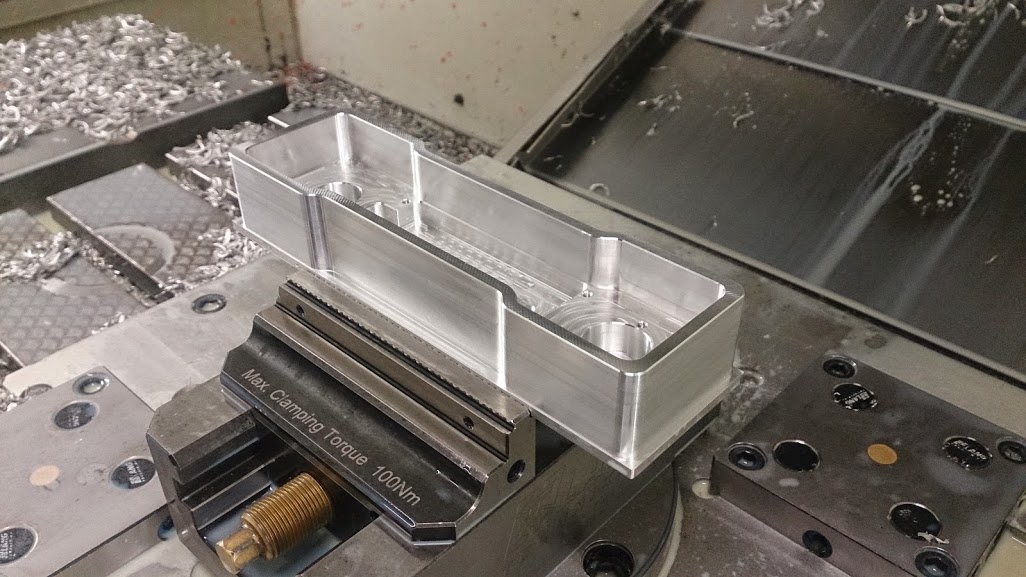
And the PCB bracket
Here some pic's of the PCB brackets.
It's only one on the pictures. That's because i screwed up the other one. I'll make a new one on monday! Haha. Oh well, **** happens!
And in an attempt to clean some of the more than 3000 pictures on my telephone i also deleted a few "making of" pictures of this bracket. It's not photo heavy, but then again, it's just a bracket. ;-)

These are some fancy brackets, aren't they?
Here some pic's of the PCB brackets.
It's only one on the pictures. That's because i screwed up the other one. I'll make a new one on monday! Haha. Oh well, **** happens!
And in an attempt to clean some of the more than 3000 pictures on my telephone i also deleted a few "making of" pictures of this bracket. It's not photo heavy, but then again, it's just a bracket. ;-)
These are some fancy brackets, aren't they?
Attachments


Small update
Hi all!
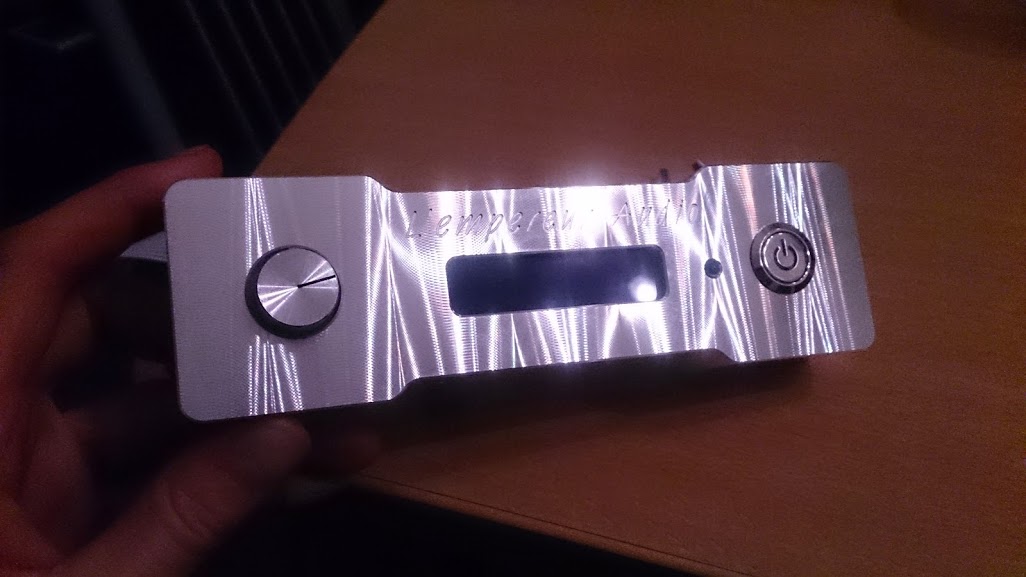
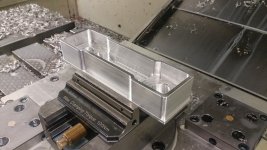
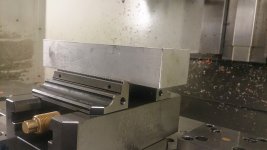
I've made/finished a few more parts, the PCB brackets are now completely finished and i've made the cover plate
I've drilled the holes in the PCB brackets so they can actually be used :lol:
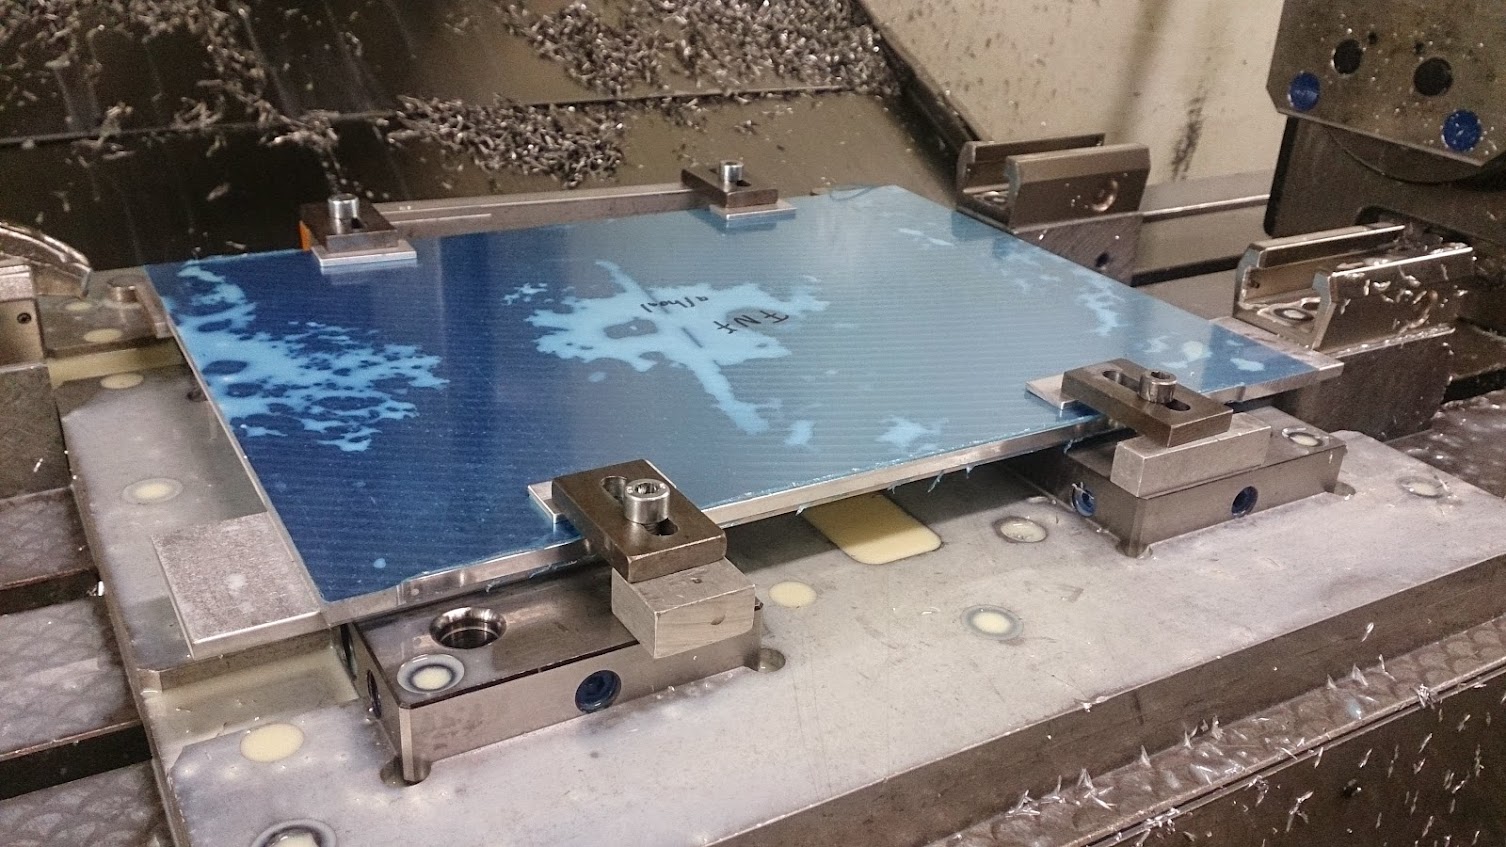
And the cover plate, it's not really going well this week, it's been late pretty much every night and i've been working on my car as well wich broke down on me :evil:
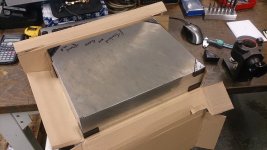
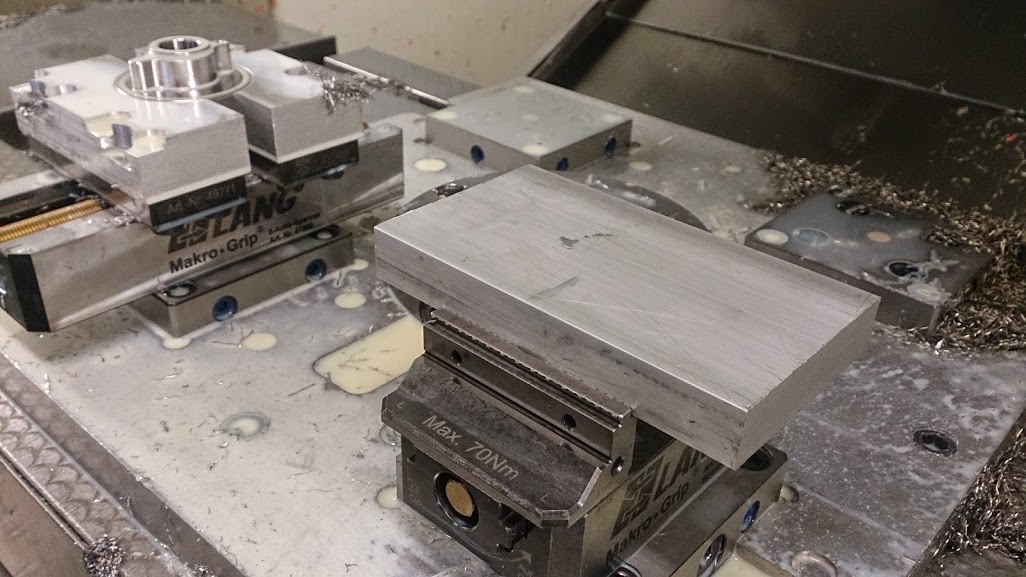
I couldn't find the other spacers for the clamps so i made the front side first and than the back side:
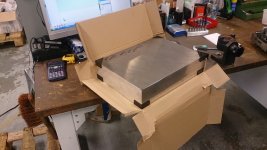
When that was done i've put 4 clamps around the plate to press it down:
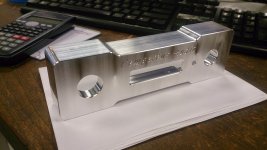
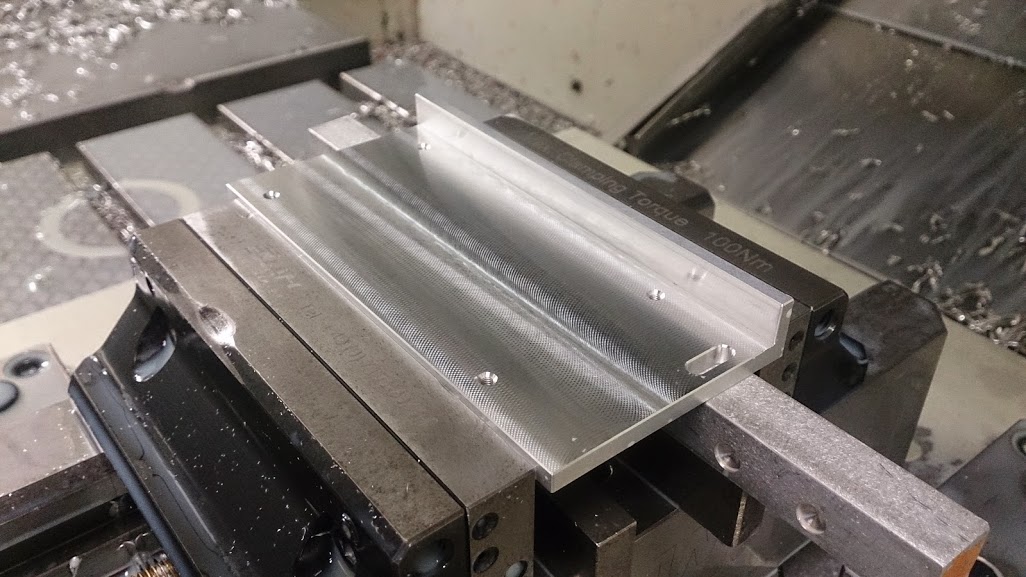
eventually it came out like this:
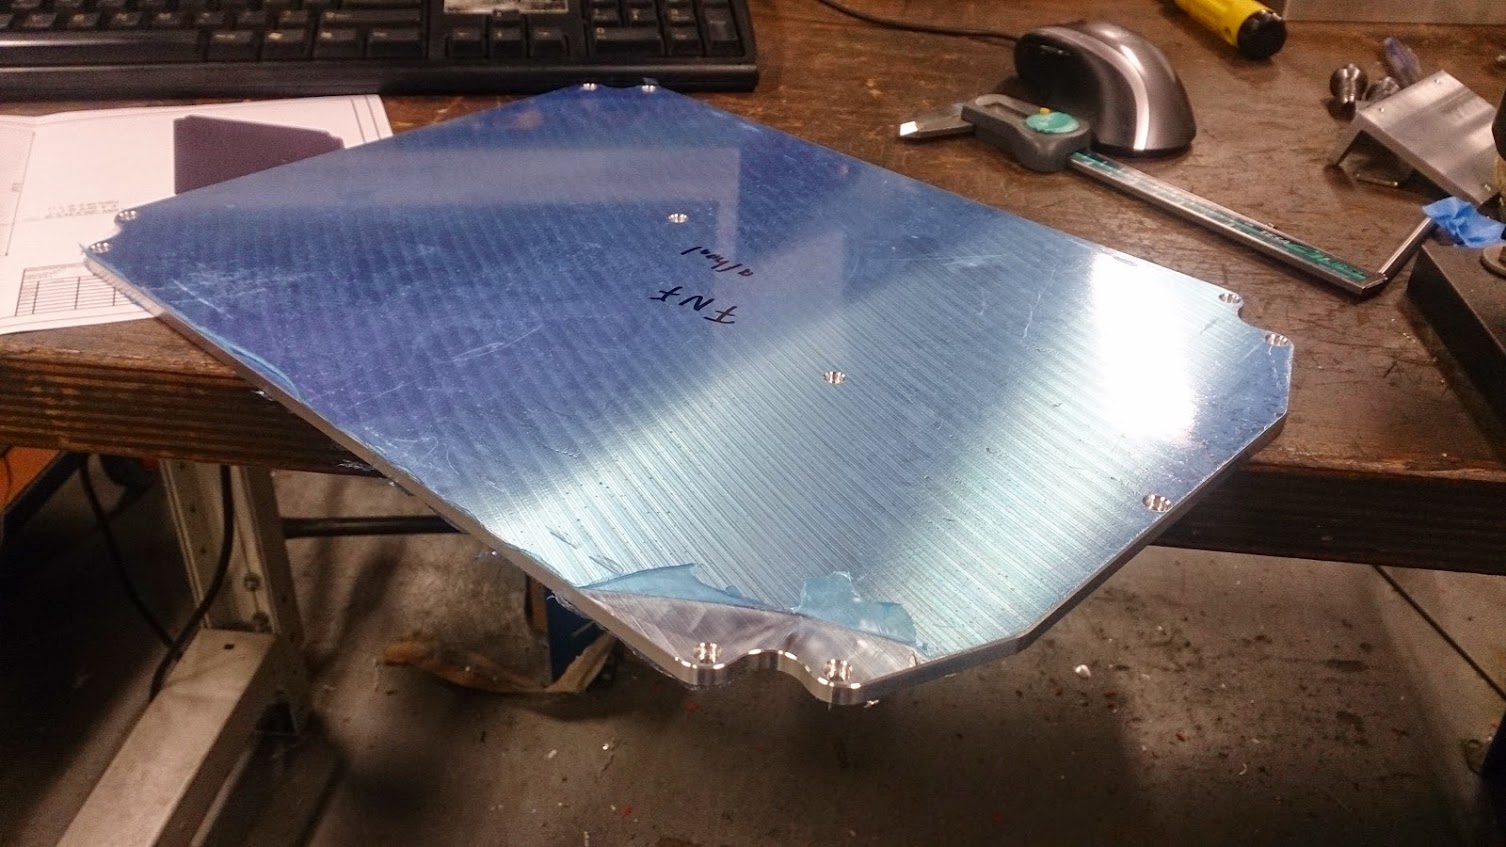
It's made of tooling plate, it's aluminum plate that's been milled from both sides and perfectly straight and flat.
For now the planning is that i'll make a start of the big block on saturday, i don't think i'll be able to get it completely finished. I'd be surprised if i did.
But here's an impression of how it's going to be:


You'll hear more soon!
Hi all!
I've made/finished a few more parts, the PCB brackets are now completely finished and i've made the cover plate
I've drilled the holes in the PCB brackets so they can actually be used :lol:
An externally hosted image should be here but it was not working when we last tested it.
And the cover plate, it's not really going well this week, it's been late pretty much every night and i've been working on my car as well wich broke down on me :evil:
I couldn't find the other spacers for the clamps so i made the front side first and than the back side:
An externally hosted image should be here but it was not working when we last tested it.
When that was done i've put 4 clamps around the plate to press it down:
An externally hosted image should be here but it was not working when we last tested it.
eventually it came out like this:
An externally hosted image should be here but it was not working when we last tested it.
It's made of tooling plate, it's aluminum plate that's been milled from both sides and perfectly straight and flat.
For now the planning is that i'll make a start of the big block on saturday, i don't think i'll be able to get it completely finished. I'd be surprised if i did.
But here's an impression of how it's going to be:
You'll hear more soon!
Last edited:
- Status
- This old topic is closed. If you want to reopen this topic, contact a moderator using the "Report Post" button.
- Home
- Amplifiers
- Chip Amps
- Introduction and project info