Hi Decky,
your amp is working just fine.
When you connect the pre-amp, something is causing the output offset to change.
It could be DC output offset from the pre, or high output impedance, i.e. source impedance, Rs.
Neither of these should alter the DC quiescent conditions of the power amplifier, if DC blocking is adopted in the amp.
Remove DC blocking at your peril.
You now need to find out where and why the offset is occurring.
My preamp is an oldish DENON integrated that I am using at the moment as the preamp (until I build my own pre). I suspect that is just a passive unit.
The other question is - am I doing any harm to the amp by connecting the sub in the way I am doing it at the moment (bypassing the input signal) ?
Thanks
The other question is - am I doing any harm to the amp by connecting the sub in the way I am doing it at the moment (bypassing the input signal) ?
Thanks
I put it into worn out Technics 5370.
Hey, you forgot mine!")
Its LM3886 56k/1k/47uf + full draft input circuit of 56k 2.2k and 4.7uf (warm sound version), plus an A25k.
All resistors both legs curved on 1/2 watt 5% carbon for smooth goodness, much bass, no DC signal in, and no DC output.
Um. . . all at 45 degree angle, both 56k's face the chip.
Its like scads more power. Tube sound anyone?
This mod was necessary because it avoids setting off the Spike when I want to jam.
Supply is 40+40 DC and chip has Artic Ceramique with massive heatsinks.
I already had the "too much" transformer, so I had to use LM3886.
It was a Technics 5370 that was worn out. Then I bought the kit and there was a unlevel frequency response (screeching midrange), no power, no bass, and too much DC out--more on one side. Not an upgrade at first. But now with a beautiful warm sound, thanks to all that carbon and some tinkering.
sangram said:Just to throw in my experience, I've found that one can eliminate Ci and have close to zero offset (<2mV) with shorted input.
Basically it requires very low value of Rf and Ri, I used 4.7K/220 without Ci on a 4766 and got output offset of 0.7/1mv (left/right).
With regular configuration of 22K/1K and a 47uF Ci the offset rose to about 10/13mV.
Eliminating Ci and not changing the resistor value gave me offset value of 60/85mV.
There was an interesting discussion with peranders on this issue, where I learnt that output offset voltage is a function of input offset currents. Also there is an interesting variation built by a forum member without Ci and 2.2K/100ohm feedback resistors, where sound quality was claimed to be improved.
Following are what I tried:
1. LM4766 - 22K/1K/47uF
2. LM4766 - 22K/1K/no Ci
3. LM4766 - 4.7K/220/no Ci
4. LM4780 - 22k/1K/47uF
5. LM4780 - 22K/1k/22uF
6. LM4780 - 10K/470/no Ci
7. LM4780 - 22K/1k/no Ci and BPA 4 chips/chanel
7. LM3886 - 22K/1K/47uf (latest, still settling in till I get bored of it)
Hey, you forgot mine!
Its LM3886 56k/1k/47uf + full draft input circuit of 56k 2.2k and 4.7uf (warm sound version), plus an A25k.
All resistors both legs curved on 1/2 watt 5% carbon for smooth goodness, much bass, no DC signal in, and no DC output.
Um. . . all at 45 degree angle, both 56k's face the chip.
Its like scads more power. Tube sound anyone?
This mod was necessary because it avoids setting off the Spike when I want to jam.
Supply is 40+40 DC and chip has Artic Ceramique with massive heatsinks.
I already had the "too much" transformer, so I had to use LM3886.
It was a Technics 5370 that was worn out. Then I bought the kit and there was a unlevel frequency response (screeching midrange), no power, no bass, and too much DC out--more on one side. Not an upgrade at first. But now with a beautiful warm sound, thanks to all that carbon and some tinkering.
Attachments
OK I am looking in putting DC blocking caps but I am trying to avoid electros. I was thinking to try with some green caps (met-polyester) of 10uF. They are big but I could fit am on the Brian's board (...all around it).
Also I would use 1k resistor instead of 680ohm that Brian supplied. That cuts the gain from 33 to 22 and produces filter frequency of 16Hz. Is this too high roll-off and are green caps any good for this sort of a job? ...or am I better off just putting standard electro of 47uF and sticking with 680ohm resistor?
Also I would use 1k resistor instead of 680ohm that Brian supplied. That cuts the gain from 33 to 22 and produces filter frequency of 16Hz. Is this too high roll-off and are green caps any good for this sort of a job? ...or am I better off just putting standard electro of 47uF and sticking with 680ohm resistor?
This applies to LM3886 and its stereo sister.
NFB 56k, 1k, 47uf.
Carbon is warmer sound--of benefit to gainclones.
Raising the gain by decreasing the loadwork improves the bandwidth response.
The 47uf cap included with Brian's kit, is quite nice.
Input circuit 56k, 4.7uf BlackGate.
This amp chip operates at a particular speed whereby it needs a matched up layout between NFB and input circuit.
56k's increase gain, increase bandwidth, and lobotomize Spike (power limiter feature) so that he's not so eager to cause clipping.
The in-series resistor, carbon, from 20k to 280 ohms, can be added to the input terminals because it will be fully sheilded by the nearby signal ground line. This is a sort of gain adjustment, in addition to your volume control selections.
The tested value is 2.2k. That's particurlarly recommendable because it matches up.
Matching volume control selections:
2.2k and A20k is good.
2.2k and A50k is good (loud enough for Ipods to break sheetrock).
A20k controls are less masking, so Alpa is fine.
A50k controls need to be a quality make.
If not using a volume control, you may apply an additional load across the signal input, from 1megaohm to 20k.
The 16hz is an excellent roll-off point if it is useful to your speakers.
Lower than 16hz, and the amplifier would attempt to amplify naturally present Theta waves (much clipping inefficient power waste ordeals).
Higher could be good, depending on your speakers.
Concentrating your amplifier into a useful frequency band will improve its power and reduce its clipping. There should also be a noticable improvement to dynamics, but that depends on voltage too. Just remember, its an *audio* amplifier, so have it do nothing else.
The green polyester/PET/Mylar caps:
These are excellent for unnoticable zobels (0.1uf onto speaker terminals). They don't even require a resistor. However, they are horrible for input filter caps.
Polyester doesn't "aim" at any particular frequency response.
E-caps are better than polyester/pet/Mylar.
If you like the bubble cap style, use a great one. Just find Panasonic PolyPro over at digikey. The model code starts with ECW and ends with JB. This results in extreme high-zoot polypropylene audiophile caps for less than the price of a burger.
BlackGate makes a warm sound cap that's also high resolution, so one would highly suggest this for a gainclone's input filter cap.
The input filter cap:
You can "aim" the frequency response of the cap, knowing that a good, high quality (ESR ONE or less) cap is going to make one heck of a boost right above its rolloff.
In this case, let's talk 4.7uf. The effect is going to conserve the amplifier power. It will almost double in power.
Refer to the LM1875 PDF for the wiring schematic. The 1m isn't necessary if using a volume control.
On with the fun!
Okay, today's sources and CDs are recorded with compression and what was previously called foldback--a distortion to accomodate popular (tiny) speakers. The 4.7uf, if used with this 56k, 1k, 47uf nfb and 56, 4.7uf, 2.2k input, layout, is going to cause divisions whenever there's 2nd order harmonics present, and thus the CDs play back bass notes on the correct pitch.
If the input filter cap is 10uf, then that opportunity is lost.
If the input filter cap is high-esr, then it will not accomodate any particular or predictable frequency response (as if it had a resistor attached to both legs).
If the input filter cap is quality Polypropylene or quality E-cap, then it works great!
What cap?
I cannot fully answer your question about specific rolloff points for capacitors without having its ESR in addition to its capacitance.
I cannot answer "tone" without knowing both its speed and its ESR. These variables will affect an audio signal more than its capacitance figure. So, be prepared to tune this one by ear.
For a guess, find the exact model BlackGate that folks were stuffing into Sonic's T-amp, 4.7uf and rocking down their houses on 5 watts. Why? It was already an award winning amplifier, and this cap, mentioned at the forums here, had improved it.
The reports of additional bass means that it is a low-esr, high-quality cap able to confine the amp to audio-only amplification.
The reports of resolution means that it is a high-speed cap able to resolve fine details.
This extraordinary capacitor will be an excellent baseline for comparison to other input filter caps. I do not know if it has the beneficial "warm sound" or not, only that it is the very highest quality at just the right size (a 4.7uf that fits).
Currently, I'm listening to LM3886's set up this way, transplanted inside a Technics SA5370 and. . . finally. . . living up to my expectations--actually beyond. I did not expect warm tube amp sound, level frequency response, great clarity, low listening fatigue, and plentiful power without clipping. I think that the boost button needs a military-style switch cover protector--I did not expect speaker grilles to go flying!! However, I also did not expect such a fight, days on the test bench, to repair the specs on an audiophile marketed kit. Thank goodness its durable!!
Specs:
From chip to output, the order of the input circuit is:
Chip
Load R (56k, same figure as NFB),
cap (4.7uf of low-esr),
in-series R (2.2k),
load, (56k or 30k or 22k, or even 1m)
Signal
See LM1875's PDF or its common Kit#50 PDF for the input circuit diagram for a full-draft input circuit.
Input filter caps
The code MKP also indicates a polypropylene cap. Those are suitable for input filter caps, but so are decent electrolytic caps.
Electrolytics can have a "tone" to them, and one of these tones could be a warm tone, which is of benefit to an over-bright amp.
If you're using the amp along with a subwoofer, an effects box, or if you'd like the brightness intact to accomodate older ears or television surround sound, the MKP (high ratings for signal speed) or the Panasonic PolyPro (same thing), would keep the brightness intact.
Hey man thanks for the extensive knowledge transfer. I did put Brian's 47uF electro. I could not say there was a huge difference with and without the cap, apart from a non existent DC offset. I will stick with this configuration and it burn in for a while. However, after your suggestions I am more then keen to buy couple of chips and experiment with a point-to-point soldering
Thanks again I learned a lot
Thanks again I learned a lot
Just build the whole receiver?
Oh you're welcome! I was just so excited about getting mine to sound like a real amp.
Next amps you might want to try are TDA7294 (K106) and LM1875 (K50). qkits.com , electronics123.com
At $11 for a kit, the LM1875 is very pretty sounding and then you can study just how good the gainclones can be.
At $28 for a kit, the TDA7294 (thompson) is extraordinarily beautiful--and not a fight to tailor the sound.
Here's a transformer, 36vct, says 4a, does 8, about $25, uber quality Canadian made.
http://www.alliedelec.com/Search/ProductDetail.asp?SKU=227-2065
That's not quite enough voltage to push those amps to glory, but hey, it doesn't cost a hundred bucks either, and its sturdy enough for a stereo pair of any chip amps.
Fine tune:
You can then use a bit of cable instead of soldering on the input circuits of the amps--just go out to a bit of veroboard/punchboard, and you can select input caps and different loads to see what the options sound like.
Then after you're satistfied, solder the now-fine-tuned input circuit bits onto the board.
Glorious use for a monoblock:
Particularly interesting is a center channel amp made with two input circuits, one TDA7294, and a full size speaker.
In this case, there is only 1 input loader, but there's two input filter caps (legs touch on one side), two in-series R, and a stereo pot.
This, when hooked to your existing power amp, will "steal" center channel information and reproduce it itself.
A simple "Y" splitter connects power amp and center channel amp to the preamp.
The choice of volume pots (A20k through A250k) regulates both preamp loading and the effects. IE a stout load (A20k) on the Thompson keeps it clean and lets it do much.
Hey, there's a couple of things I didn't try on LM3886--thought up, but didn't try--because it was such a long fight. When it just suddenly up and worked, I stopped right then, and breathed a sigh of relief. Oh, but you wanted more gain, so here goes!
With LM3886, I didn't try:
(Scenerio 2)
Metal 56k,56k (instead of the 22k's), carbon 1k (instead of 680R NFB), carbon 1.5k (instead of 1k input), and a a50k stereo potentiometer--I wondered about leaving the screeching metal against the audio signal while also passing it smoothly.
This is a 2x boost similar to above post.
(Scenerio 3)
Carbon 100k,100k (instead of the 22k's), carbon 1.5k (instead of 680R NFB), carbon 2.2k (instead of 1k input), and an a50k or a100k stereo pot--I wondered about the additional potential for a power boost.
This would thoroughly lobotomize Spike, so you'll want some speaker protection fuses (fuse holders on the hots left and right).
This is a 4x boost. Heatsinks? big! Voltage? whatever you dare.
Scenerio's 2 and 3 should have more gain than my mod in the above posts.
Scenerio's 1 and 2 had 40+40 DC (56vct or so transfo), massive heatsinks, with air intake below, air output above. Artic Ceramique was used between chip and heatsinks AND between heatsinks and chassis. Results were fantastic, but more is theoretically possible. . .
Scenerio 3? That's attempting a more amps, less volts to support the commonly recommended 50vct (48vct) transformer (or similar torroid that you already bought) at maximum output.
It works in theory for a 4x boost, but if it doesn't work in practice, just use the average between what you want and what it wants for a 75k (or so!) layout and about a 3x boost.
None of these require a preamp, except that a passive preamp can be useful.
You could just find a double pole - six throw rotary switch in the bottom drawer at Radio Shack. Double pole? Left and right. Six throw? six pairs of RCA jacks for input. One can work a RIIA, one can work a radio, with four more inputs left over, there's almost a full receiver. .
Tape loop?
On the first tape loop, The 2 rca jacks for record line always gets output from the dp6t rotary switch (above). The dp6t doesn't go to the volume control. . .
Next, we intercept signal before it reaches the master volume control.
We might send it there, and we might not. How?
That's a double pole, double throw on-on switch (no center off). There's a very cute chrome model in that same drawer.
The loop line is worked by the DPDT switch--center terminals directly to the master volume control inputs (so that it always has input)--flip down for dp6t dial's sources, flip up and only the tape input goes into the master volume control.
That's a pro-style receiver with a passive pre. There's 1 radio kit, 1 RIIA kit, 1 dp6t rotary, 1 dpdt (tape loop), ten RCA jacks, and a pot for volume. After you get that wired (its actually darned easy), then you can add more tape loops, and. . .
Remove the passive pre's volume control and put this instead:
An active preamp kit, such as the volume, bass, treble, lc, etc with gain too. That bit of gain can help you run all this stuff.
Headphone jack:
Its very useful for sum total unplanned connections of other amplifiers, and maybe even headphones!
My example circuit has the headphone left and right "hot" fed by 330 ohm resistors with 2 watt capacity and the ground wire joins up with your chassis ground. In addition to your speaker hot lines going to this circuit, it also goes to . . .
Main and Remote (speaker selector).
Well, that's not rocket science, its DPsT switches. Since our power amps have a zobel across speaker output, this will keep it sufficiently busy to withstand open connection. The above switches take left and right and either do or do not send it to the speakers.
OR. . . if you don't have the zobels. . .
You can use a DPDT On/On switchss in logic so that there is always a load, one of which is dummy load corresponding to whether or not the headphone switch is in use or not. But I just can't figure that out--so use the zobels.
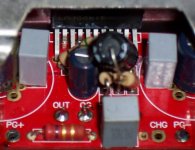
This will help understand what's going on inside the Denon reciever.
The ground:
You'd think that one ground would do it, but oh no. So here's some help
Speaker grounds go absolutely nowhere else than their own speaker terminals, and they don't connect together.
Input signal grounds go nowhere else than the input signal lines. While they may connect together, the only place for it is the potentiometer. Its best if they don't connect each other at all.
The potentiometer doesn't make metal-to-metal contact with the metal enclosure that has a seperate ground, chassis ground--that's "best practice" in theory, though.
If using a torried transformer, the CG (common ground) goes only from amp centerpoint to the chassis. It is also the ground for the headphone jack.
If using a center tap transformer (one of my posts has a photo of how to connect to Brian's superb power supply), then the output side of the board for center tap is common ground for chassis, and for amps (brian's are marked CG).
This is one wire from the power supply and one wire from each amp, all very short, and this case is the power ground=common ground because--A center tap transformer has only 3 wires to feed the rectifier board. This center, after the caps get through playing with it, is ground for amps, chassis, and headphone jack.
The cable from power supply to chassis ground is half as long and exact same type as the cable from power supply to each amp CG.
The easiest way to understand the grounding is to duplicate test bench conditions. See, the speaker cables go nowhere but the speaker. The input goes nowhere but the input.
You can probably recycle an old receiver as a home for gainclones or thompsons. Gainclones take more voltage, so that's how to tell which ones to use. Thompsons have one heck of a gain, but top out at 35+35 DC.
See the grounding above for why you'll probably want to cut out and replace the speaker jacks (fiberglass plus new speaker terminals).
As a finishing touch, its nice to put a new aluminum panel at the front, so its now your own design.
Oh you're welcome! I was just so excited about getting mine to sound like a real amp.
Next amps you might want to try are TDA7294 (K106) and LM1875 (K50). qkits.com , electronics123.com
At $11 for a kit, the LM1875 is very pretty sounding and then you can study just how good the gainclones can be.
At $28 for a kit, the TDA7294 (thompson) is extraordinarily beautiful--and not a fight to tailor the sound.
Here's a transformer, 36vct, says 4a, does 8, about $25, uber quality Canadian made.
http://www.alliedelec.com/Search/ProductDetail.asp?SKU=227-2065
That's not quite enough voltage to push those amps to glory, but hey, it doesn't cost a hundred bucks either, and its sturdy enough for a stereo pair of any chip amps.
Fine tune:
You can then use a bit of cable instead of soldering on the input circuits of the amps--just go out to a bit of veroboard/punchboard, and you can select input caps and different loads to see what the options sound like.
Then after you're satistfied, solder the now-fine-tuned input circuit bits onto the board.
Glorious use for a monoblock:
Particularly interesting is a center channel amp made with two input circuits, one TDA7294, and a full size speaker.
In this case, there is only 1 input loader, but there's two input filter caps (legs touch on one side), two in-series R, and a stereo pot.
This, when hooked to your existing power amp, will "steal" center channel information and reproduce it itself.
A simple "Y" splitter connects power amp and center channel amp to the preamp.
The choice of volume pots (A20k through A250k) regulates both preamp loading and the effects. IE a stout load (A20k) on the Thompson keeps it clean and lets it do much.
Hey, there's a couple of things I didn't try on LM3886--thought up, but didn't try--because it was such a long fight. When it just suddenly up and worked, I stopped right then, and breathed a sigh of relief. Oh, but you wanted more gain, so here goes!
With LM3886, I didn't try:
(Scenerio 2)
Metal 56k,56k (instead of the 22k's), carbon 1k (instead of 680R NFB), carbon 1.5k (instead of 1k input), and a a50k stereo potentiometer--I wondered about leaving the screeching metal against the audio signal while also passing it smoothly.
This is a 2x boost similar to above post.
(Scenerio 3)
Carbon 100k,100k (instead of the 22k's), carbon 1.5k (instead of 680R NFB), carbon 2.2k (instead of 1k input), and an a50k or a100k stereo pot--I wondered about the additional potential for a power boost.
This would thoroughly lobotomize Spike, so you'll want some speaker protection fuses (fuse holders on the hots left and right).
This is a 4x boost. Heatsinks? big! Voltage? whatever you dare.
Scenerio's 2 and 3 should have more gain than my mod in the above posts.
Scenerio's 1 and 2 had 40+40 DC (56vct or so transfo), massive heatsinks, with air intake below, air output above. Artic Ceramique was used between chip and heatsinks AND between heatsinks and chassis. Results were fantastic, but more is theoretically possible. . .
Scenerio 3? That's attempting a more amps, less volts to support the commonly recommended 50vct (48vct) transformer (or similar torroid that you already bought) at maximum output.
It works in theory for a 4x boost, but if it doesn't work in practice, just use the average between what you want and what it wants for a 75k (or so!) layout and about a 3x boost.
None of these require a preamp, except that a passive preamp can be useful.
You could just find a double pole - six throw rotary switch in the bottom drawer at Radio Shack. Double pole? Left and right. Six throw? six pairs of RCA jacks for input. One can work a RIIA, one can work a radio, with four more inputs left over, there's almost a full receiver. .
Tape loop?
On the first tape loop, The 2 rca jacks for record line always gets output from the dp6t rotary switch (above). The dp6t doesn't go to the volume control. . .
Next, we intercept signal before it reaches the master volume control.
We might send it there, and we might not. How?
That's a double pole, double throw on-on switch (no center off). There's a very cute chrome model in that same drawer.
The loop line is worked by the DPDT switch--center terminals directly to the master volume control inputs (so that it always has input)--flip down for dp6t dial's sources, flip up and only the tape input goes into the master volume control.
That's a pro-style receiver with a passive pre.
There's 1 radio kit, 1 RIIA kit, 1 dp6t rotary, 1 dpdt (tape loop), ten RCA jacks, and a pot for volume. After you get that wired (its actually darned easy), then you can add more tape loops, and. . . Remove the passive pre's volume control and put this instead:
An active preamp kit, such as the volume, bass, treble, lc, etc with gain too.
That bit of gain can help you run all this stuff. Headphone jack:
Its very useful for sum total unplanned connections of other amplifiers, and maybe even headphones!
My example circuit has the headphone left and right "hot" fed by 330 ohm resistors with 2 watt capacity and the ground wire joins up with your chassis ground. In addition to your speaker hot lines going to this circuit, it also goes to . . .
Main and Remote (speaker selector).
Well, that's not rocket science, its DPsT switches.
Since our power amps have a zobel across speaker output, this will keep it sufficiently busy to withstand open connection. The above switches take left and right and either do or do not send it to the speakers. OR. . . if you don't have the zobels. . .
You can use a DPDT On/On switchss in logic so that there is always a load, one of which is dummy load corresponding to whether or not the headphone switch is in use or not. But I just can't figure that out--so use the zobels.
This will help understand what's going on inside the Denon reciever.
The ground:
You'd think that one ground would do it, but oh no. So here's some help
Speaker grounds go absolutely nowhere else than their own speaker terminals, and they don't connect together.
Input signal grounds go nowhere else than the input signal lines. While they may connect together, the only place for it is the potentiometer. Its best if they don't connect each other at all.
The potentiometer doesn't make metal-to-metal contact with the metal enclosure that has a seperate ground, chassis ground--that's "best practice" in theory, though.
If using a torried transformer, the CG (common ground) goes only from amp centerpoint to the chassis. It is also the ground for the headphone jack.
If using a center tap transformer (one of my posts has a photo of how to connect to Brian's superb power supply), then the output side of the board for center tap is common ground for chassis, and for amps (brian's are marked CG).
This is one wire from the power supply and one wire from each amp, all very short, and this case is the power ground=common ground because--A center tap transformer has only 3 wires to feed the rectifier board. This center, after the caps get through playing with it, is ground for amps, chassis, and headphone jack.
The cable from power supply to chassis ground is half as long and exact same type as the cable from power supply to each amp CG.
The easiest way to understand the grounding is to duplicate test bench conditions. See, the speaker cables go nowhere but the speaker. The input goes nowhere but the input.
You can probably recycle an old receiver as a home for gainclones or thompsons. Gainclones take more voltage, so that's how to tell which ones to use. Thompsons have one heck of a gain, but top out at 35+35 DC.
See the grounding above for why you'll probably want to cut out and replace the speaker jacks (fiberglass plus new speaker terminals).
As a finishing touch, its nice to put a new aluminum panel at the front, so its now your own design.
Murphy is alive and well and living with Thorsten Loesch!
Very good. You will notice a huge difference when the dog suddenly unplugs the input with everything playing at full volume -- with the capacitor in place, your speaker cones will not go flying across the room and break Grandma's heirloom vase -- a very serious form of distortion.
PLEASE pass the word to other novices, decky: DO NOT build gainclones without Ci!
decky sees the light:
I did put Brian's 47uF electro. I could not say there was a huge difference with and without the cap, apart from a non existent DC offset.
Very good. You will notice a huge difference when the dog suddenly unplugs the input with everything playing at full volume -- with the capacitor in place, your speaker cones will not go flying across the room and break Grandma's heirloom vase -- a very serious form of distortion.
PLEASE pass the word to other novices, decky: DO NOT build gainclones without Ci!
Originally posted by craigg4c
PLEASE pass the word to other novices, decky: DO NOT build gainclones without Ci!
Doesn't the input cap already block DC? I've built mine and i plug/unplug it "live"* and i can't tell the difference with or without Ci.
Edit: *I know i shouldn't do that
.Edit 2: I have a 100K resistor from input to ground plus the 47K one at the other side of the cap.
- Status
- This old topic is closed. If you want to reopen this topic, contact a moderator using the "Report Post" button.
- Home
- Amplifiers
- Chip Amps
- Ci and DC offset ??