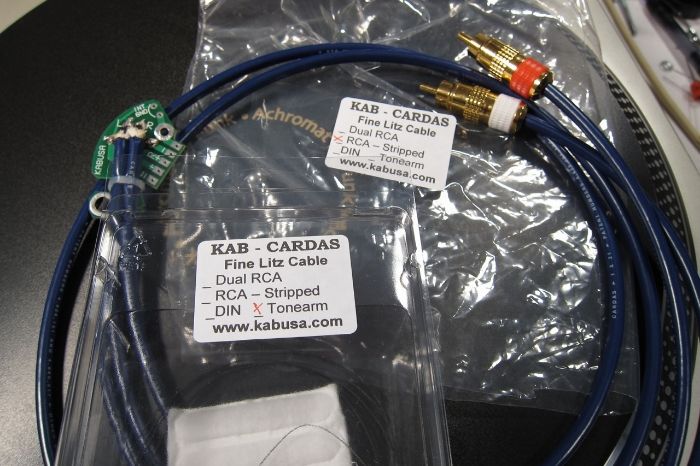
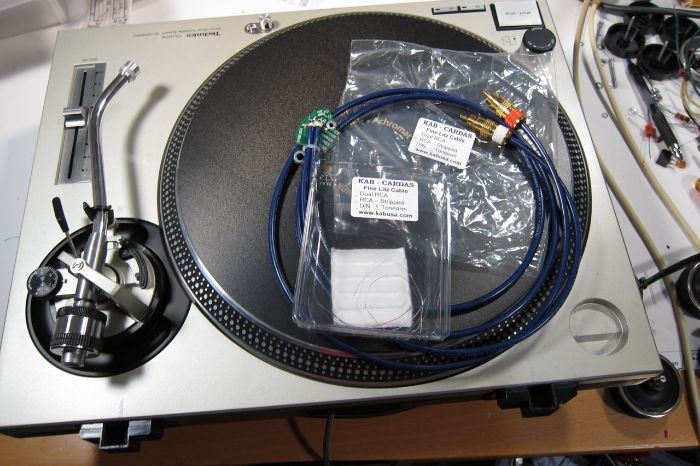
This is what I started with, a KAB rewire kit (the prepared tonearm wire, fishing wire and damping) and a replacement interconnect with the KAB Technics circuit board. This cable is not on their webpage, it's an all-litz coax of very low capacitance. Call or email Kevin, he will happily make you one.
I storongly suggest getting the wire kit, the wire itself is prepared - it's cut to length, tinned (which is no small feat on litz wire, and worth the price of admission) and it's covered in a graphite coating to help counteract the triboelectric effect of teflon-covered wire.
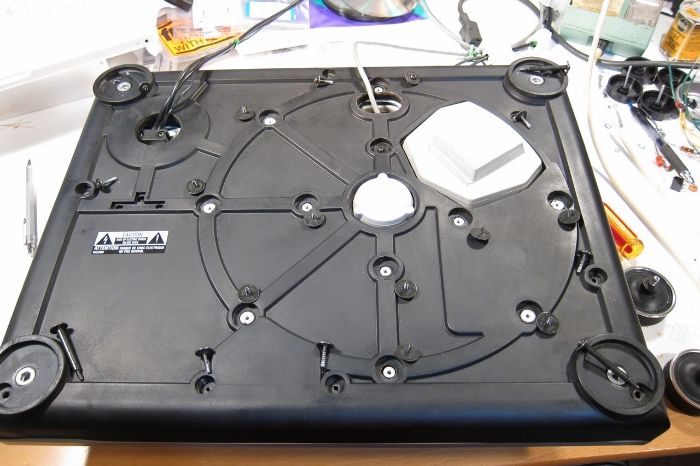
Remove the platter, rest the turntable on something soft or properly supportive, and remove the base. Take a photo of all the screws near their holes, so you can reference the photo when you re-assemble the table.
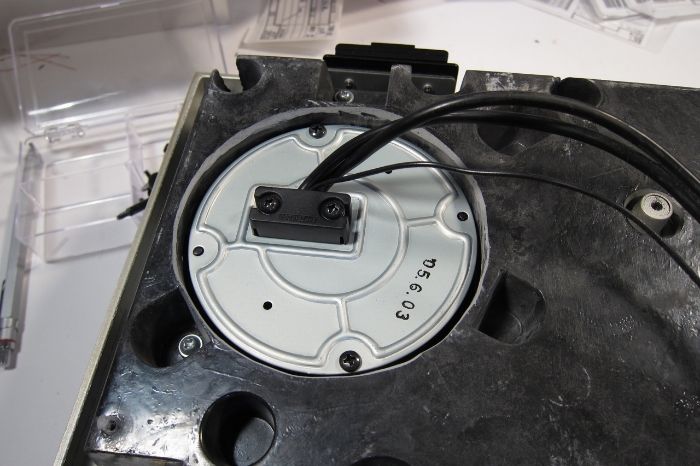
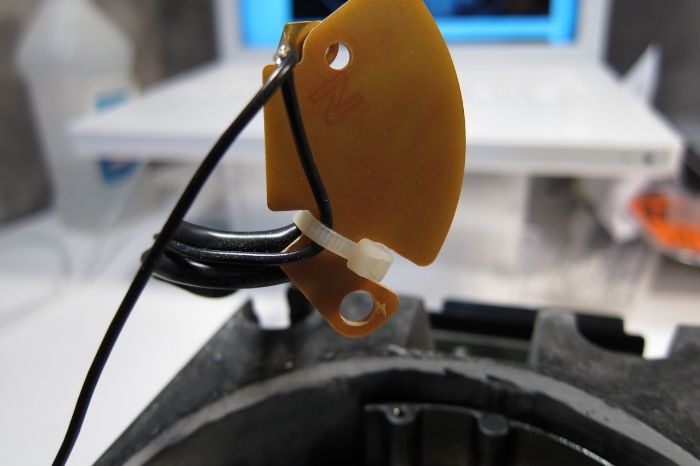
This is the bottom of the arm, the screws holding the plastic block (strain relief) need to be removed, and the strain relief as well.
Remove the metal lid.
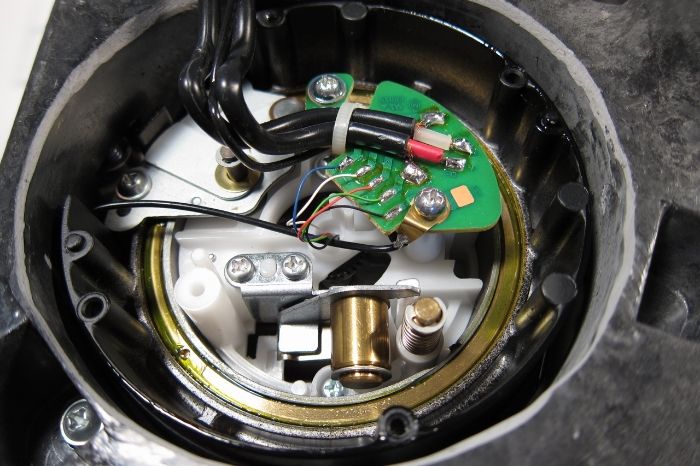
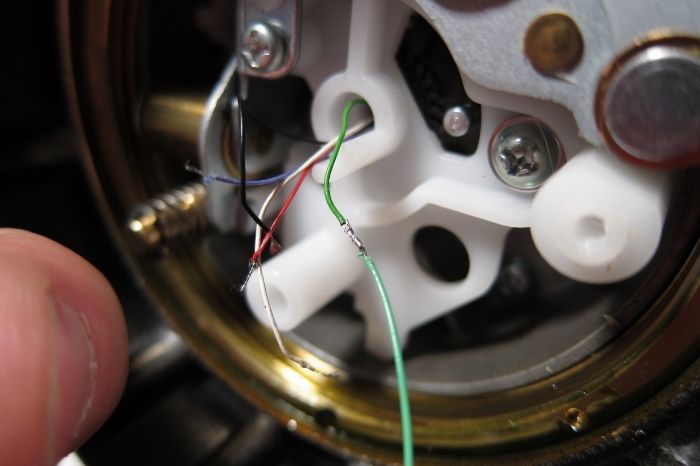
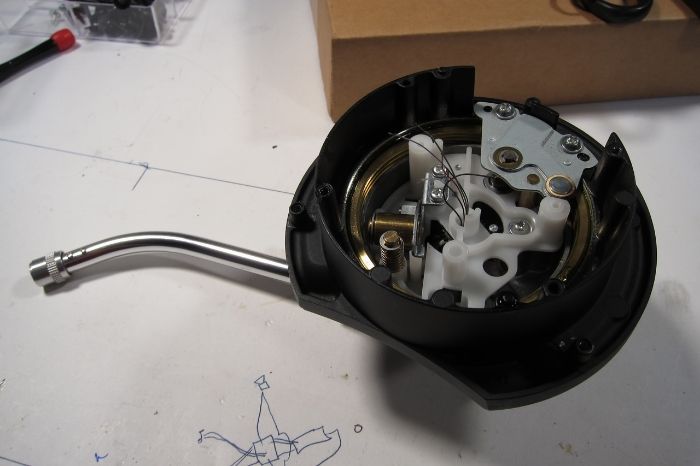
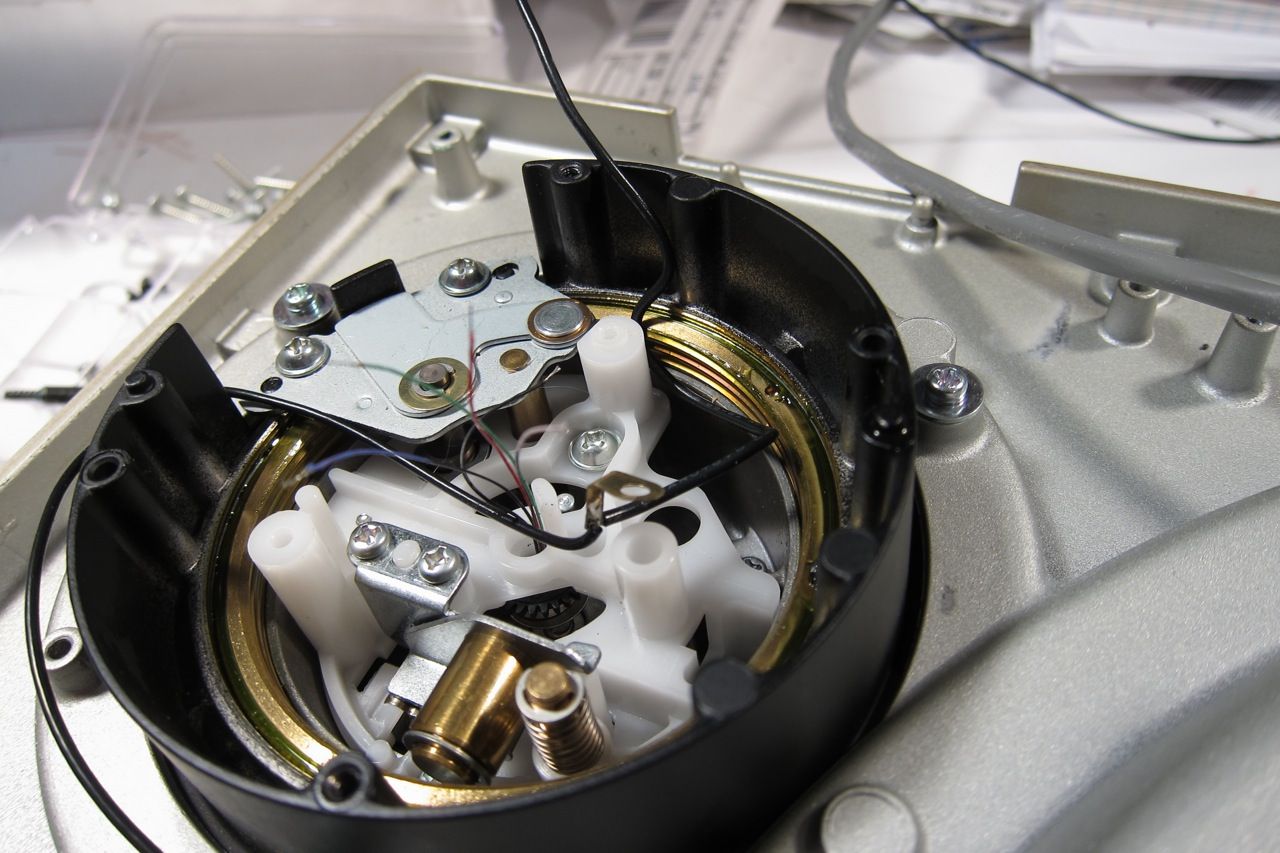
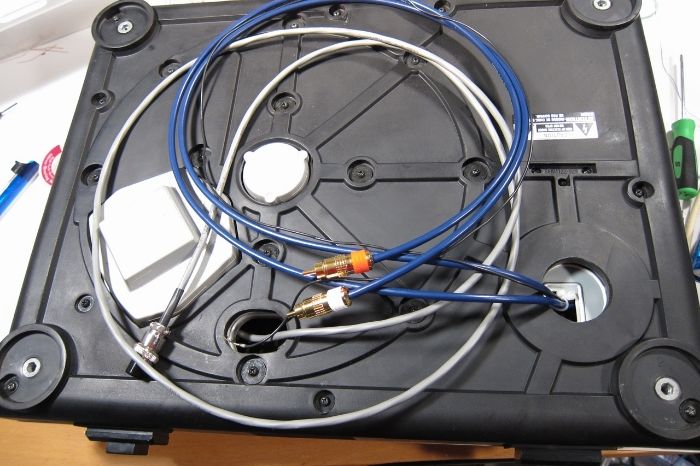
And here is the stock wiring. It's actually quite nice. De-solder the small wires from the PCB.
Remove the screws from the PCB, and lift gently. The zip-tie needs to be cut, as the ground wire is not going to be removed from the turntable.
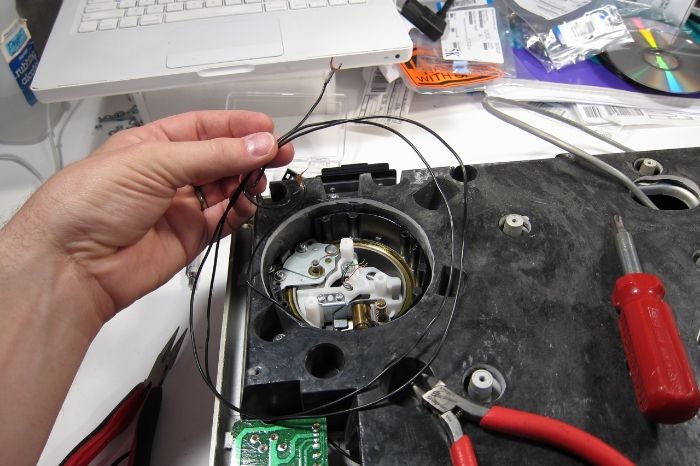
Arrange the groundwire out of the way, as it's going to be connected to the table throughout.
You can see here that I got a bit ahead of myself, not removing the resin sub-plinth yet. It's actually easier if you do that first.
")
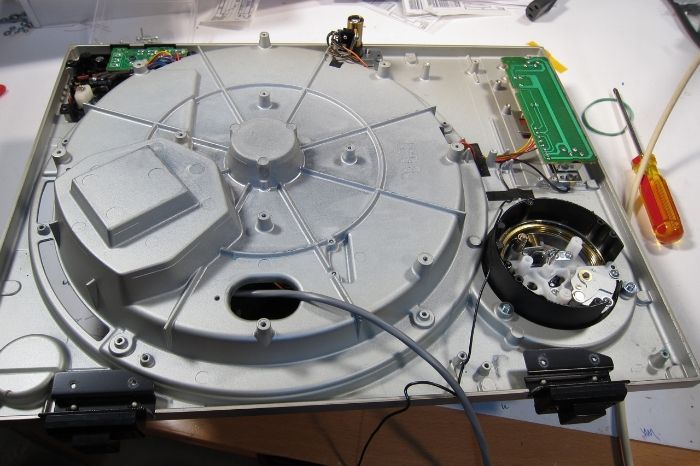
Sub-plinth removed.
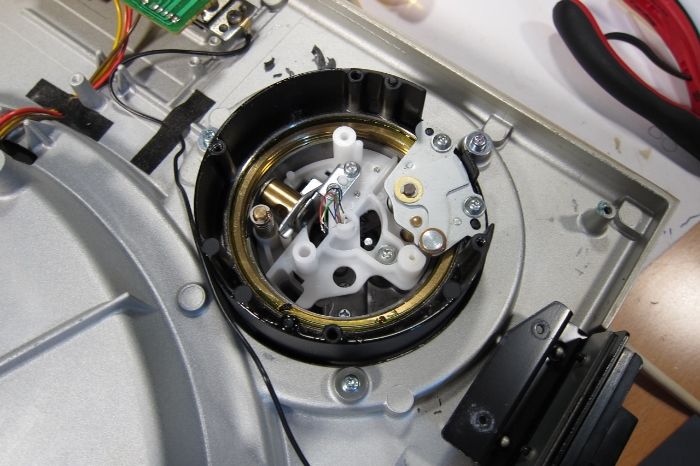
The 3 silver screws around the perimeter of the arm hold it in. Remove those and it will easily slide out.
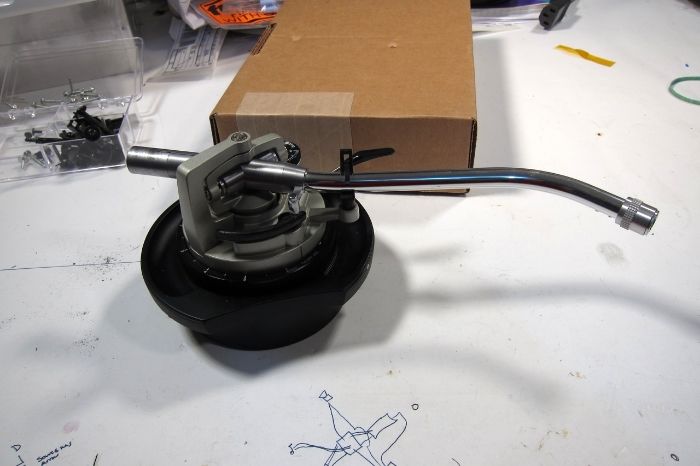
The arm assembly removed.
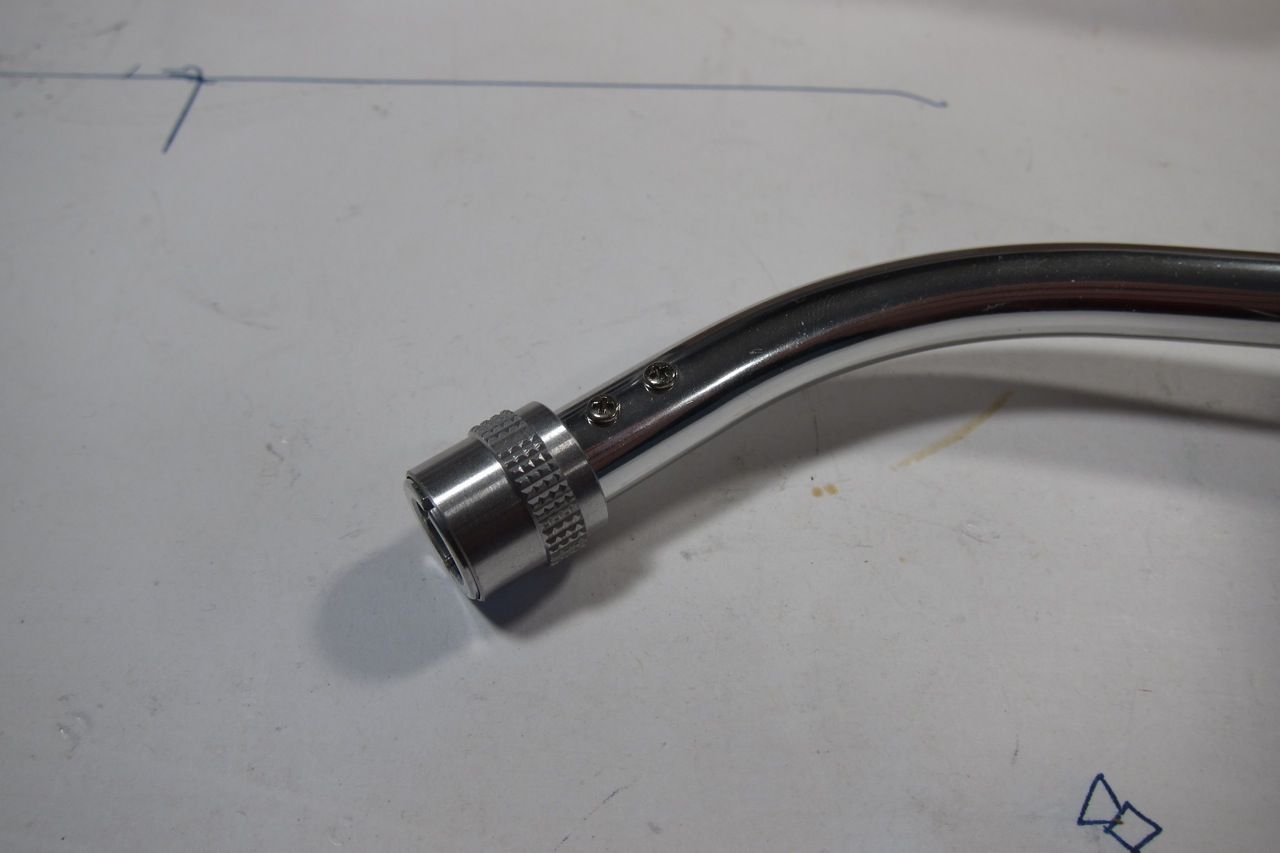
Remove these screws.
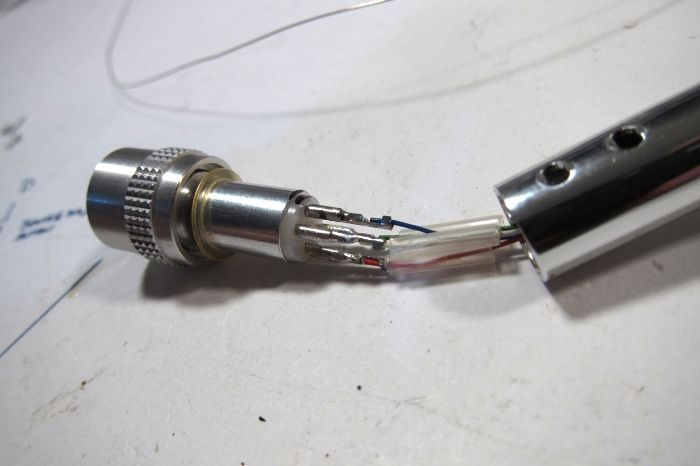
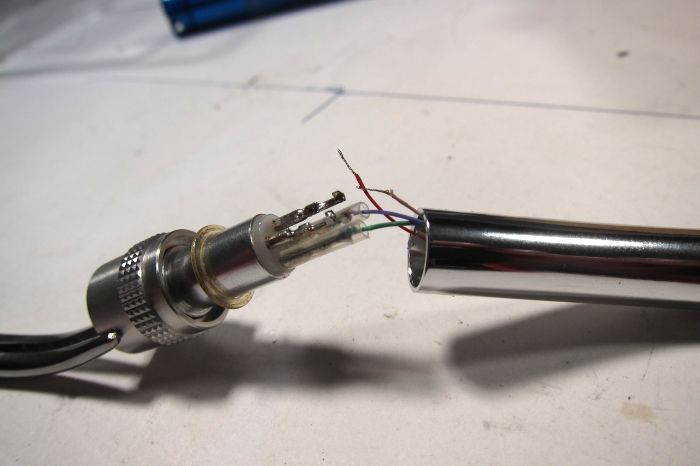
Pull out the headshell collar, but don't pull out the wires!
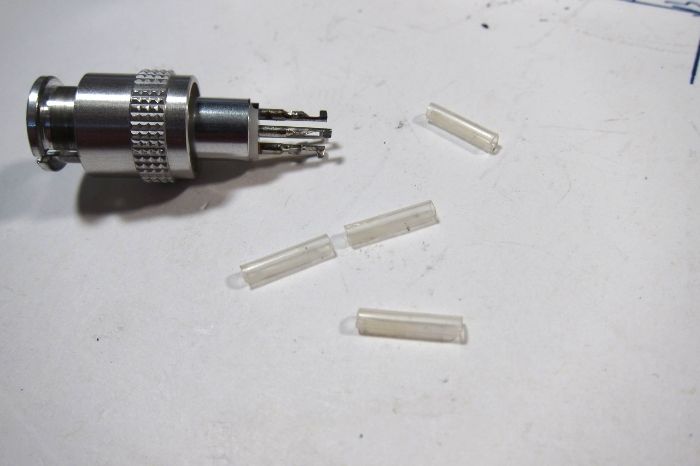
De-solder the wires, and place the insulators aside.
I attached (soldered) the new wire to the old. Gently, without forcing anything, you can fish the new wire through the whole assembly using the old to pull it through.
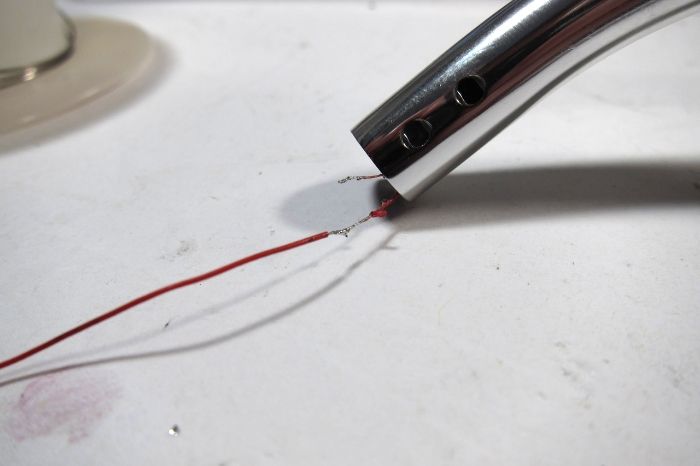
When the new wire is through, unsolder the old wire and discard. (Ignore the color difference from the previous photo.)
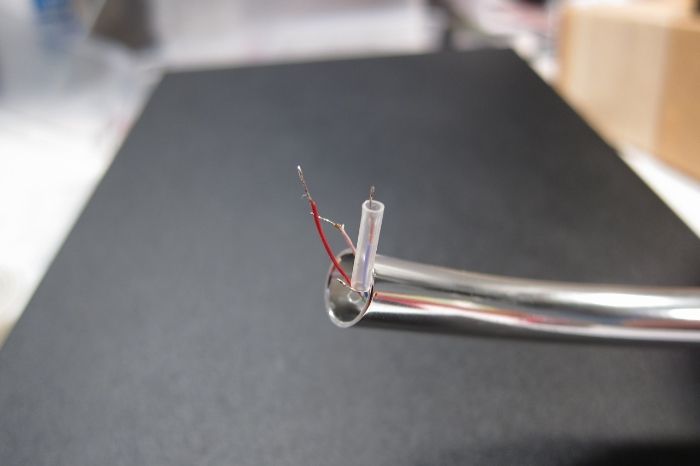
Once all the wires are through replace the insulators,
And re-install the collar. This is very fiddly to solder.
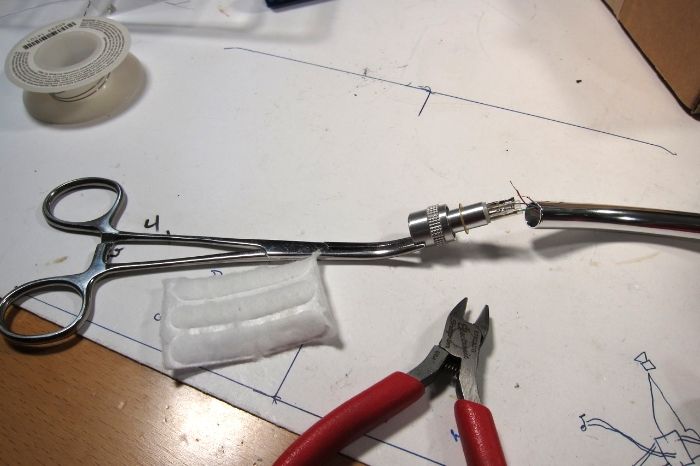
Cut a few strips of the Cotton and gently stuff down the armtube.
The wires need to be re-attached on the base.
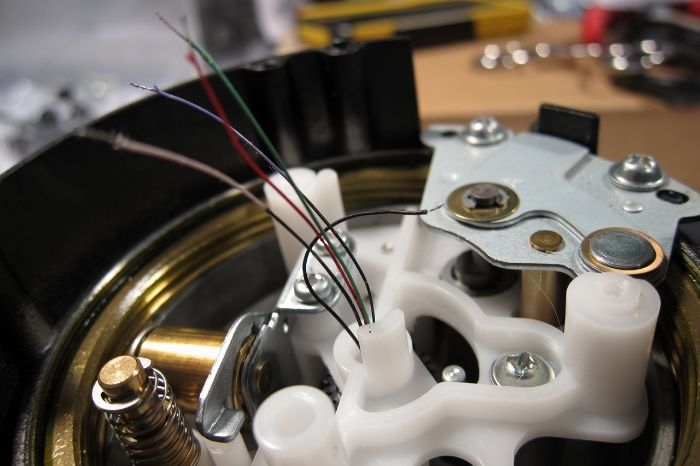
Here are all the wires, and the old ground wire. That, like the ground that goes out with the RCA leads remains stock.
Lay the groundlead back in it's place, the bend of the wire will naturally find it's home again...
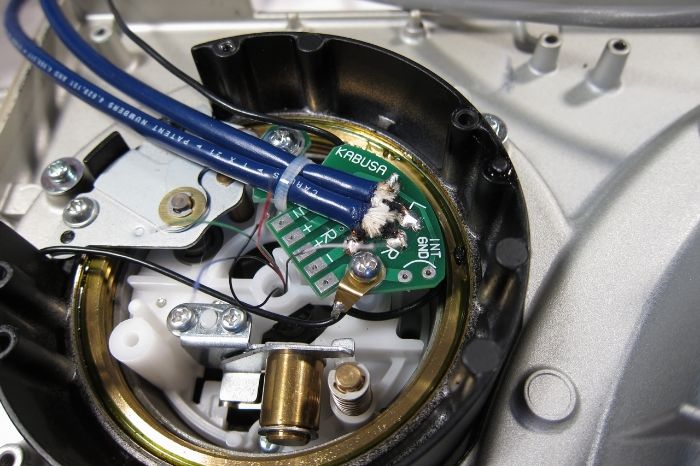
Attach the PCB in place of the old.
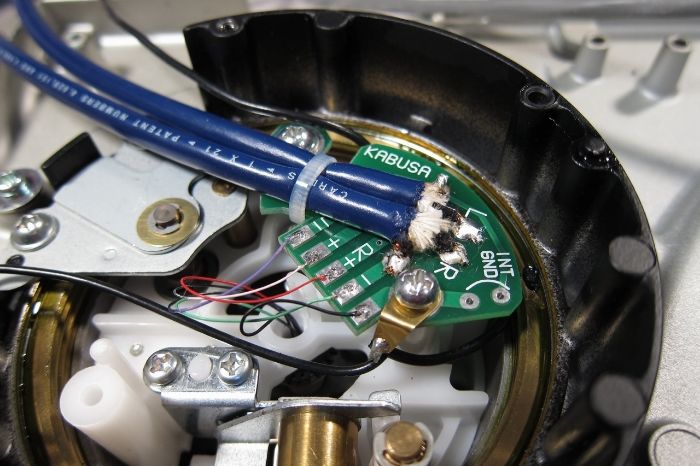
Attach the new wires to the new board.
This is a great time to check continuity with your meter. If it's all good, start to re-assemble the table.
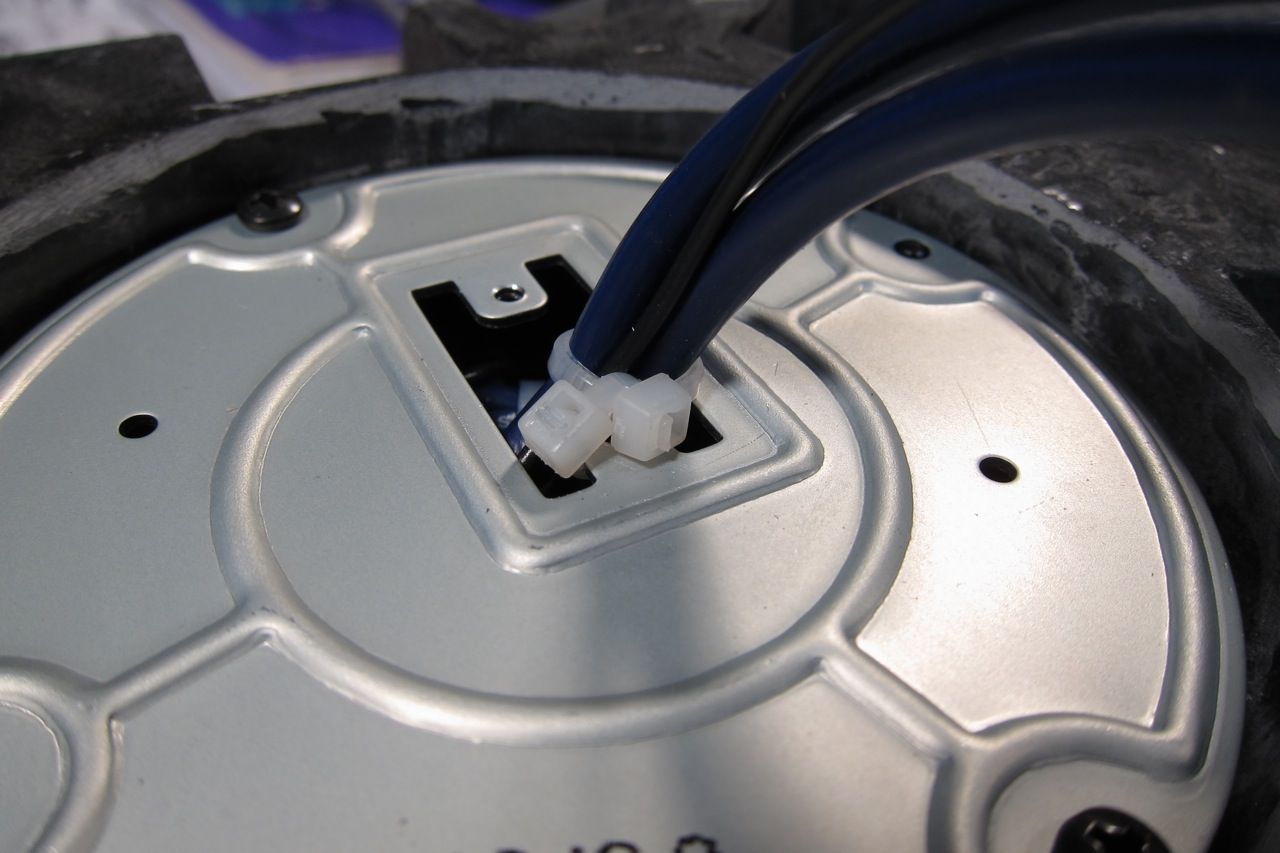
I needed to improvise a strain relief, as the new cable will not fit through the original plastic block.
And it's done!
Last edited:
Bluewater - Fixed.
Murphy - I can't believe how good it sounds. I'm totally flabbergasted, it's like somebody took a switch labeled 'awesome' and turned it on.
The stock wiring in all but the Mk.5 tonearms has an issue where the insulation corrodes the plating of the wire, so the difference in sound is the difference from corroded stranded wire to clean litz. Needles to say there is a marked improvement.
Excellent guide - thanks!
I have to confess that almost everything went wrong when I did this last night. First, the internal tonearm ground wire broke in half when I was disassembling the arm (I ended up reusing the old blue tonearm wire in its place). And when I pulled the headshell collar off, I pulled the wires up into the gimbal, which meant I had to disassemble the entire arm/wand and fish everything through. The upside was that I got to give the tonearm assembly a thorough cleaning and was able to stuff cotton in both ends of the arm wand.
Some lessons learned (FWIW) for anyone attempting this:
1) You might want to solder the new tonearm wires to the old (to pull through the assembly) before you remove the headshell collar.
2) Use an alligator clip (or whatever else you've got lying around) as a heatsink on the headshell pins when desoldering/soldering the tonearm wires to the headshell (attach the clip right next to the white plastic) - the pins are spring loaded and you don't to ruin the springs or to have solder flowing back into the white plastic part of the headshell (which causes the pins to get stuck in place).
3) If you have a solder bulb/sucker, I would suck the solder off the headshell pins when desoldering the old wires. This will help prevent excess solder from locking the pins in place and make it easier for you to place the new wires for soldering. I didn't do this and I wish I had - soldering those four tonearm wires took me forever and ended up much messier than I would have liked.
A most excellent guide for anyone wanting to try this at home.
As on You Tube.
Is it all done and back together? What do you think of the mod?
Yep, all done and reassembled (so many screws!).
Can't say much about sound quality yet - I didn't finish until the wee hours and I didn't want to wake up the neighbors by cranking up the volume. And the turntable is currently hooked up to an old Vestax DJ mixer, which doesn't exactly have the highest fidelity phono stage. I should finish up my Pearl 2 this week or next and will report back when I've got that in the mix.
With all those caveats, I do note that I am hearing slightly tighter bass and less "hiss" (background noise/static), so I count this as a success regardless of whether more substantial improvements manifest with the Pearl.
Virtually everything I've read in the past emphasizes that you should not solder the leads to the headshell. And I have to agree. I have three cartridges on three headshells. If I solder the leads I take the chance of damaging the cartridge plus I can no longer swap out cartridges easily. Unless of course you are referring to another part as the headshell.
Virtually everything I've read in the past emphasizes that you should not solder the leads to the headshell. And I have to agree. I have three cartridges on three headshells. If I solder the leads I take the chance of damaging the cartridge plus I can no longer swap out cartridges easily. Unless of course you are referring to another part as the headshell.
Sorry, lazy typing on my part, I was referring to the headshell collar pins (and specifically to the step of soldering the tonearm cables to the connectors inside the arm wand).
Pass DIY Addict
Joined 2000
Paid Member
Curious about the impact of a tonearm rewire on my SL-1200, I measured the capacitance of the stock red and white audio cables:
* *324pF at 1kHz 350pF at 120hz red lead
* *362pF at 1kHz 410pF at 120Hz white lea
**
All of these measurements are significantly higher than the 100-200pF recommended loading for my cartridge. I was thinking of getting a 3ft length of cardas super flexible double litz wire from KAB and making a single wire run from the tonearm collar to the preamp. Any thoughts about doing a single wire run vs separate runs for the tonearm and from the TT PCB to the preamp?
Another thought is to drill out the tonearm collar and headshell and pass the wire all of the way up to the cartridge pins, but this would be a bit more difficult...
The only downside to a contiguous run is that it's delicate. And you probably need to fish the external run into a shield anyway.
But, I think it would be worth doing.
OR... rewire the internal with Cardas, and then make the external run from BlueJeans Cable LC-1, which is the lowest capacitance stuff I've found at 12.2pF/foot!!!! Plus they have the tools to terminate it properly. (Their normal crimped Canare RCA plugs)
But, I think it would be worth doing.
OR... rewire the internal with Cardas, and then make the external run from BlueJeans Cable LC-1, which is the lowest capacitance stuff I've found at 12.2pF/foot!!!! Plus they have the tools to terminate it properly. (Their normal crimped Canare RCA plugs)
Pass DIY Addict
Joined 2000
Paid Member
- Home
- Source & Line
- Analogue Source
- SL-1200 Tonearm rewire