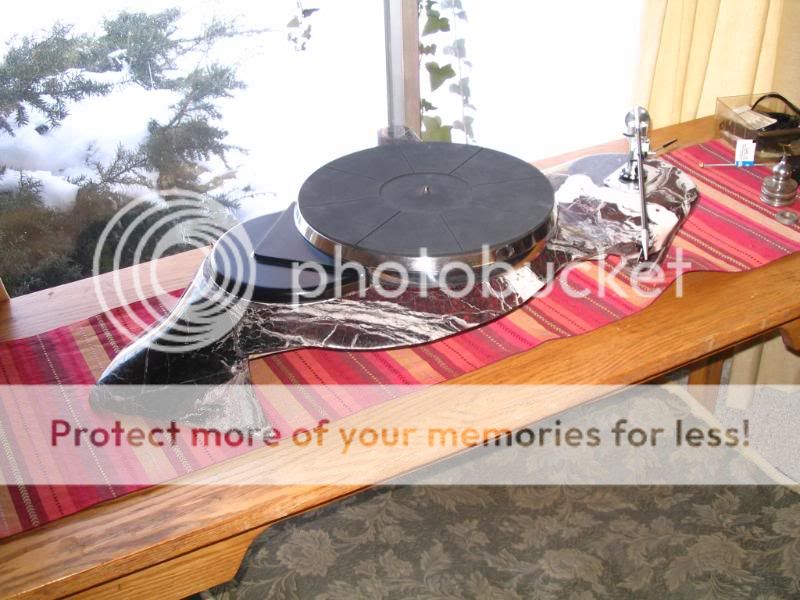
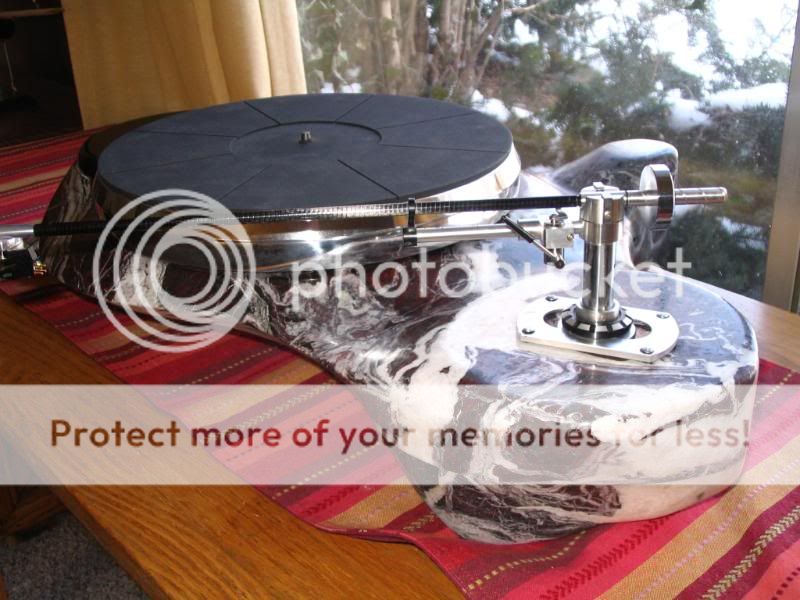

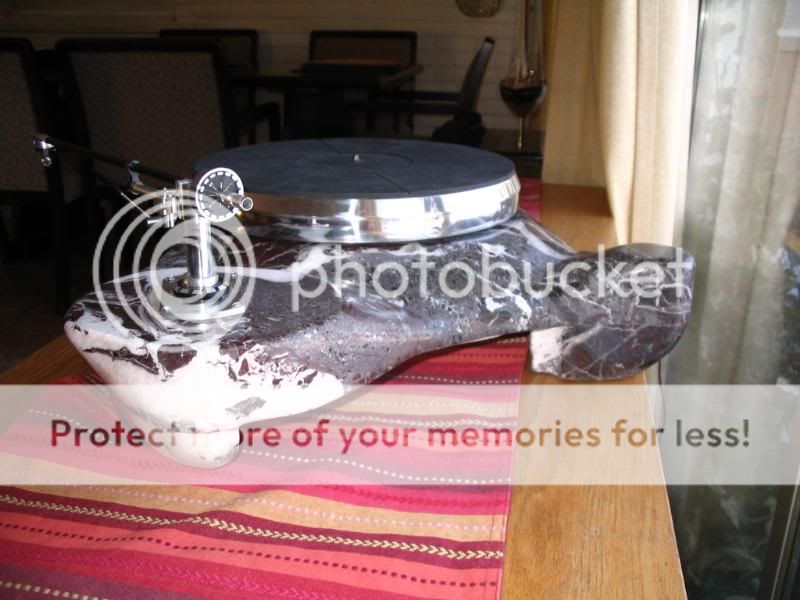
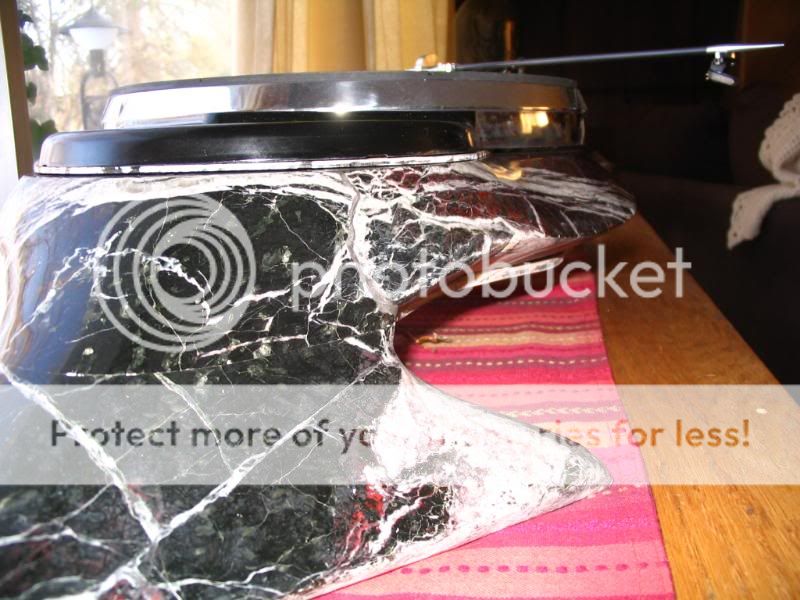


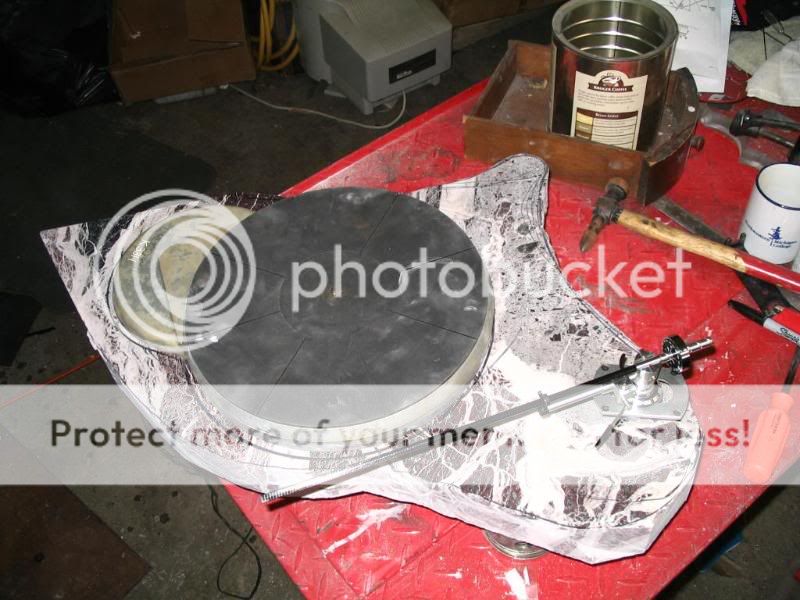
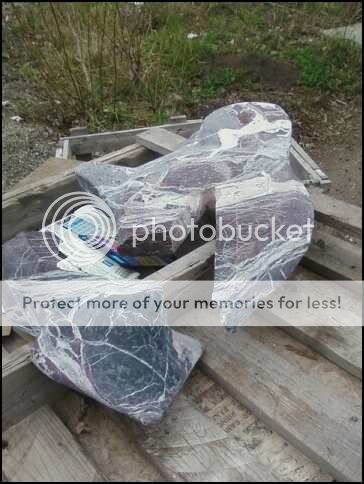
I did the rough cuts with a 7" diamond blade on my angle grinder, then did the shaping with a 4" diamond blade on the angle grinder. Then I standed starting with 4" 30 grit diamond pads going up to 3000 grit. Then used polishing glaze.
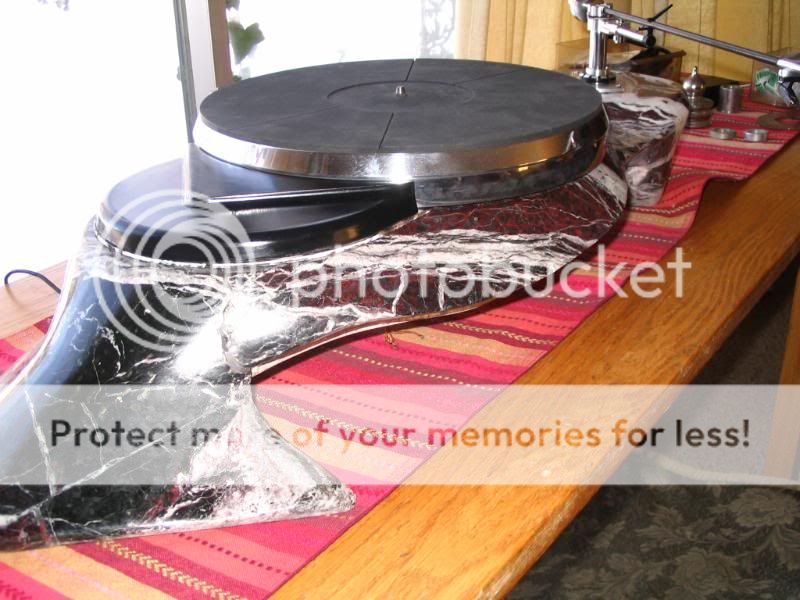
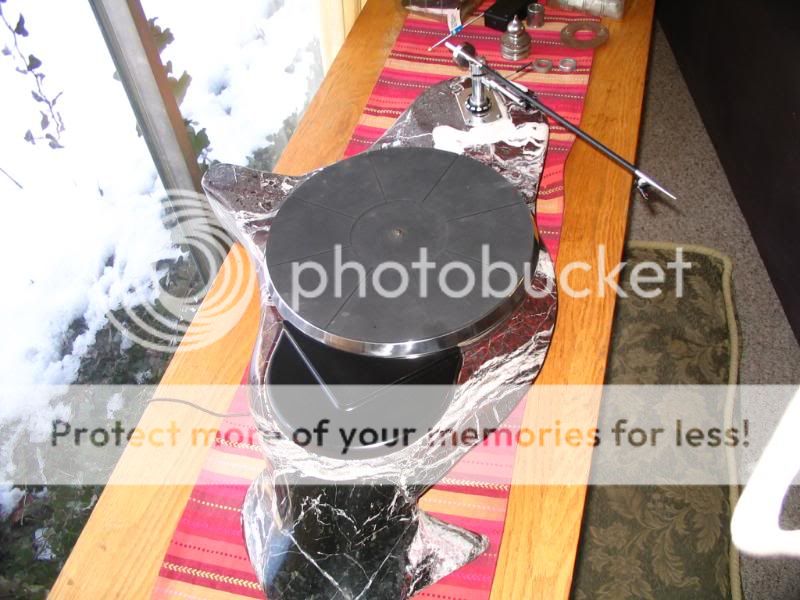
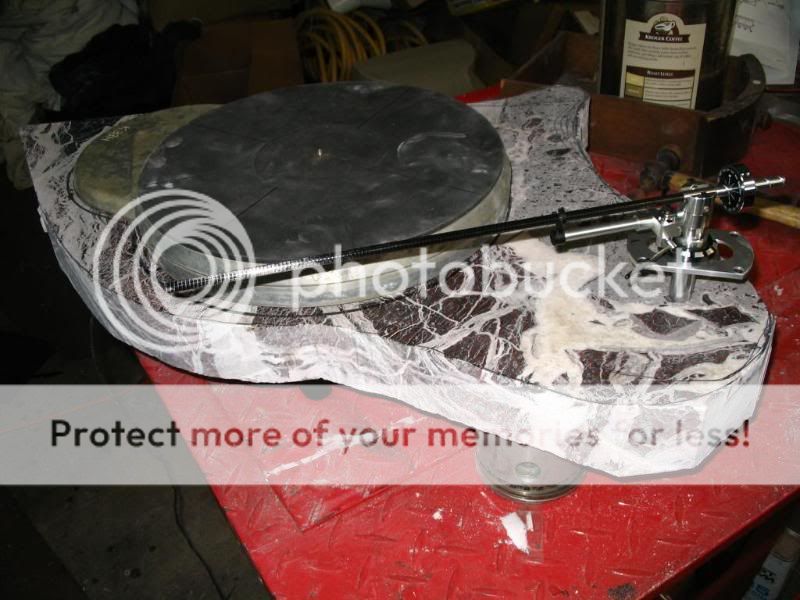
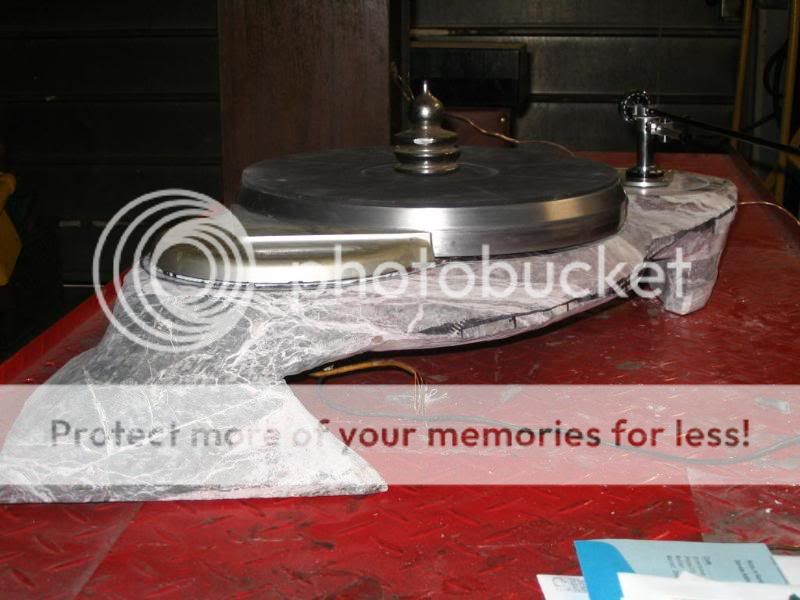
Yep, the arm sticks right out there. Too much trouble to move it now, so I'll just be careful. No kids in the house so that is a plus.
Yep, the arm sticks right out there. Too much trouble to move it now, so I'll just be careful. No kids in the house so that is a plus.
I did the rough cuts with a 7" diamond blade on my angle grinder, then did the shaping with a 4" diamond blade on the angle grinder. Then I standed starting with 4" 30 grit diamond pads going up to 3000 grit. Then used polishing glaze.
Yep, the arm sticks right out there. Too much trouble to move it now, so I'll just be careful. No kids in the house so that is a plus.
Wow you must be one patient guy - that had to take an awful lot of angle grinder time, but the results are very nice! I was betting on the no kids answer...nieces and nephews??
Wow you must be one patient guy - that had to take an awful lot of angle grinder time, but the results are very nice! I was betting on the no kids answer...nieces and nephews??
Yep, it took almost a year of on/off/on/off work to get her done. All the nieces and nephews are grown and don't come around to much any more. But I do have three daughters and (god willing) there will be grandkids. I am building an audio rack soon and this will go on the top shelfe.
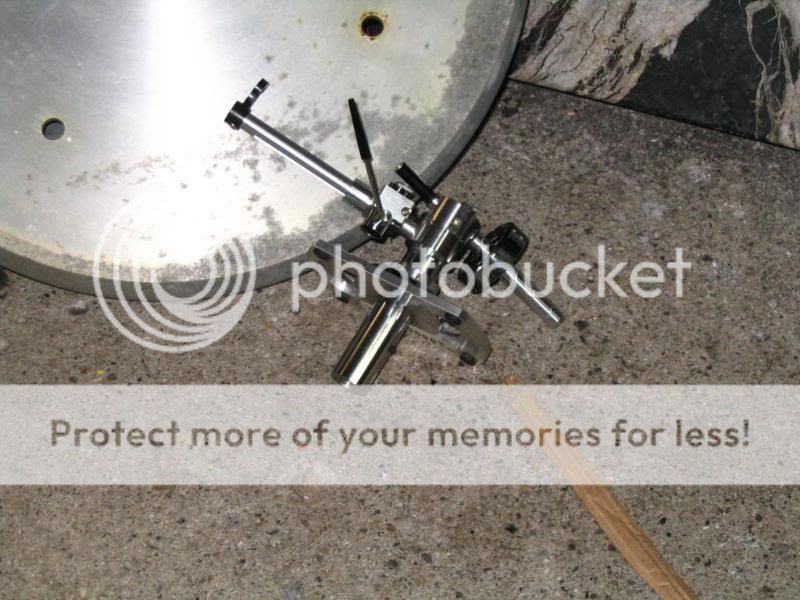
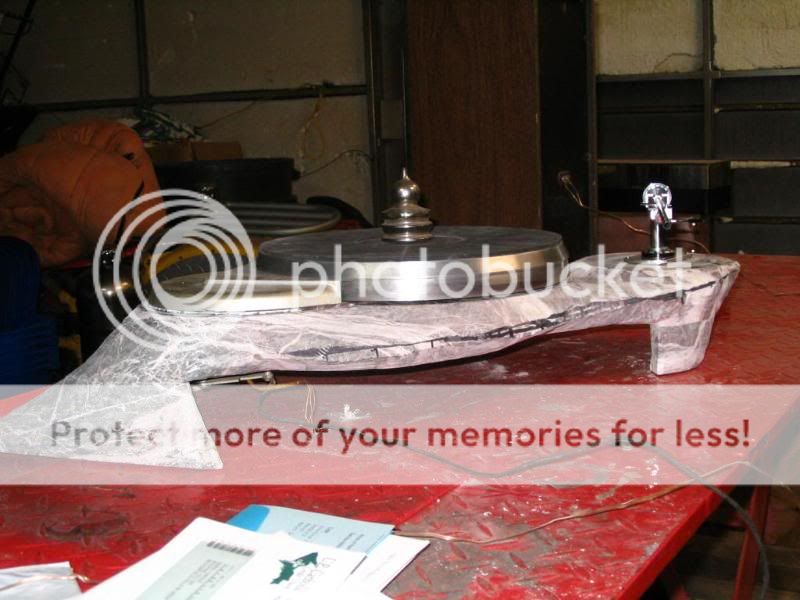
Here is a better shot of the headshell. I used an aluminum bolt. I cut the head off and put it in my drill press and then shaped it with files and sandpaper. Then drilled and tapped into the bottom of the headshell to mount the cross bar on. The cross bar is threaded to take the cart screws.
It looks cool, but to change the cart angle, I have to take the cart off, loosen the screw, change the angle, tighten the screw, then remount the cart.

Here is a pic of the origanl counter weight but with the 3" longer wand it is not enough weight to balance the arm.

So I went to a machine shop and sliced off a length of Hex stock, put it in the lathe and bored out a socket so it will fit over the origanal counter weight. I will paint the new piece shinny black when I know it works, then glue it on the origanal.

It looks cool, but to change the cart angle, I have to take the cart off, loosen the screw, change the angle, tighten the screw, then remount the cart.
Here is a pic of the origanl counter weight but with the 3" longer wand it is not enough weight to balance the arm.
So I went to a machine shop and sliced off a length of Hex stock, put it in the lathe and bored out a socket so it will fit over the origanal counter weight. I will paint the new piece shinny black when I know it works, then glue it on the origanal.
I hope this is not taken the wrong way, as I think the design is quite elegant.
However, having that bit of aluminum extended beyond the cartridge mount point may not be the best idea sonically.
As it was made from a bolt, would it be possible to use a different 'bolt' that ends at the cartridge mount point? I think this might be a better way to go, and then you can compare results.
It will also reduce the weight so far from the pivot, which allows a smaller counterweight, which lowers your effective mass, which has implications for optimal cartridge matching (cartridge compliance and arm effective mass matching). You want the resonant frequency of the arm to be below 10 Hz I believe.
I may have mentioned it already, but you really want to become a member at www.vinylengine.com. There you can get set up protractors for ANY length arm (good for people like you and me) and a few hundred years of experience from around the world with pretty much every table and arm ever made.
The work you have done is excellent!
Hi Jim, I spent hours going back and forth about that long tip of the headshell. It was function over beauti. Beauti won out. The headshell is epoxied into the carbon fiber tube so I would have to make up a whole new wand. I do have more of the tubing so if there is obvious issues I can make up a new one.
I am somewhat active on Vinyl Engine and have posted all this over there.
Over on AK, one of the members was giving me crap for making the new weight out of steel and not marble......so.....this weekends job is to try and make the weight out of marble. This should be interesting having a chunk of marble in a lathe. Will SURELY use a face guard.
Hi Jim, I spent hours going back and forth about that long tip of the headshell. It was function over beauti. Beauti won out. The headshell is epoxied into the carbon fiber tube so I would have to make up a whole new wand. I do have more of the tubing so if there is obvious issues I can make up a new one.
That's unfortunate. Who knows? Maybe it will be fine. I am going on the historical information available...
I am somewhat active on Vinyl Engine and have posted all this over there.
I may have seen it there as well....
Over on AK, one of the members was giving me crap for making the new weight out of steel and not marble......so.....this weekends job is to try and make the weight out of marble. This should be interesting having a chunk of marble in a lathe. Will SURELY use a face guard.
See if you could rig up a right-angle grinder on the lathe and 'grind that rock rather than trying to single point it. A bit of water drip will keep the dust under biblical levels... Still use a face guard. Better yet, a face guard under a Catcher's outfit might be more appropriate...

"Still use a face guard. Better yet, a face guard under a Catcher's outfit might be more appropriate" Ain't that the truth.
What I'm thinking is to cut the marble into a square then drill a hole just a bit bigger than the stem of the BW balance tube, then cut out the center resess that the stock weight fits into. Then mount the piece with a bolt through the center hole, slow the drill press way down and then shape it with all my tools. It is certainly a shot in the dark, but it could me cool too.
What I'm thinking is to cut the marble into a square then drill a hole just a bit bigger than the stem of the BW balance tube, then cut out the center resess that the stock weight fits into. Then mount the piece with a bolt through the center hole, slow the drill press way down and then shape it with all my tools. It is certainly a shot in the dark, but it could me cool too.
- Status
- This old topic is closed. If you want to reopen this topic, contact a moderator using the "Report Post" button.
- Home
- Source & Line
- Analogue Source
- Finally finished my DIY TT Pix