

.jpg)
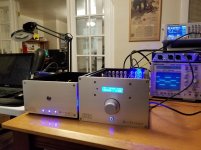
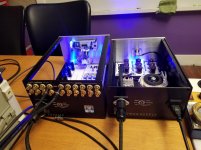
I have been working on this Jensen 990 based preamp for a while now. I have a history in recording studios from way back in the 80's. I have had the opportunity, over the years, to listen in many different studios to many different line level amplifier topologies. I have developed a love for discreet opamps and the crappy inter-stage coupling of the day. I prefer inverting stages to non-inverting. I can't explain it; it is just what I like. I like to measure equipment for a baseline but have come to understand that things that measure well don't always please my ear. Oh, and by the way, my ear wins. That's almost true. If the equipment does not pass the wife test it will never make it to my living room. So aesthetic is important.
This unit is designed to compliment my Pi Server that I displayed at the 2017 Burning Amp. Sadly, I was busy with my duties as the lecture coordinator and did not get a chance to hook it up to any of the many amazing systems on display there.
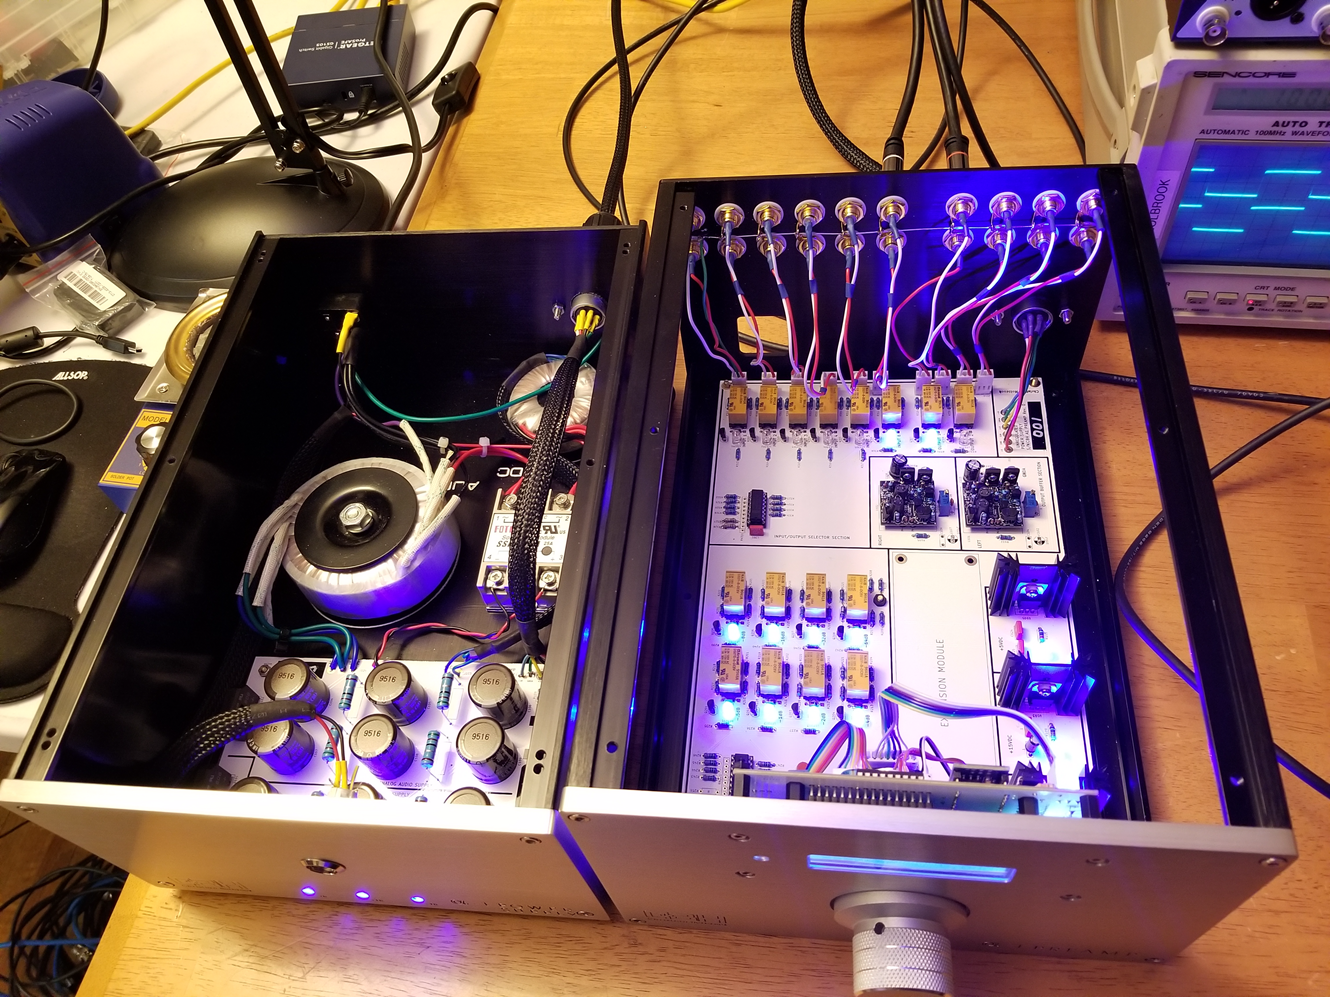
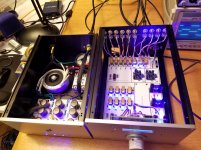
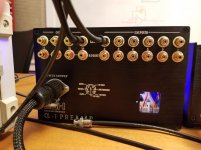
The IO configuration is 6 IN and 2 OUT. The two outs are configured as a/b switchable, but that is software settable. The 990's are configured as inverting amps at unity gain. I know that this will cause raised eyebrows but again, I like it. The gain is trimmable so I may increase it later; but we will start as at unity and see how it plays with my amps. The footprint works with any discreet opamp using the API 2520 footprint. The audio rails are +/-15.
The Jensen 990's are a kit from Hairball Audio: Hairball Audio. I can't recommend this kit enough the build guide is stellar.
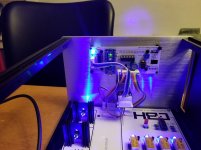
The attenuation is done via an R2R ladder under the control of an Arduino nano.
Thanks to: Logarithmic Attenuator Calculator for the R2R calculator.
I modified amb and linuxwork's code to use non-latching relays and a couple of other tweaks to reduce memory usage as the nano has 2k less memory than the Atmega 328 that the code is designed for.
If you havent checked out the AMB Laboratories site it is chock-full of goodies and references.
Thanks again to Ti Kan and Linuxworks for their contributions.
I separated the power supply from the main chassis. The power supply uses CRC filtering and 78xx, 79xx regulation.
Like the AMB pre, the audio supply is switched off when not in use the 5VDC supply is kept on continuously.
The input/output section is relay selected. The relays are under the control of the Arduino via an PCF8574/A port expander.
The R2R attenuator is also controlled via the Arduino and another port expander.
The chassis are cheap Chinese ebay units. I cut them on my cheap Chinese desktop mill. I am still learning how to use the mill but have managed to hide most of my mistakes.
Testing:
I tested this unit on my shiny new Avermetrics unit. After seeing this unit displayed at Burning Amp 2017 I decided to purchase it. I have been pleased so far and may do a write-up on my experiences so far.
You can see my test results in the attached pdf.
Use and Listening:
I have had this unit working in my living room system with several sources; some good, some not so good. It has performed well. There are some things I want to change already, but sonically it pleases me. I may tweak the gain to better drive some of my less sensitive amps, but the jury is still out.
Things to Change:
The current IR mounting causes a reduction in the viewing angle that needs to be widened.
The fly-by-wire volume control mapping is not right and needs to be modified to use all of the knob rotation.
There are several board labeling issues that need to be resolved if future runs are created.
Going Forward:
I am currently developing code to use a bigger OLED display.
There is an expansion slot that will be used for boards that are meant to be stackable. I am working on a phono pre, Bluetooth audio, headphone amp, and Bluetooth remote.
I do have some extra boards. PM me if you are interested. The cost for the four-board set is $69USD plus shipping.
I would be interested in producing this as a full kit if the interest is there.
Attachments
Last edited:
Thanks Carl_Huff for letting me know that the images are not showing.
I am including them as attachments to this post
I am including them as attachments to this post
Attachments
- Status
- This old topic is closed. If you want to reopen this topic, contact a moderator using the "Report Post" button.