This kind of solder paste is normally not acid-free.
How are the pcb's looking after longer time? Any experience?
regards Olaf
those that a friend did for me are now only four days old and they look all right, no changes for better or worse. i believe that it should be all right since it was well rinsed, and info of soldier paste says that it is possible to rinse it in cold water. if i notice anything bad or wrong i will post here.
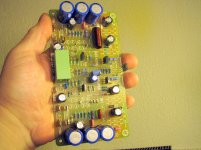
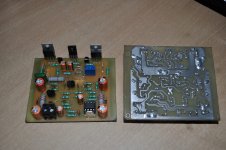
Very nice Alex. Hoping to receive mine in a week or so. I have the two populated that I etched but one of them is giving me fits. I'm probably going to just transfer over most of the parts to the new boards when they arrive. The one I have working sounds very nice.
Blessings, Terry
Blessings, Terry
Thank you Terry , nice to hear it's working your amplifier ,I agree,factory PCB are better ......Very nice Alex. Hoping to receive mine in a week or so. I have the two populated that I etched but one of them is giving me fits. I'm probably going to just transfer over most of the parts to the new boards when they arrive. The one I have working sounds very nice.
Blessings, Terry
") .
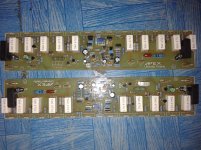
.Still missing two 4R7/3W resistors.......
Regards,Alex
Attachments

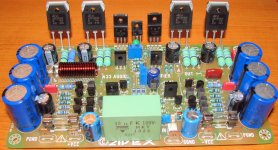
Thank you Terry , nice to hear it's working your amplifier ,I agree,factory PCB are better ......
Still missing two 4R7/3W resistors.......
Regards,Alex
Nice work,
Regards
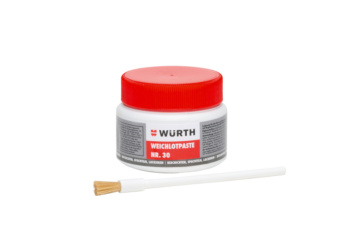
Soft solder paste No. 30 - 0987130
or similar (sorry if this is a comercial but i don´t know how else to describe this product)
it is used for soft soldering of copper tubes. a friend showed me today,it is really easy : use brush to apply paste in about 1mm layer over whole copper side of pcb,than use heat gun // pistol grip hot air gun and heat the paste to about 300°C - if it starts to bubble that is a sign that temperature is too hot. you will see how the surface of paste is getting smoother,apply heat to about one minute (depending on how big is pcb) and than rinse in watter. it takes a try or two to get it right but you have seen the result - it looks great and it is really really easy to do!
i will do a YouTube video as soon as possible to show how it is done - one picture as thousand words,one video as thousand pictures...
http://youtu.be/J7zLt3vowkQ
Alex
thank you again you were right I only need it the PDF files that you post already and do my own PCB, I thought is gonna be really complicated and is not I just fallow your layout step by step and it looks great I will try to make close or similar to yours and I just star it today and it does goes smoothly " yes I know, only diy "
Regards
Juan
thank you again you were right I only need it the PDF files that you post already and do my own PCB, I thought is gonna be really complicated and is not I just fallow your layout step by step and it looks great
I will try to make close or similar to yours and I just star it today and it does goes smoothly " yes I know, only diy " Regards
Juan
Attachments
Last edited:


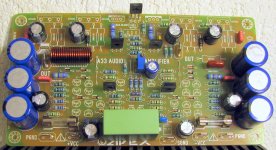
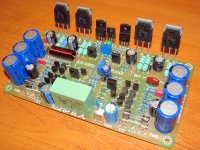
Finished 1st channel A33 and it's singing.
Next one in the next week, and maybe housed
Just tested with 1pair outputs, and protection resistors in fusible places.
Nice work,
Regards
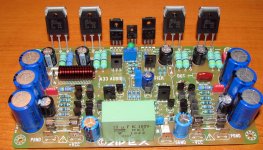
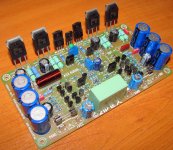
Just completed A9 yesterday. Fake BC560 and MPSA92 made me wait this long to finish.
Mile can I use IRFP140 and IRFP9140, just thinking bigger package will have better heat transfer to heatsink.
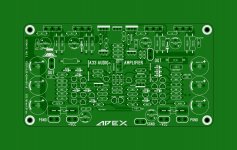
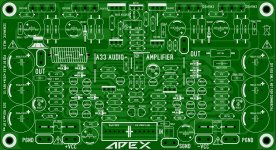
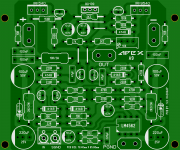
Layout for Apex AX9.
Regards,
Sonal Kunal.
Mile can I use IRFP140 and IRFP9140, just thinking
bigger package will have better heat transfer to heatsink.Layout for Apex AX9.
Regards,
Sonal Kunal.
Attachments
Just completed A9 yesterday. Fake BC560 and MPSA92 made me wait this long to finish.
Mile can I use IRFP140 and IRFP9140, just thinking
Layout for Apex AX9.
Regards,
Sonal Kunal.
Nice work, IRFP140/9140 can be use as many other vertical mosfets.
Regards
- Home
- Amplifiers
- Solid State
- 100W Ultimate Fidelity Amplifier