It is taking forever for that casting to dry out. I may as well put my enthusiasm on hold for at least a day or two and let it dry.
Let patience be your friend and wisdom guide your way.
Amen.
Amen to that brother.
I have the foam but I haven't had the time to play with it yet. I need to experiment first. The instructions say 25 seconds to mix it, 45 seconds to pour before it starts to foam. Not much time.
And I said it was going to be messy. I have visions of you pouring the mixture into something, giving it a few seconds, then cry in horror as it expands over the sides and dribbles everywhere
From the pix it looks like you calculated the mix to volume ratio correctly,
As I said earlier try and mix in a cool place but pour in a warm place if at all possible.
This stuff is sticky, I recommend using disposable plastic gloves when using it, takes weeks not days to scrub off.
When you can try an experiment with glass fibers mixed thru part A before adding part B
As I said earlier try and mix in a cool place but pour in a warm place if at all possible.
This stuff is sticky, I recommend using disposable plastic gloves when using it, takes weeks not days to scrub off.
When you can try an experiment with glass fibers mixed thru part A before adding part B
cry in horror as it expands over the sides and dribbles everywhere
My real concern is getting it to the bottom of the void without it hitting the sides on the way down (it will foam on the side and block the way down). I want to see how viscous it is once mixed. I guess I could calculate the volume exactly and mix enough to fill the void completely.
From the pix it looks like you calculated the mix to volume ratio correctly,
Hi Ted,
Two things going on here at once - the horn flare which I'm just making the molds for out of plaster. The pic shown the new positive mold casting from plaster.
The foam is for the speaker panels, to fill the voids.
I did order some high density foam (16lbs per cubic foot) that I may try to mold a horn flare with but it is mainly for other things.
My real concern is getting it to the bottom of the void without it hitting the sides on the way down (it will foam on the side and block the way down). I want to see how viscous it is once mixed. I guess I could calculate the volume exactly and mix enough to fill the void completely.
You will need to fill both sides at the same time, so mixing too much is probably a better option than too little, but it is an easy calculation.
I did think you were trying to cast the horn mould in foam, there are good reasons to try, I'm thinking fiberglass epoxy skin with foam over the top
I did some foam pouring last night.
First thing I notice when I open the cans (part A and part B) from US Composites is that they are only about 3/4 full, probably less This means I will not have enough to fill all of the panels in both boxes. Needing roughly 120 litres of expanded foam, including waste would require a total of 240 litres for both boxes. Allowing for the one small panel already filled with spayfoam would be my safety margin (~20 litres). The 8 litres of unexpanded should give ~240 litres expanded (30x expansion). If I only have 6 litres to start, well it becomes obvious that I'll run short.
If I had known that they advertise 2 gallons as a gallon and a half, I would have looked elsewhere or at least ordered the amount extra that I need.
Enough ranting...onward!
I cut out ribs from 1.5 inch Styrofoam board to create a divider half way down the void:
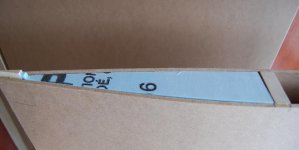
that way I could pour from both ends:
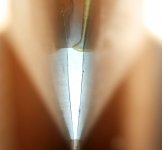
It took some trial and error to determine the best amount to mix up at a time. An ounce of part A and an once of part B gave the best results:
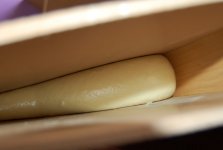
Otherwise, fairly boring work - measure it out in plastic beer glasses, mix it up while counting (one one thousand, two one thousand three one thousand...) and pour it in. It went in easily without touching the sides and once it was in I tipped and tilted the panel to spread it out evenly to give an even "lift". Each pour was about 5 inches high when expanded.
First thing I notice when I open the cans (part A and part B) from US Composites is that they are only about 3/4 full, probably less
If I had known that they advertise 2 gallons as a gallon and a half, I would have looked elsewhere or at least ordered the amount extra that I need.
Enough ranting...onward!
I cut out ribs from 1.5 inch Styrofoam board to create a divider half way down the void:

that way I could pour from both ends:

It took some trial and error to determine the best amount to mix up at a time. An ounce of part A and an once of part B gave the best results:

Otherwise, fairly boring work - measure it out in plastic beer glasses, mix it up while counting (one one thousand, two one thousand three one thousand...) and pour it in. It went in easily without touching the sides and once it was in I tipped and tilted the panel to spread it out evenly to give an even "lift". Each pour was about 5 inches high when expanded.
Last edited:
If it doesn't I'll just shove some foam in there - works for Earl...
Well you've got the foam
If I had known that they advertise 2 gallons as a gallon and a half, I would have looked elsewhere or at least ordered the amount extra that I need.
Well, they must have advertised using the can's "U.S. dry gallon" volume, and then filled it using the "U.S. liquid gallon" measure.
Anything to make an extra buck I suppose.

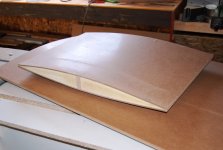
With all of the panels filled for the first speaker, I brave the -10C of my workshop to trim them to size and start fitting them together.
A panel after trimming it to size:
First step is to make some cardboard templates of each curve:
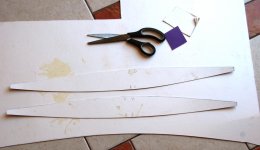
The idea is to cut out the side panels to fit the top and bottom panels which means that some of the "meat" will need to be removed from the sides.
Lay out the curve using the template:
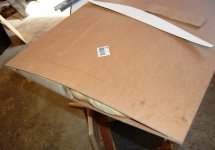
Free hand route to the line:
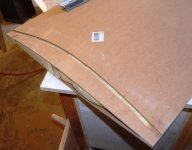
The sliver of hardboard is taken out along with the foam under it and the piece of the backbone.
A panel after trimming it to size:

First step is to make some cardboard templates of each curve:

The idea is to cut out the side panels to fit the top and bottom panels which means that some of the "meat" will need to be removed from the sides.
Lay out the curve using the template:

Free hand route to the line:

The sliver of hardboard is taken out along with the foam under it and the piece of the backbone.
With the meat removed, leaving the outer skin:
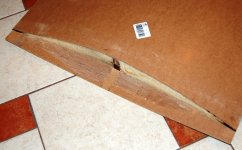
The top/bottom panel is then scribed to the curve to fit tight against the inside face of the outer skin:
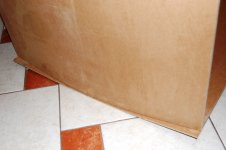
After it is glued and screwed together, I will trim off the excess.
This is how the inside corner looks:
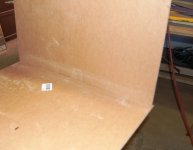
This seems difficult and it is but didn't take very long to do. Getting everything squared up and making the layout so that it allows for the different curvatures but still maintains a box that is true and square was time consuming.

The top/bottom panel is then scribed to the curve to fit tight against the inside face of the outer skin:

After it is glued and screwed together, I will trim off the excess.
This is how the inside corner looks:

This seems difficult and it is but didn't take very long to do. Getting everything squared up and making the layout so that it allows for the different curvatures but still maintains a box that is true and square was time consuming.
Dry fit of the panels:
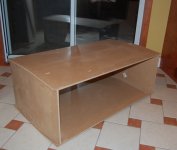
Looking like a box?
The fun starts tomorrow - gluing it together. I need to use large screws thru the backbone of the top/bottom panels into the backbone of the side panels as the major mechanical fastening. I'll use the high density foam as "glue" after scooping out some of the other foam.
I have decided to go with particle board and MDF for the front and back, with a particle board full panel brace from front to back.
West System supply an easy to work Epoxy.
For larger volume work I use polyester resin, it's much cheaper.
Both these setting compounds are exothermic.
The horn profile will get hotter than ambient. How much hotter depends on thickness and speed of cure.
I wonder is they do an add-in that slows the cure down?
What about a single layer of glass reinforced resin around the male half of the mould and when it is half cured, pour in a filler mixed with the resin to make up the thickness. The filler will reduce the cost and reduce the volume of resin thus making for less heat.
Blame me for having what are 2 projects in one thread, there is bound to be confusion.
Andrew the resin I will get today is indeed polyester resin, for fiberglass repair. I will use it to reinforce the inside corners of the enclosure. It has nothing to do with the horn. The horn will be cast with polyurethane resin, link is above.
Any glue, no matter how strong, is only as good as the substrate it is adhered to. Unfortunately, the structure of hardboard reveals a weakness when you want to glue something to its face - it will easily separate when stressed, the glued on part will take a thin layer of the surface on fracture. So any glue made for wood will perform just as well as the strongest epoxy.
There is one "fix" for this (I think) and that is to consolidate the surface of the hardboard. A brushed on coat of clear polyurethane will do this, as it penetrates the surface it does not break down (like oil paint would - the oil would be absorbed into the "wood" but the binder resin would sit on the surface) and will cement the surface layer to the ones below. It also increases surface area for anything glued on, as any stress on the part will be better spread across this thicker, harder surface.
Hi John,
I think you are on to something with these panels. I have used polyurethane foam in some cheap tables made of board on frames. Much stronger and more dead afterwards, still light weight. However, if I would choose material, it would be steel plates instead of hard board Well, wishful thinking.....
It may work or not, I think you are aware of the dangers here, and will test it first.
Peter
I think you are on to something with these panels. I have used polyurethane foam in some cheap tables made of board on frames. Much stronger and more dead afterwards, still light weight. However, if I would choose material, it would be steel plates instead of hard board
There is one "fix" for this (I think) and that is to consolidate the surface of the hardboard. A brushed on coat of clear polyurethane will do this, as it penetrates the surface it does not break down (like oil paint would - the oil would be absorbed into the "wood" but the binder resin would sit on the surface) and will cement the surface layer to the ones below. It also increases surface area for anything glued on, as any stress on the part will be better spread across this thicker, harder surface.
It may work or not, I think you are aware of the dangers here, and will test it first.
Peter
West System supply an easy to work Epoxy.
For larger volume work I use polyester resin, it's much cheaper.
Both these setting compounds are exothermic.
The horn profile will get hotter than ambient. How much hotter depends on thickness and speed of cure.
I wonder is they do an add-in that slows the cure down?
.
West system make both a fast cure and a slow cure epoxy, I usually use their slow cure as it is more forgiving, it is more expensive true, but being 4 times stronger you don't need as much and the fillers can be souurced cheap sometimes,, EG chalk or talc powser
- Status
- This old topic is closed. If you want to reopen this topic, contact a moderator using the "Report Post" button.
- Home
- Loudspeakers
- Multi-Way
- Large 3-ways design / build